
Post-Production From Start To Finish: How I Manage and Process a Large Number of Images in Lightroom
How do I start this? The question has been haunting me for weeks now. First, I want to thank you for the many great responses to the previous chapter of this series. In my last article, you saw my process for achieving a large number of images for at least four different clients — taken care of all in the same shoot. Here comes the hard part where I reduce the number of images to a digestible amount without having a sense of lack or missing anything significant. I struggle with this part the most, solely because I prefer to take so many pictures in the field.
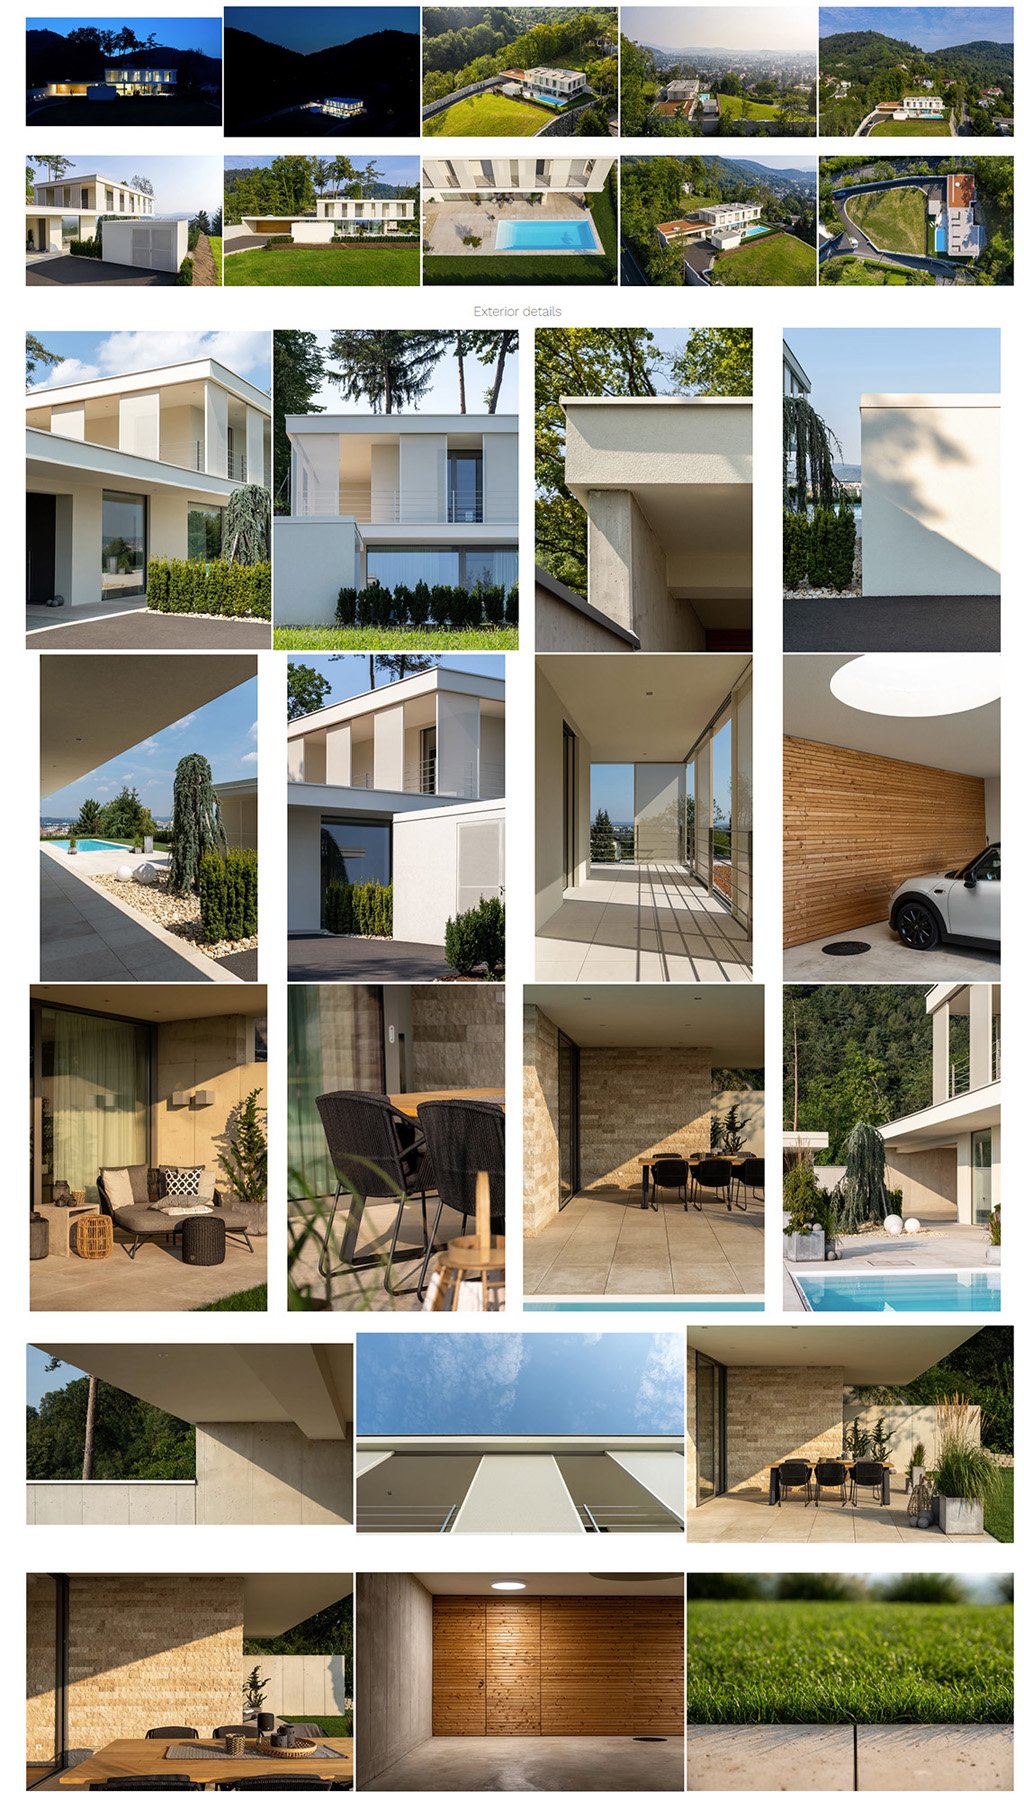
Let’s see how I choose the pictures to be handed over to the architect — which won’t be easy because, as you can see, this plethora of photos was not taken at random. I had a reason to take all of them, and there was a thought process behind each. The truth, however, is that no architect needs hundreds of photos of a project. At least not for a single-family home. So although my job on the spot was to photograph the house to the best of my ability in the time available, now I must compile a gallery from the available footage that shows the house, the design, the unique solutions, and how the house plays with light during the day with due care. How do I do all this? I usually end up giving close to 80-100 images for a project of this length, supplemented by making a 35-50 image selection of my favorites. Are you ready? Let’s jump to it.
The Selection Process
The starting point is a bit overwhelming. Look, I made around a thousand images and 366 photographs were picked in the first round (This number is a shock sometimes, even for me.) 366! Now, to manage them from here, the logical thing to do is to break them up into parts before you start to make your final picks. This helps you get organized and compare similar images to each other. Chronological order is NOT our friend here.
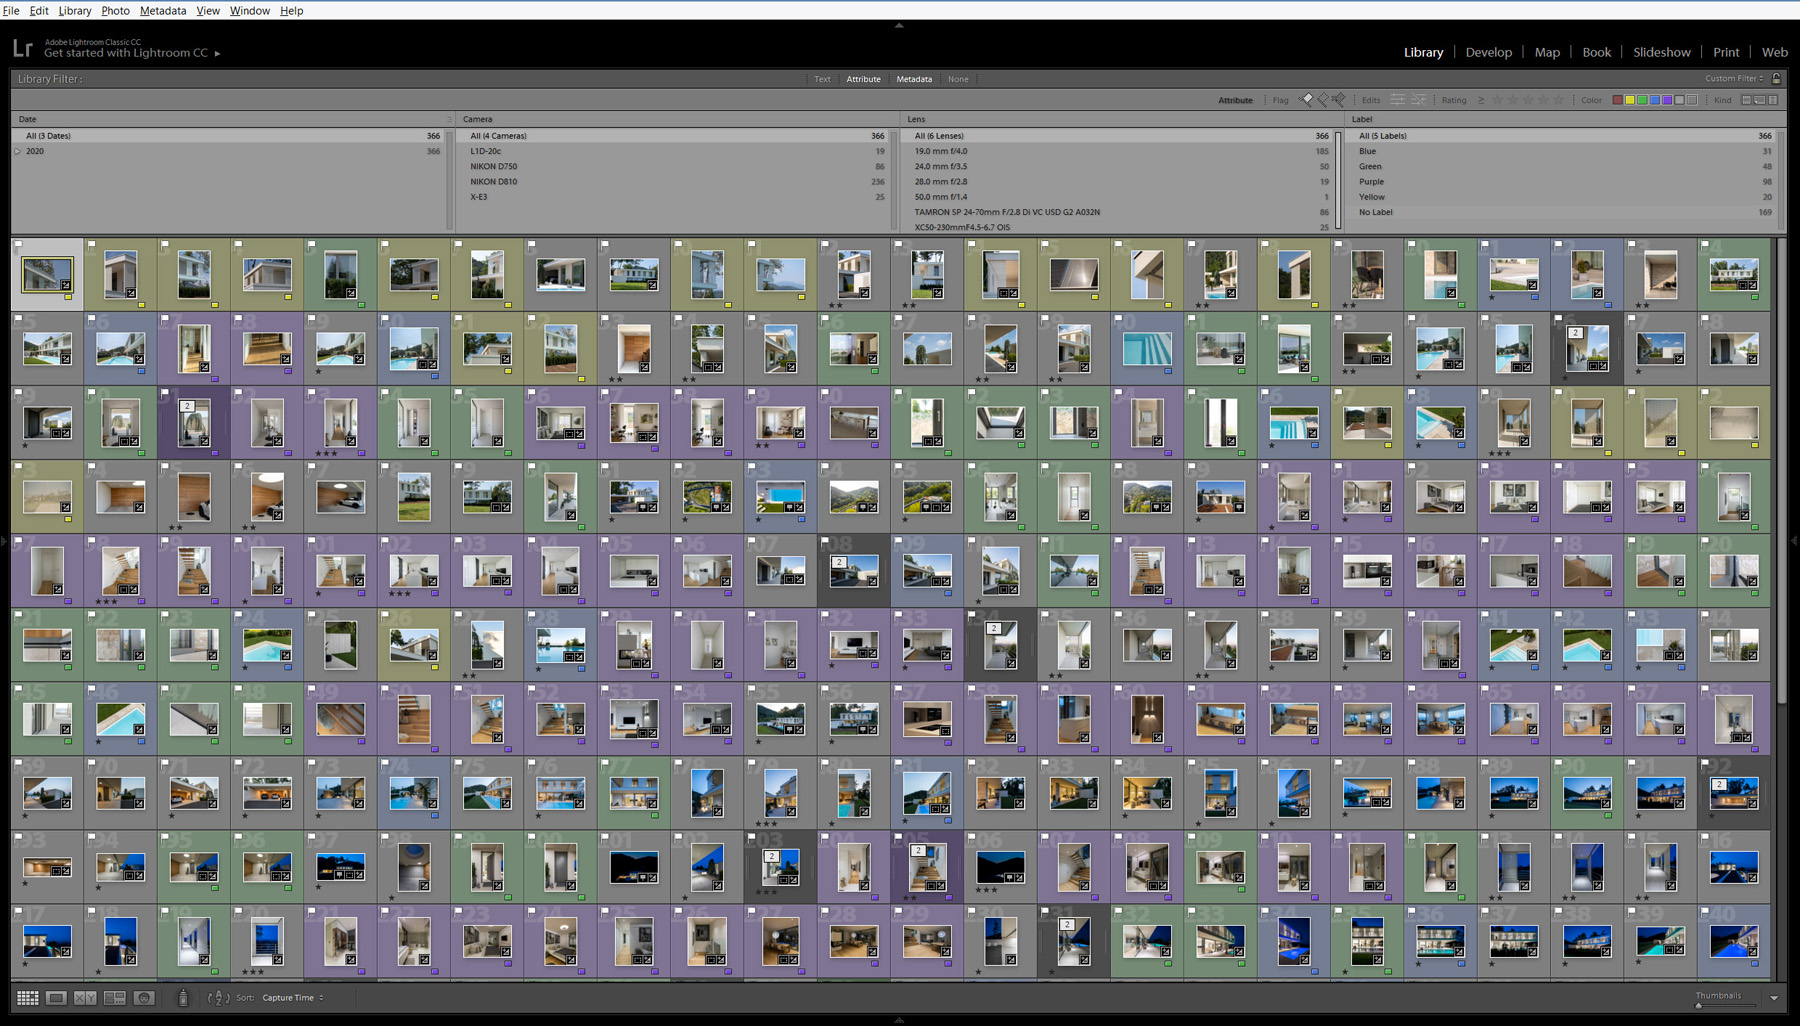
First, I categorize the images I mark with colors. (The default LR settings for the hotkeys are 6-red, 7-yellow, 8-green, 9-Blue, etc) In this case, the images of the pool are shown in blue, the images highlighting the windows are green, and the images marked with yellow are about the large displaceable elements. The interior images got purple color, so if I choose the non-color sorted images, I can see the exterior images which are about the architecture.

Lightroom has a great way to sort images based on metadata like camera and lens. Since I use several cameras and I know each one by what type of images I shoot with them, I can narrow it down based on that kind of data. I need the images I took with my D810 now, which pairs us down to 114 images. For me, this is a more manageable starting point. Before I start my selection process, I apply my base preset to the first image, and then I sync those settings on all the others, which makes it easier to compare images.
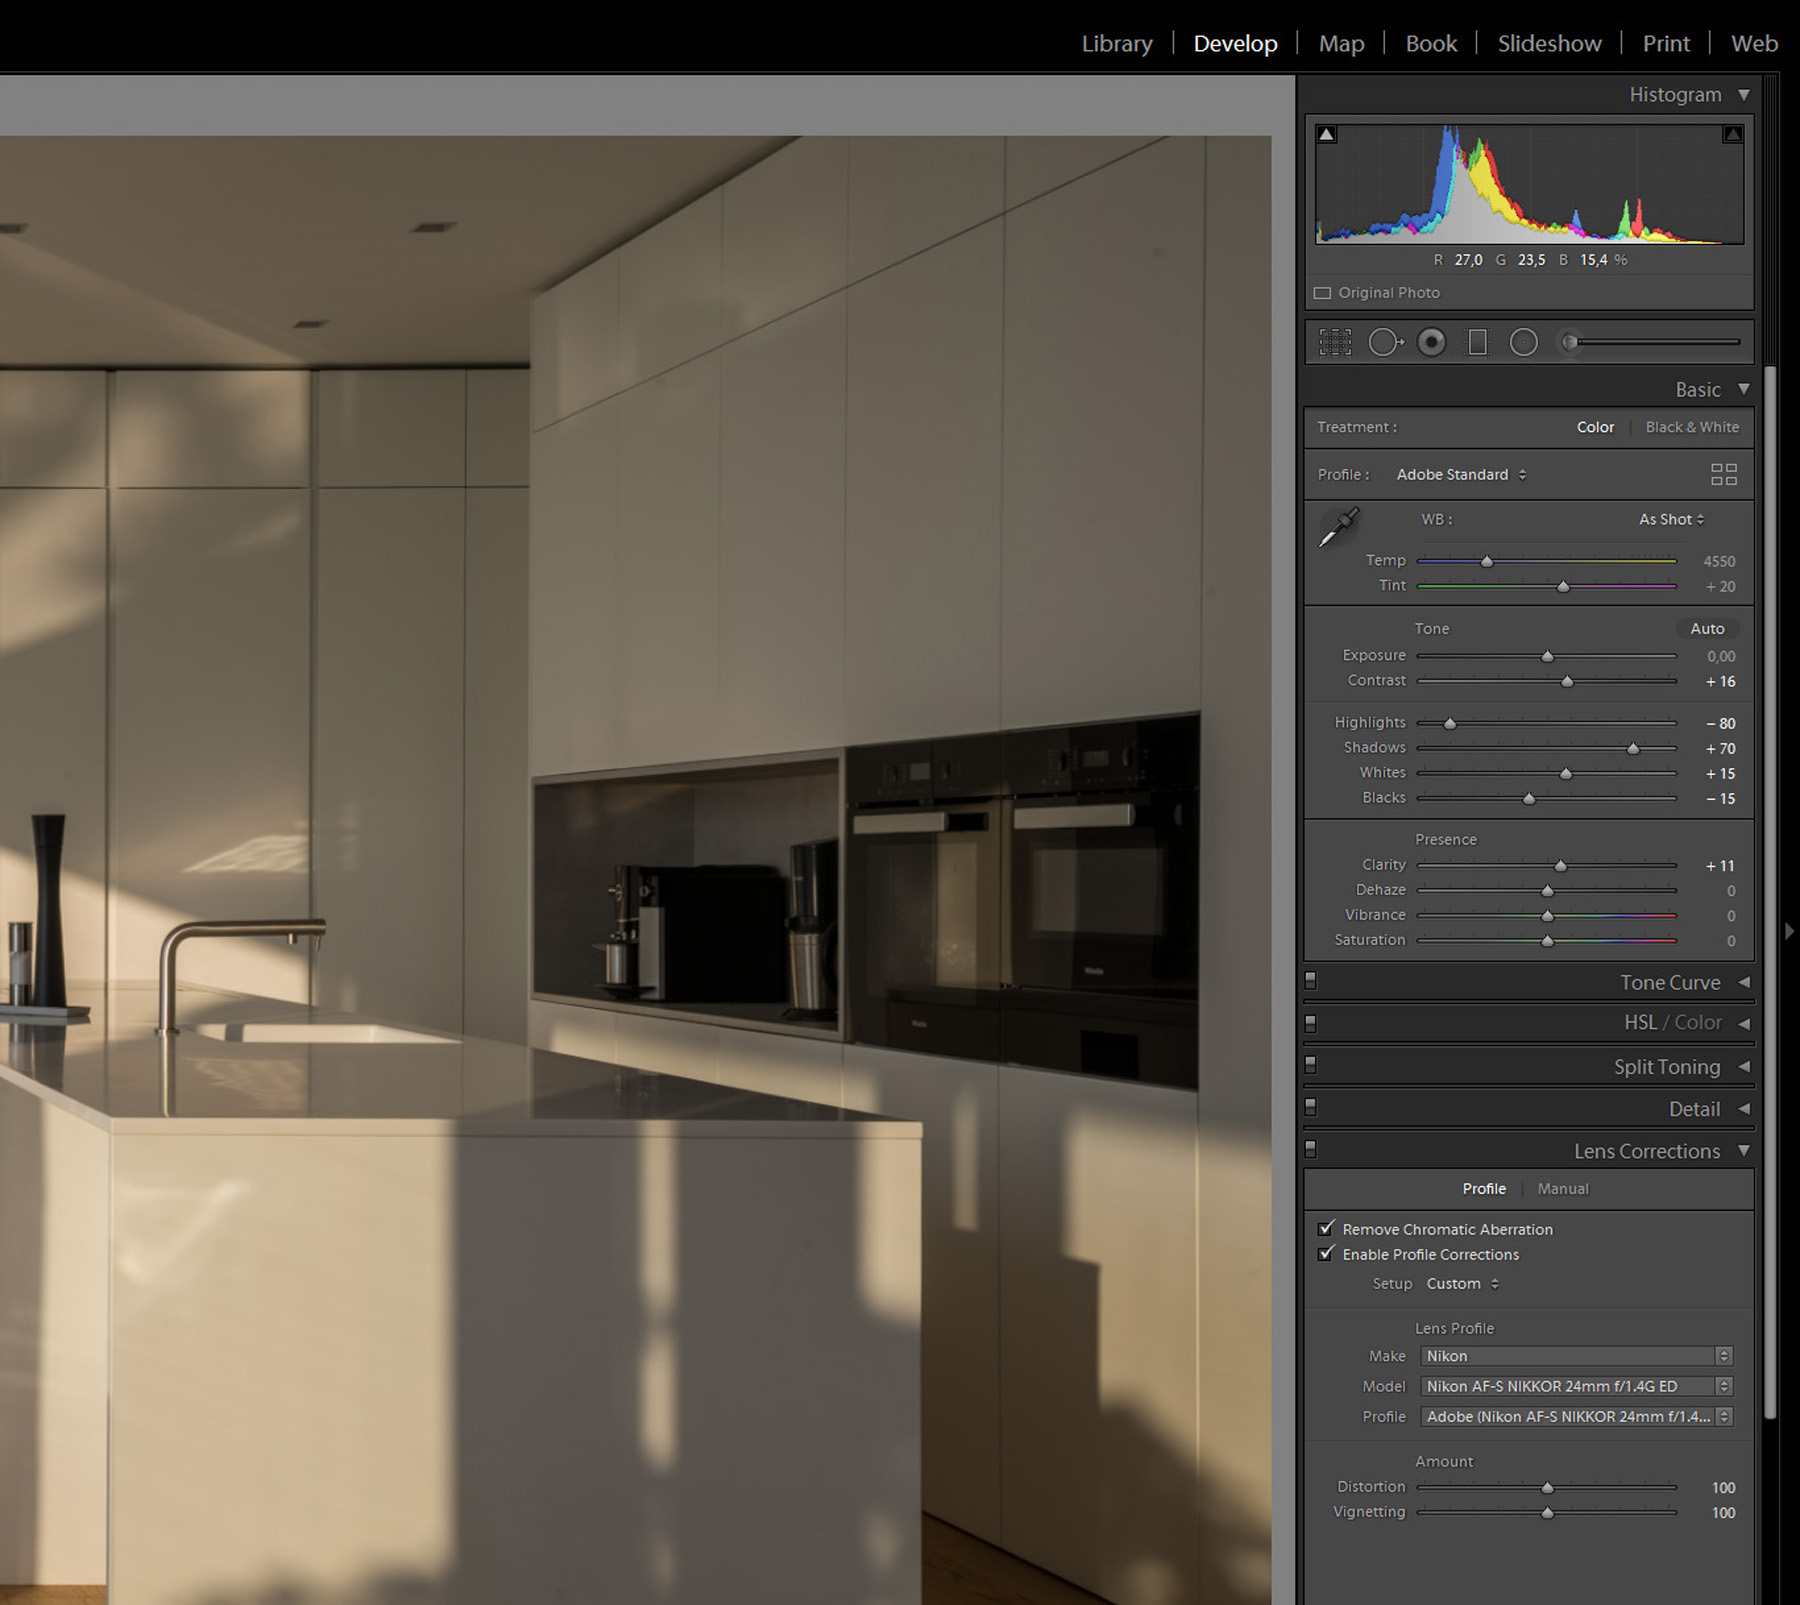

As you can see on the image above, many images have at least ‘1-star’, so my first round of narrowing the images is not helping much; I’m down to 89 images, so I have to give it at least one more round of culling. That ended up with 50 ‘ 2-star’ images which I liked better. For now, that’s fine for me. I know that this still may seem like a lot at first, but you’ll now see how quickly we work out these in Lightroom. Besides, I have selected 25 outside detail images and 10 aerials.

Let’s go inside, where I picked previously 80 images, and now I’m going to cull that down to around 35 images, but that means only 25 different compositions photographed in different lighting conditions. You have seen in the previous chapter o this series, that I have similar compositions with daytime, blue hour, and early morning light, but I use more than one of them just if I feel that is necessary. My detail selection for interiors is just 10 images.
If we do the math, I’ve got 130 images in my selection. If I add to this the fact, there are much fewer compositions, and 35 of them are details, it is a number I am happy with. I’m going to process these in Lightroom. Would you see how I do all of them? Just kidding, it would be pretty boring after a few, so I’ll share the process for the different selections.
Processing Exterior Images in Lightroom
I’m going to work on all of my images one more time from the beginning so that you can be with me the whole time. Right away, after I open the first image I have selected, I start questioning my previous decision: does this image really have a place in my selection? The answer is no! On the one hand, I was 1 minute late because I made the pair for this image from the other side of the house (which eventually became an unsuccessful attempt – I wrote more about this in my previous post). On the other hand, I’m not completely accurate with the composition. This error is not too difficult to fix in photoshop. If this were one of the main images in the selection, I would definitely try to fix it later, but now it goes among the ‘1-stars’.
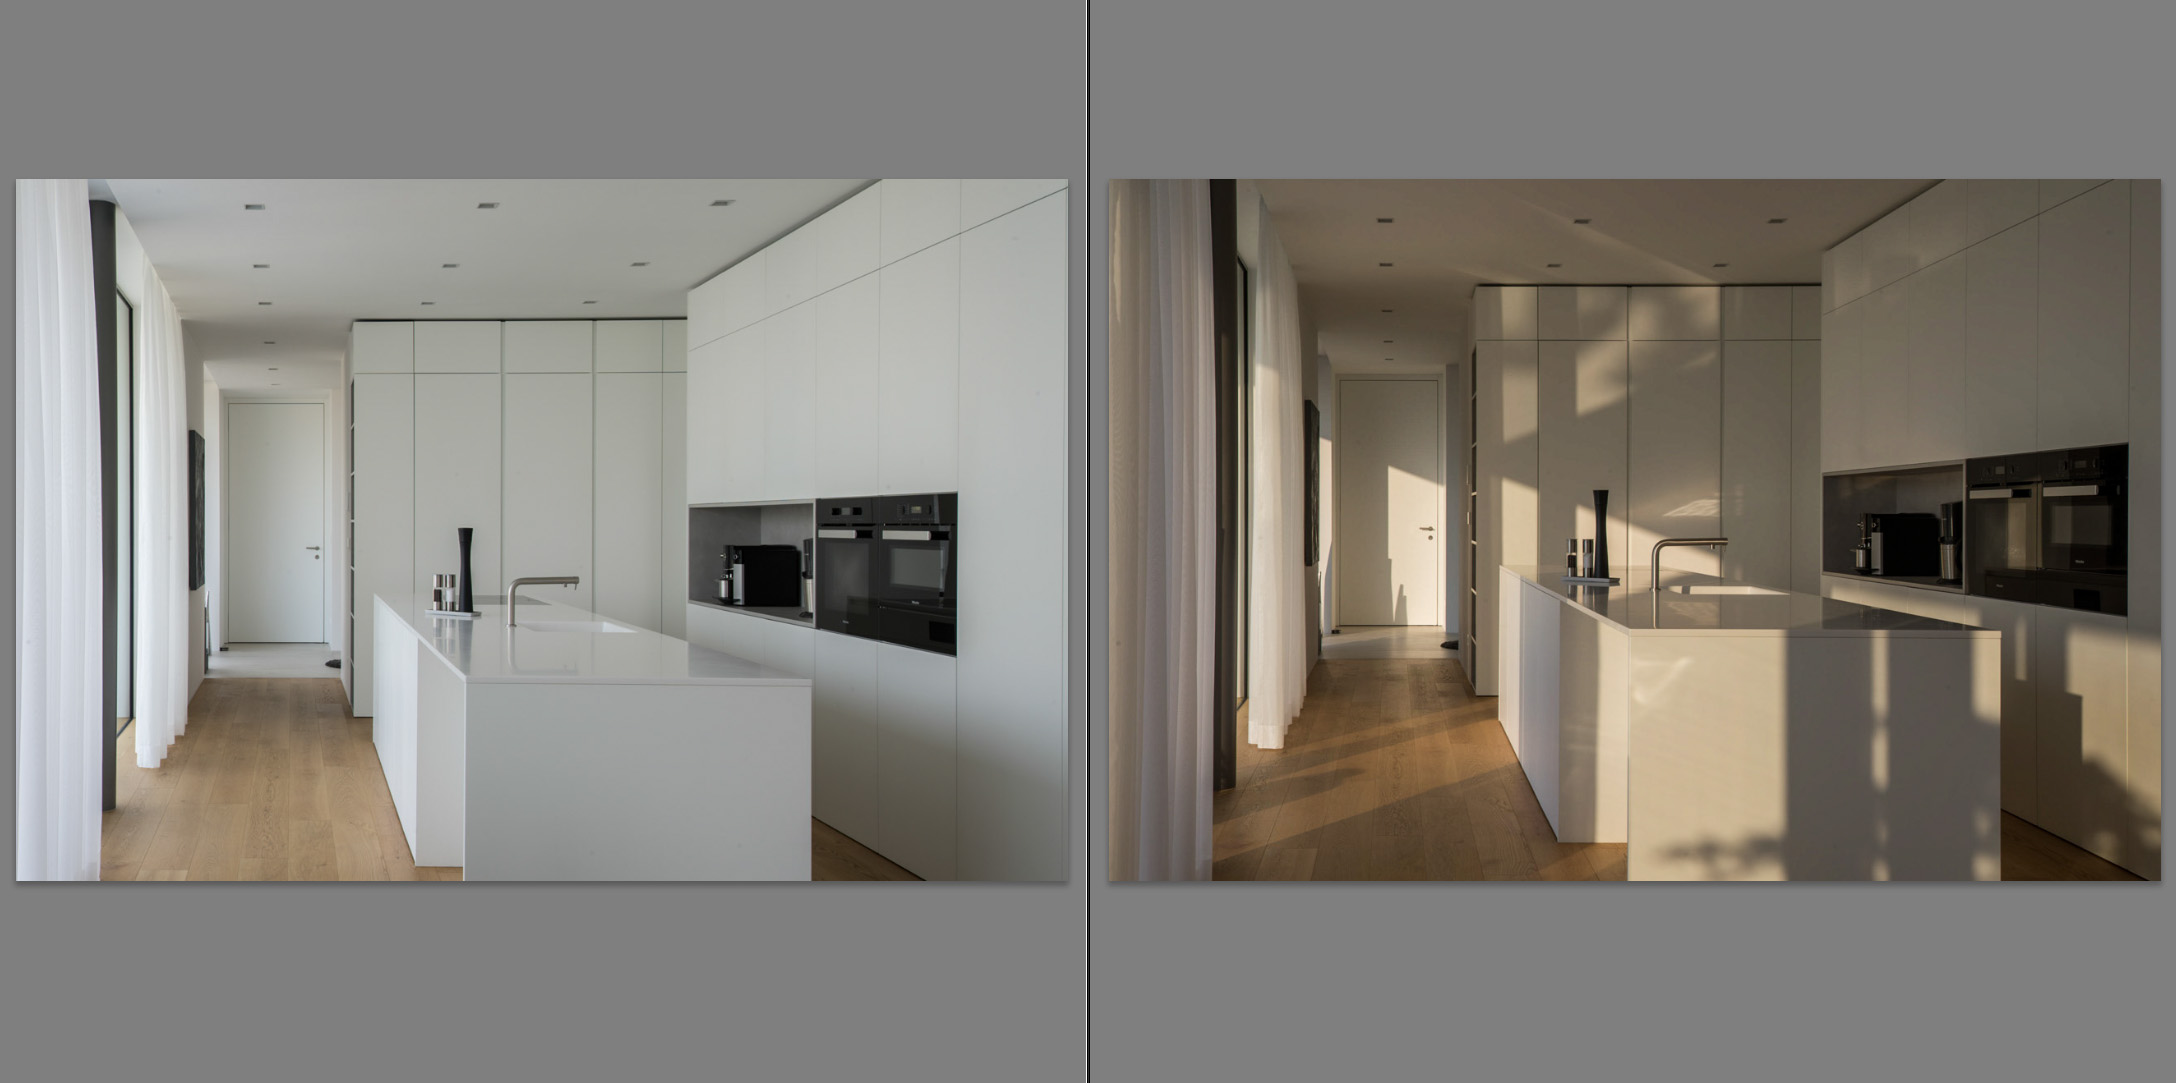
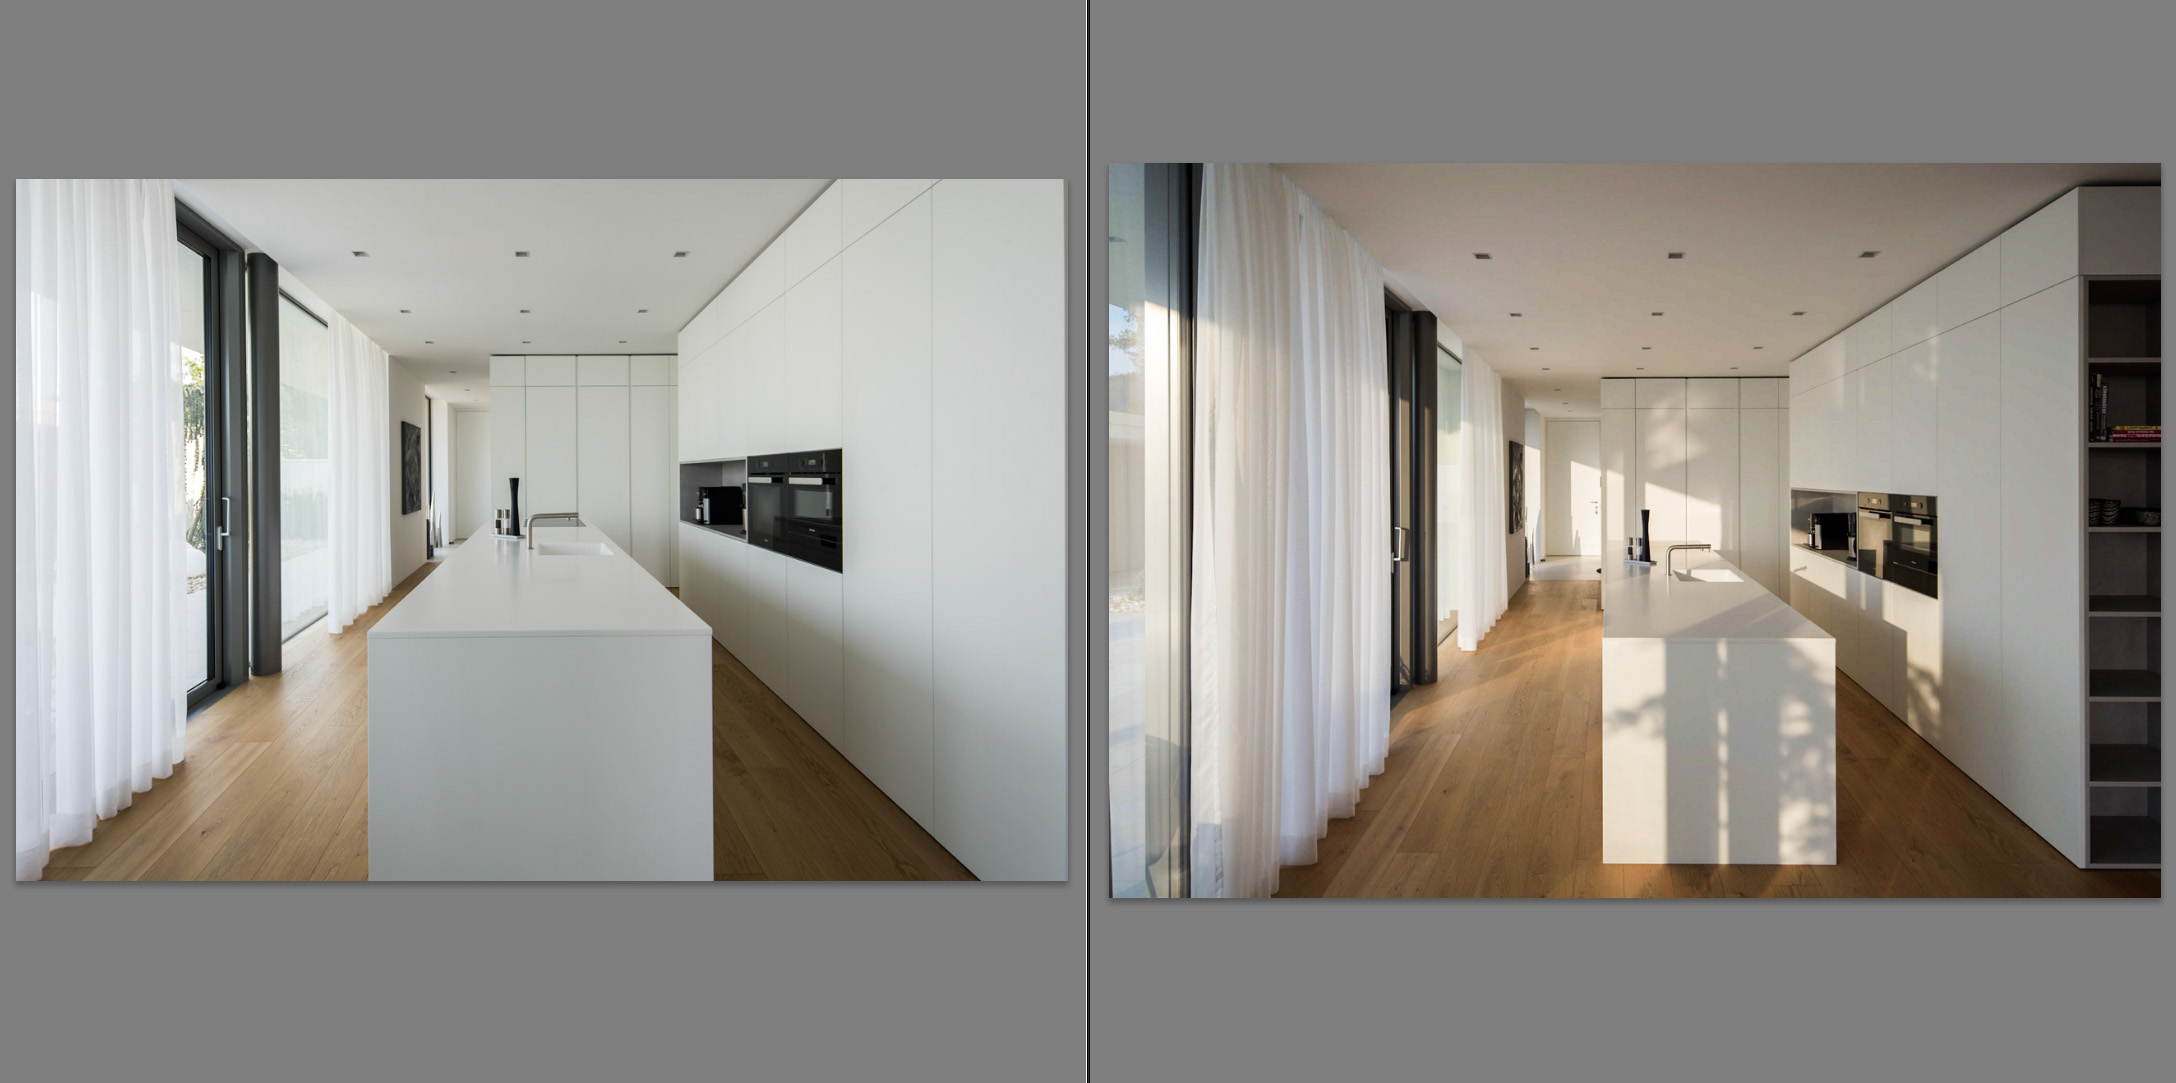
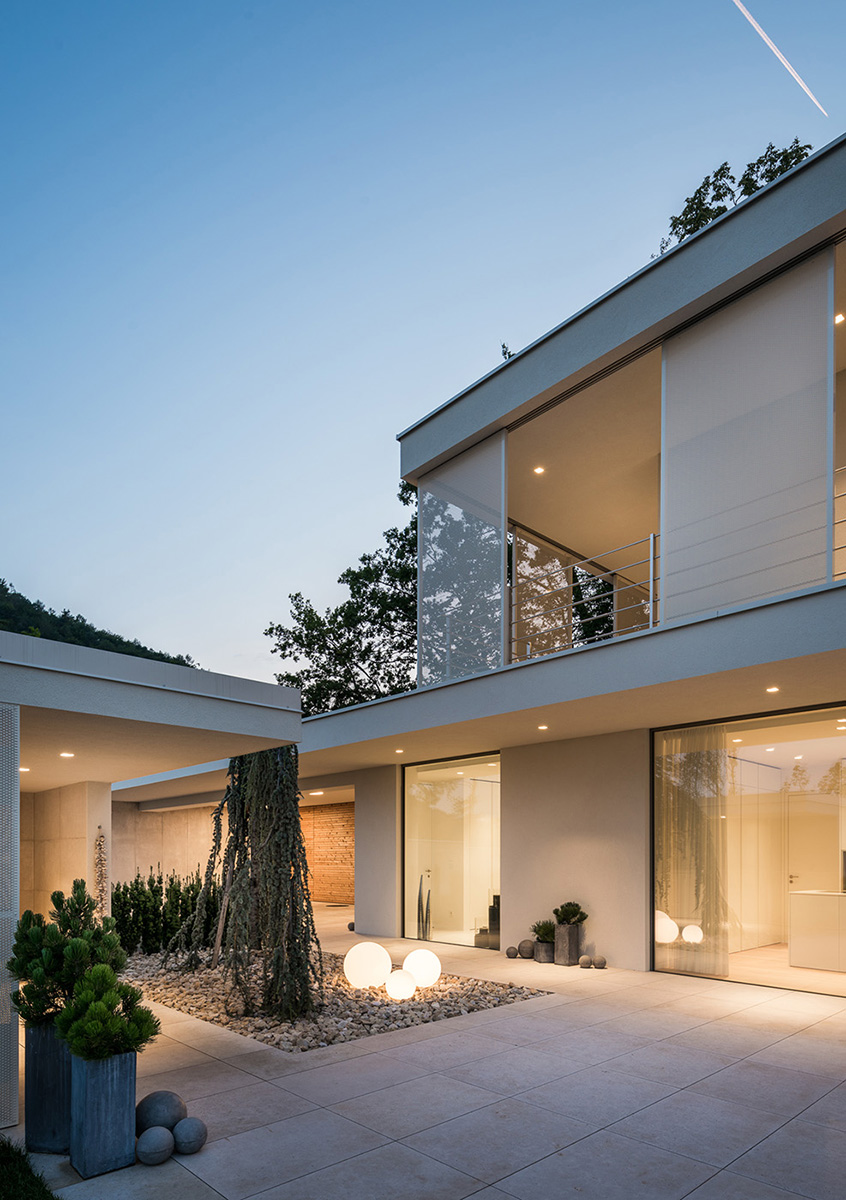
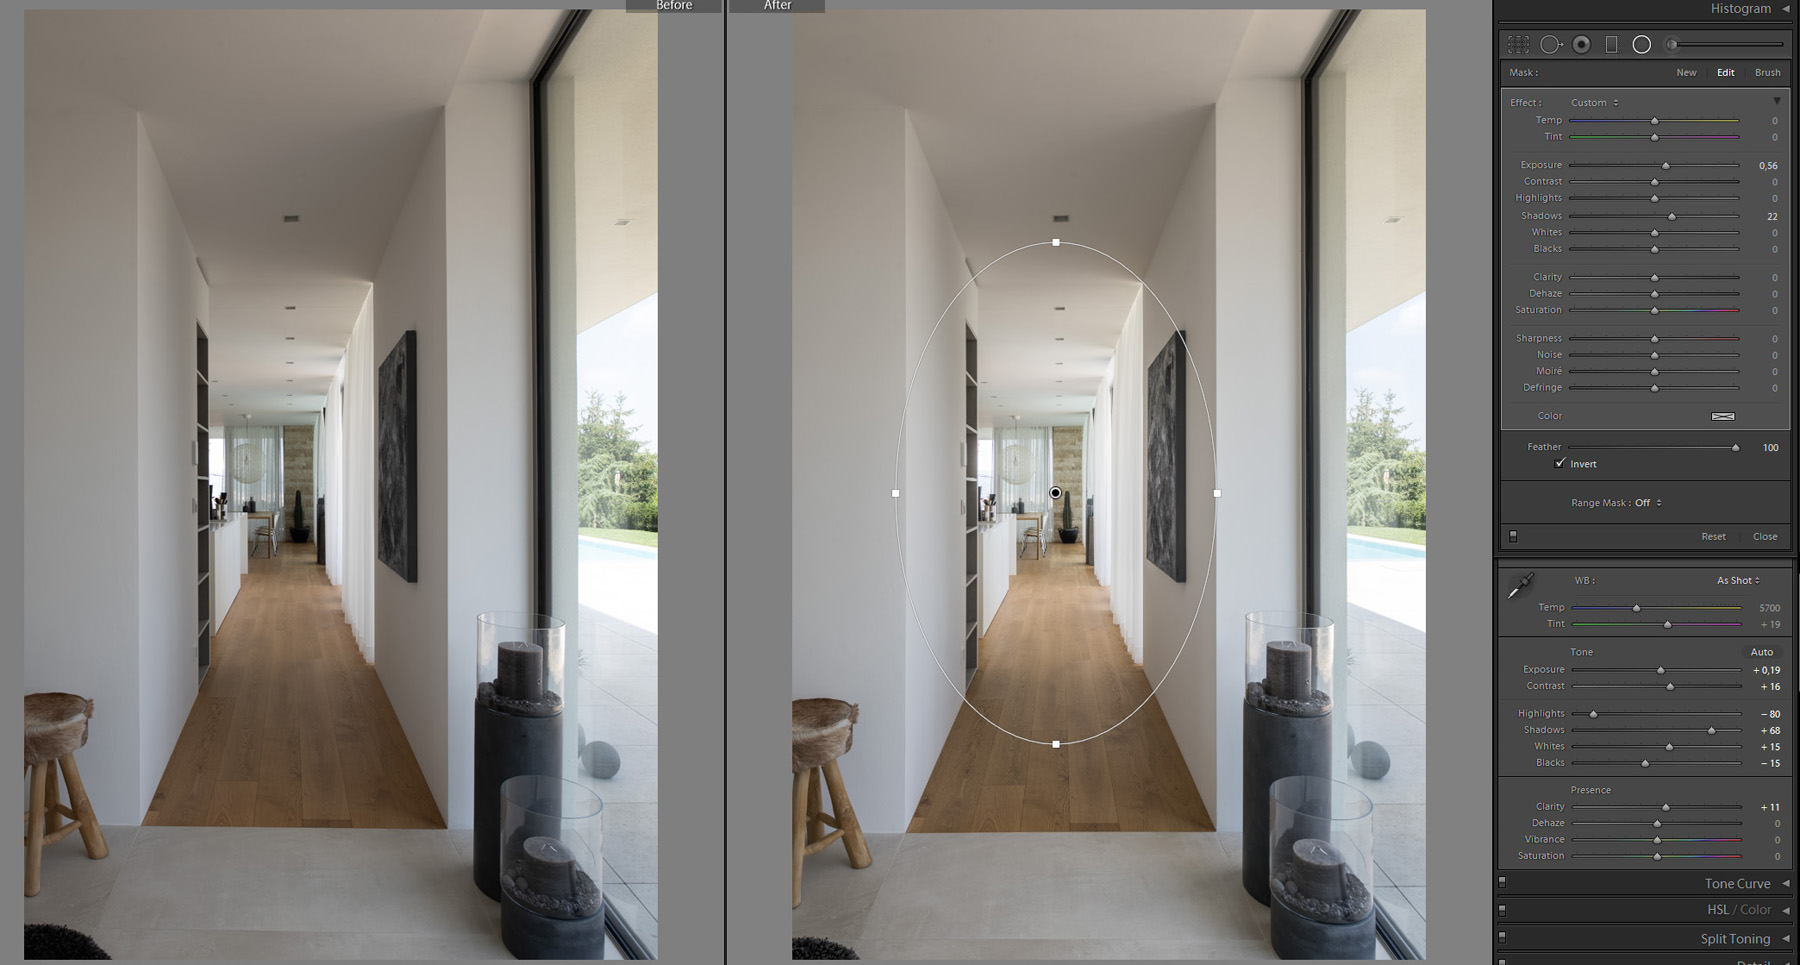
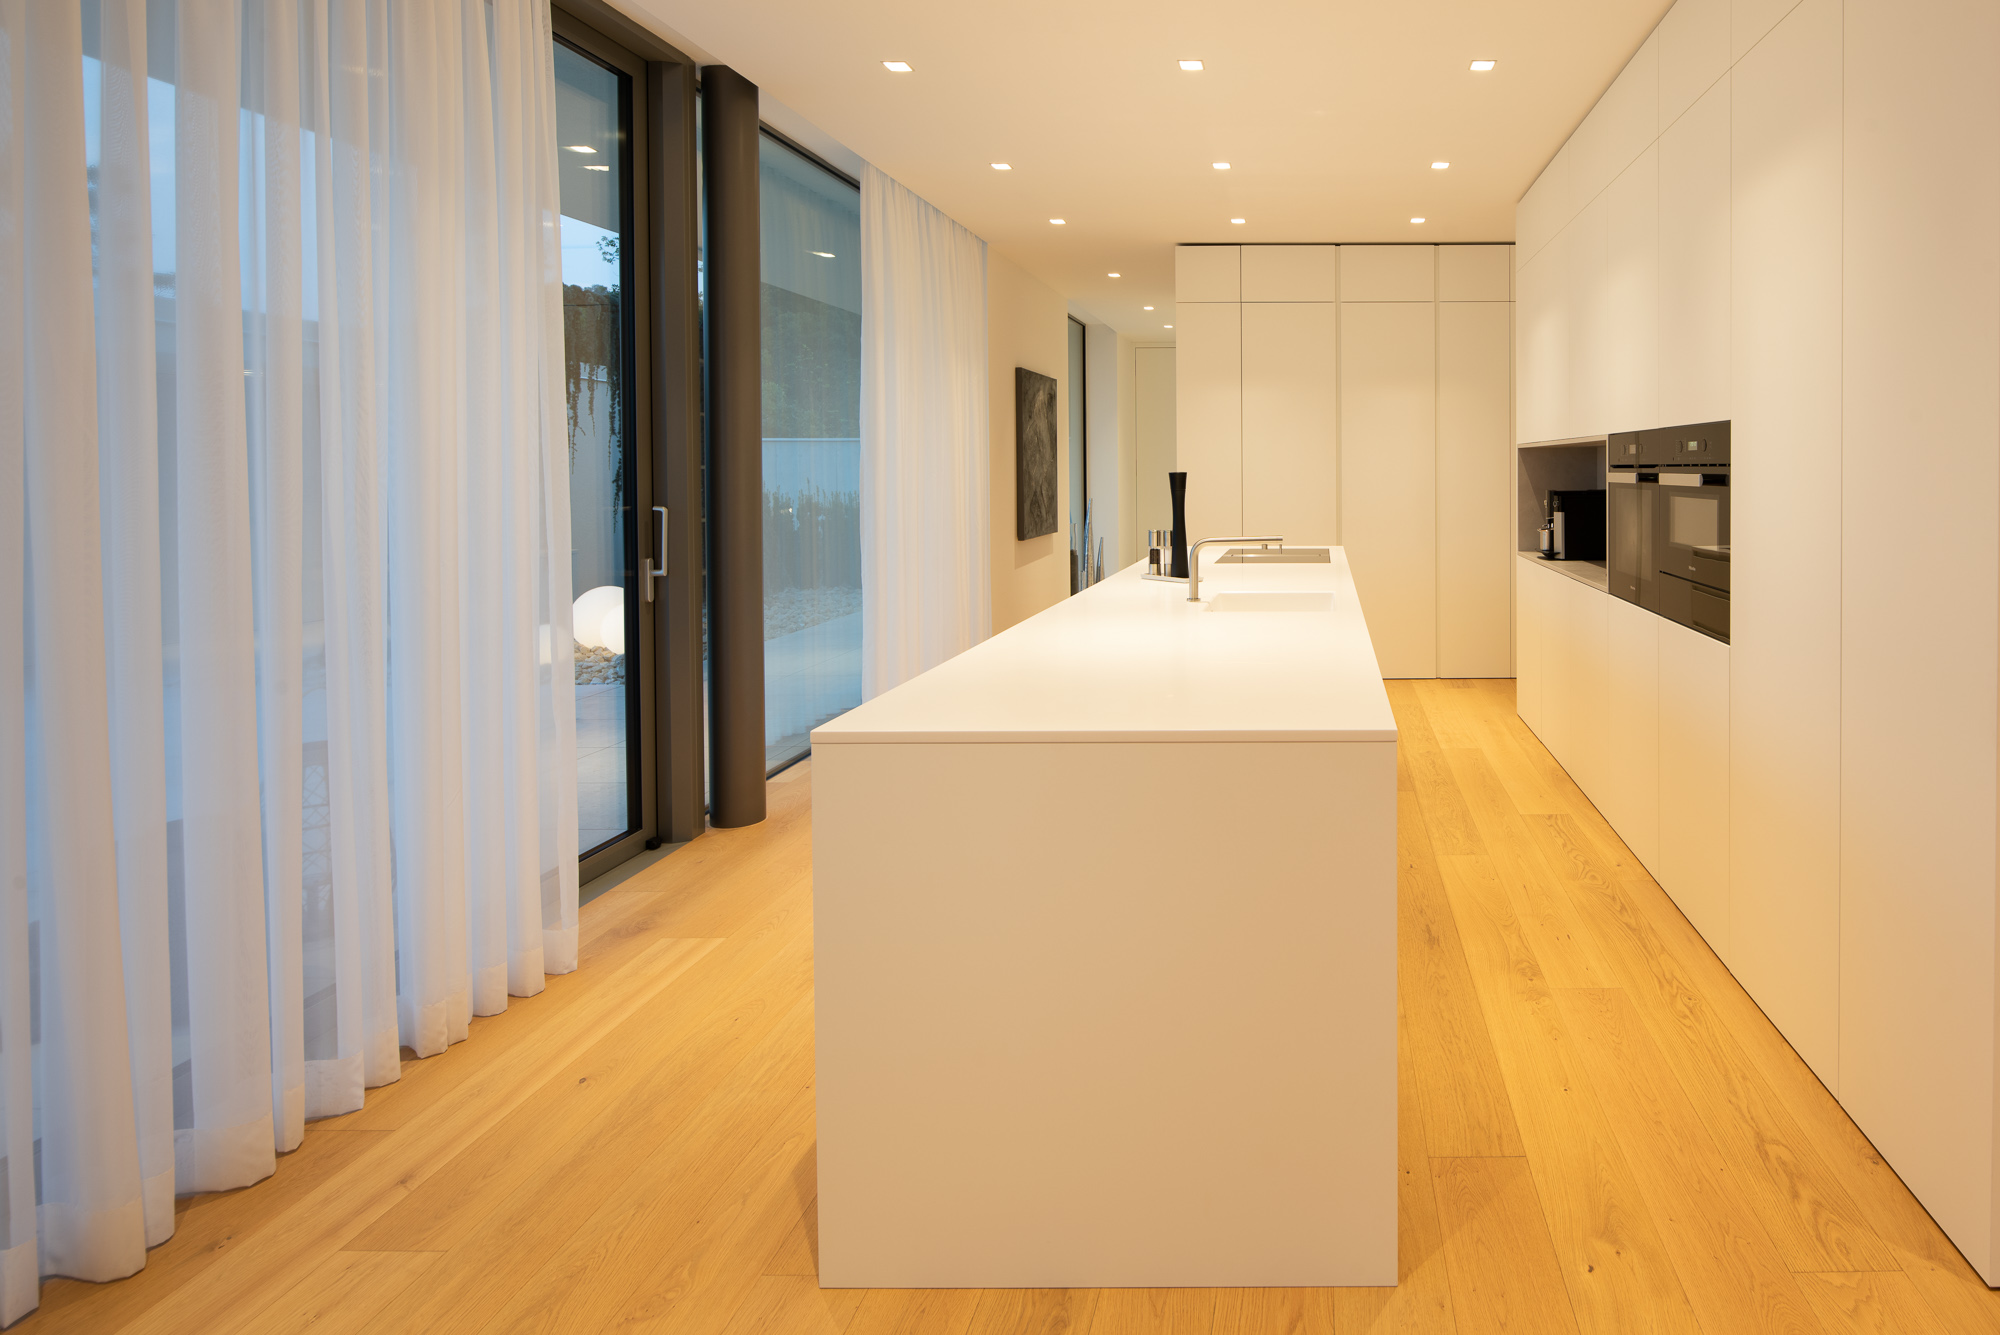
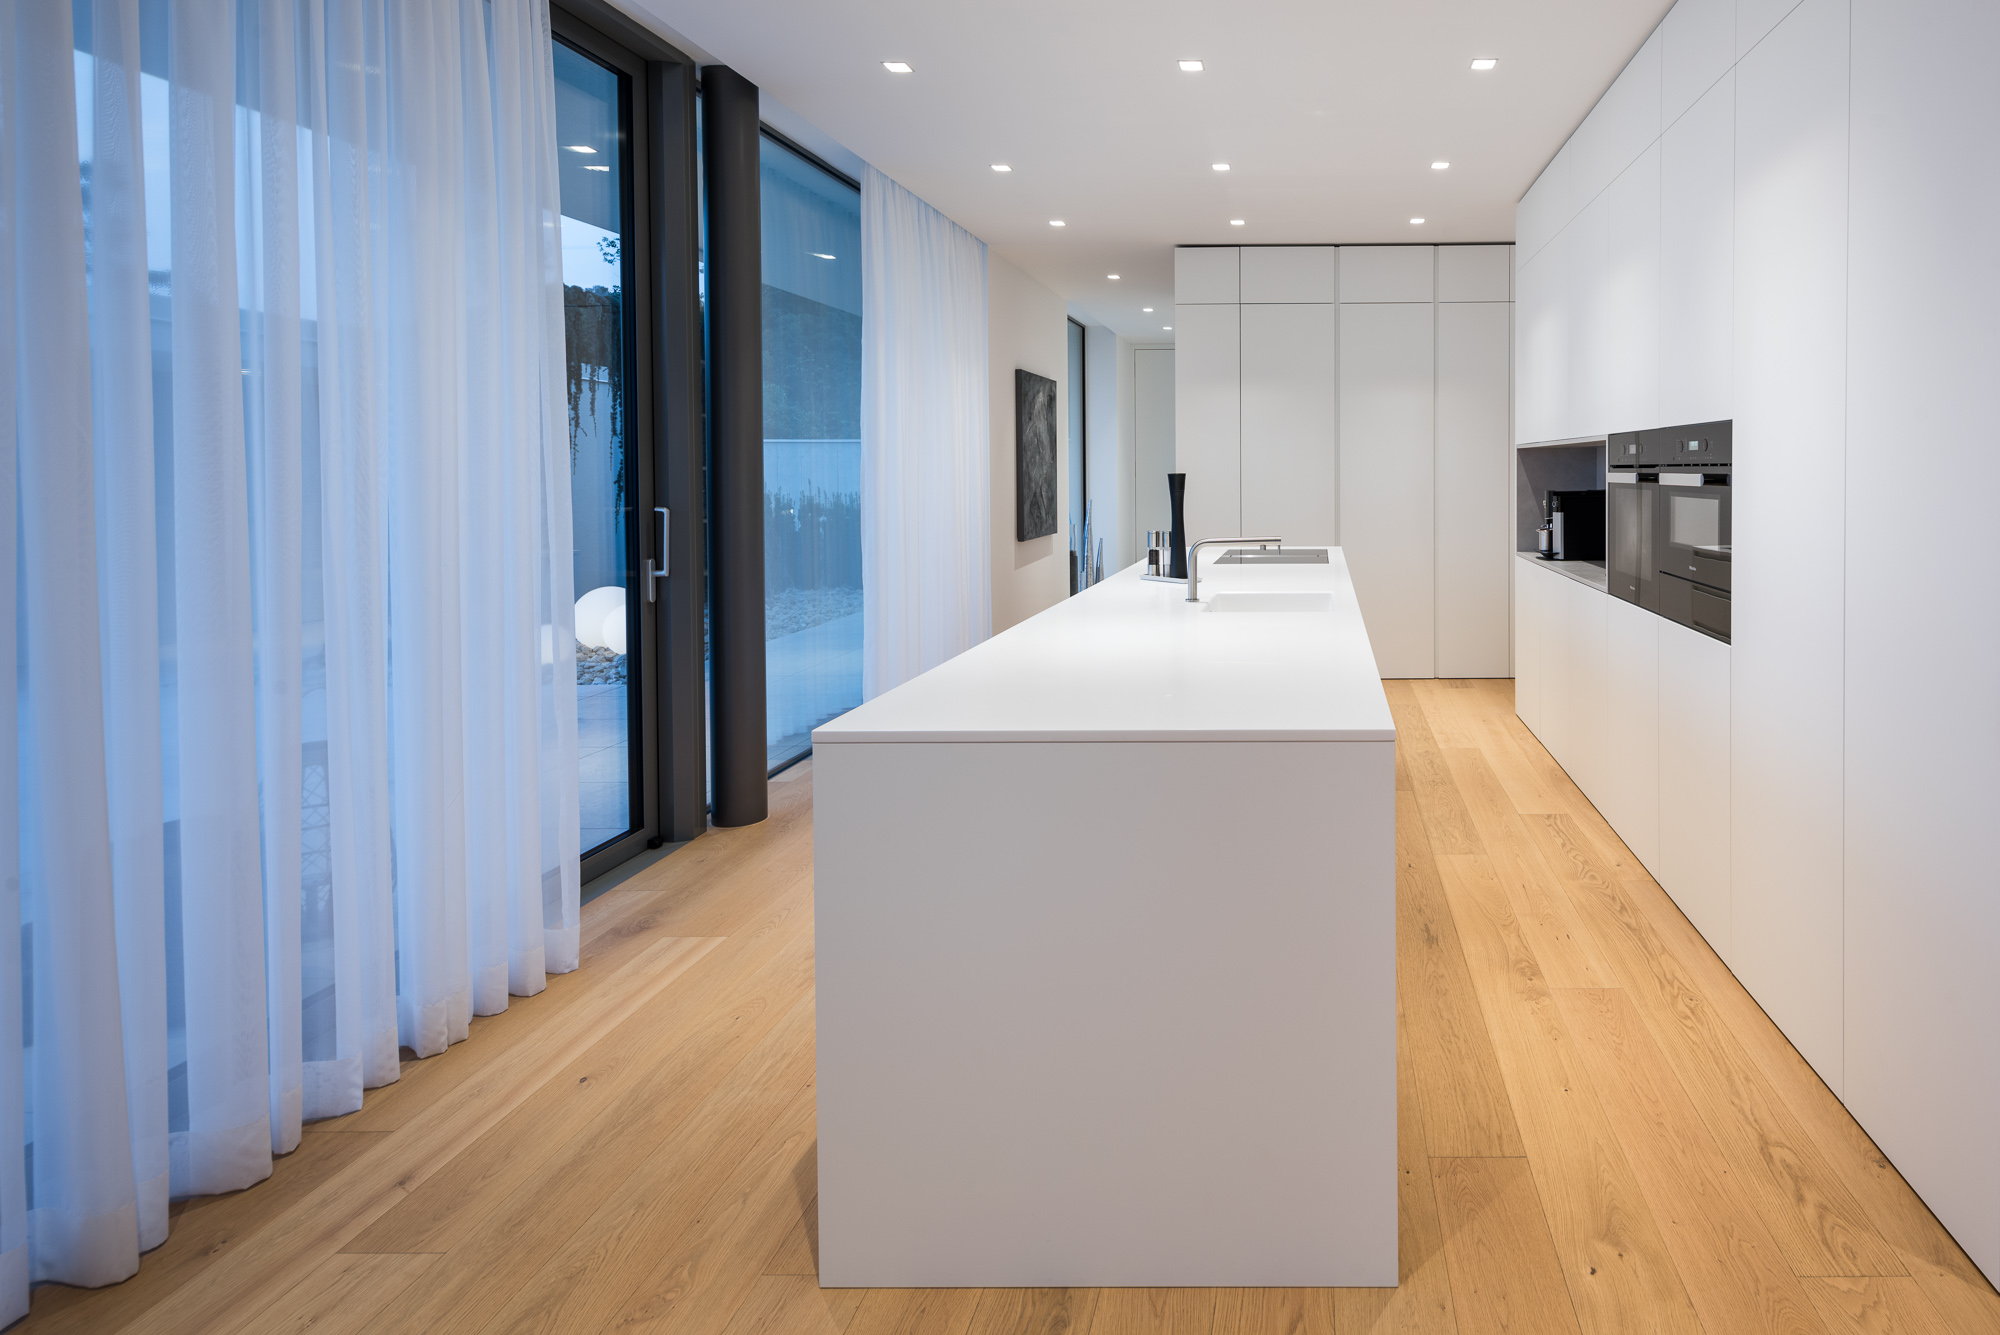
You may ask what the hell is this image (below) doing in my selection; there were many images from the next morning with amazing light and shadows throughout this corridor. Although I like those images more for various reasons, as almost every photographer would, it is a different story when it comes to magazines. You have to know your market. This is an Austrian house and I would be thrilled to see it in the leading architectural magazine in Austria called Architektur Aktuell. Many of the projects they present radiate a calm, quiet atmosphere with muted colors, where the emphasis is not on the light but the design, where the architecture comes to the fore. This is the main reason why many images stayed in my selection that aren’t as exciting as some of the other versions I’ve made of the shot.
Sorry for jumping ahead to interior examples, but the same thought process was behind all of the images below.

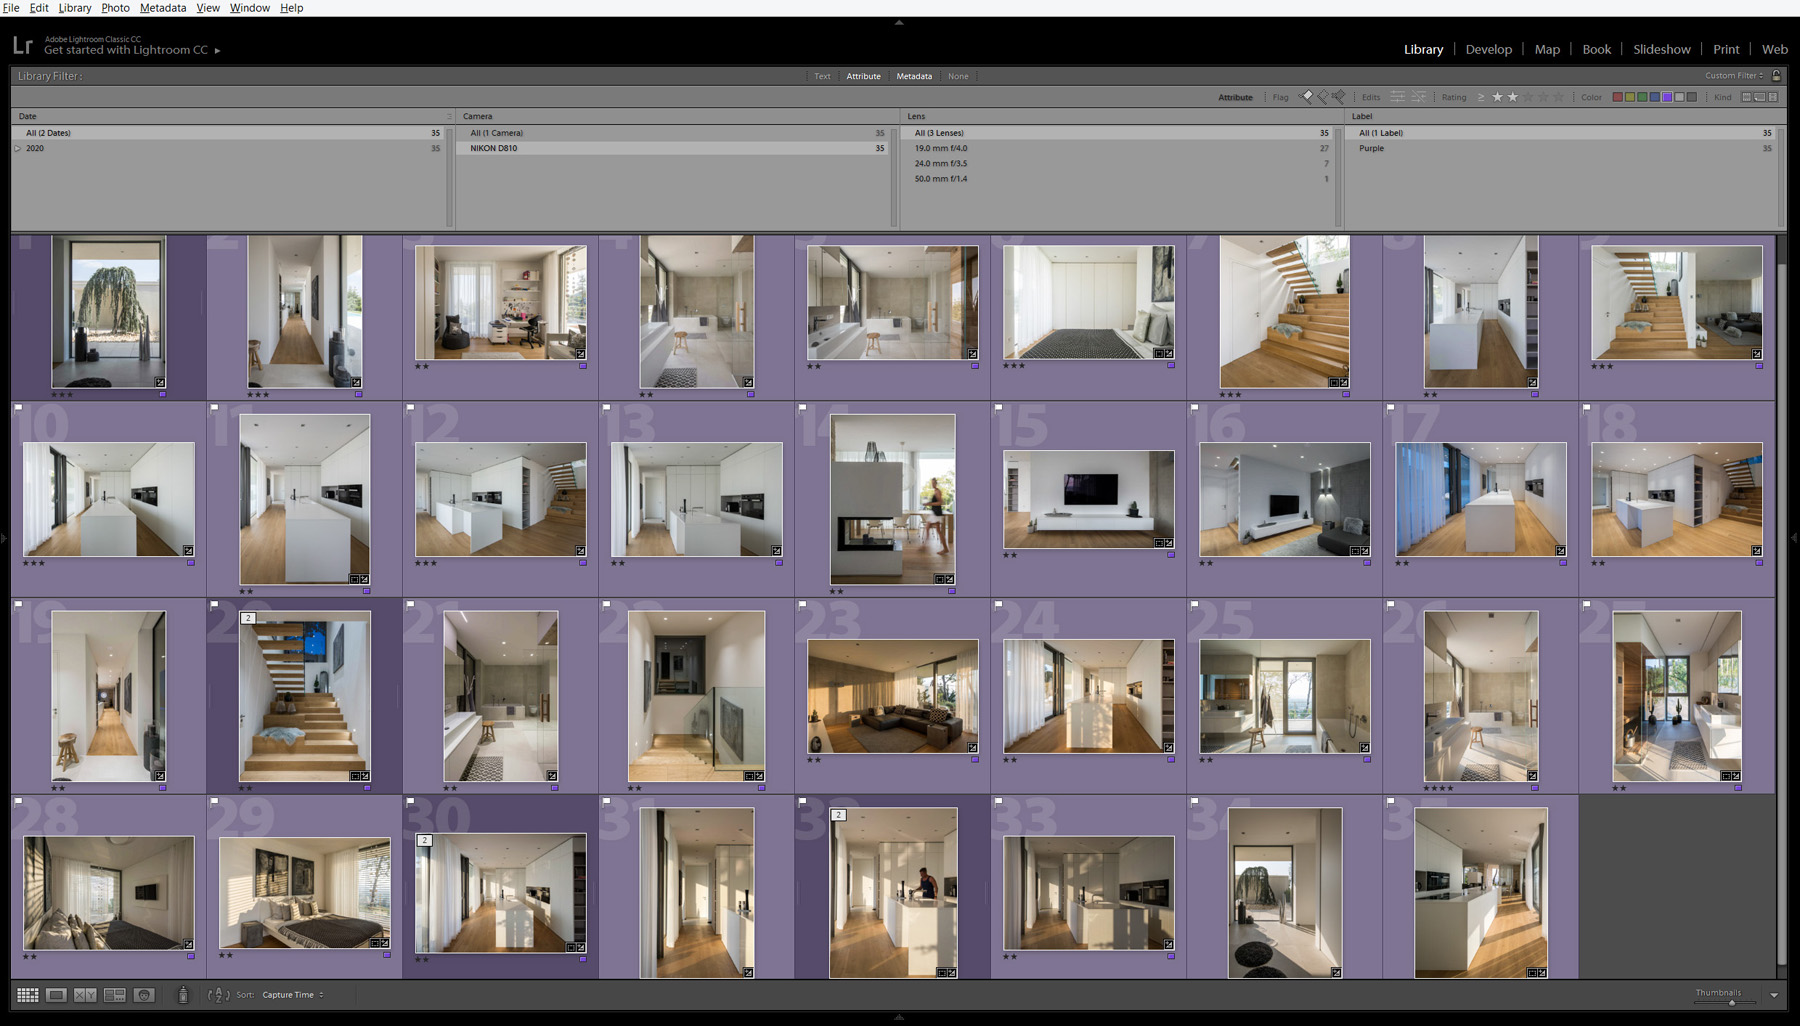
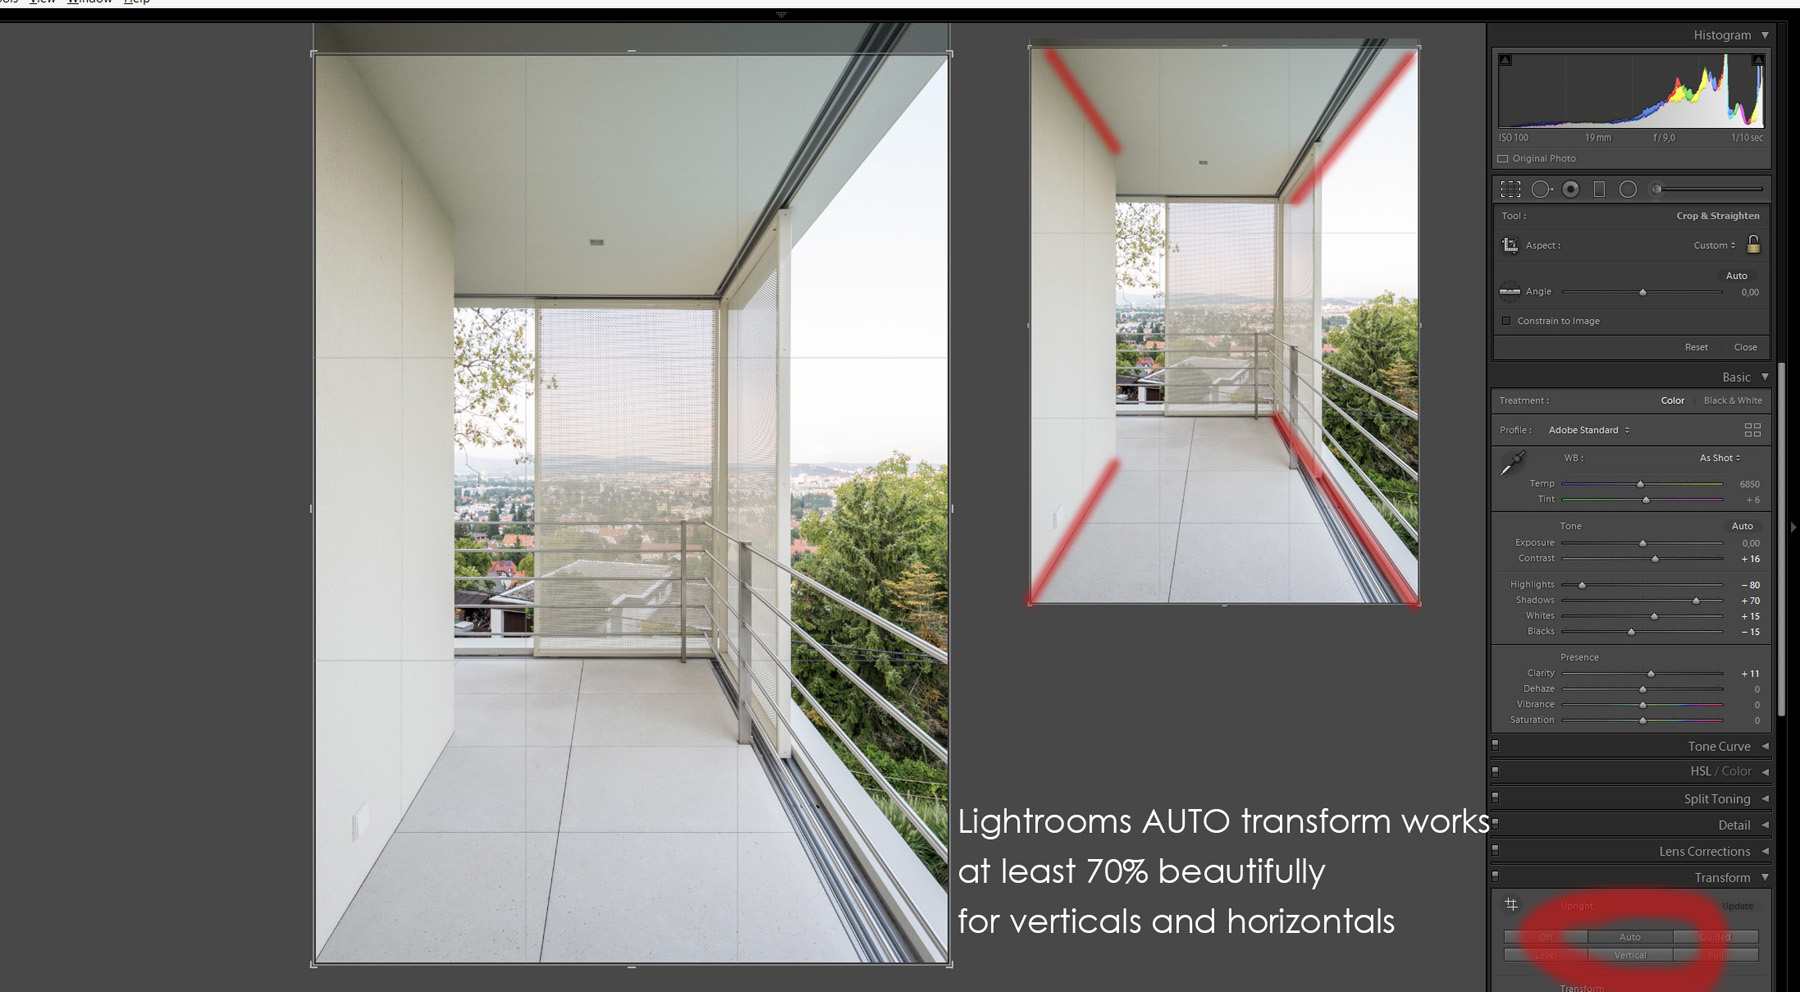
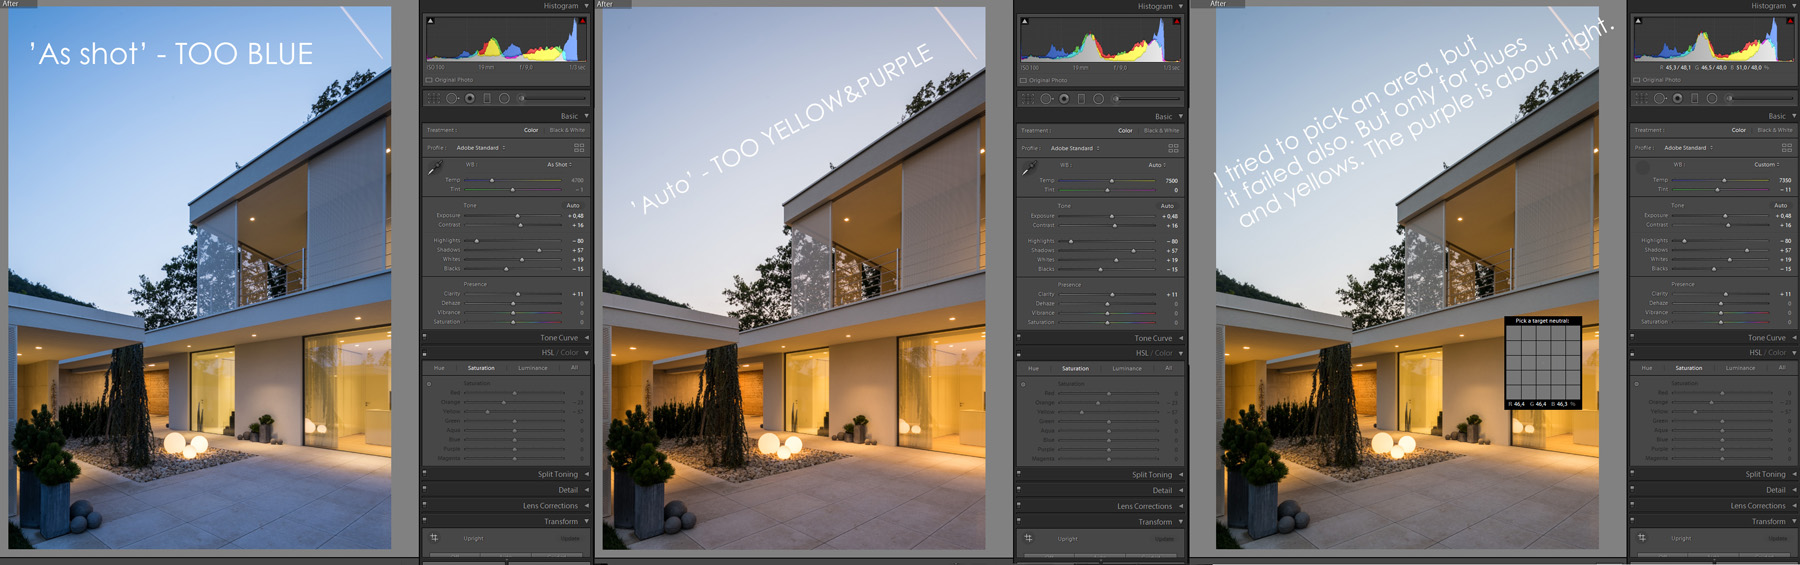
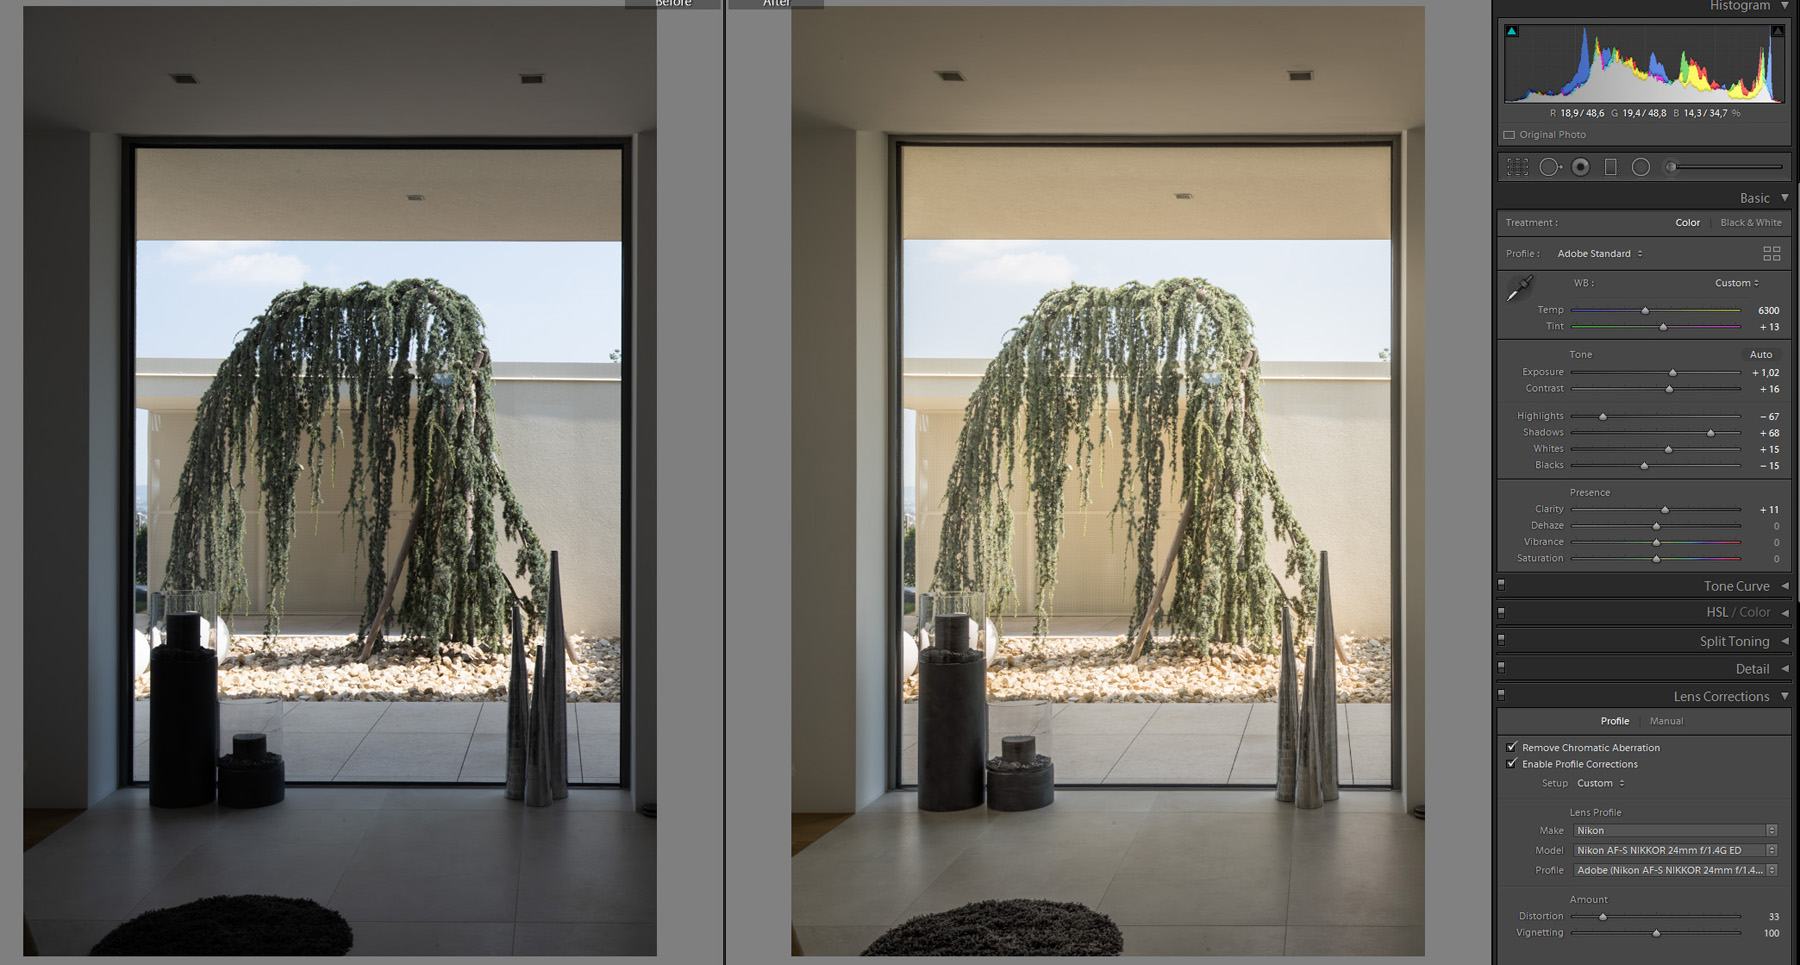
The base settings I added before are obviously not enough for individual images; I tweak them if I don’t like what I see. I adjust the white balance first, which can be tricky for exterior early blue hour images.

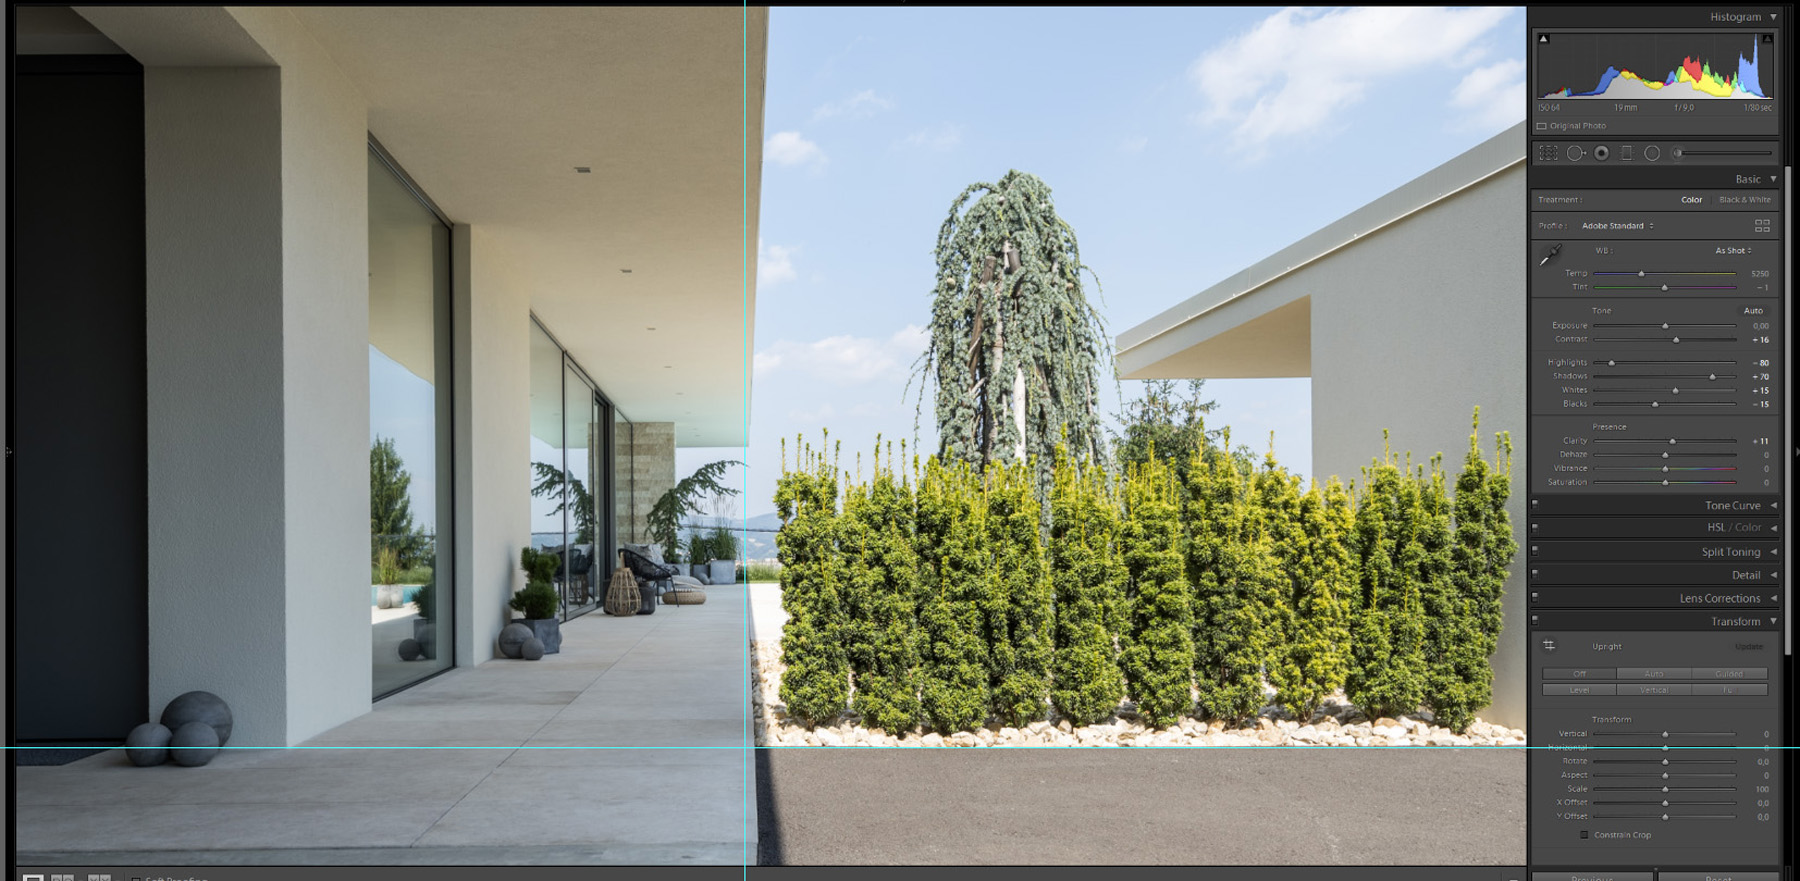
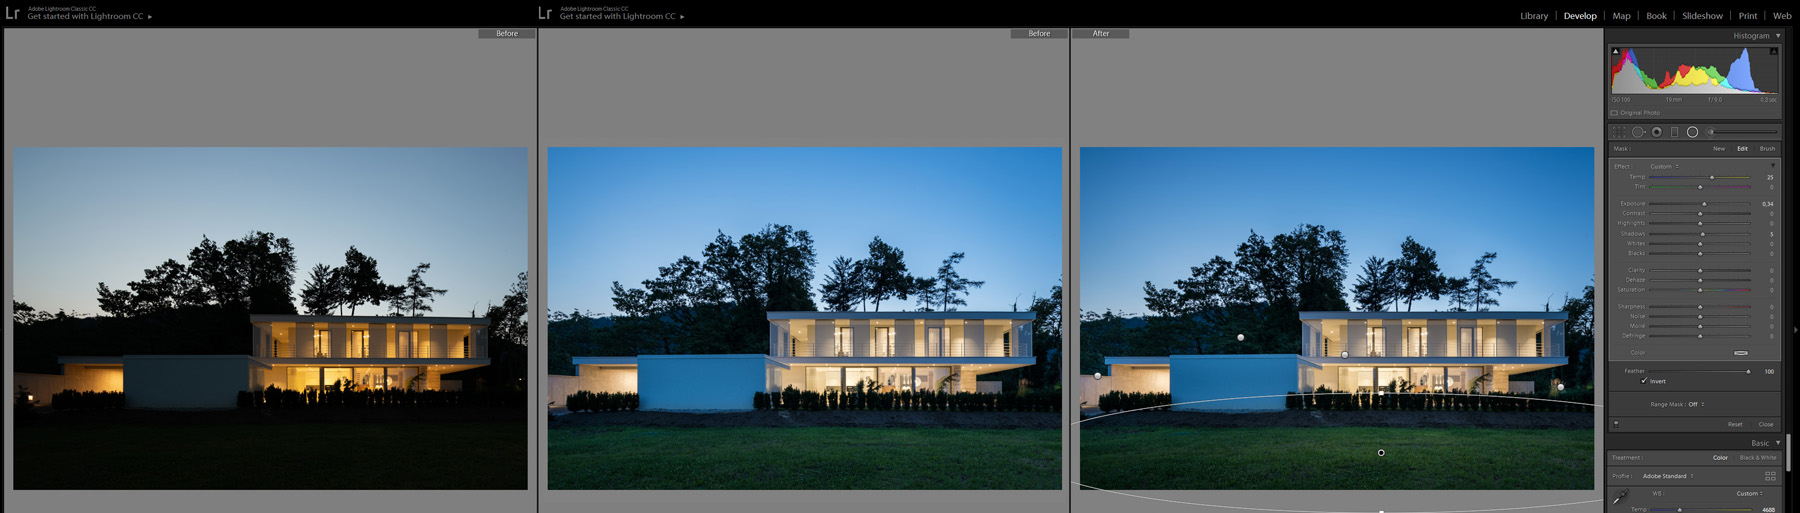
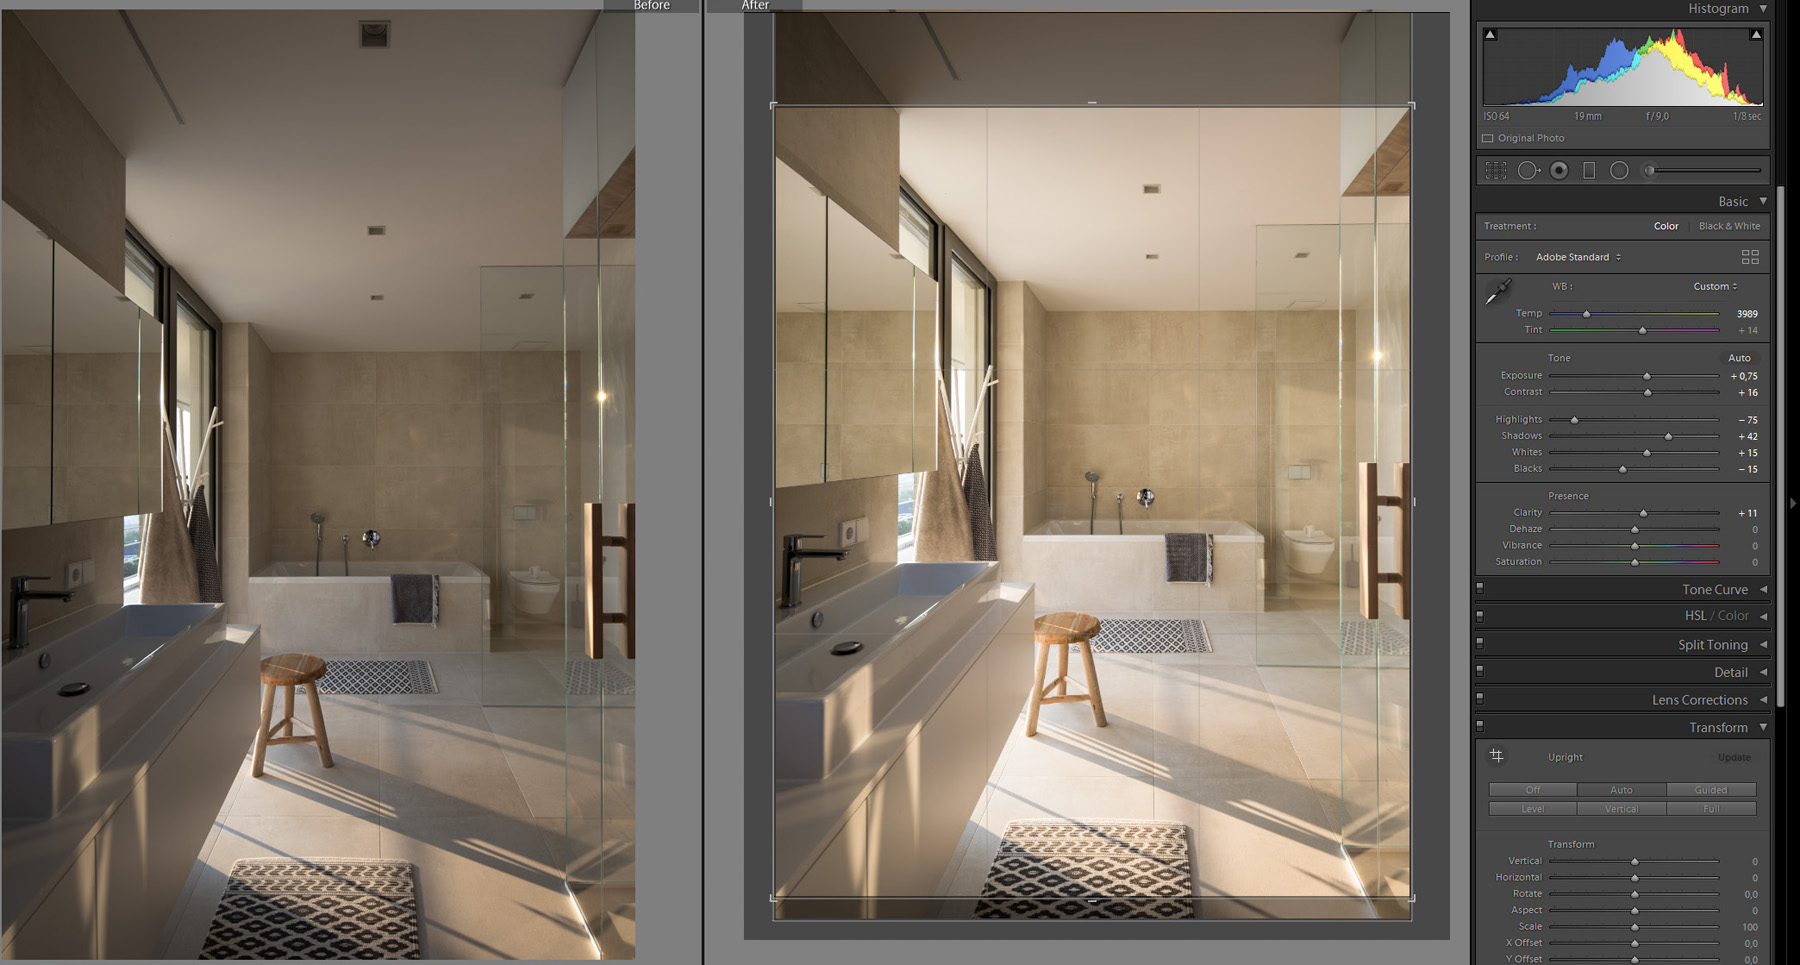
Now you get the basics with my main process, let’s see some examples with before/afters.
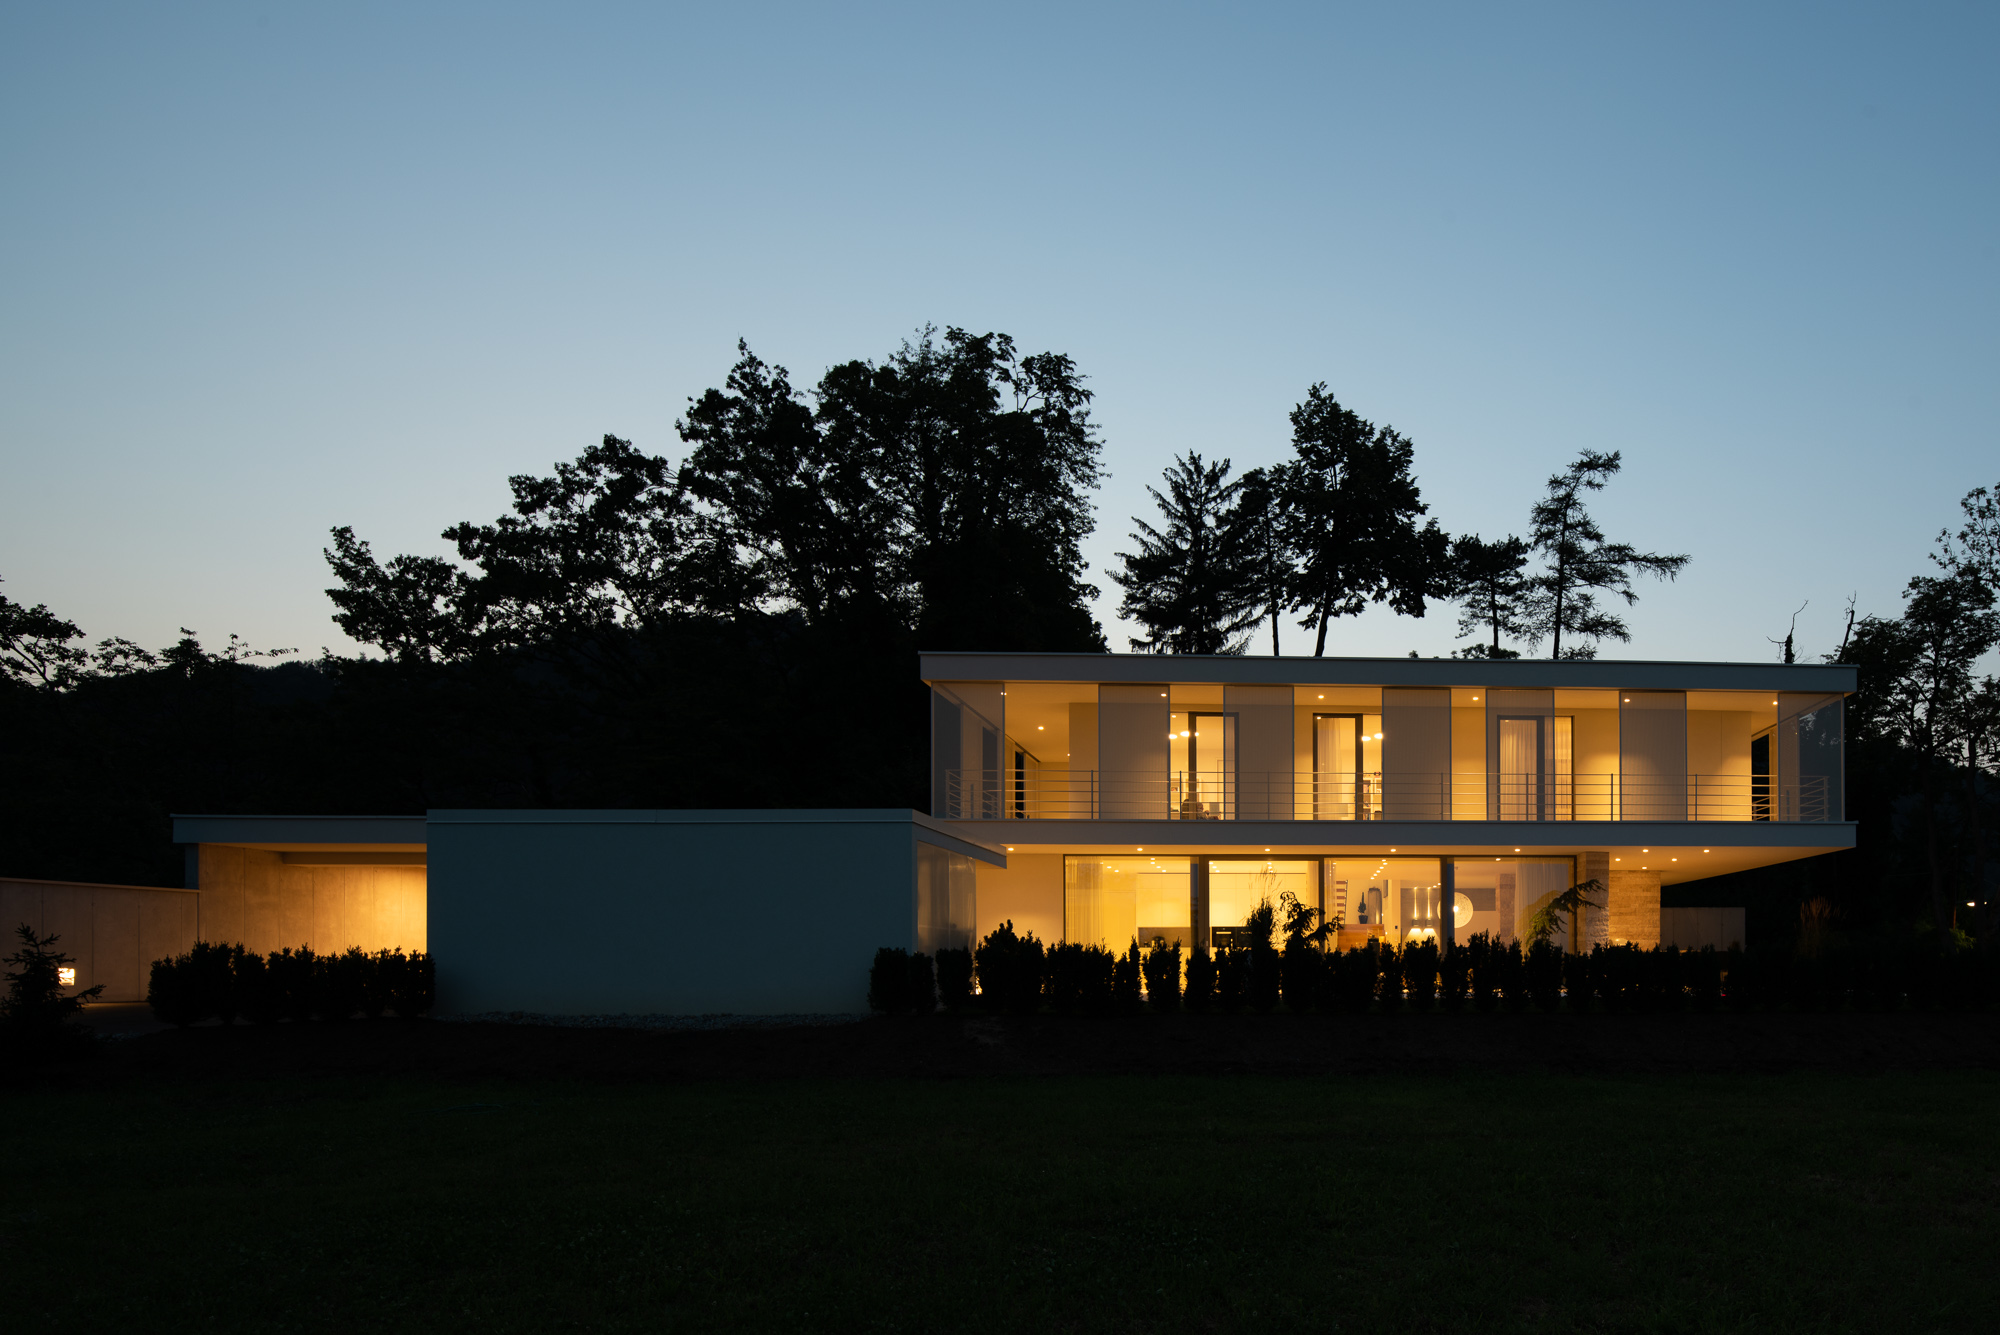

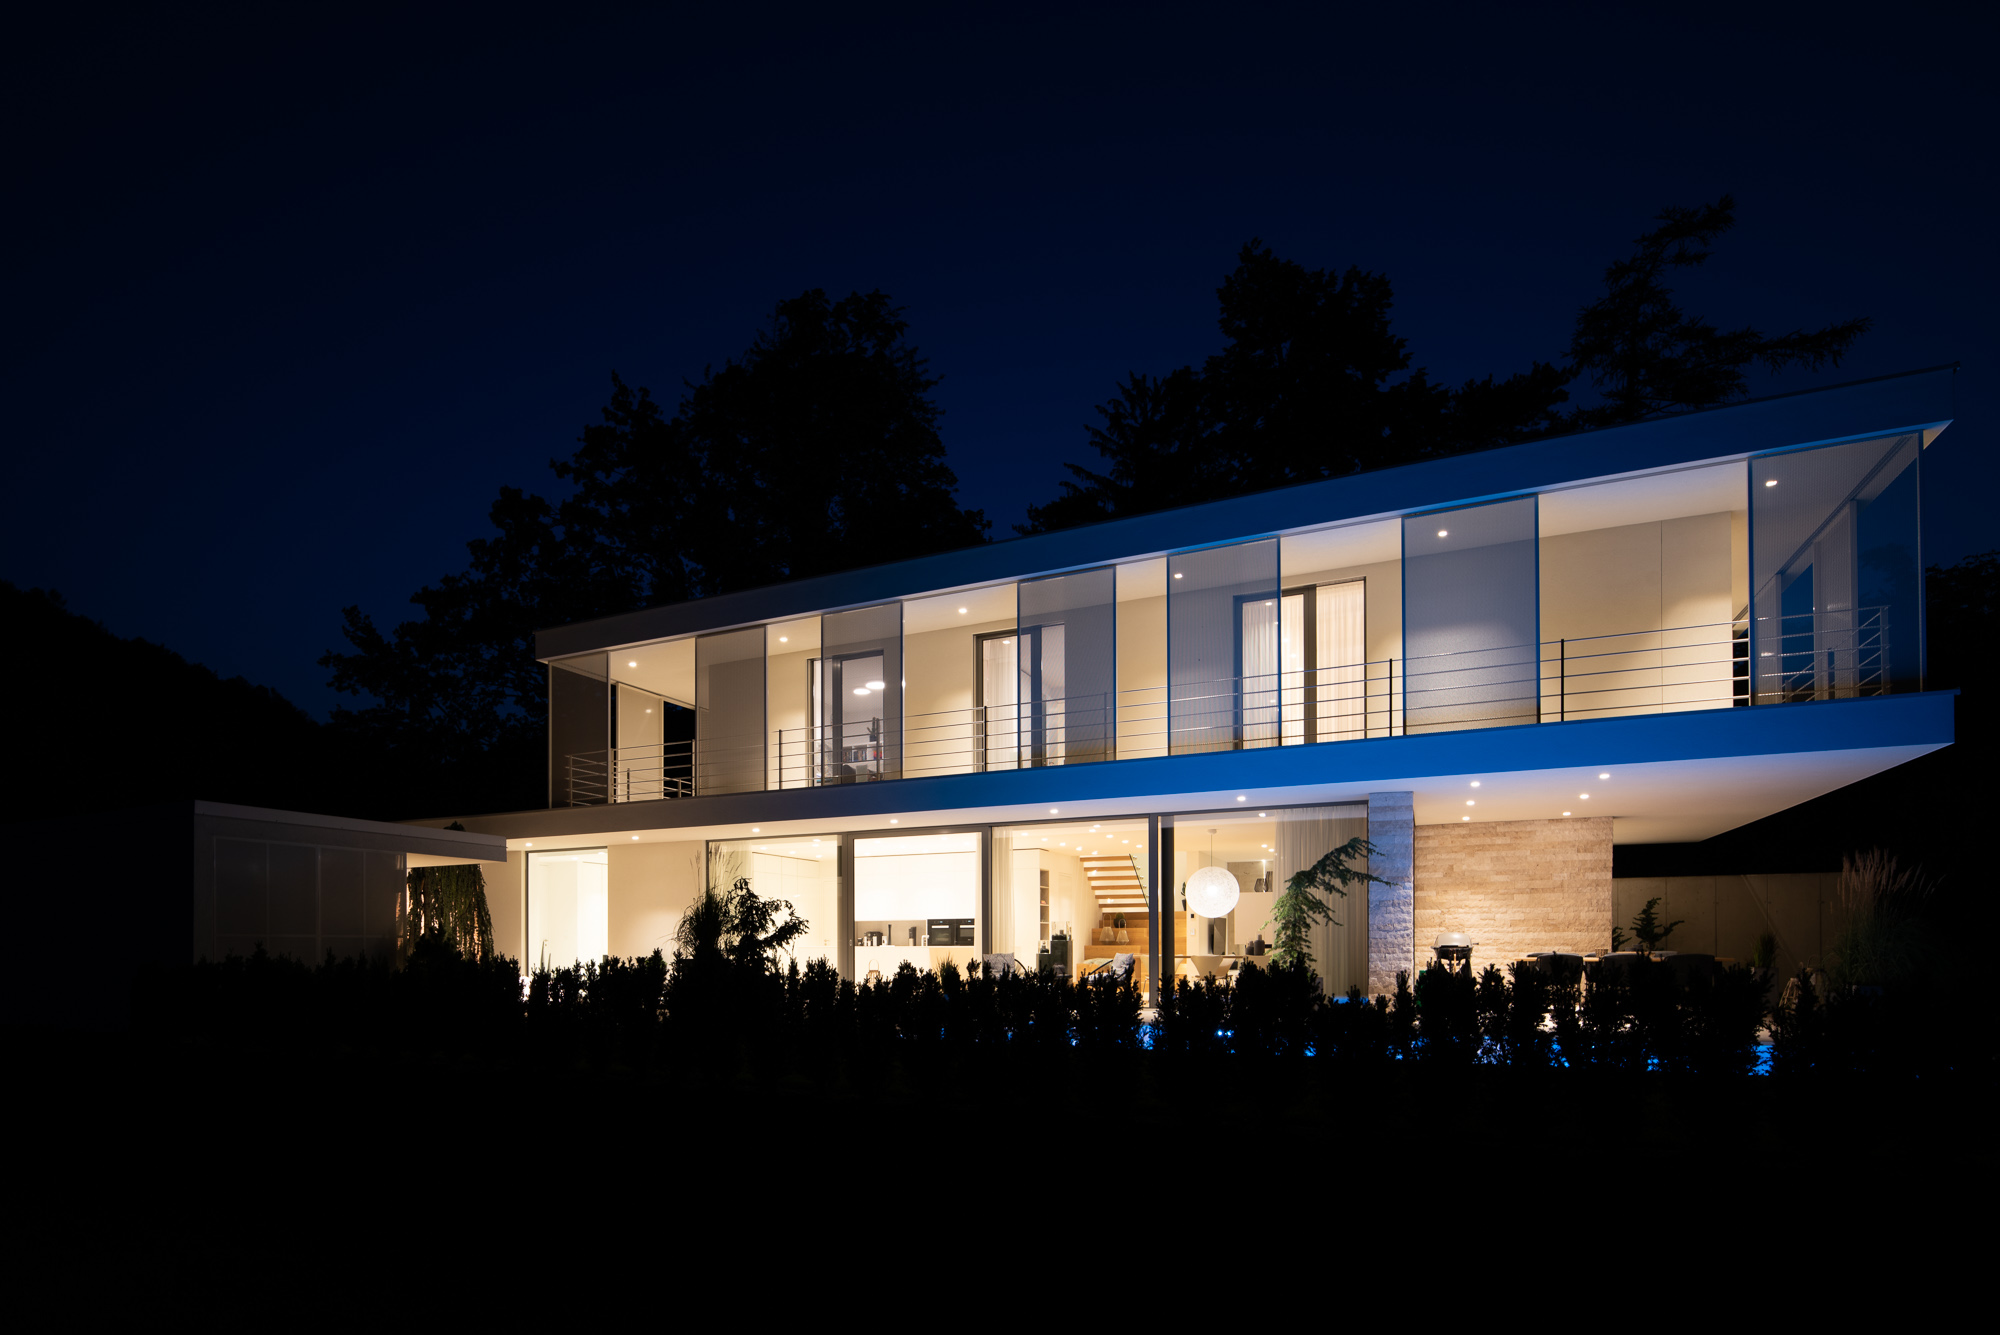

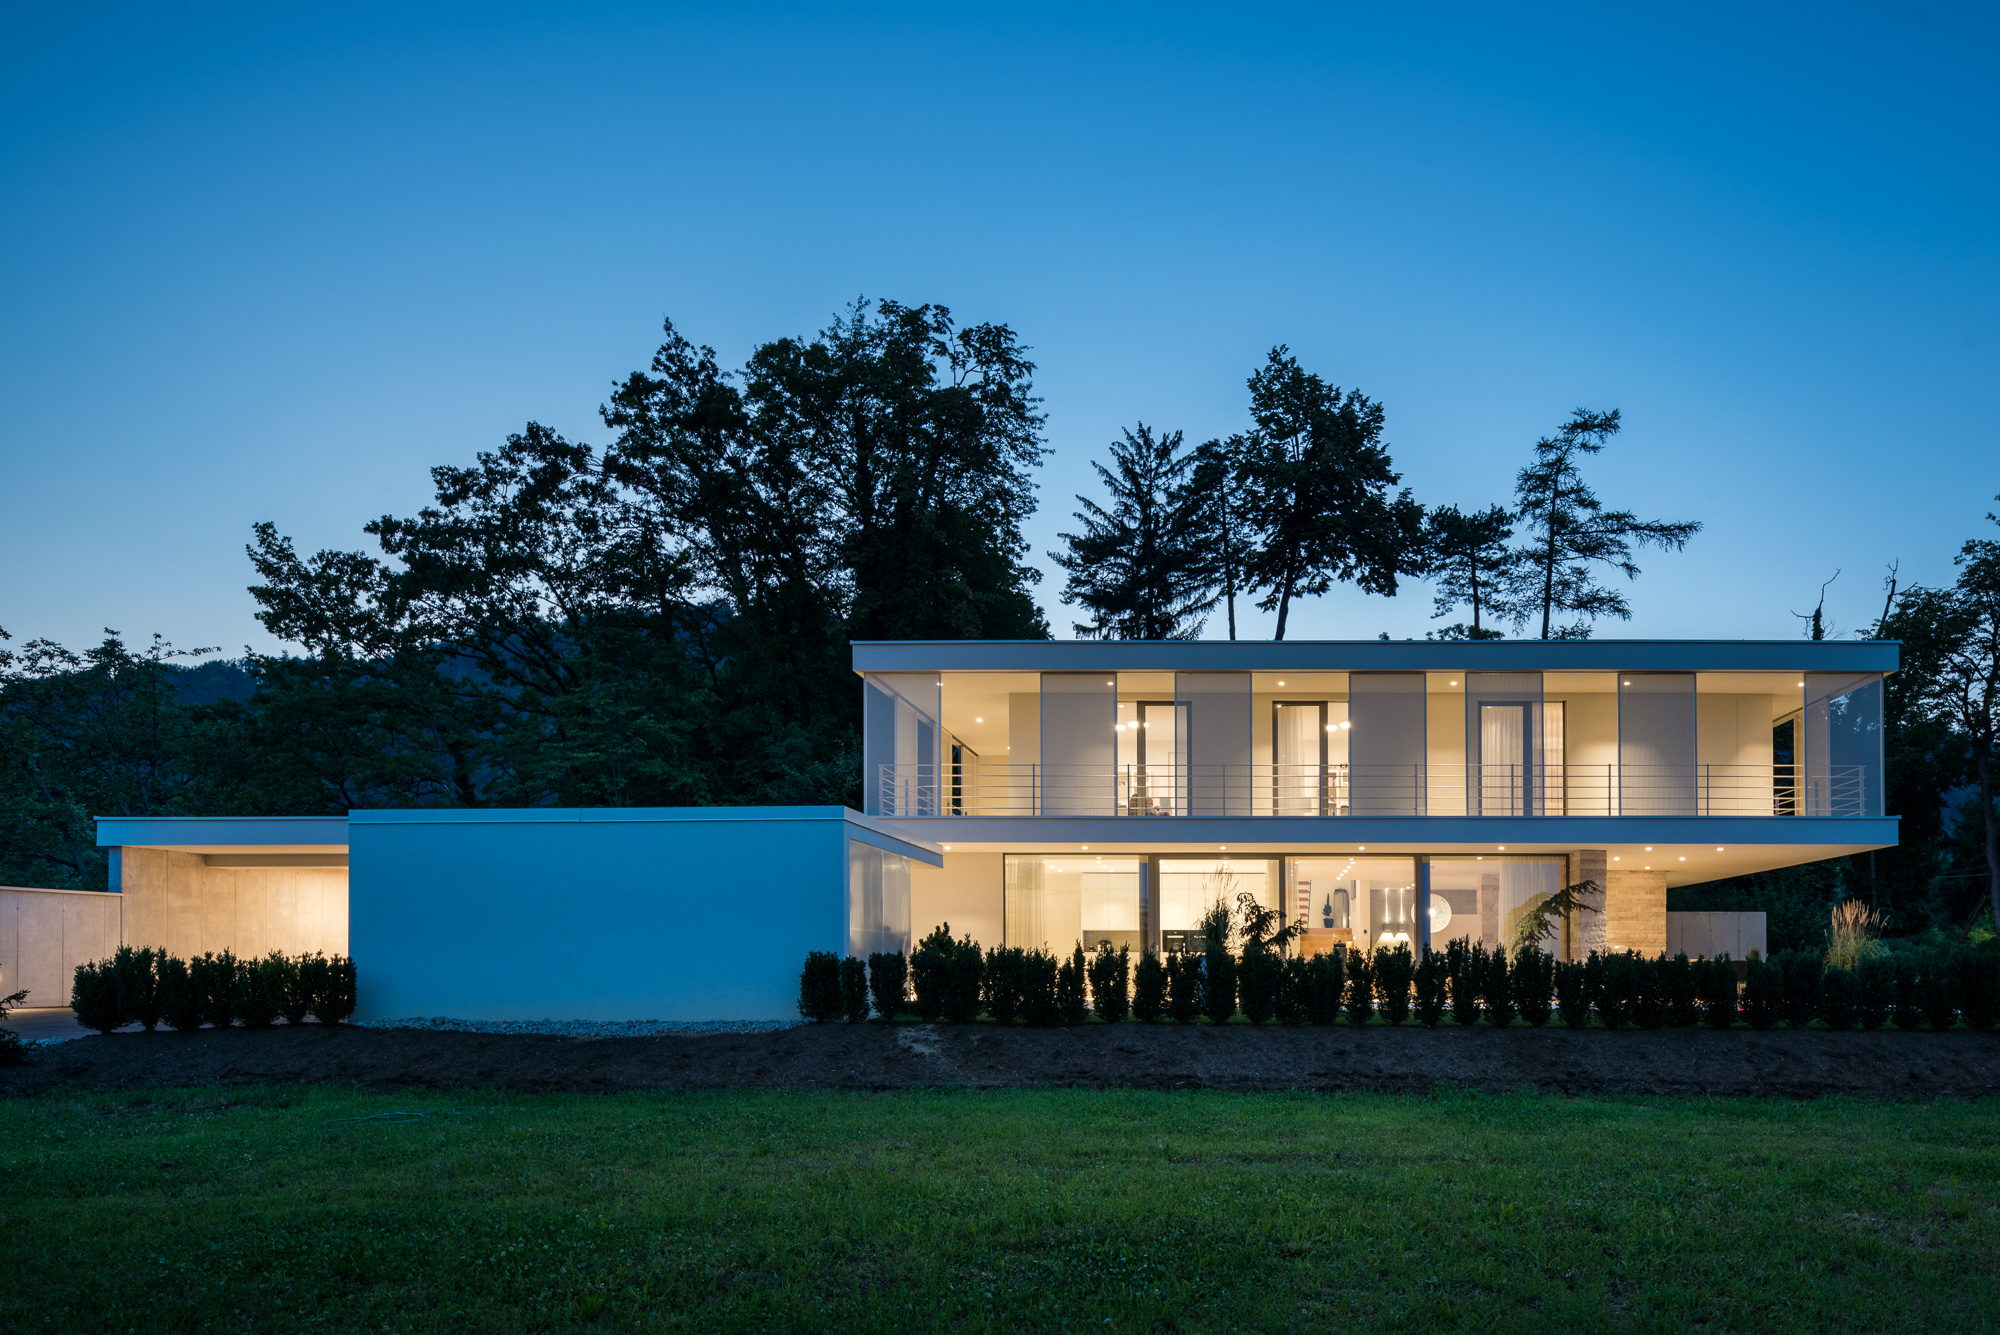
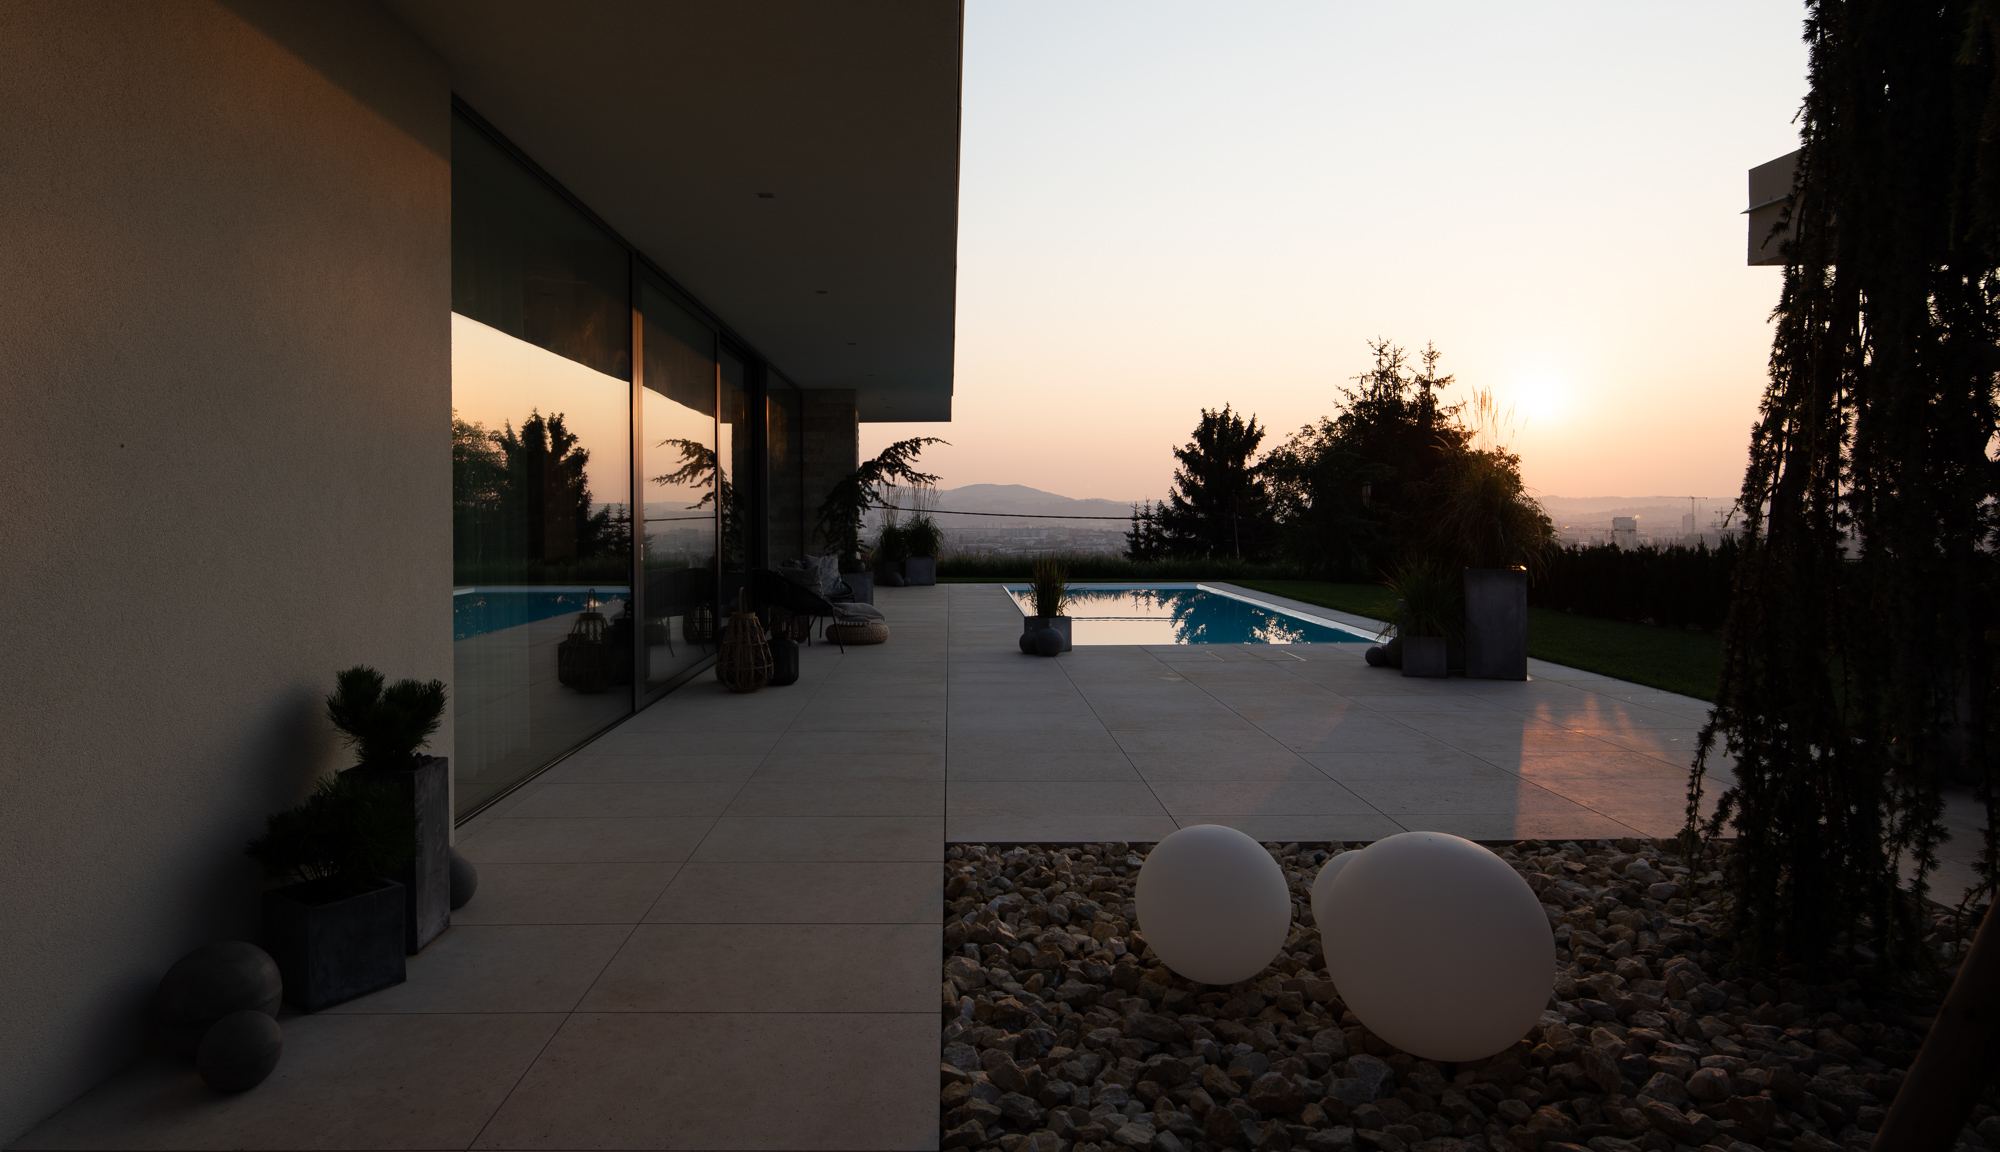
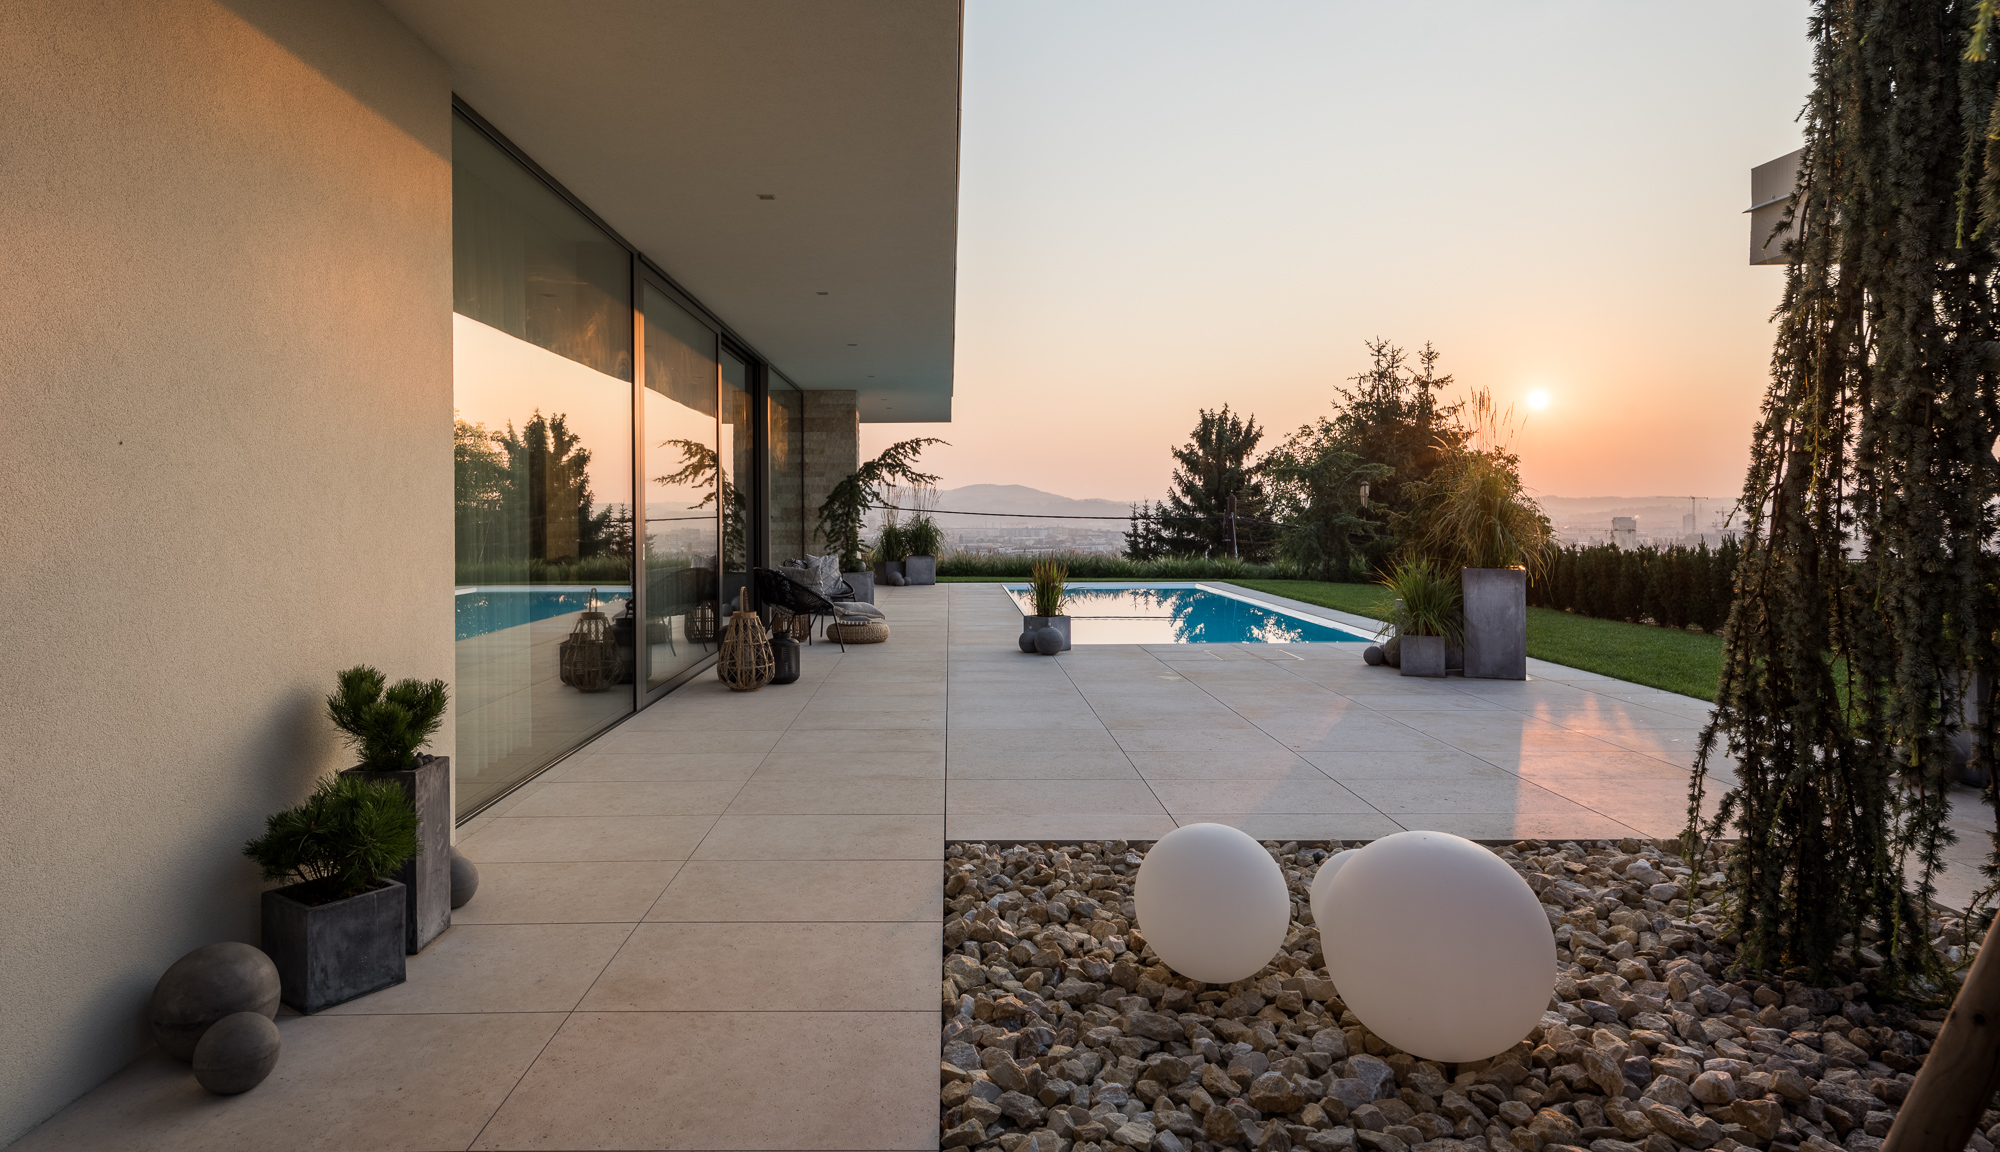
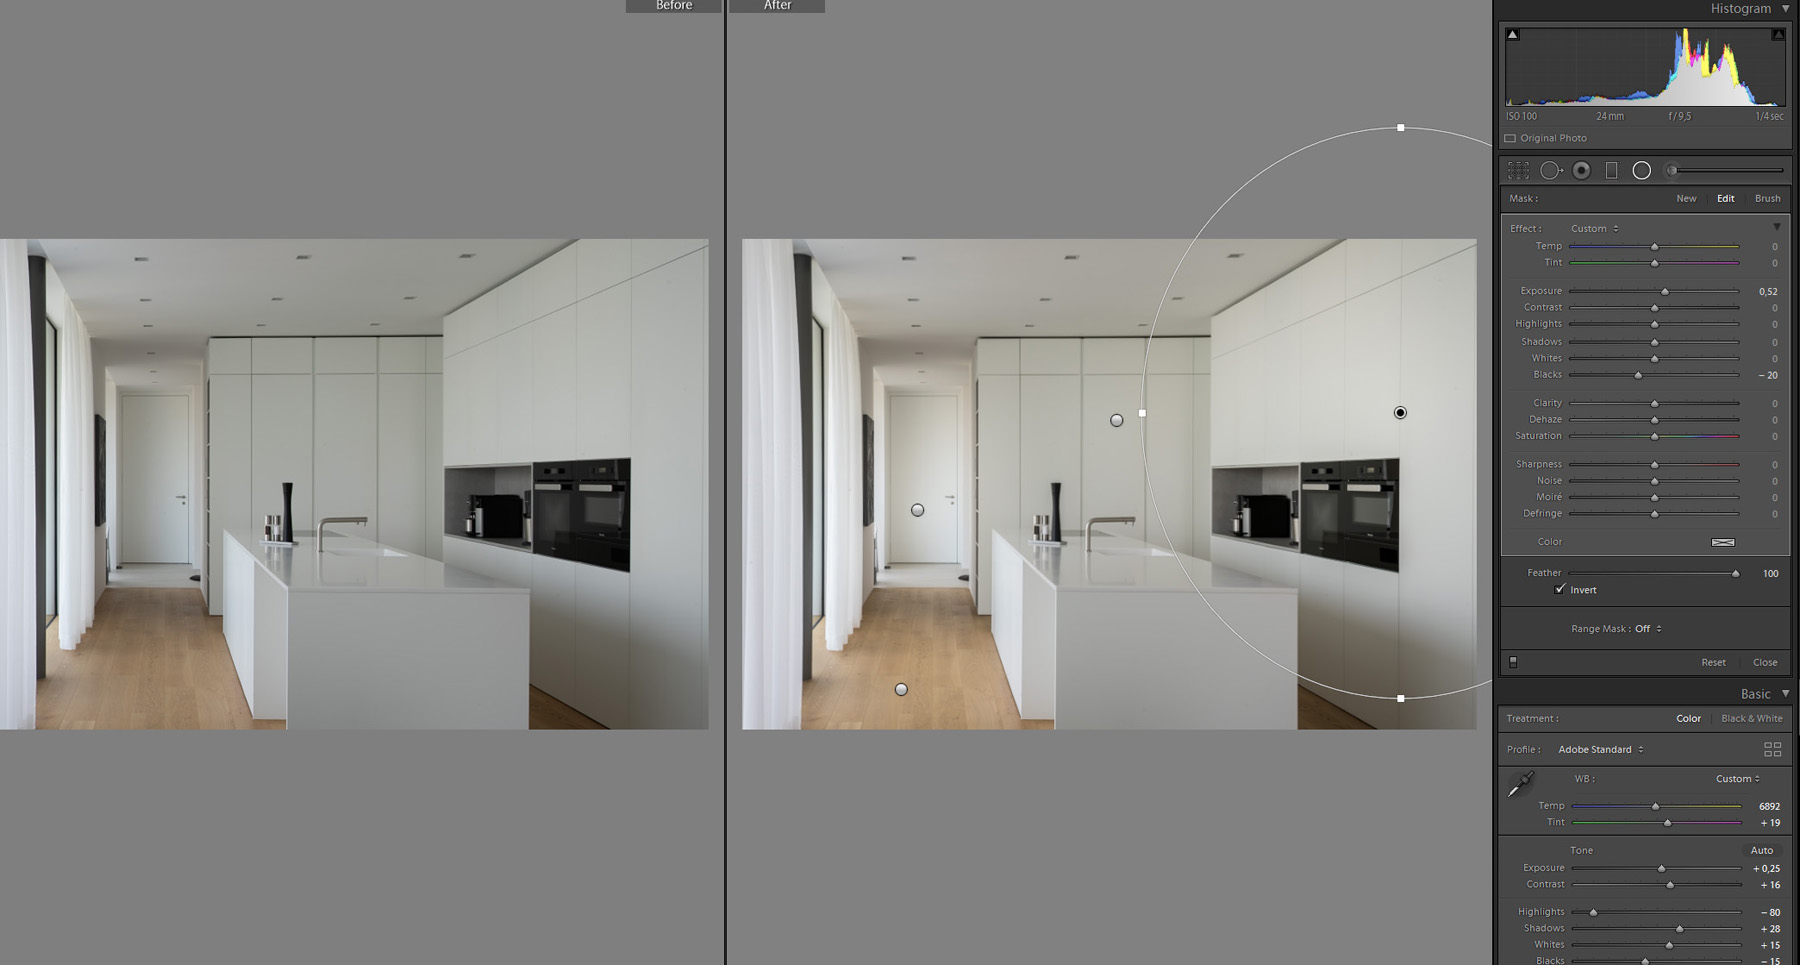
I added one last touch with radial filters and graduated filters. This way, I can highlight certain areas to guide the viewer’s eye through the image. The main adjustments I use here are ‘exposure’, ‘highlights’, ‘shadows’, and white balance issues. For example, on the first set, I added some yellow to the grass to overcome the blue color cast of the evening sky.

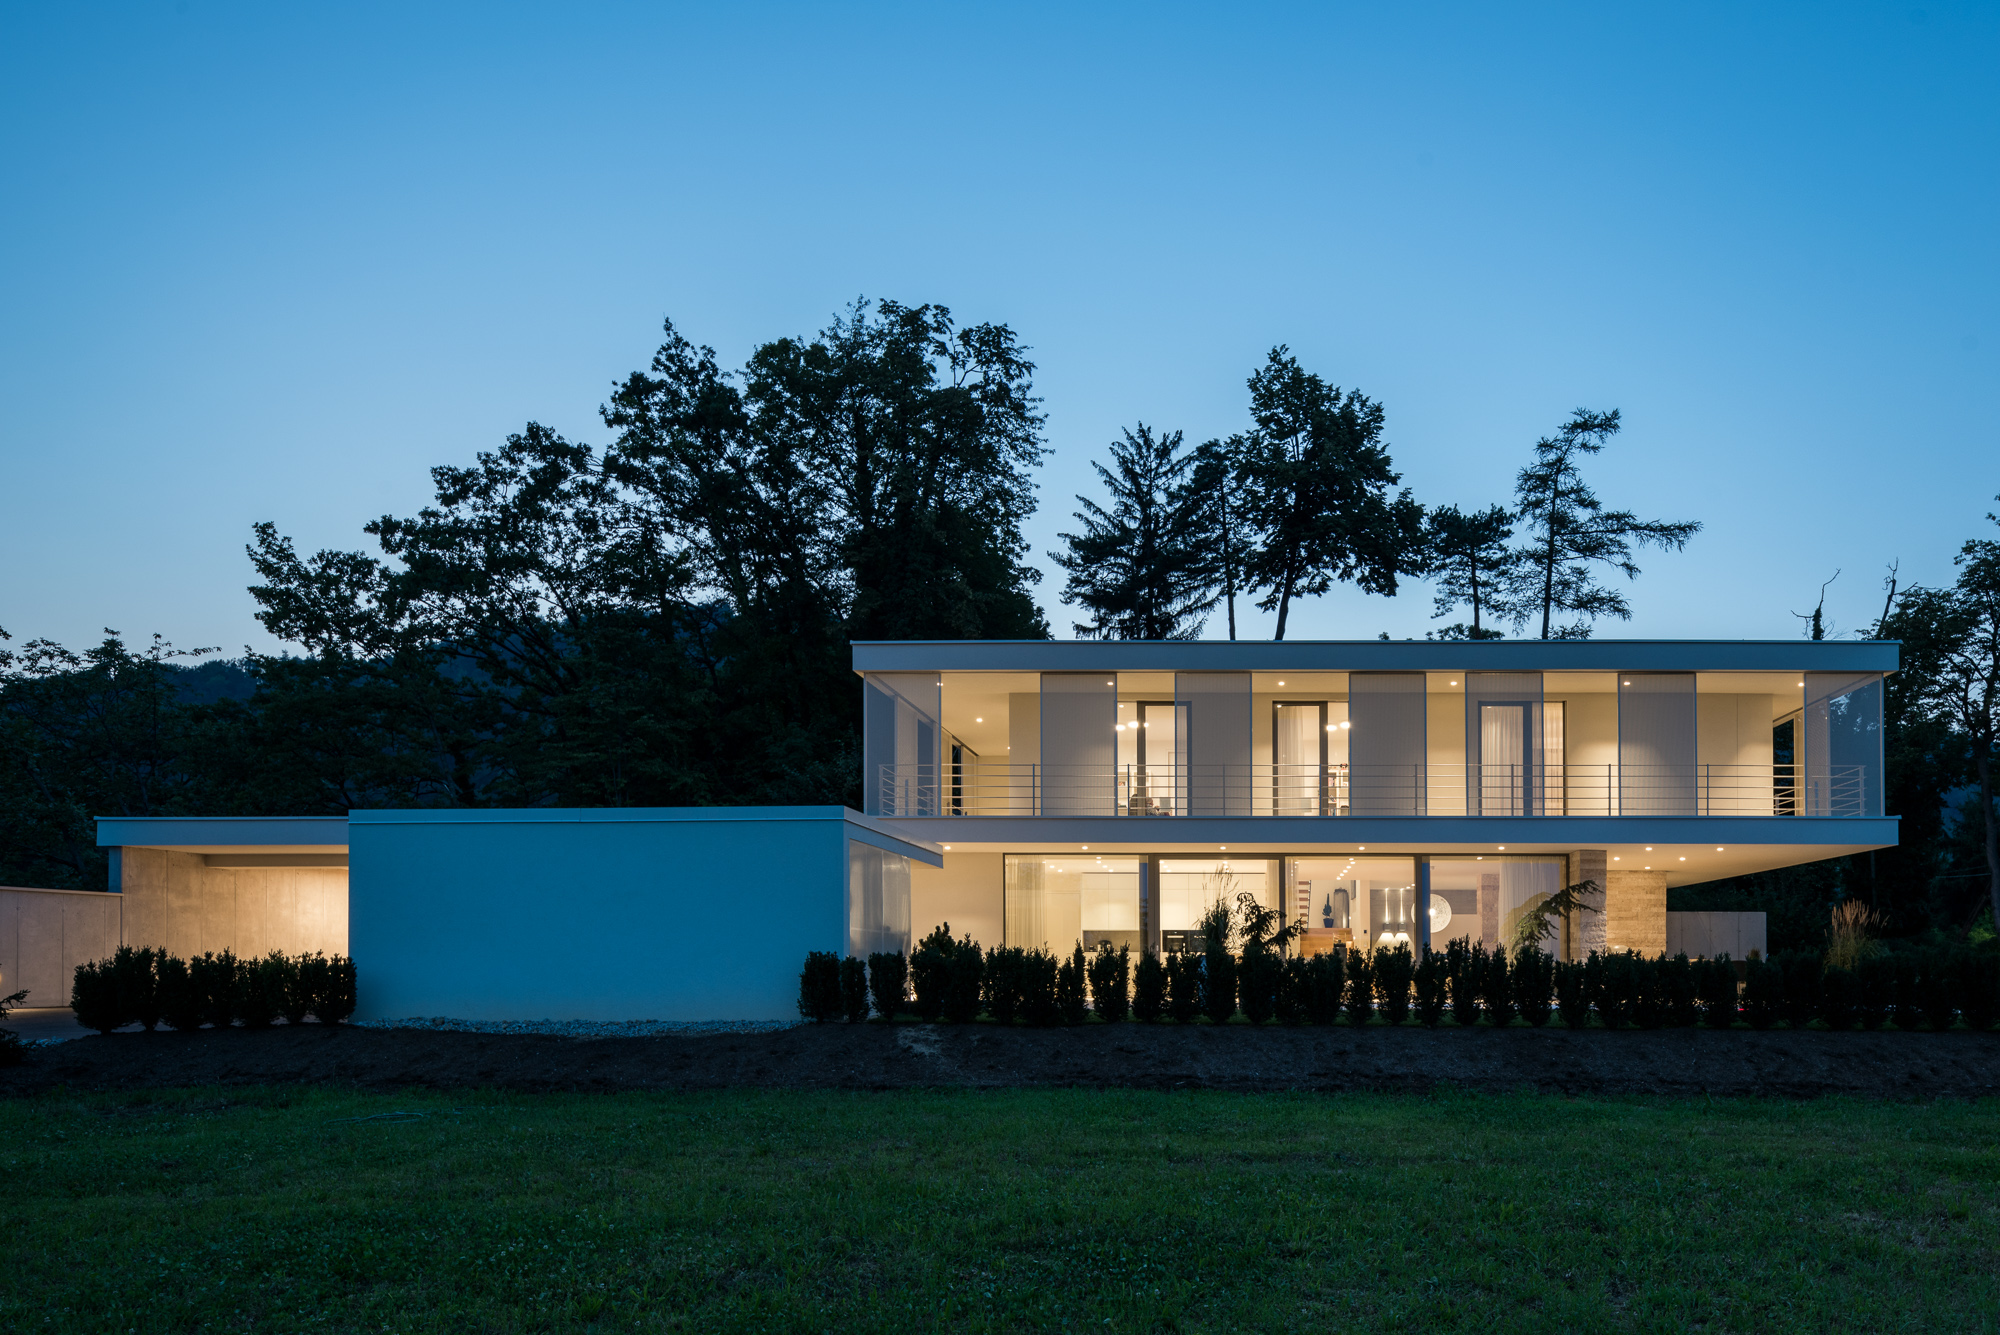
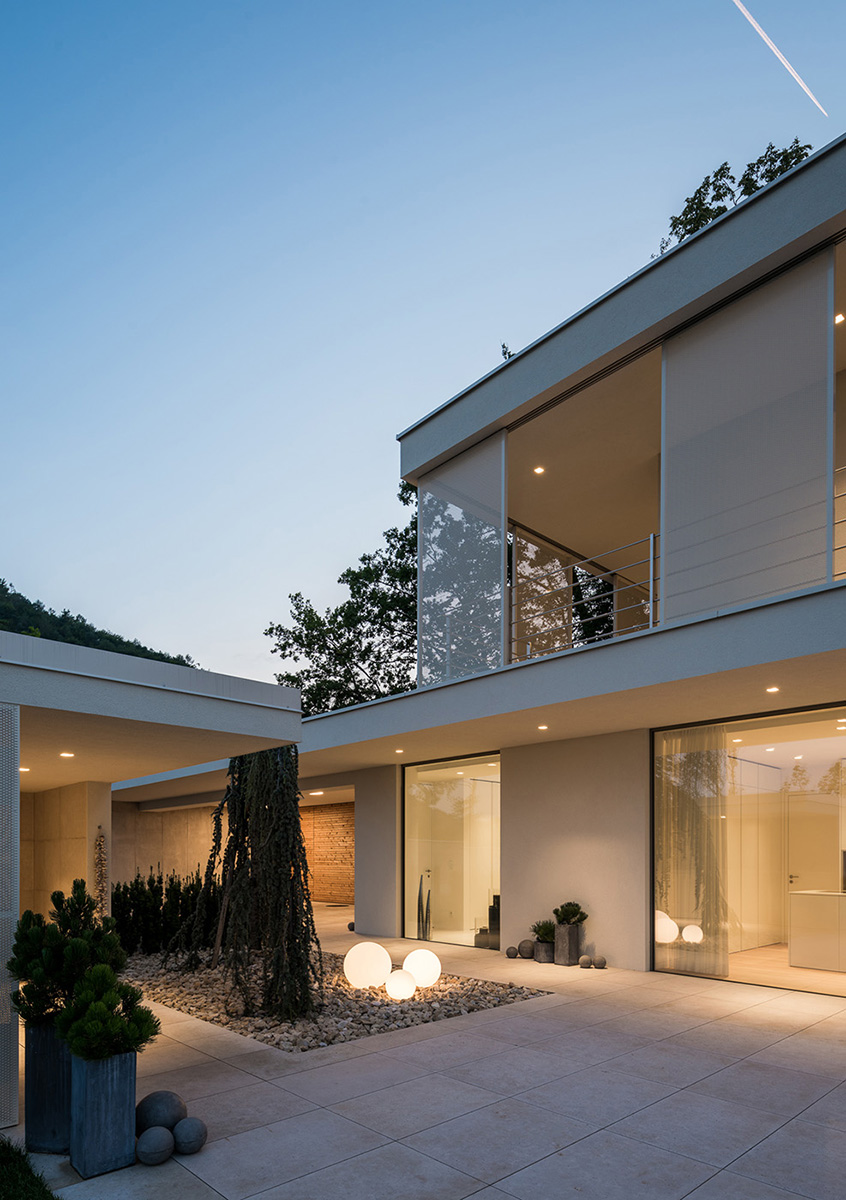
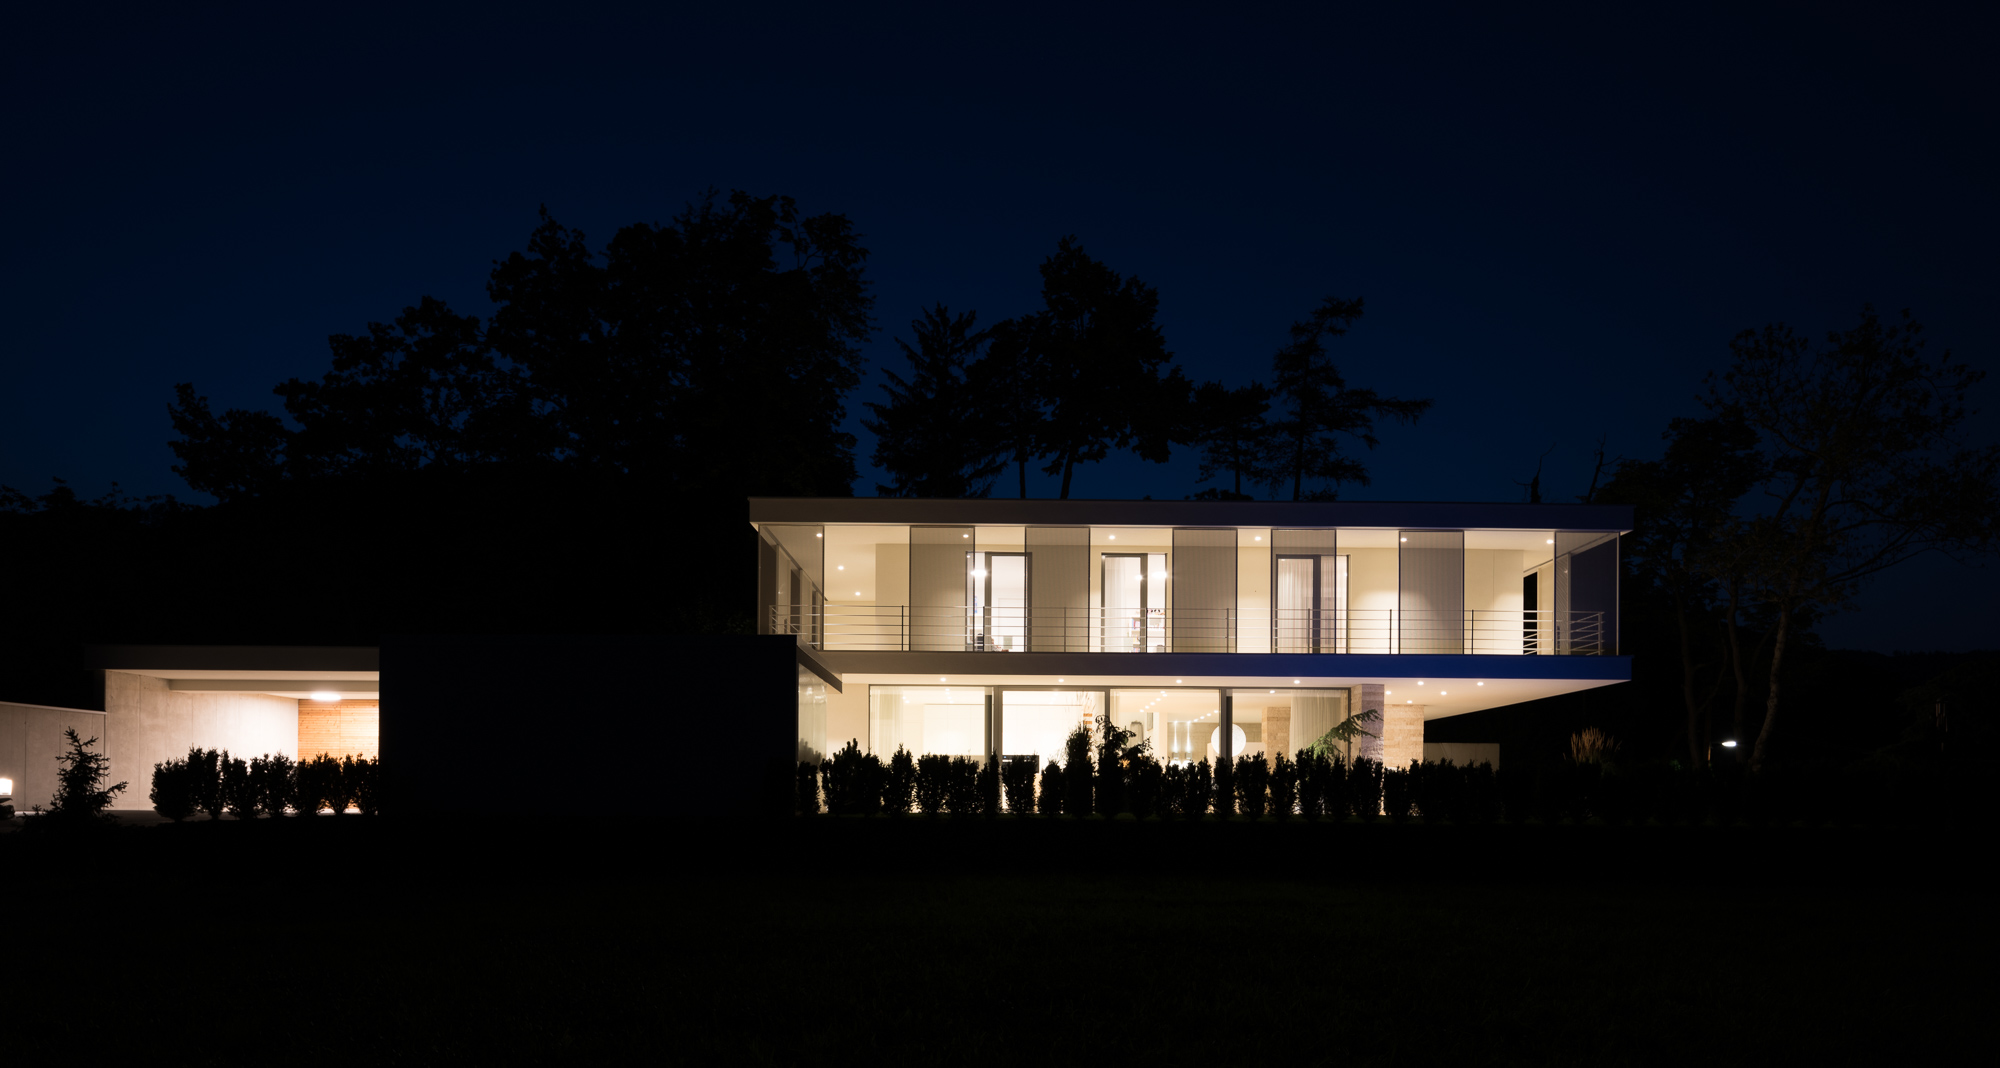
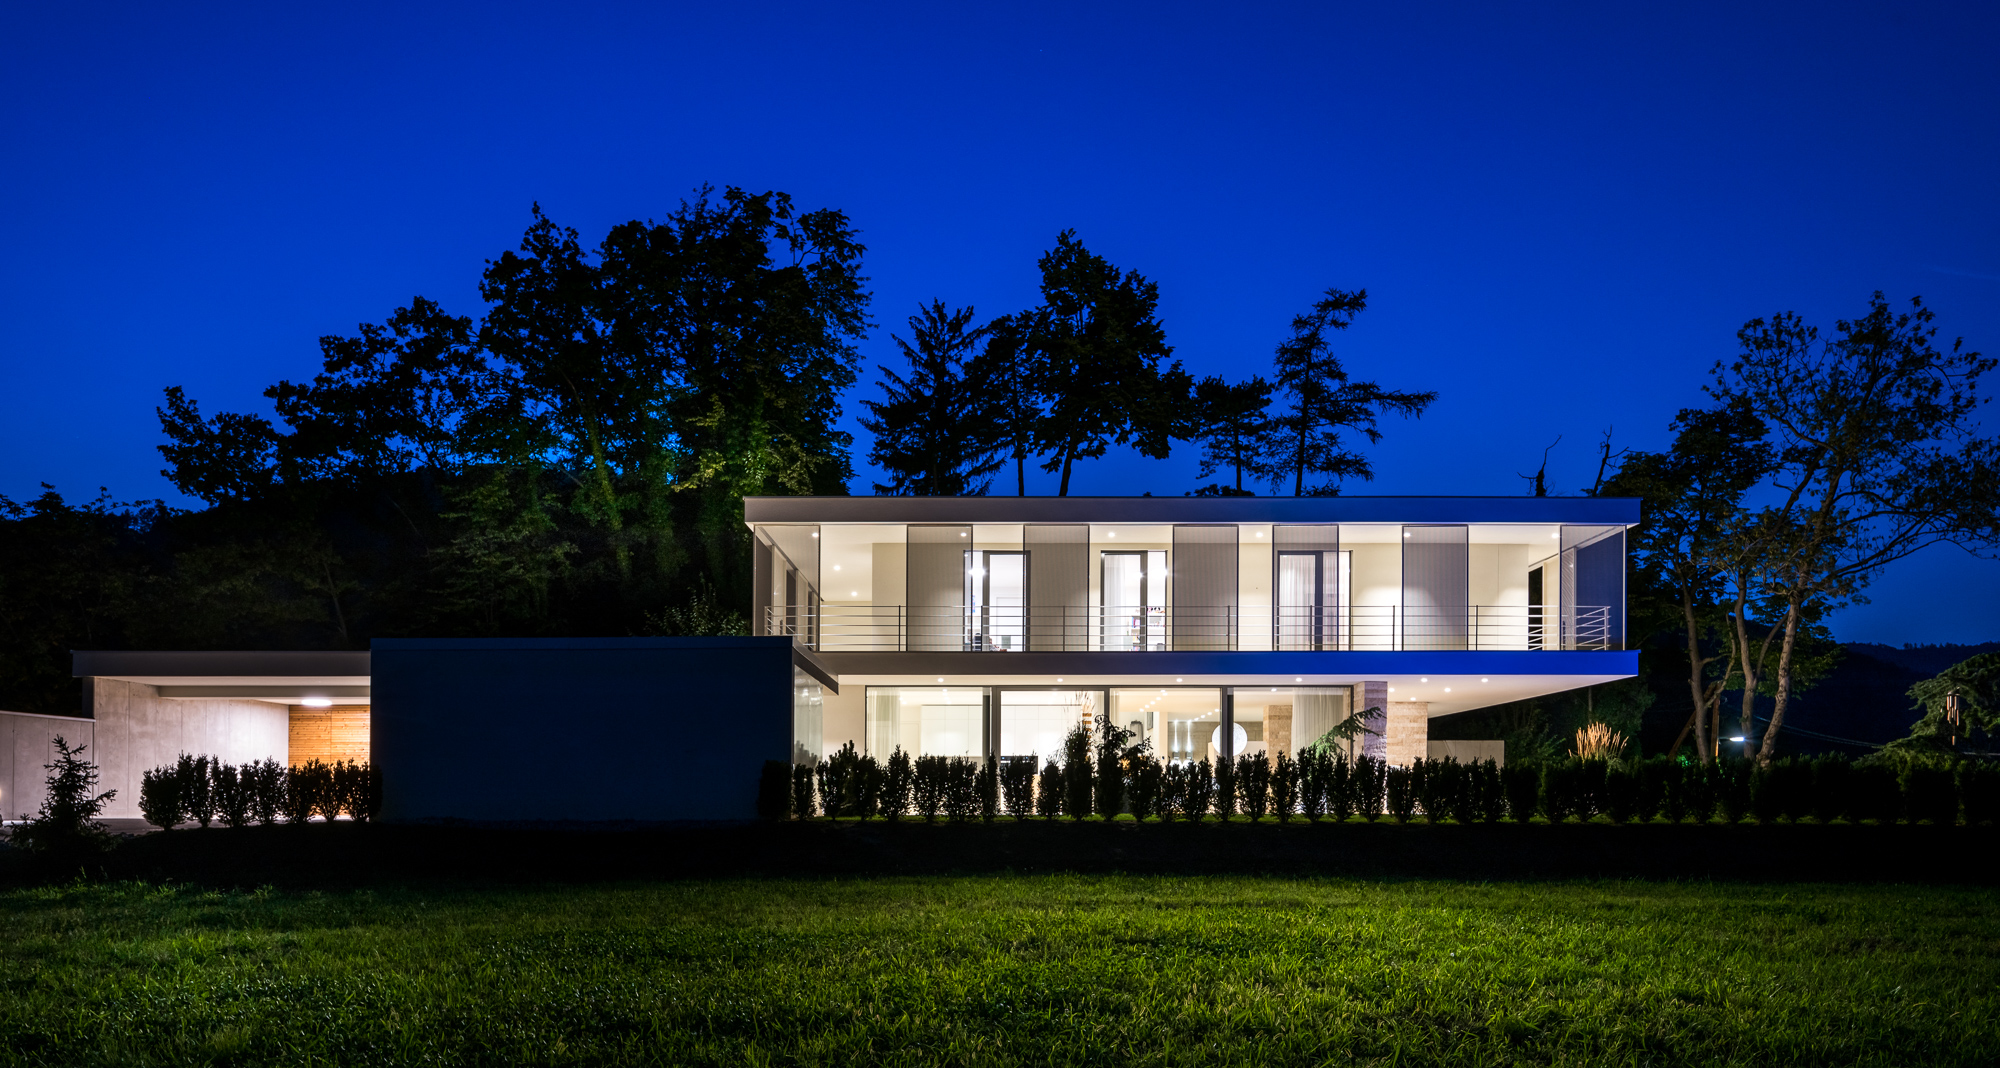
The early morning images are simpler to post-process; almost all of them are single exposures, with only my base adjustments + cropped and straightened.

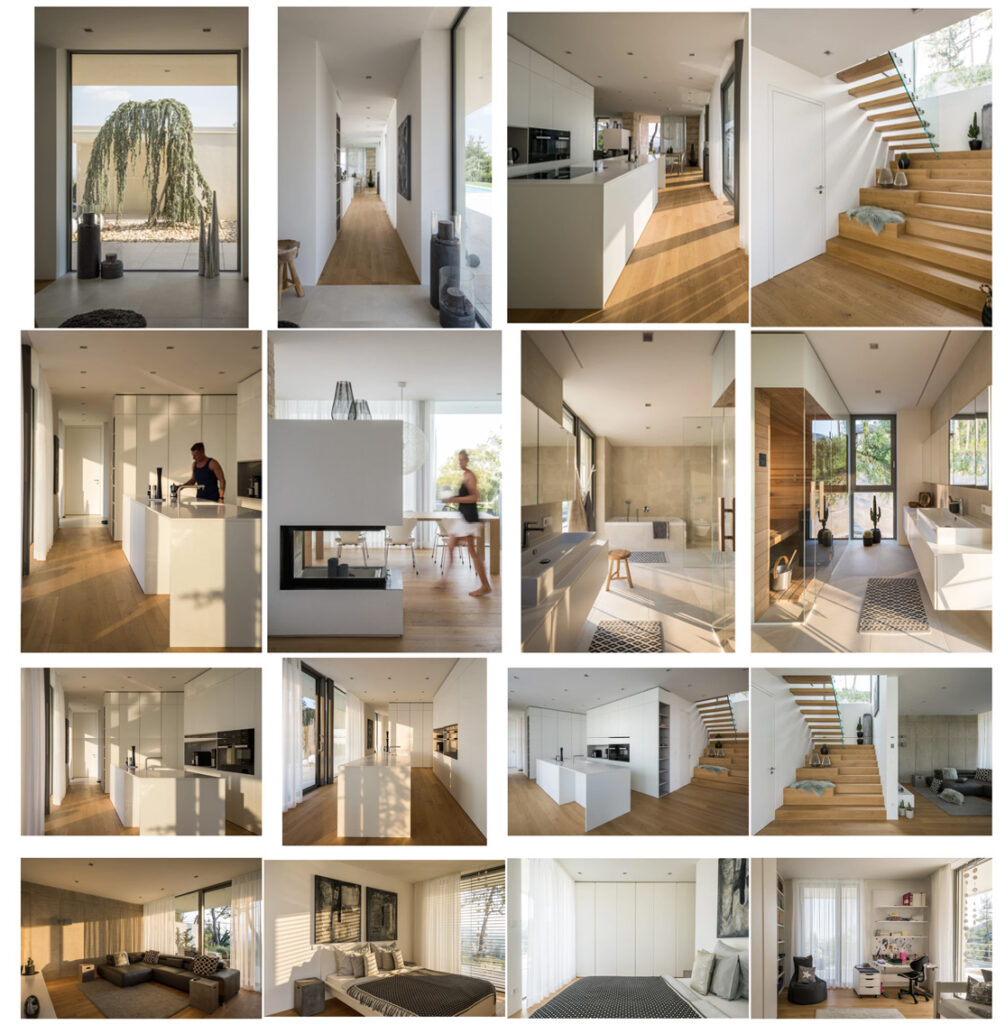
I narrowed down the selection for exteriors even more to 28 of my favorite photographs. Those images tell the whole story. For the sake of load times on the blog, if you’d like to see these photos individually, you can click for the galleries. It will take you to my website, where all the images are uploaded. These are all processed only in Lightroom, so please keep that in mind!

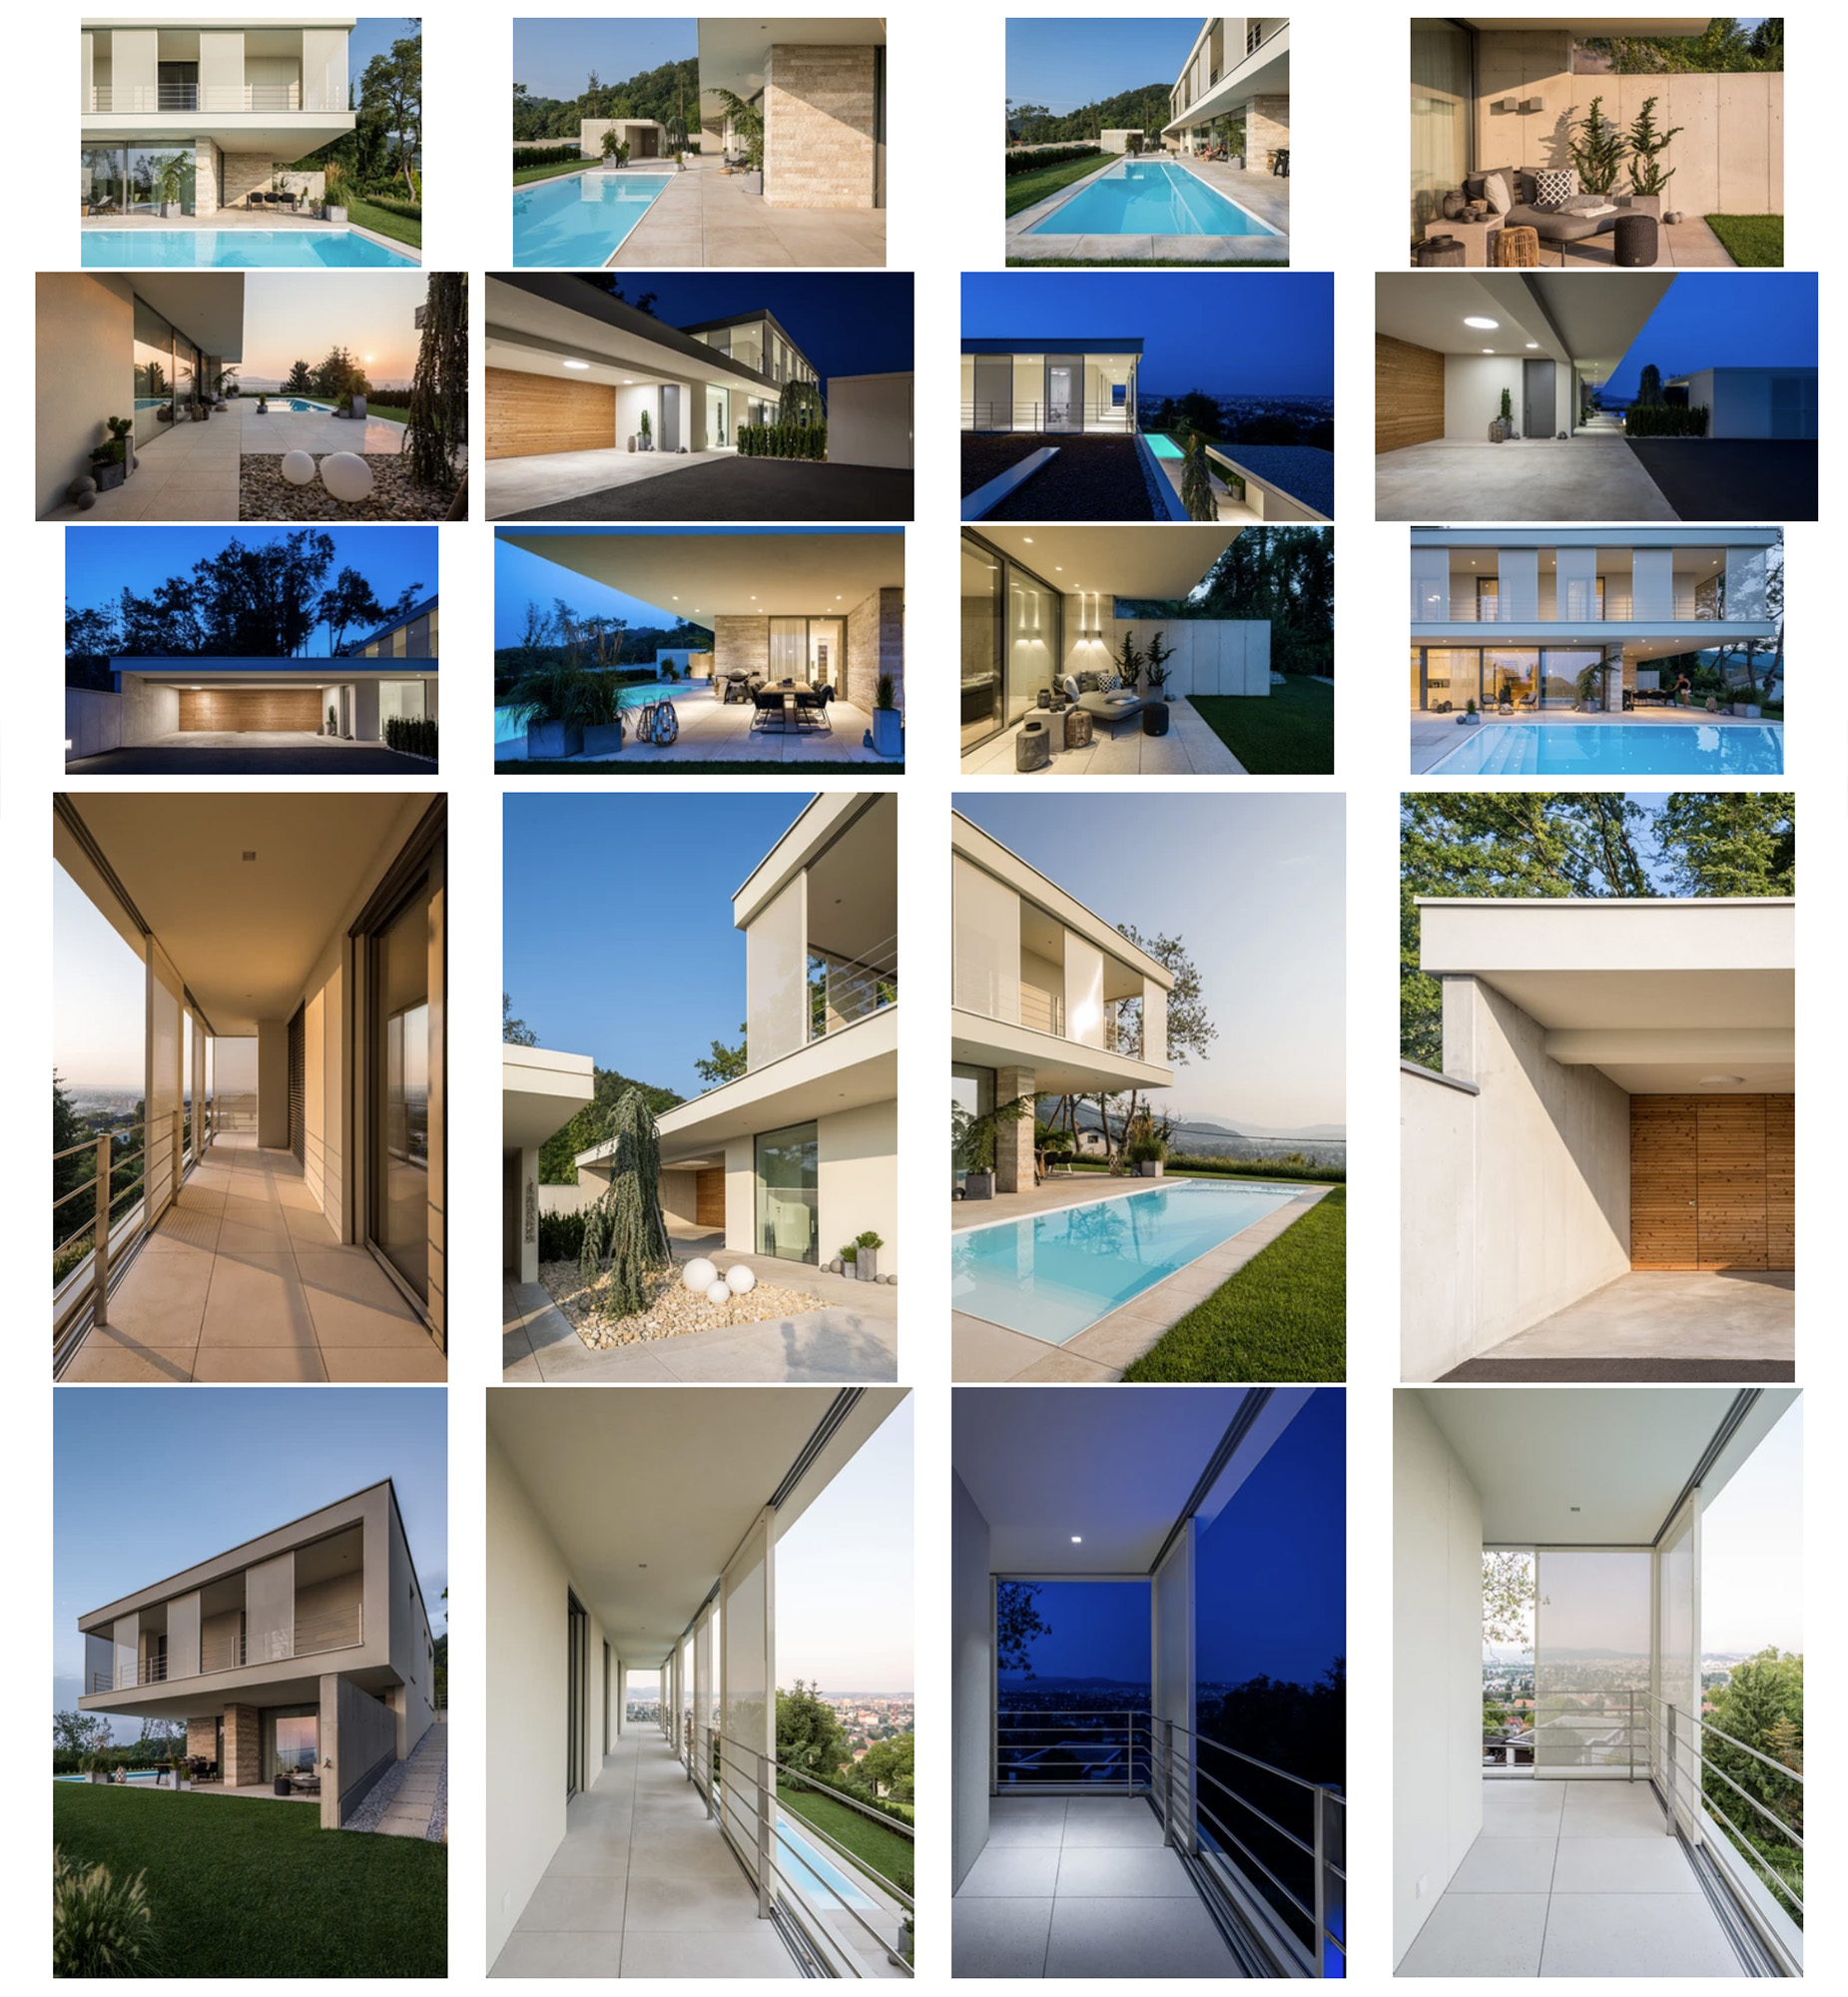
CLICK HERE to see them larger.
Processing Interior Images in Lightroom
Now that you’re pretty familiar with the meat and potatoes of my process, I’ll expedite things by showing you some screenshots that share my adjustments. Just for fun, I timed myself processing these 35 images, and it took 75 minutes to finish them, make sample images for the article, and write some comments about them. This is why I don’t mind having so many images; if they are taken in the right moments out in the field, your work is much easier in front of the computer.

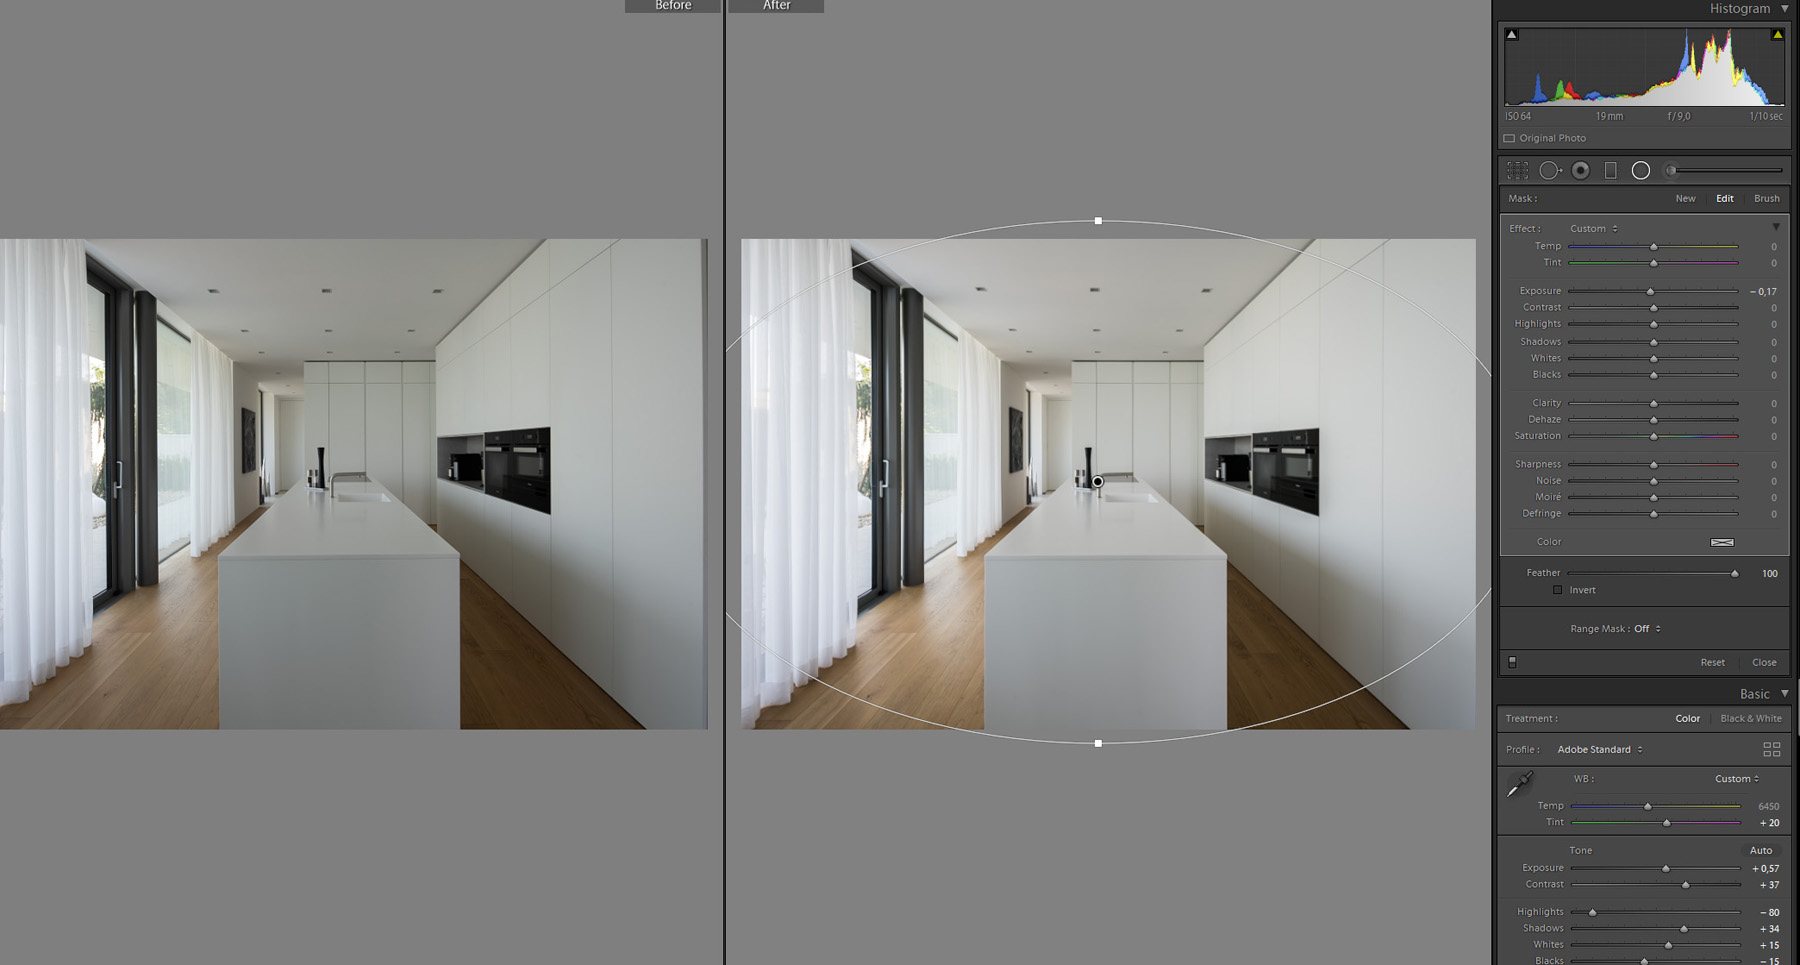
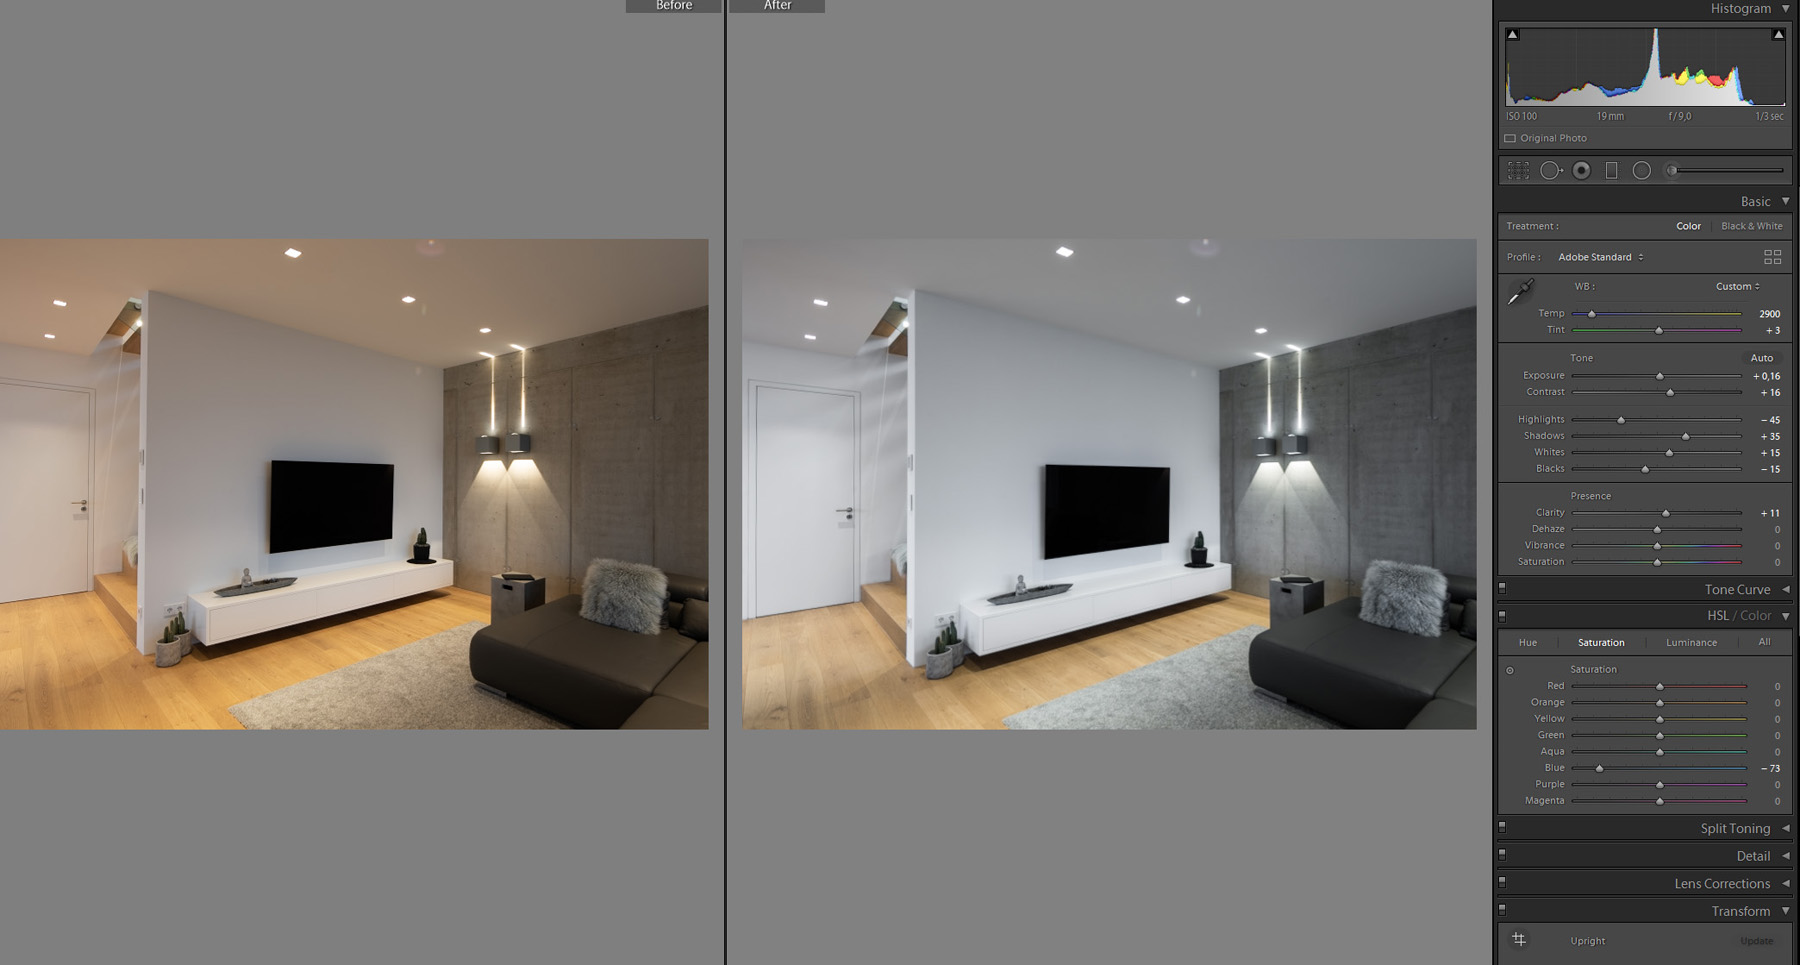
Early blue hour colors with the lights on are somewhat harder to get right, and it is again about personal preference. My goal is to get accurate colors when the lights are on, so I use the color picker on the white wall to set it right, and after that, I remove the blues that come from the window behind me.
Here you can see my interior galleries! They consist of my favorite interiors with 16 images, plus interiors with 19 images, and 10 details.

Final Thoughts
A lot, right? I think so too, but on the other hand, this way, I feel “mission accomplished”. Remember, I drove 15 hours there and back, almost the same amount of the time spent on location — so to spend one or two more hours for additional images seems a reasonable effort to me.
Well, to sum this up, I started by saying that I want to end up with a selection of 35-50 images as my favorites. Let’s do the math. Exterior favorites = 28, interior favorites=16, which totals up to 44. There are around 30 completely different compositions. If I add 3-4 images from the aerials, I’m still in the range that I wanted to be in.
With all that said, I have to admit many of the images I worked on now are better, a bit nicer than they were when I processed them for the first time in August. If you are writing on the best architectural photography blog in the world about post-production, it sets the standard higher, makes you think harder, and be even more critical of your work. Thank you all for reading to this point; I hope you find some useful tips in my process. Please share your thoughts! I’m looking forward to your feedback and input that helps me write the next chapter!