An Intro To My Workflow With The Amazingly Powerful Luminosity Masks
I really don’t know how I could do my post-processing job without luminosity masking. When I mentioned this in my article The Architectural Photographer’s Digital Toolbox, many asked me to show my workflow with luminosity masking. While it is impossible to sum up in one single article, because I really use this tool for everything, I can make a start and give you a look into my process!
What are luminosity masks?
About fifteen years ago Tony Kuyper — coincidentally an American with a Dutch name 🙂 — started creating and selling panels to make luminosity masks accessible in Photoshop. He explains on his website: “I started my work with luminosity masks in 2006. While the concept of luminosity masks existed since Photoshop started using masks, the process described in this tutorial for creating the different series of masks — Lights, Darks, Midtones — was the breakthrough that allowed their widespread adoption. Once these series were available, the different masks accurately target specific tones in the image, making them a precision tool for adjustments and exposure blending. The concepts discussed in this tutorial have since been widely adopted, copied, and promoted throughout the photo community. Almost anyone who now writes or makes videos about luminosity masks still creates series of masks identical to those described here. So, much to my surprise, this tutorial turned out to be ground zero for the luminosity mask explosion that eventually engulfed digital photography. They have become such an integral part of post-processing that Adobe included luminosity masks in Lightroom and Adobe Camera Raw starting in 2017.”
Luminosity masks panels
Since the introduction of Luminosity masks, various providers of panels have entered the market. These panels are plugins for Photoshop. Without wanting to discount others, the best known are:
- Tony Kuyper’s TK7 panel
- Lumenzia by Greg Benz
- Raya Pro and Lumi32 by Jimmy McIntyre
- John Weatherby’s ProPanel
Since the early days, the panels have evolved from masking tools to instruments that are also packed with conveniently programmed actions. Although this technique was originally seen primarily as a tool for landscape photography, you now also see more and more architectural photographers using luminosity masks.
Let’s take a look at the workflow of a complex photo to understand the potential of the luminosity masks.
Luminosity Masks Workflow: an Example
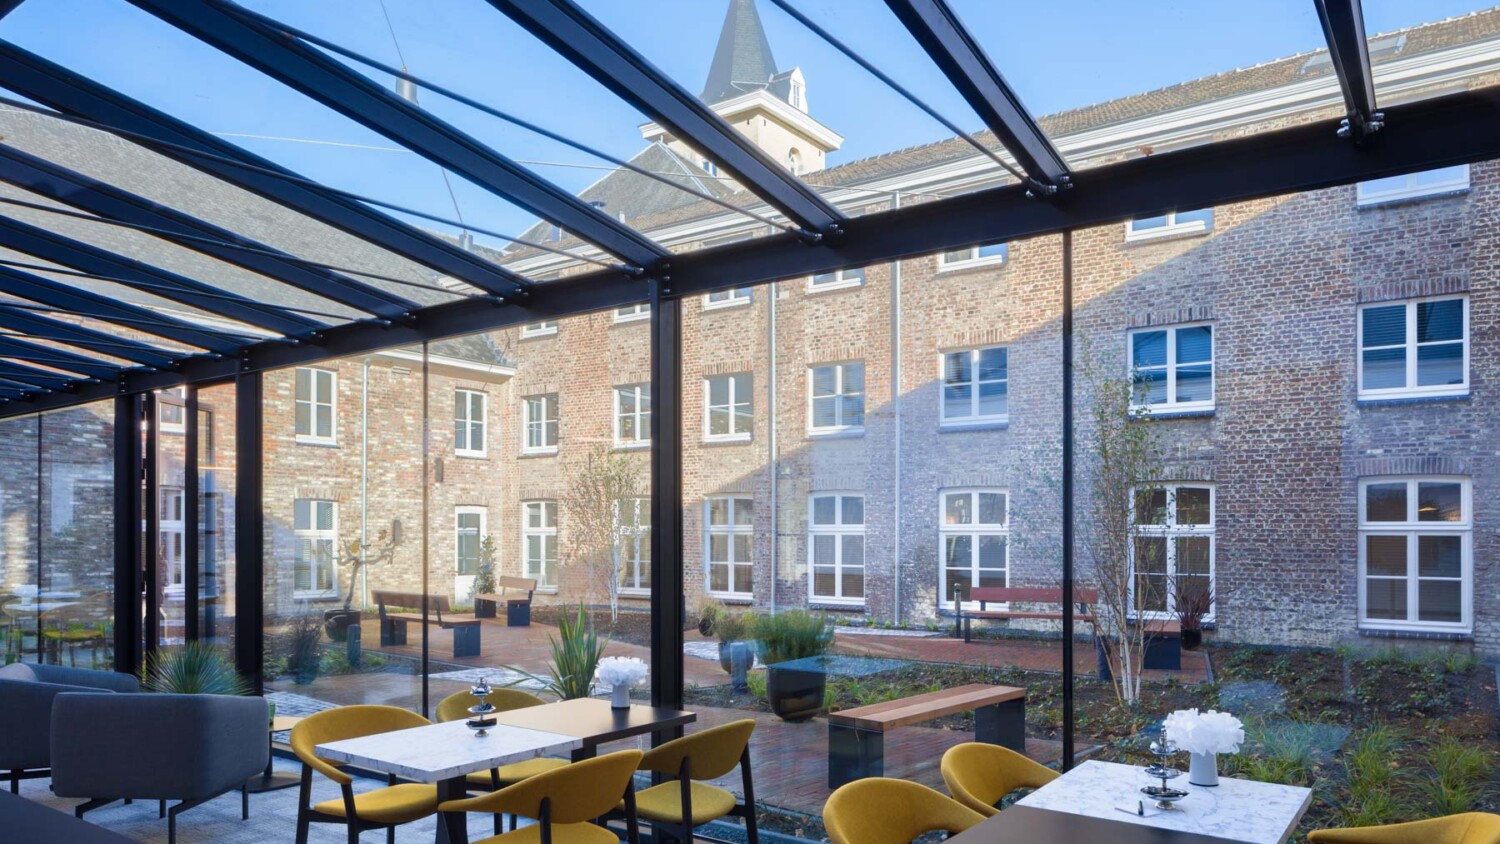
Sometimes you don’t have the luxury of waiting for the best light. In my case, it was a restored old building that is now being used as a funeral home. On this shoot, it was not possible for me to schedule work around the best light. All I could say is “I will come when it is allowed to come and then I will make the best of it.” In the funeral home, the inner garden had been completely redesigned and the reception area was connected to the garden by a large glass construction. Obviously, that had to be captured. No problem (that’s what you always say to clients and then you later think about why it wasn’t a problem).
By default, my camera is always set to make three exposure steps. Sometimes even when it is not really necessary, but yes, that is the power of habit and I can easily store those extra MBs on my 24Tb external hard drive. Usually, I only need two photos to merge, one where the highlights are okay and one where the shadows are fine. In this case, making multiple exposures was not a luxury. The contrast between light and dark was huge. The sun was shining brightly on the rear part of the courtyard; at the time that I could take the pictures, it was not yet high enough to illuminate the rest. Check out this triptych I made below:
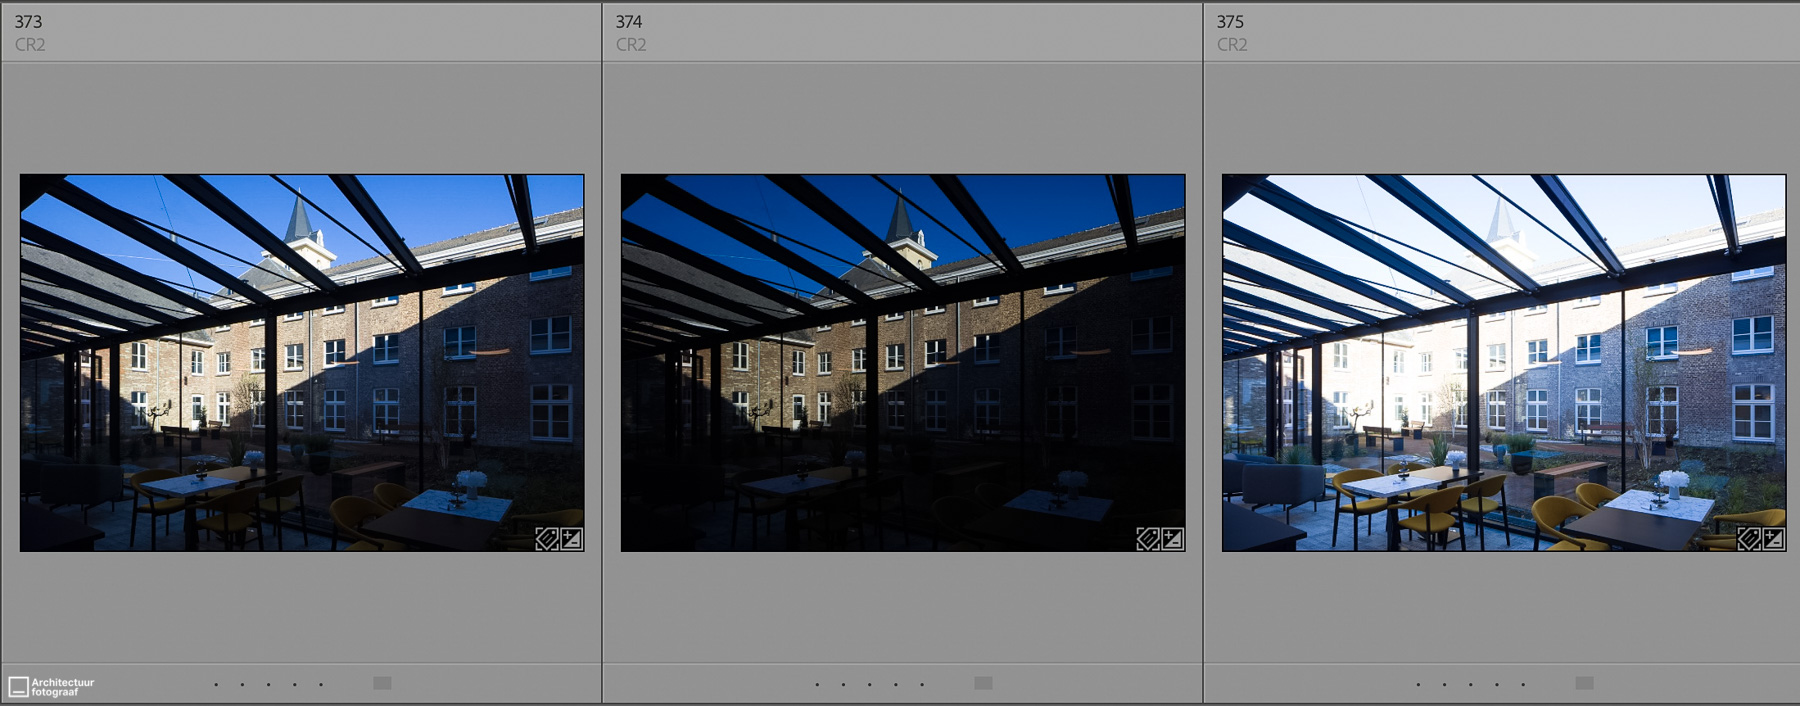
What lies ahead with these images is a complex blending:
- big contrast between light and dark
- shadows are very blue
- the steel construction must be black and not grey/blue
Prepare for blending
My golden tip for this kind of exposure blending: make sure that the images you need to blend look similar. My base is always the light version of the photo, and I then blend the dark photo into it to get the highlights back. Specifically: I’m going to use the left and right photos above, and therefore have to make the left photo suitable for blending. I do this through an action that I programmed in Lightroom: exposure up, shadows up, highlights down. That is the basis.

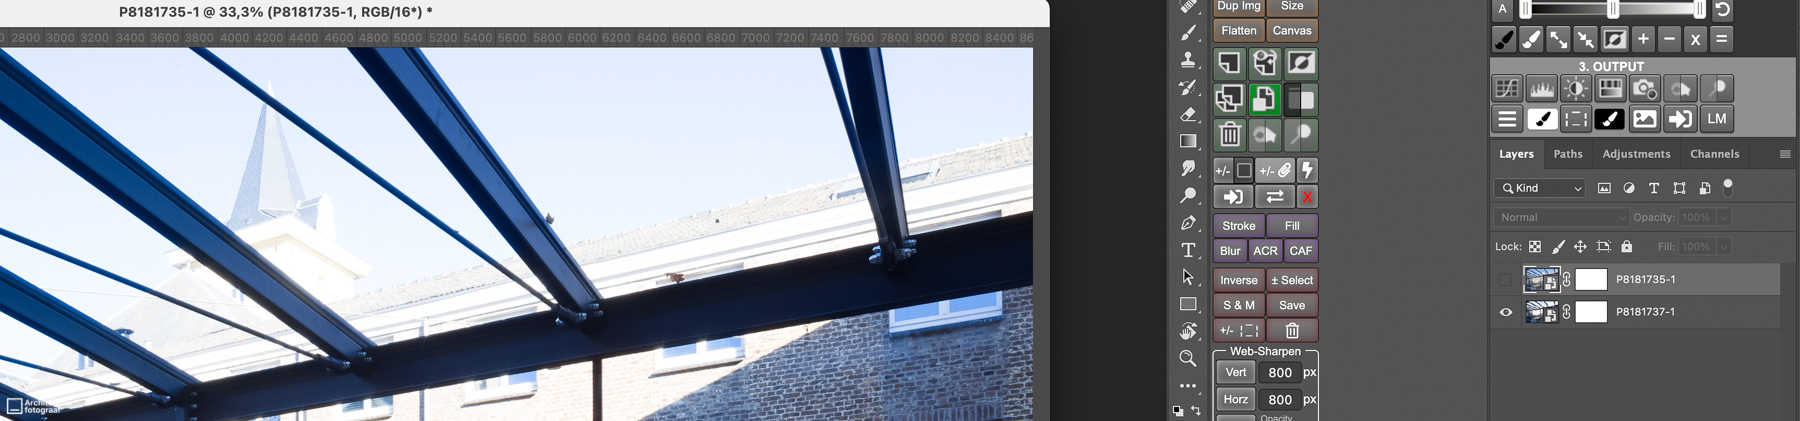
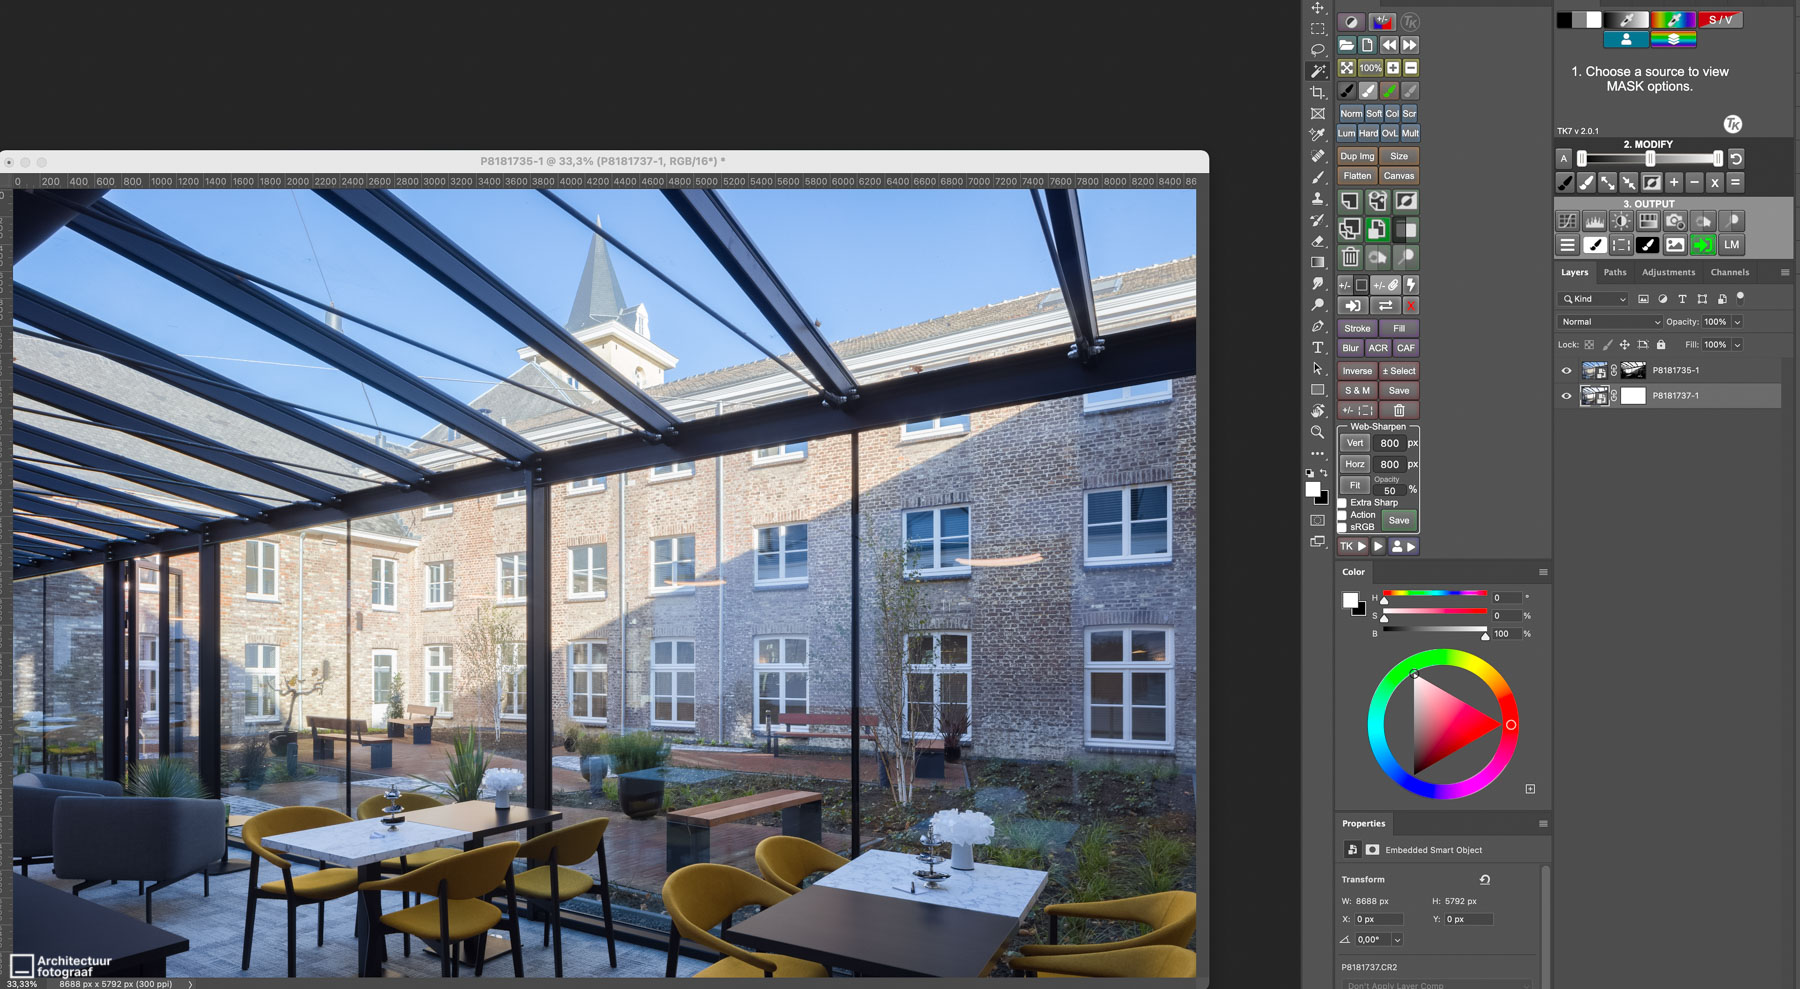
I open this prepared photo and the light photo in Photoshop as Smart Objects. That is important because then I can open them again later in the RAW editor.

In all the panels for Luminosity Masks there is a button to stack the files — handy! Now we are going to blend. The dark photo will be on top, but we want to create a mask based on the light photo. That’s why we turn off the visibility of the dark photo.
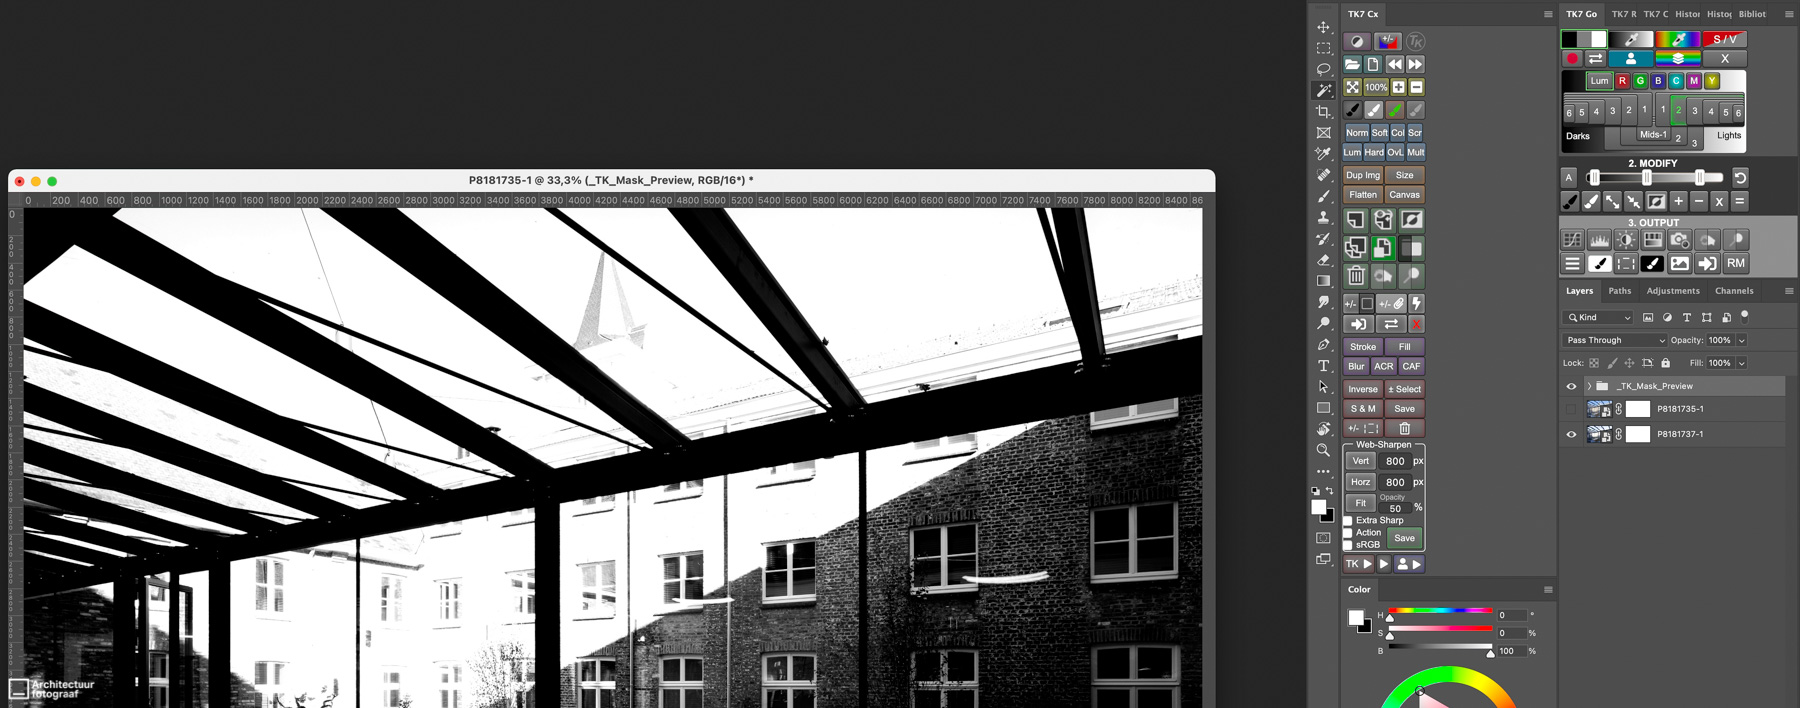
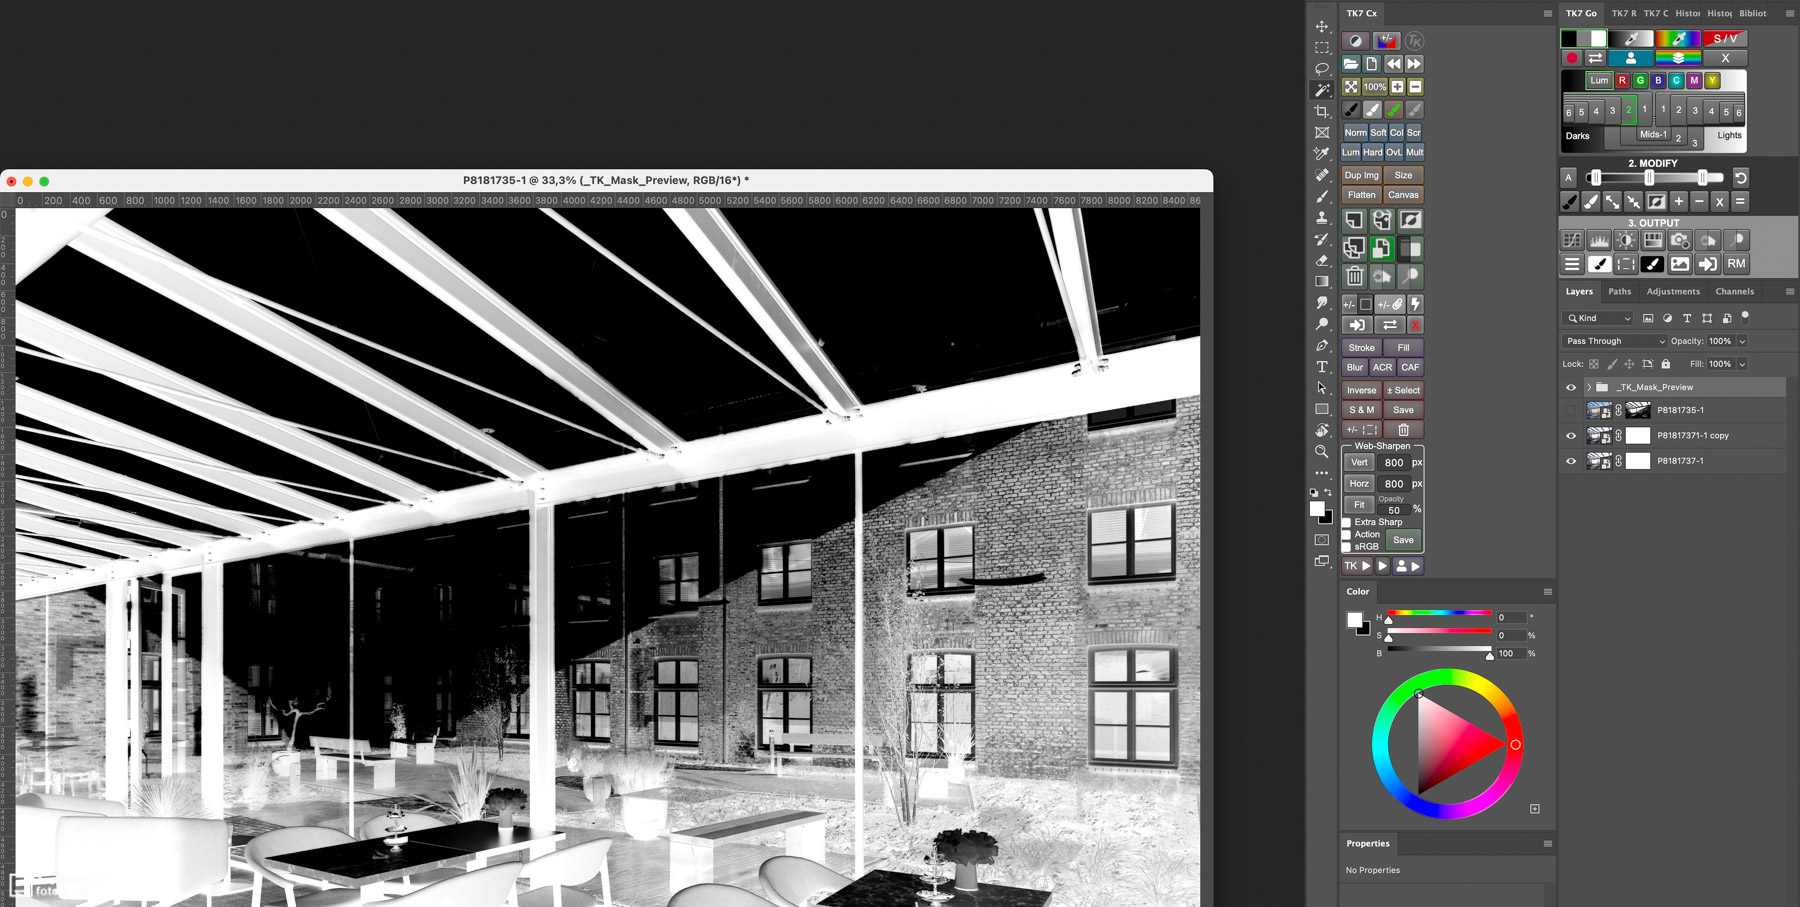
Now the magic is about to begin. I choose a Lights2-Mask with a few minor adjustments.
It is starting to become something. But it looks like the light photo can be adjusted a bit. We then open it in Camera-Raw (that’s why we opened the files as Smart Objects). It can be a bit lighter, warmer, and less blue.
Before we start the ‘normal’ editing, we must pay attention to the construction of steel beams. They are black, not as gray as above. To tackle that, we copy the light photo (sometimes it works with the dark one, it doesn’t matter to the principle). We do this of course through a New Smart Object via Copy. We open that copy in Camera-Raw and all we do is make sure that the steel construction looks good. To this end, we reduce the exposure; the whole picture will be darker, but that’s okay. We now make a new mask with luminosity masks: a darks-2 with some minor adjustments in the levels.
Our darks-2 mask has selected too much. The picture becomes a bit darker again, and we don’t want that. That is why we are going to apply a technique called masking the mask – it is just a click away on a smart button in the Luminosity Masking panel. The layer is then grouped with itself and provided with a black mask. We then paint with a white brush where we want to see the layer. In this case, it is easy because it the beams are made of straight lines. We apply the same technique to the dark photo. It is well blended on the highlights, but what you often see is that the blended highlights are also included in other parts of the photo where this is not really necessary (and ugly sometimes). That is why here too we “mask the mask,” and therewith we choose which part of the blending may end up in our image. This is really a very important step; with digital blending you have to stay in control and not the technology! This is how the image looks after blending, ready for further editing.
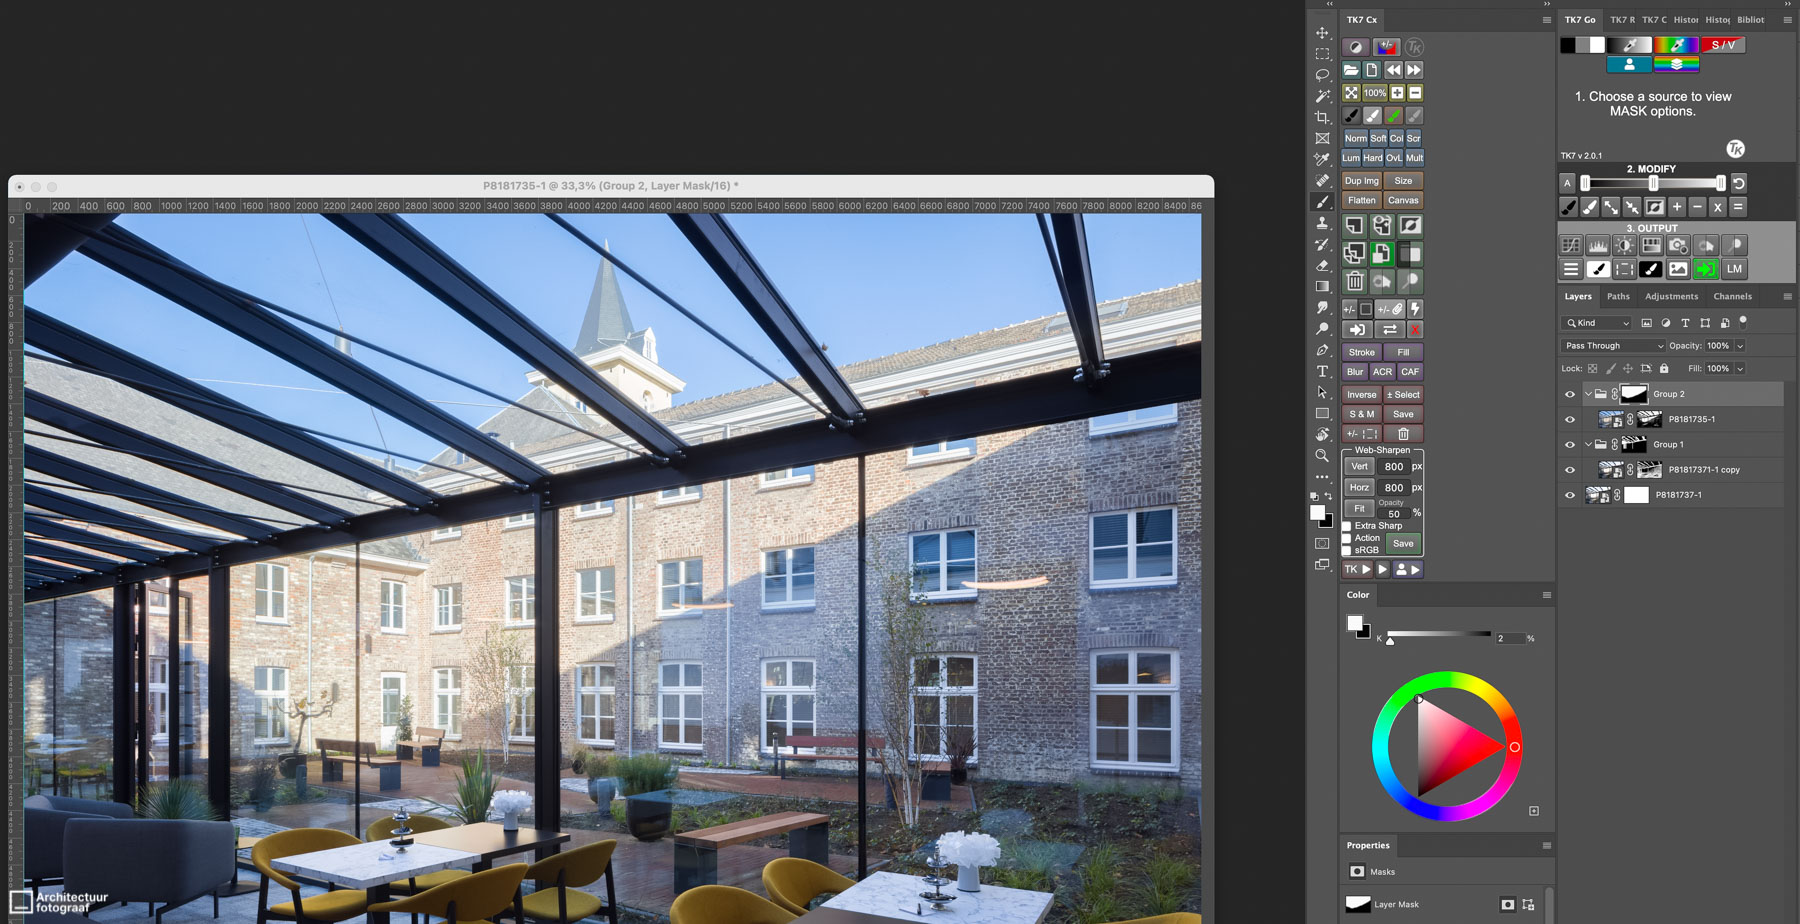
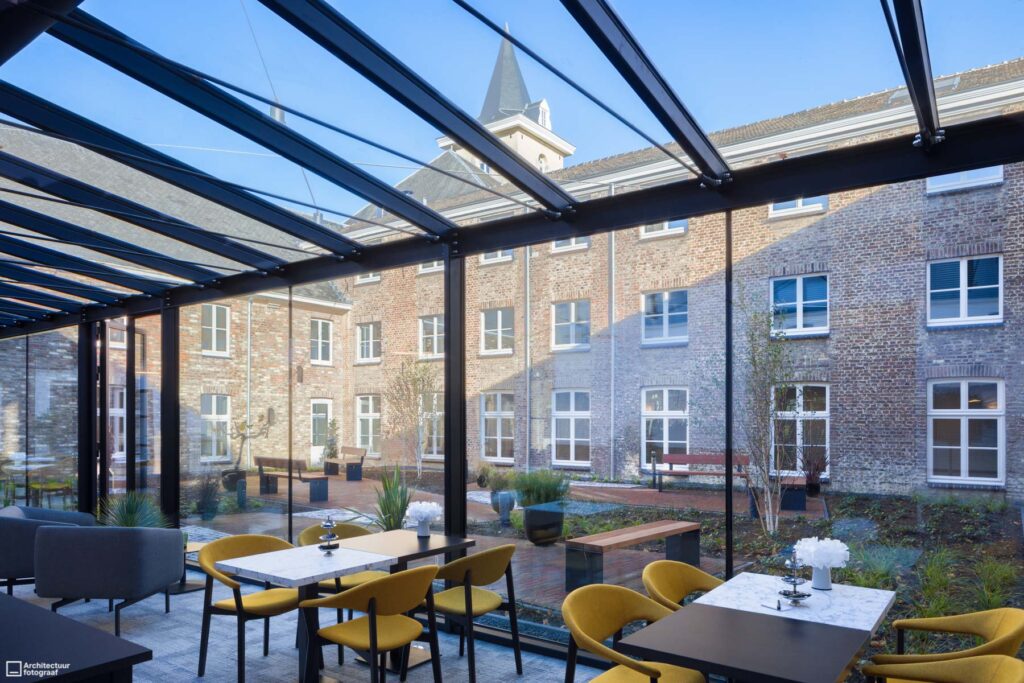
Then we start working with the image. I noticed that I thought the light image could be a bit lighter, the dark a bit darker, etc. Because we made those layers as smart objects, I can go back to make the adjustments again and again. After removing a few reflections, and further tweaking as we always do as an architecture photographer, the image below finally emerges.
Conclusion
Because I am not that smart, it took me quite a while to master the technique of luminosity masks — it was quite a steep learning curve. But I easily recoup all the time I have invested in studying and practicing, because there is no other tool in Photoshop that allows you to blend photos so precisely and easily or remain in control of exactly where your edits end up in your photos. Which panel you use is not very important in my opinion, it is really based on your personal preferences. I have tried a number of panels, but I prefer Tony Kuyper’s TK7. I don’t want to say a bad word about the other panels; they also work perfectly and it is just which you feel comfortable with.
Do you have any suggestions? Do you see opportunities to improve on the above? Experience with other panels? Share it in the comments so we can all learn from it!