The Architectural Photographer’s Digital Tool Box
When it comes to the gear we use as architectural photographs, it’s pretty boring stuff. There isn’t much in the way of choices. We use sturdy carbon tripods, a couple of tilt-shift lenses, a high-resolution camera, occasionally some lighting gear, and if we want to share screens with our clients on location, the trusty Camranger or tethered laptop. For our physical gear, that’s the end of the story.
Wait, read on! In addition to our physical equipment, we also have access to a variety of digital tools to perfect our output. And that’s where the fun starts, because there are so many choices. For example, there is not one app for the weather forecast, but there are dozens of them. Over the years I have developed a digital toolbox that I would like to share with you. You can take advantage of it, but be aware that what I’m sharing is not omniscience, but just my preferred way of working. If you have an app or tool that you find works better, don’t be shy — share with me in the comments below!
Tools I use on my computer
TK7 for luminosity masks
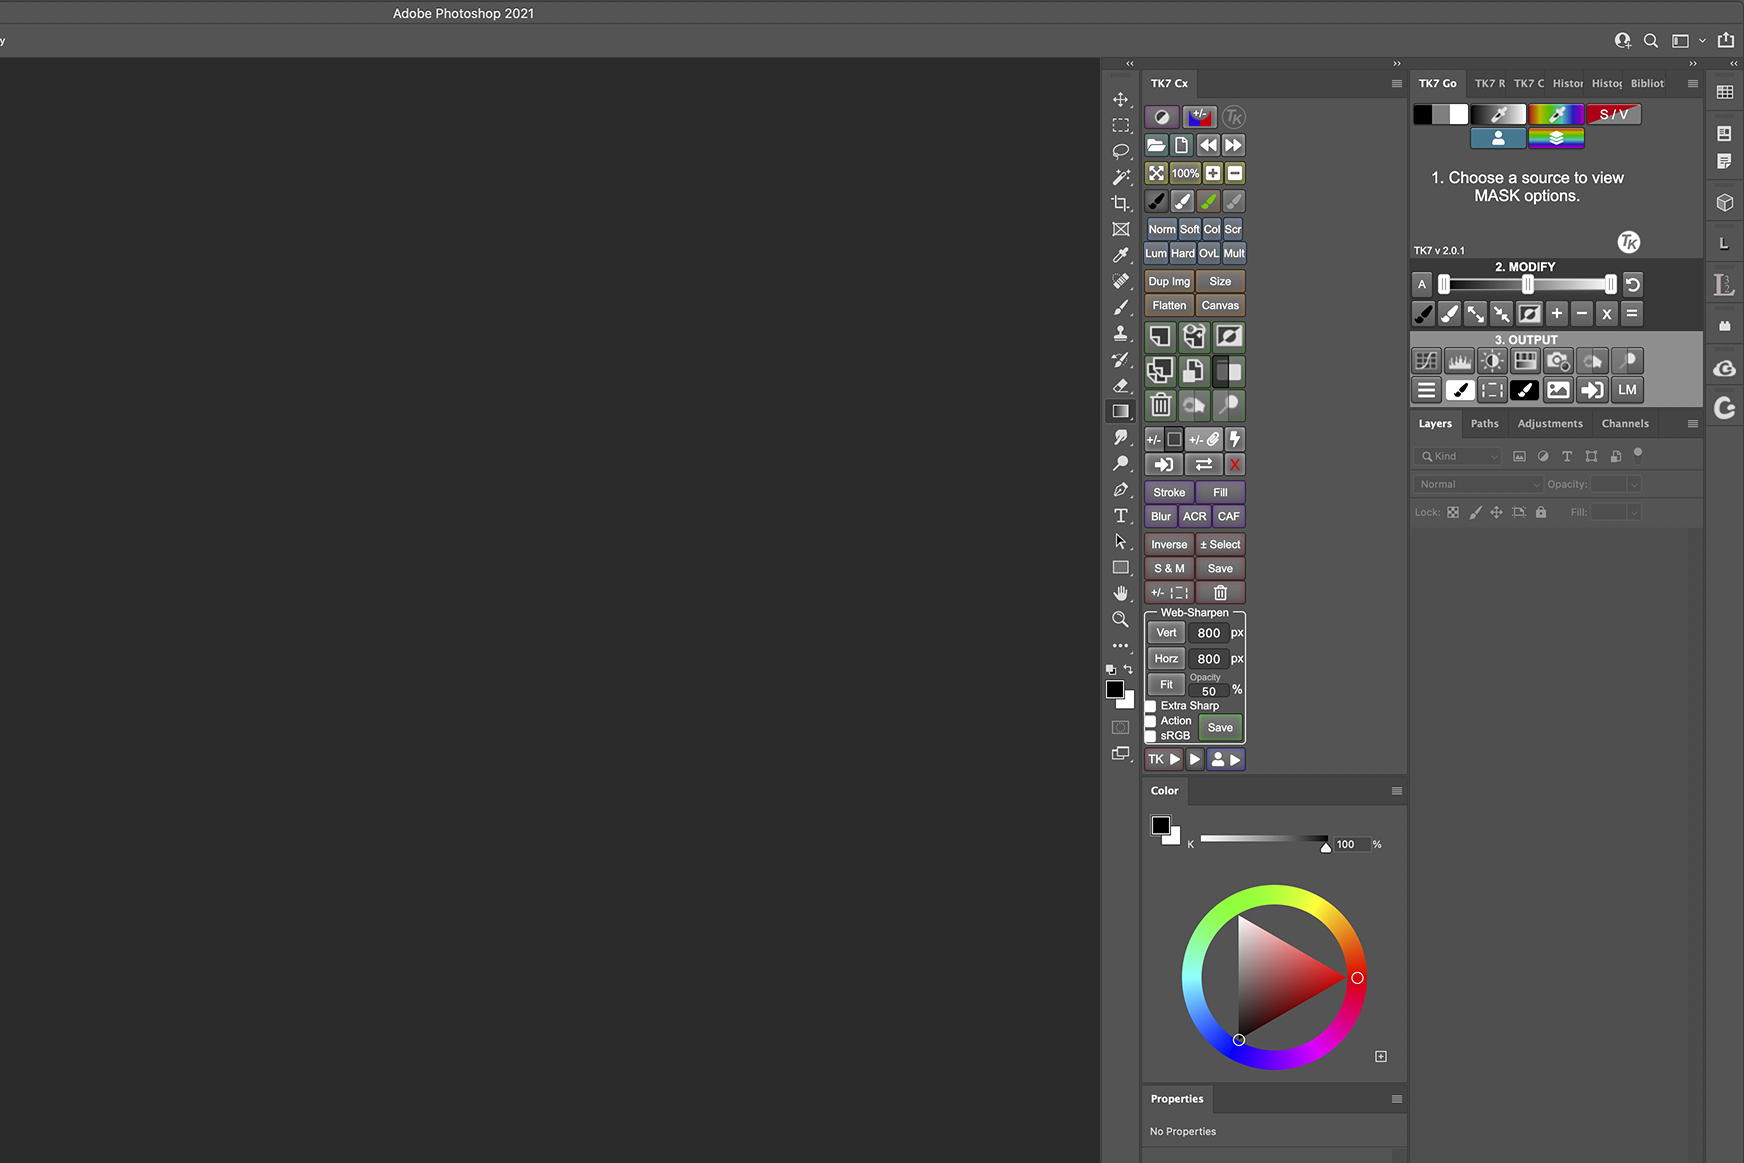
For post-processing, it comes as no surprise that I use Lightroom and Photoshop. Pretty basic stuff there. Within Photoshop, I use the TK7 Actions Panel with luminosity masks and actions. I don’t know how I could do my work without that panel, developed by Tony Kuiper. There are more good tools for working with luminosity masks like Lumenzia, but TK7 is my personal preference. Using the panel results in this setup for my Photoshop Workspace (looks probably like a lot of panels, but on a 32-inch screen there’s enough space left).
PhotoEphemeris for light scouting
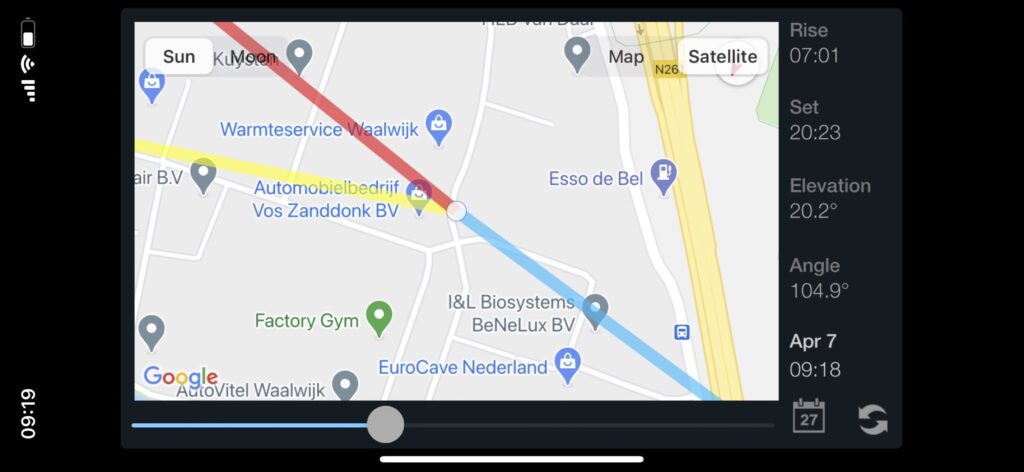
As an architecture photographer, you need to know what time you should be in certain places for the best light. Google Maps / Google Earth are therefore indispensable when planning a shoot. But you can’t do without websites like PhotoEphemeris, where you can conveniently see at what time the sun hits which part of a building. I rarely physically visit a project before the shoot, but I scout them all digitally. Here’s how that works:
Tools on my phone
High quality weather & radar tracking
The Weather! California readers may find that difficult to understand, but in a country like the Netherlands, the weather is the elusive factor in planning photo shoots. My to-go app is the German Weather & Radar. When this app tells me that the weather is nice where I need to be and when I need it, I dare start a two-hour drive while leaving home when it is still cloudy or raining.
GeoTagging
Sometimes it is nice to know exactly where you took a picture. Then GeoTag Photos is useful. This makes a log of your GPS data, which you can later import into the metadata of the images. Many cameras do this naturally nowadays, but as long as you use a camera that does not have a GPS, this is a handy app. It also records your kilometers driven, which is useful for calculating your travel costs.
LightTrack for tracking the sun on location
Although at home you naturally study the location of your next shoot very carefully, it can always be slightly different when you are there and you still want to check again at what time the sun is where. Unfortunately, the web application PhotoEphemeris does not have an app for the iPhone, but on the spot, I’m using LightTrack. But wait: AL commented on this article that there is a iOS-app for PhotoEphemeris (and it works great). You can either enter an address or let the app determine the location and you immediately get a good overview of what the rest of your day looks like. Photopills is an alternative, with perhaps even more options. Both are useful apps, you will have to decide for yourself which one suits you best.
Camranger 2
Especially useful for interior shoots is the Camranger 2. The Camranger is connected to your camera via a cable and then creates a WiFi network to which you can connect a computer or tablet. Actually, the Camranger gives you a very large remote control for your camera. You can then see very well what is and what is not in the shot (should that chair be slightly different or not?) An especially handy quality of the Camranger is that you can let others watch what you are doing and help you decide on the composition of the image. (yes, that chair has to be slightly different!).
Lee Filters Exposure Guide
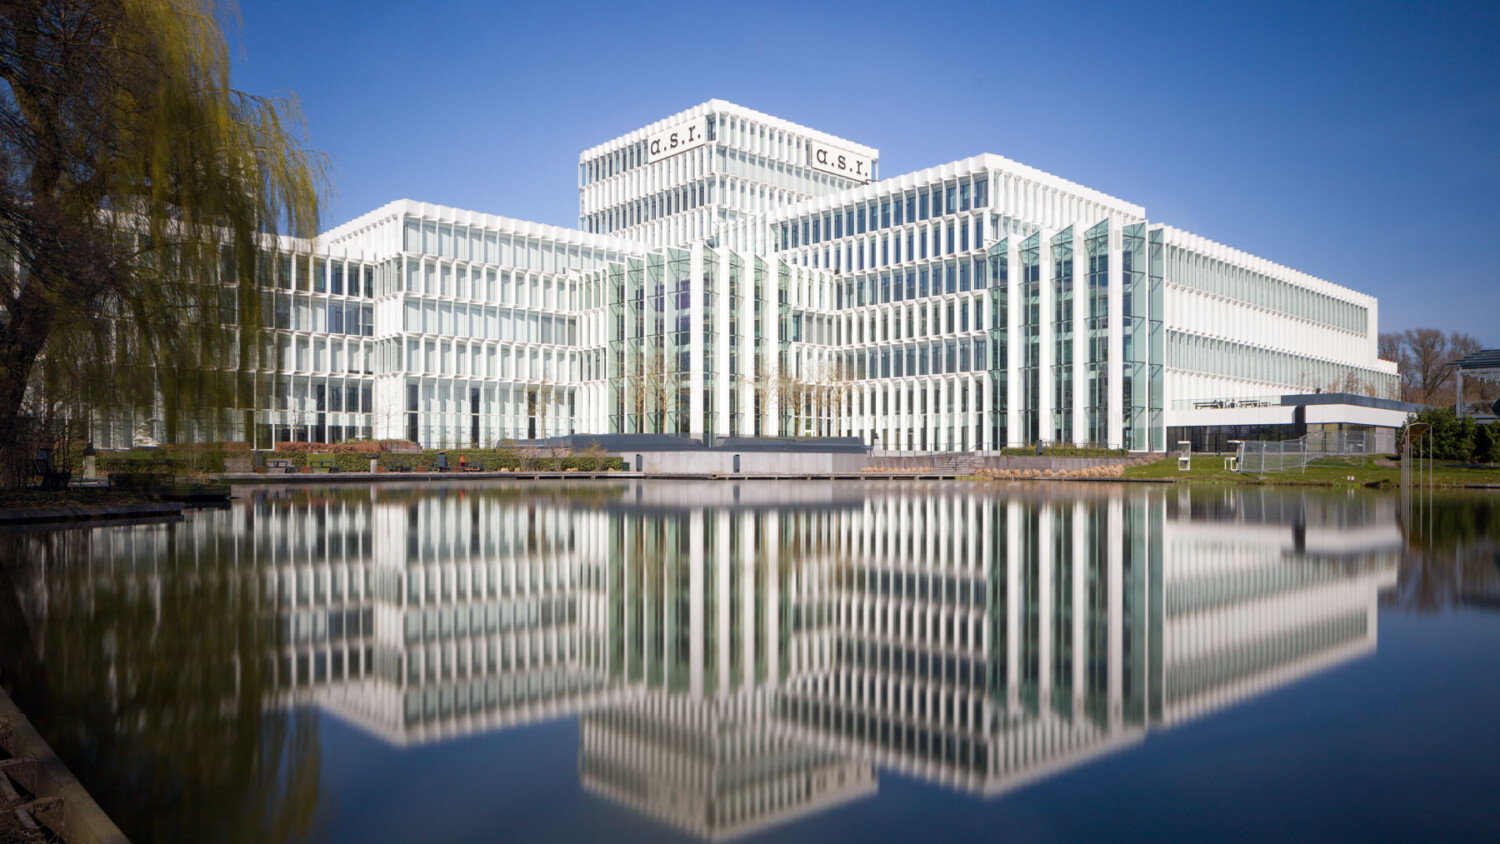
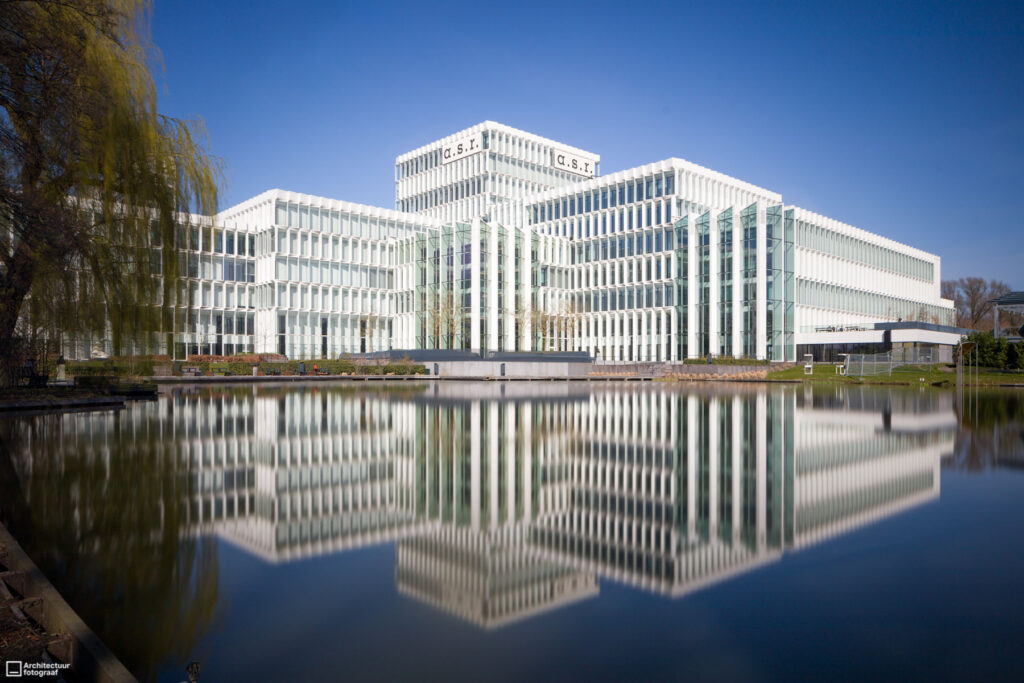
One of the techniques I like to apply is using long shutter speeds. I don’t want to be wrong with calculating the shutter speed too often because it takes so much time to make one photo (five minutes for the example above). I use a filter set from Lee Filters that allows me to use slow shutter speeds even in the middle of the day. There is also a Lee Stopper app which is really great. Below is a video where the operation is explained. Super simple and very accurate.
Conclusion
As mentioned, this is not a list from a guy who has a hold on wisdom! No, this is me sharing my digital gearbox, knowing that there are many alternatives and probably even better ones. Let us know yours!