Photographing A Hungarian Countryside Home, Part 3: The Kitchen Shot
We have arrived at my third and final image in this series, and this time, we’re photographing an interior. In the first two articles, I showed how I create twilight and daylight exterior images. To create this image, I used just a handful of techniques, such as blending different exposures, cloning, cropping and making some color adjustments. Let”s jump right into it.
This image was created as part of my “Amateur vs Pro Architectural Photographer: Hungarian Edition” video, which can be seen here.
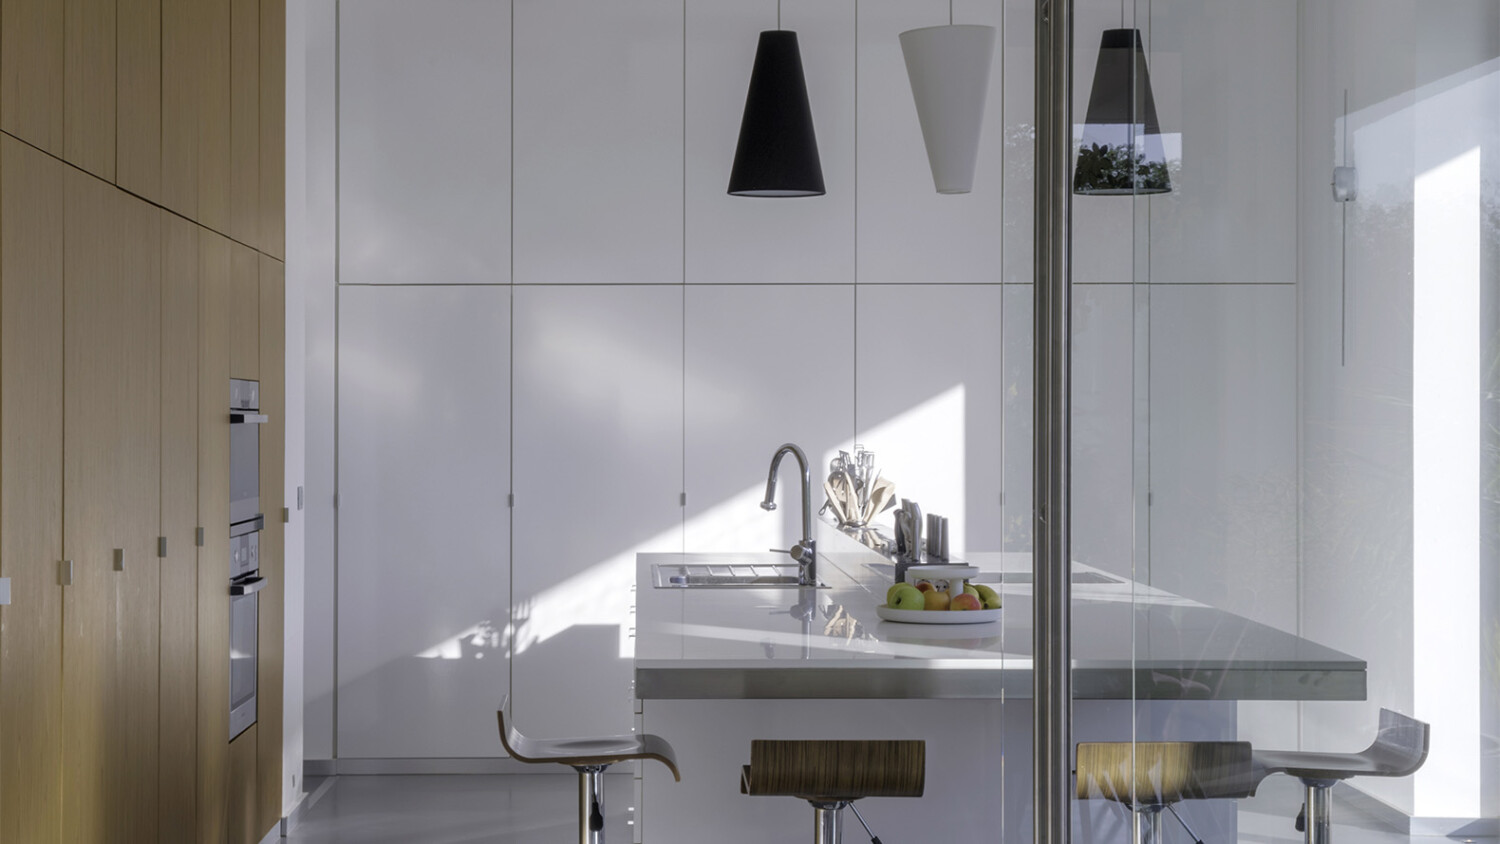
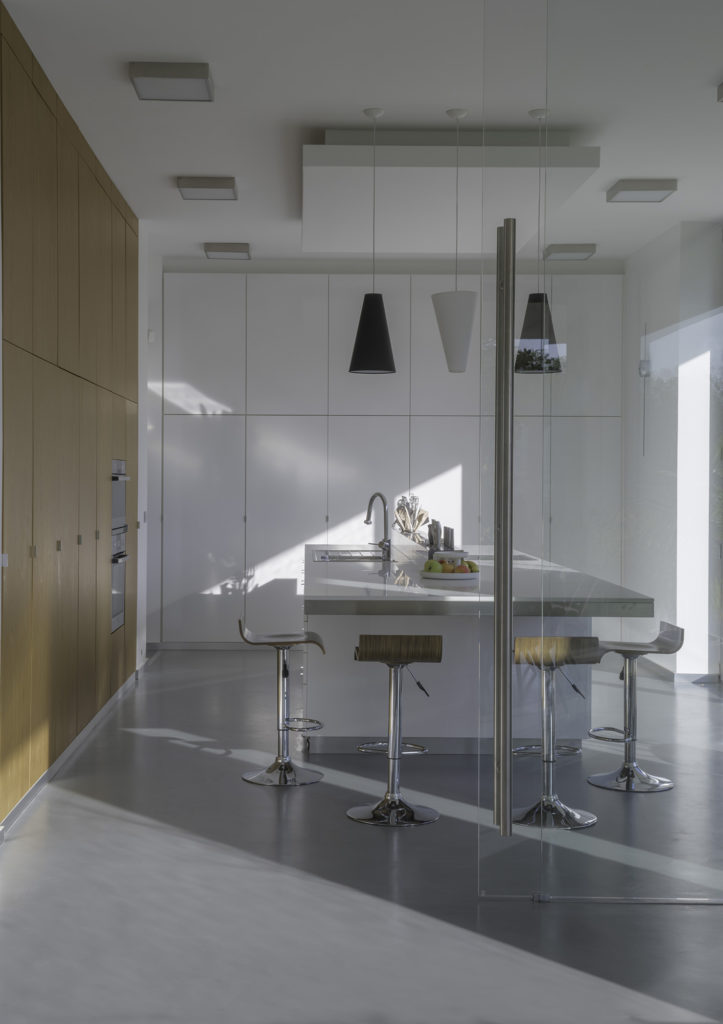
In most homes, the kitchen is of the most expensive and most attractive spaces. That was definitely the case in this particular situation, so I knew I had to have a stellar kitchen shot. I set the scene, and actually made both a vertical and horizontal shot, so I could have the option of picking the better one later.

Horizontal image centered 
Vertical image off-centered and backed up a bit with a 24mm TS and a 1.7 extender
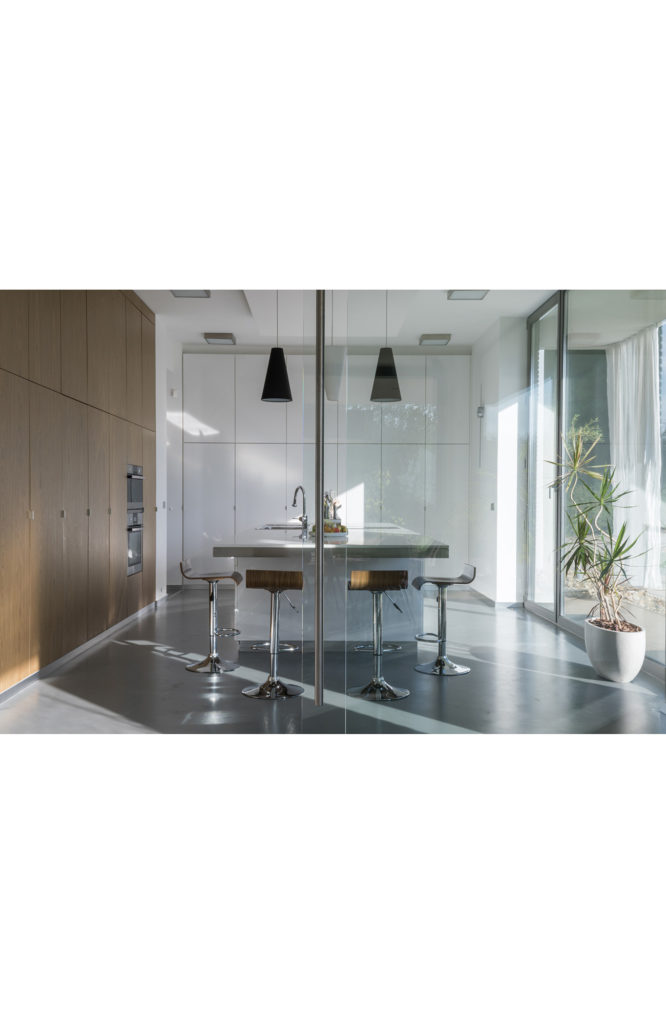

As you can see I didn’t just turn the camera for the vertical image, I made a bit of a different composition which worked much better as I wanted to show the lovely wood cabinets on the left and the airiness of the space. The gear I used is the same as the daytime exterior such as: Nikon D810, Nikon 24mm TS, Nikon 1.7 extender and a CamRanger.
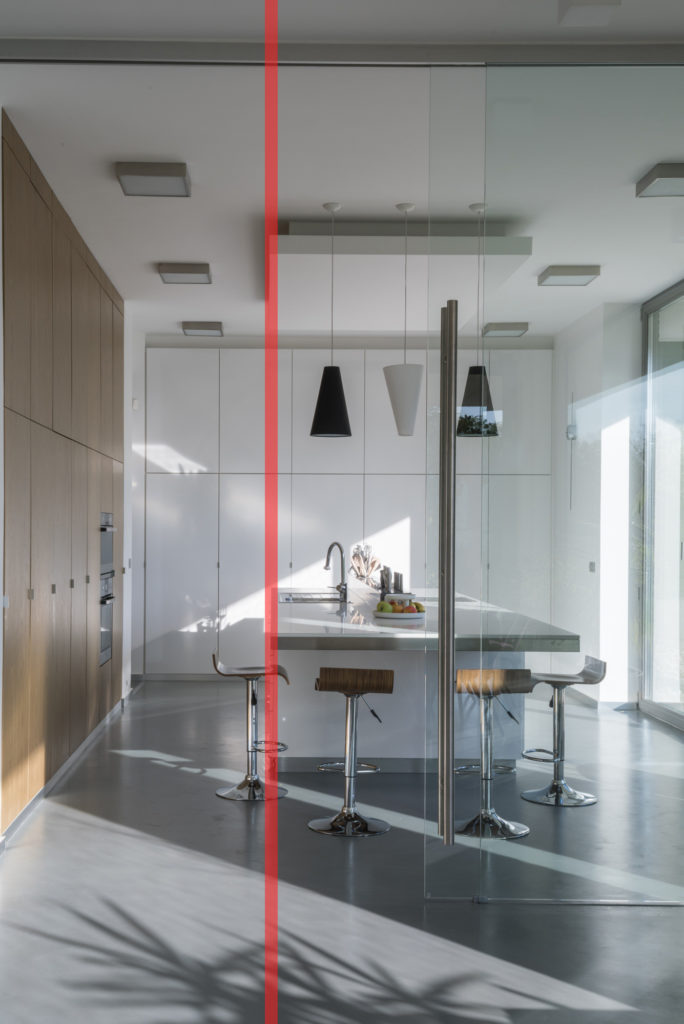
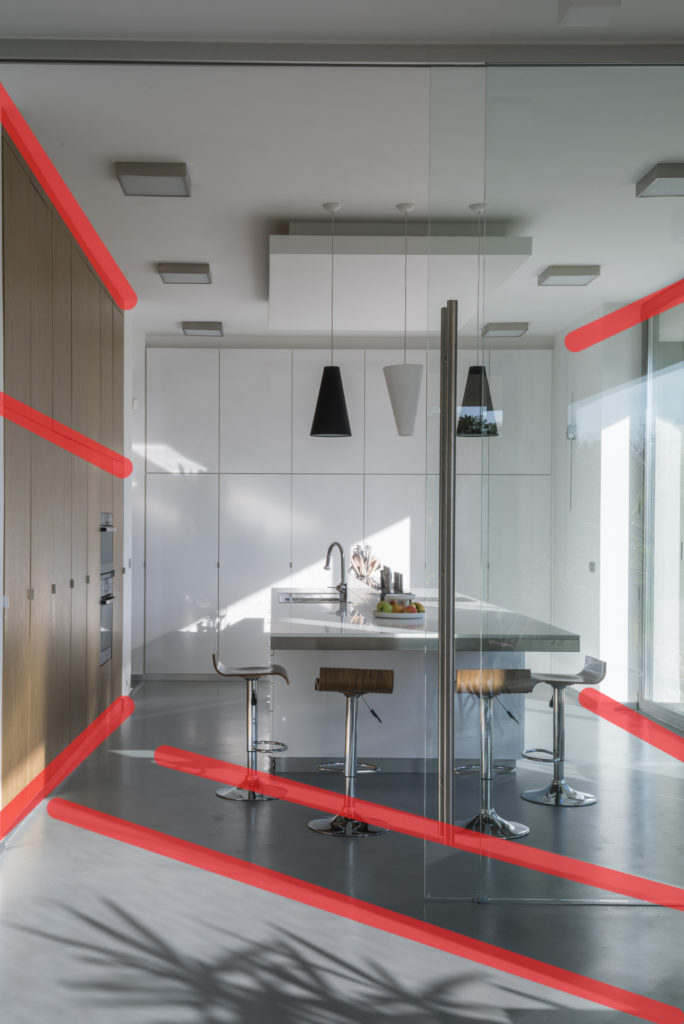
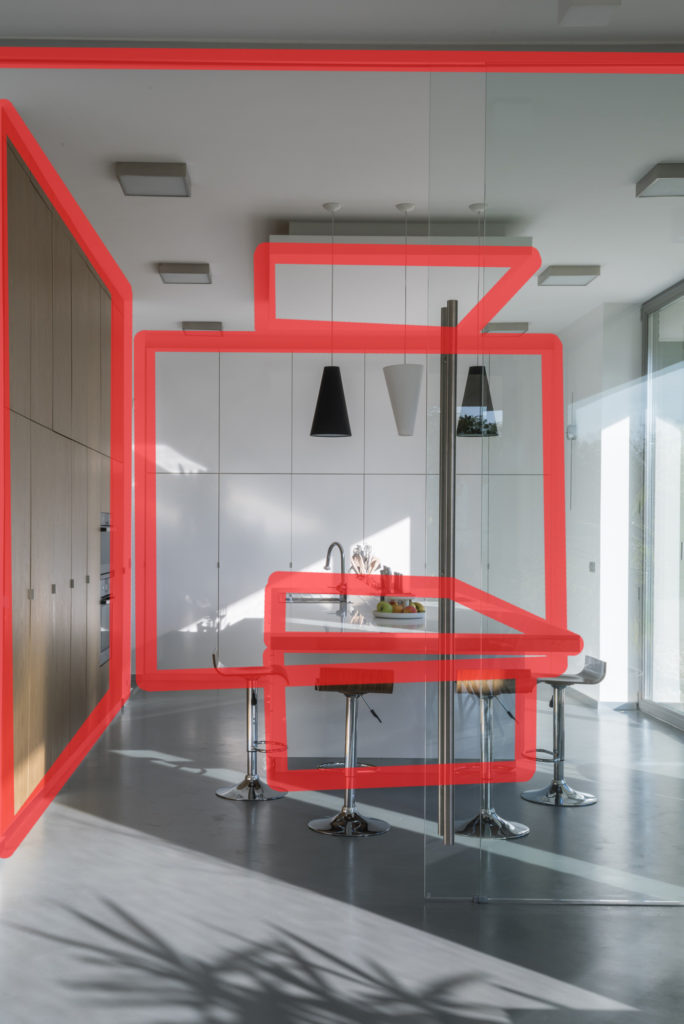
The power of the one-point perspective
The famous one-point perspective is a strong compositional tool I use on more the 80% of my images. First I tried to shoot with the 24mm TS lens, but there were a few things I didn’t like in that image: it felt a little distorted and not as graphic as I would have liked. I moved back and a bit higher, and put the lamps in a much nicer position. I could also see the corner of the cabinet and the kitchen island, as well as more of the countertop.
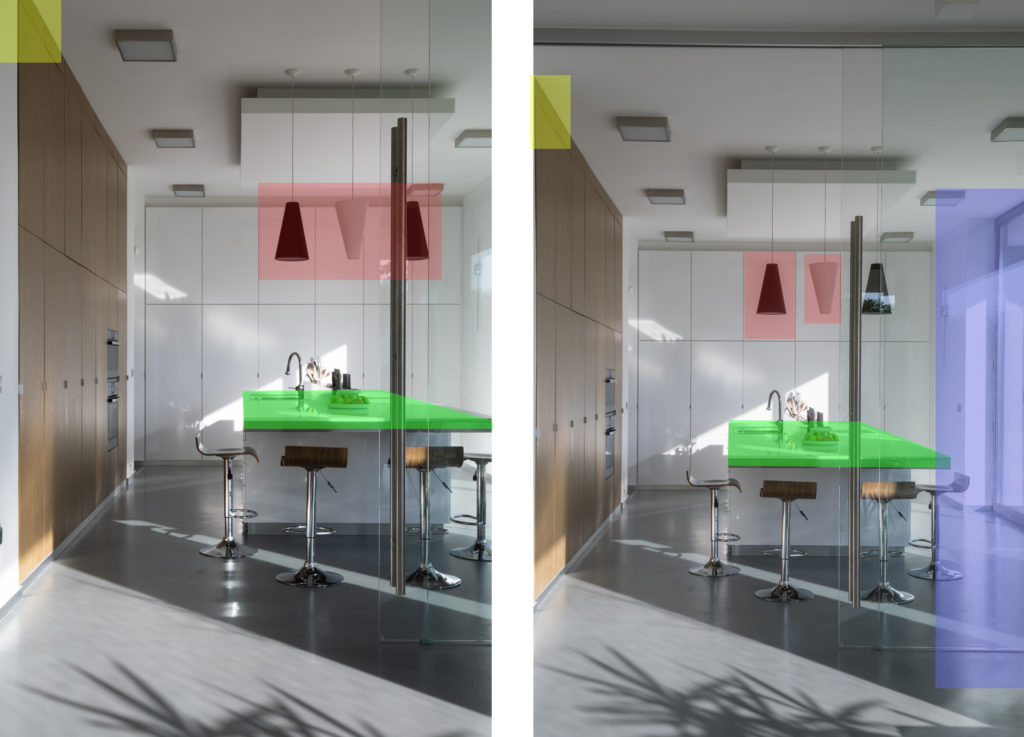
I aligned the camera with the kitchen island and the ceiling in the middle (24mm TS with no shift applied)I added the extender and shifted to the right
Leading lines are helping the eye to move through the image Geometrical shapes are enhanced by 1pp
Getting the colors right
To put the image together, the process was similar to the other images I showed you before. First, I blended together three different exposures, and then cloned out some distracting elements like the shadow of the palm, a light switch, etc. If you look close enough, the chair in the middle is crooked. I tried to straighten it out on the spot, but it looked like this, so I had to do it in PS. (Make a rough selection -> Ctrl+J for new layer -> Ctrl+T for free transform -> right-click and select “Distort” -> adjust the corners till it looks good)

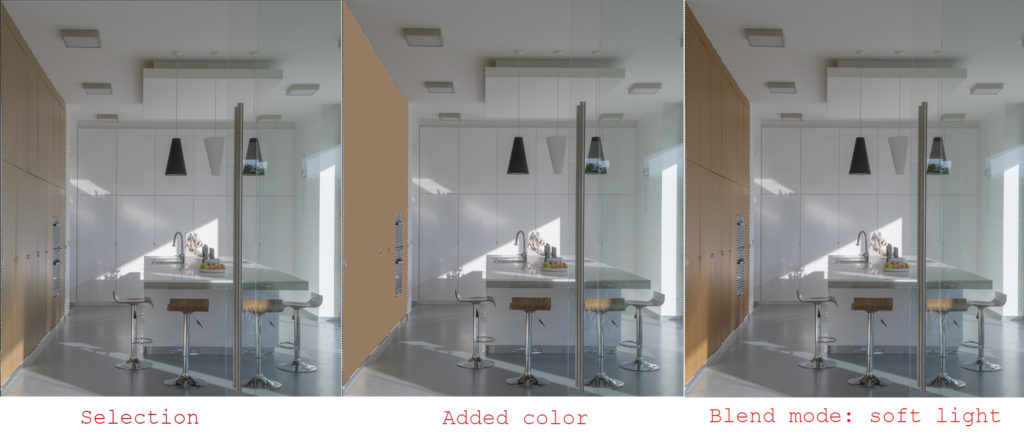
After blending, cloning and the adjustment of the chair I though that the image actually looked a bit flat; but before I add some contrast, I want to make sure that the cabinet has proper colors. Here is a method that just works great for me and has repeatable results: select the area precisely with the pen tool -> add a new layer and fill the selection with a color that you sampled from the image that looks correct -> change the blend mode to ‘Soft light’. On this image, I changed the opacity to 80%, of course it will be different on every image you make depending on your taste and how accurate your color choice was.

Before After

The complicated part is done! Now only the final touches remain. If you have read my previous two articles, now you know what is coming. Yes, my favorite method to add some contrast, Nik’s Software Color Efex Pro and a curves layer to brighten up the image a little bit. For a more detailed step by step of this, refer to my previous two articles linked above.
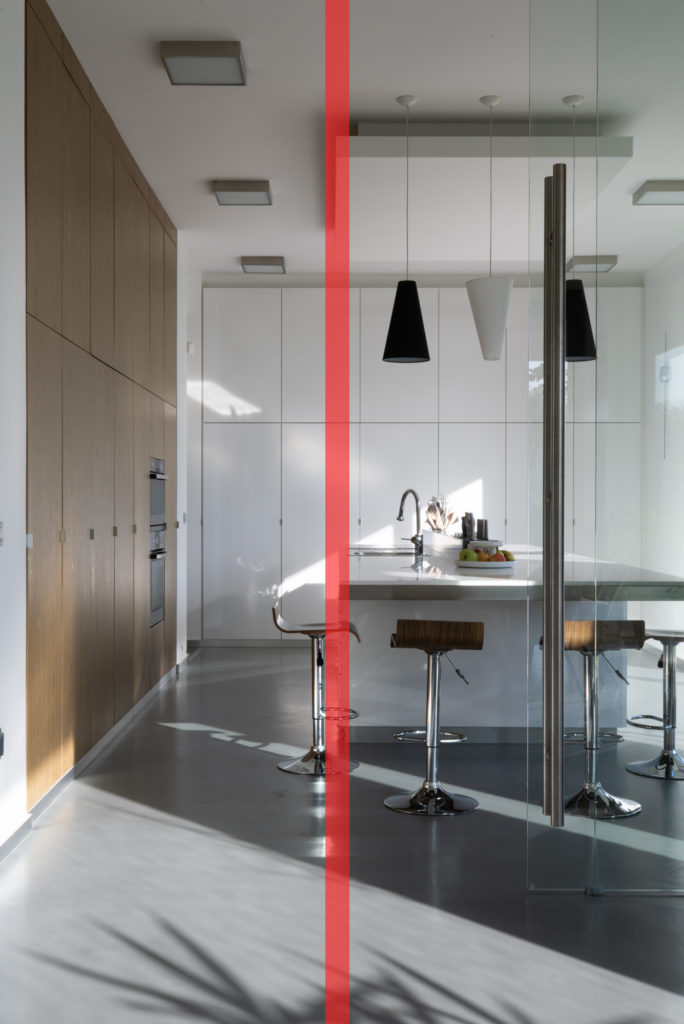
About the crop
One thing of the many things I learned at a workshop in Dubai this year is that the crop can take an image from good to great. Most of the images can work with more than one crop, but in this case, I had an idea while composing the image: I wanted to use the corners as starting points, one for the shadow on the bottom right, and one for the cabinet on the top left corner. This, for me makes the image even more geometrical.
Before 
After


Final thoughts
After all that, I do have one issue with the image, which would have been easy to fix at the scene, but it is a nightmare to fix in post, so I ended up letting it go. The reflections from the countertop on the white cabinet are a bit distracting. To fix this problem, I should have blocked the light hitting the countertop for an additional image and just brush that layer in with a big soft brush… Next time I will not forget that!
I hope you learned something from my first three articles, and I would love to read your comments. Hopefully you have picked up some new techniques for improving your own images; whether they are location or post-production techniques. As always, every image needs post production and whether that is a little or a lot can be hard to tell before you jump in, but having as many tools in the bag as possible will make your life much easier when it comes to producing high-quality photographs.