How I Photographed This Contemporary Home in the Hungarian Countryside
My name is György Palko, and I’m an architectural photographer based in Hungary. For my first post on APA, I’m going to share how I edited one of my favorite twilight images. To perfect this image, I used a wide range of techniques including exposure blending, color correction, cloning and sky replacement.
This photo was taken on a contest against a friend of mine who is a commercial hotel photographer based on the youtube video “Amateur Vs. Pro Architectural Photographer” produced by Fstoppers (featuring our very own Mike Kelley). We promoted our 3-3 image montages on his youtube channel which can be seen here, and he beat me even more than Lee has beaten Mike!
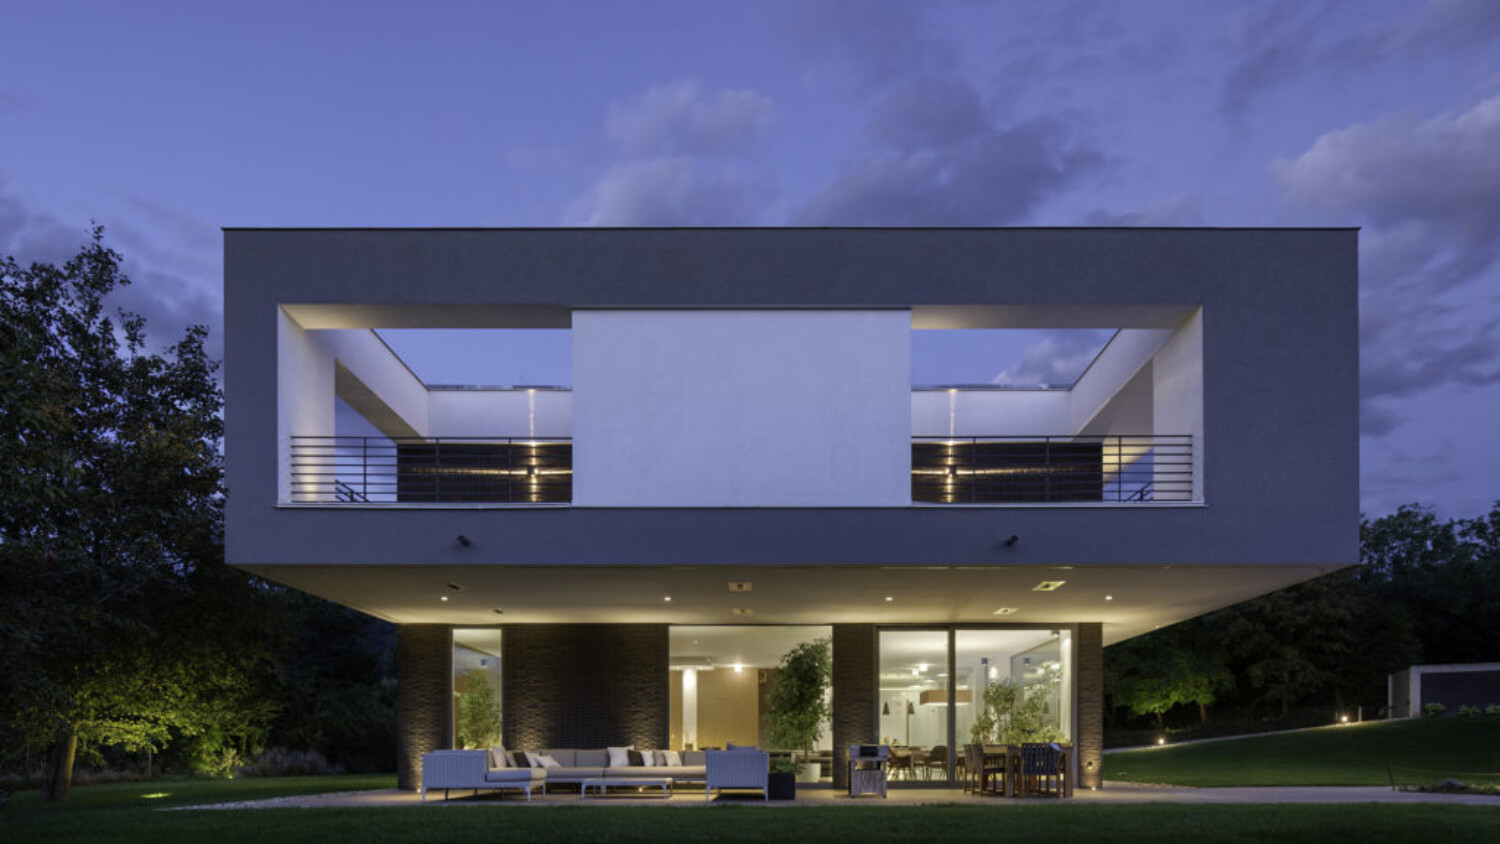
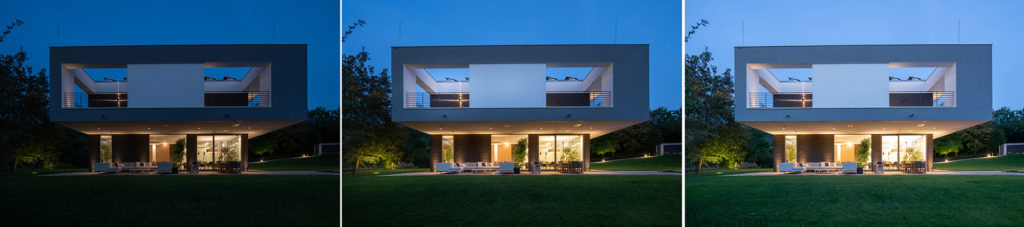
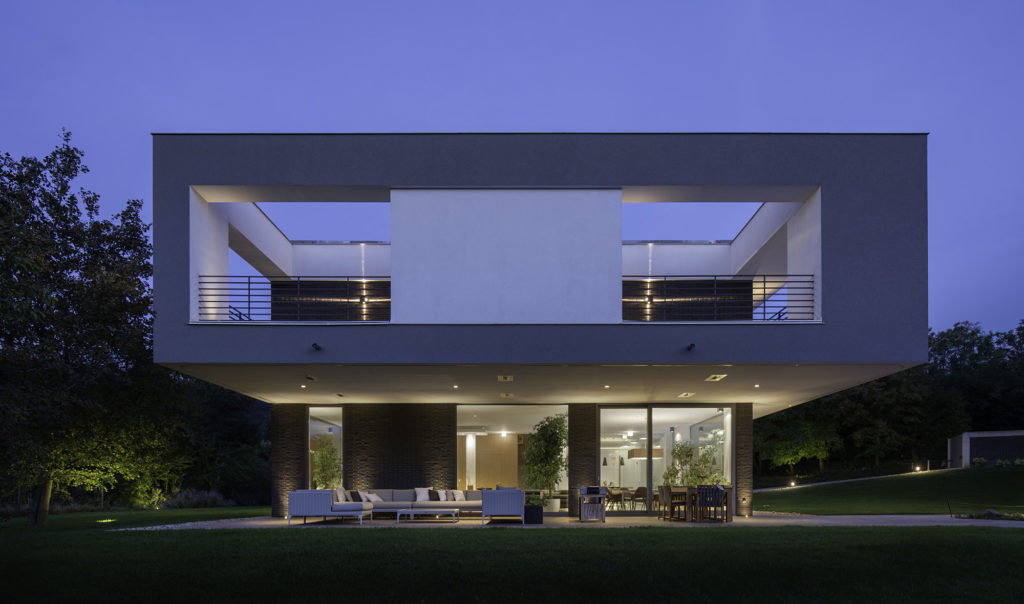
I wanted to create something different than the obvious and somewhat boring straight on shot, and it was a struggle to find the right angle. For my very last attempt I walked down the hill and tried to shoot the side of the house despite a broken lamp on the balcony on the right side (you can see the cross-shaped light on each side of the balcony in the final photo, one of which was not functioning on location). I was about 10 minutes after the ideal twilight time (as Mike parrots constantly: F/8, ISO 200, and 0.5 sec), but as I bracketed 3 images, I was covered. The middle exposure was F/9, ISO125, and 2.5 sec, so not as good as it could be but not awful, timing-wise, either.
After some gentle Lightroom adjustments, I loaded my three bracketed images into Photoshop. I used the standard method for this which was -> highlight each image -> right click -> ‘Edit in’ – > Open as layers in Photoshop.
Blending exposures
As you can see the highlights are burned mainly in the interior, so the first step in photoshop is to begin blending images together to tame the highlights. From this point on, I’ll list out each step I take to put the image together.
1. I place the darker exposure above the base exposure, and hide it by clicking on the eyeball icon in the layers palette.
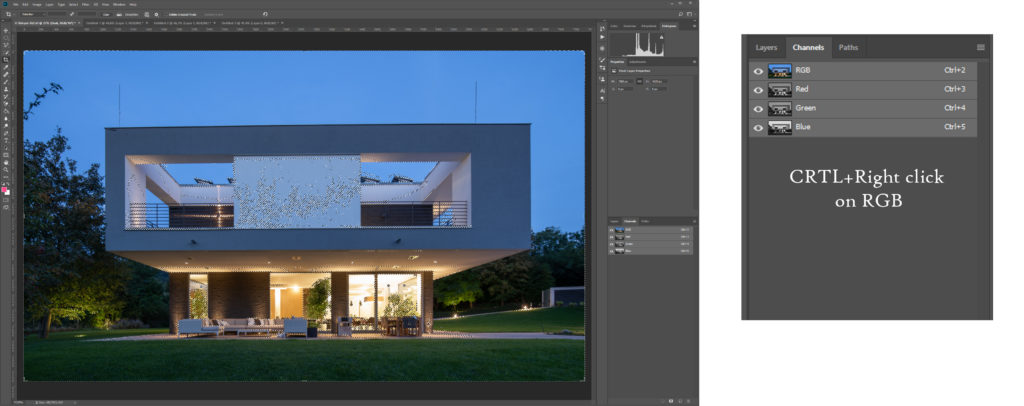
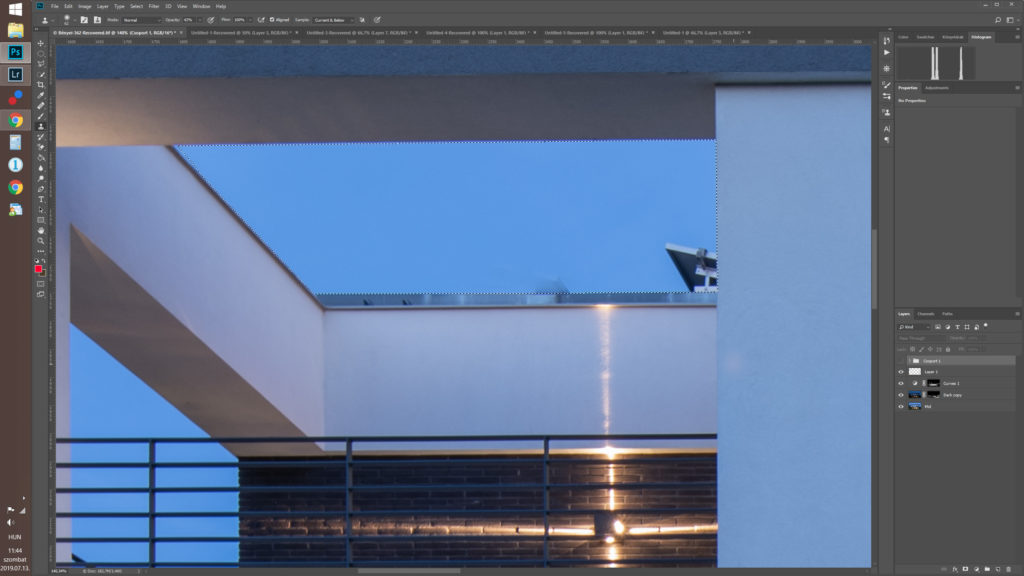
2. Next, I navigate to to the Channels palette and Ctrl+right click (CMD on Mac) on the RGB channel, which will activate a mask based on the brightness values of the image.
3. Click on “Save selection as channel”
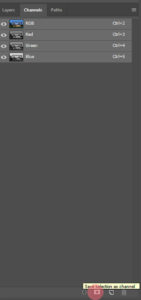
4. Adjust the contrast on the selection for better blending. I do this by selecting the Alpha 1 channel and applying a curves adjustment to the layer. Clicking Ctrl+M brings up the curves adjustment, and I adjust contrast until it the highlights and shadows are clearly differentiated. Once I have a nice contrasty image, I’ll click ‘OK’ on the curves adjustment dialog box, and then CMD/Control Click the Alpha 1 channel to activate that black and white selection.

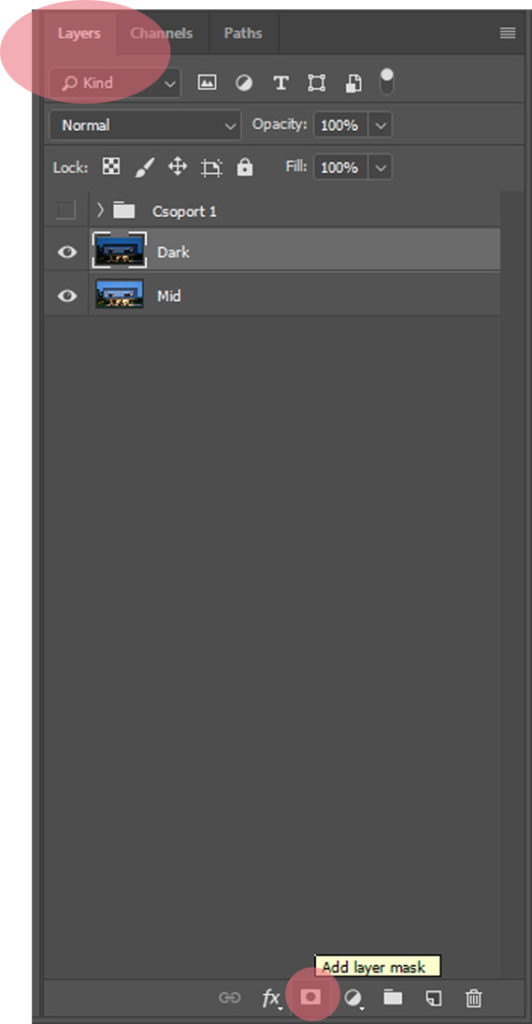
5. Go back to the Layers palette and apply the selection as a layer mask on the dark layer by clicking on the ‘Add layer mask’ button on the bottom of the Layers palette.
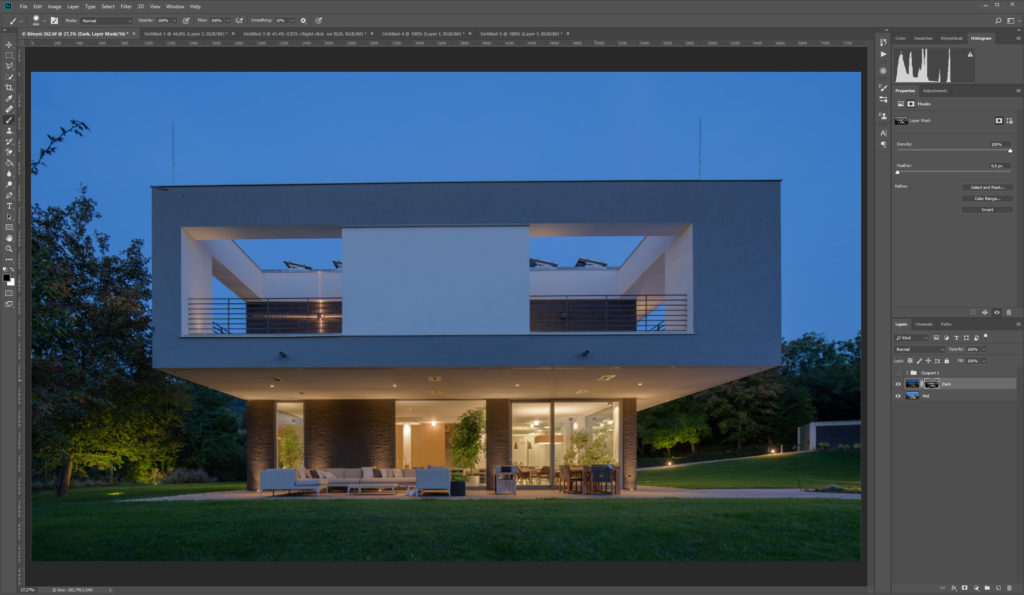
At this point we have created and applied what we call a luminosity mask to the image. Essentially we are using a darker exposure and a Photoshop layer mask to manually blend together specific parts of the image to raise or in this case, lower exposure values to taste.
This all comes down to personal preference, and I’ll often use a brush to fine-tune my masks to make the most natural looking image. On this image, after the blending the histogram shows information only on the left side, which means the picture is significantly darker than I’d like it to be. Only in a few places would I want the picture to be this dark, namely the interior, the trees and some of the grass. I use a big brush at 100% for the sky and most of the front of the house, and as I get closer to the terrace and the interior I change the size and the opacity of my brush to make a more gradual transition.
After the blending, I correct color casts. To deal with the orange in the interior I use a Curves adjustment layer -> “Sample in image to set a grey point” -> now the whole image is way too cold and blue, so I apply a layer mask from the dark layer (because this is the same area where the orange color cast is prominent) -> to fine-tune this mask I use the brush, and I paint with black where I don’t need to remove the warm light, like on the trees, or from the grass.
So as you can see, the process of blending this image together was not wildly difficult – I only had to use two frames to get the overall blend to where I wanted it. That’s the beauty of shooting at twilight!
Cloning + Cleanup
Now I need to remove a few distracting elements using the clone tool: tree branches, lightning-conductor, solar panels, some sandbags near to the bench and the lamp. I use different tools for these:

Step 1: The tree branch. Probably the easiest with the ‘Spot Healing brush tool’. Just paint over the whole thing, and ta-daaa.
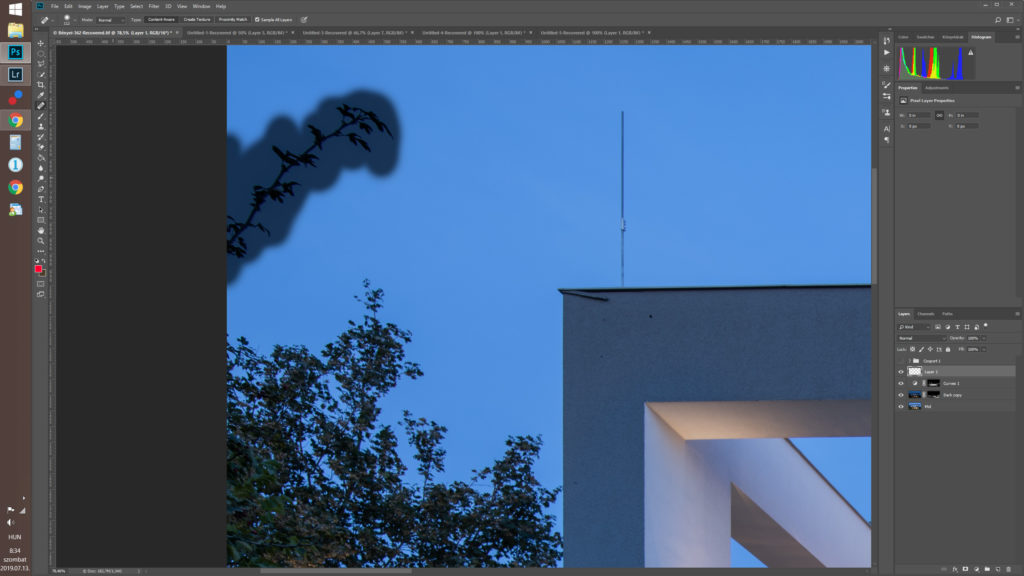
2. To remove the lighting-conductor I use the ‘Healing brush tool’ instead of the clone tool because it uses the sampled parts of the picture to fix where you need it, but not like the clone tool. It will be more seamless especially if the background is the sky or a wall.
3. For the sandbags, I need to zoom in really far, and with a small brush using the clone tool clone them out. I used the pen tool to make a perfect selection around the leg of the bench and the shadow beneath it. As you can see I removed one leg which was half-hidden by one bag, I did this by choice assuming that no one ever will notice this without the before picture. If I wanted to mess with it for 20-30 seconds more, than sure I can use another leg to correct this, but that’s probably a bit further than I really need to go.

4. The solar panels are easy to clone out, I just need a good selection around the roof with the pen tool.
5. The lamp on the left side is perfect and creates an interesting shape, so I really need that on the right side also. To do this none of these tools work. Normally I would do everything before fixing the verticals at the end so that if I need to go back and fix it I don’t have to delete or undo my perspective correction work, but to double the left side, mirror it and paste on the right side would be easier if the verticals and horizontals are correct.
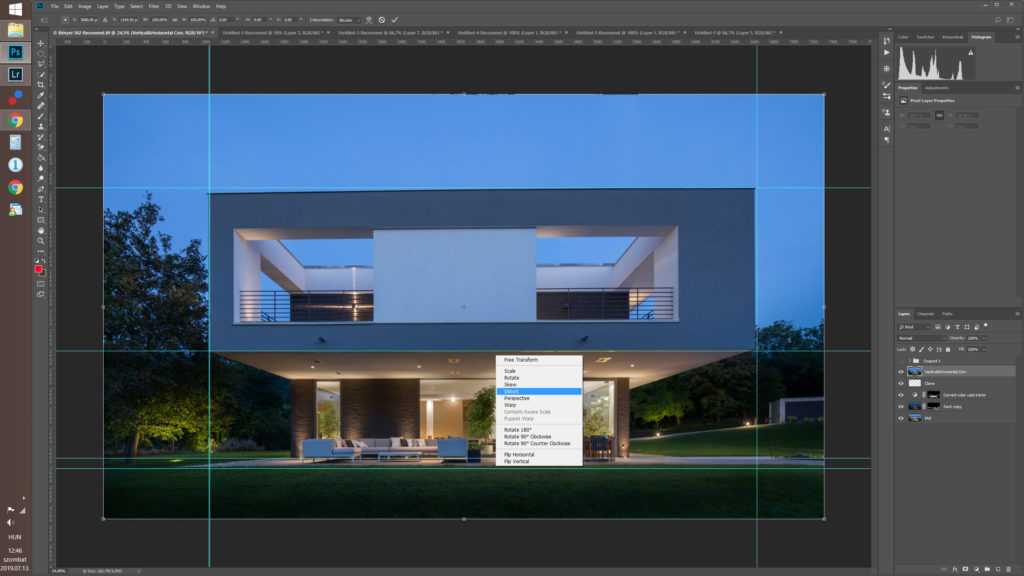
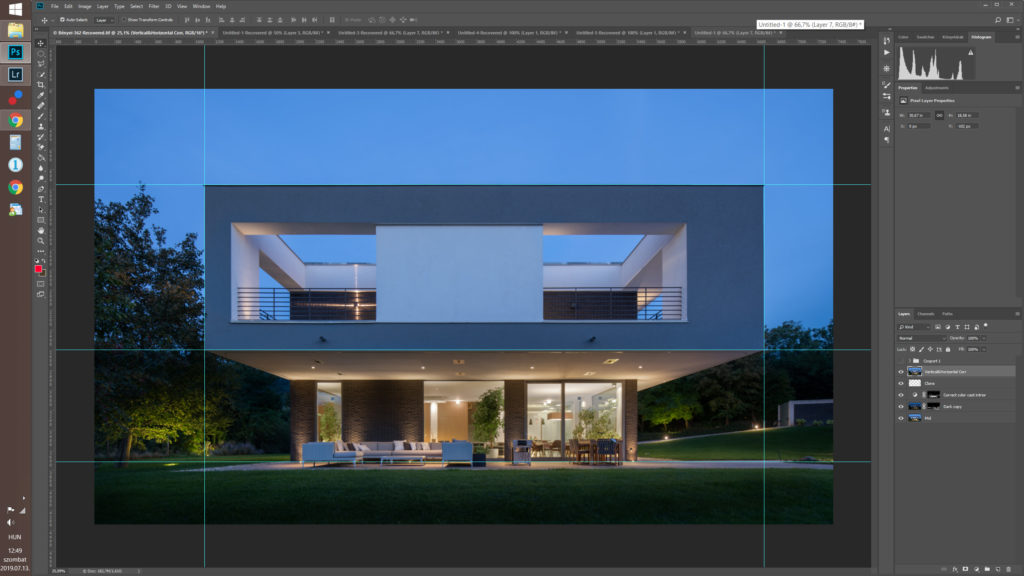
Correcting verticals and horizontals is simple: Select all layers using Shift+Ctrl+Alt+E which will merge everything onto a new layer. Drag out guidelines from the rulers on the edge of the application window to see how much you need to adjust – I usually drag them over the vertical edges of the building. Press Ctrl+T for free transform, right-click and select ‘Distort’ and adjust to taste.
Now, to fix the lamp. I selected the area of lamp on the left side with the glow, and pressed Ctrl+J to copy it to a new layer. As I did previously, press Ctrl+T for free transform, right-click and select ‘Flip Horizontal’. Move it to the right side, and transform -> distort until it fits roughly. From there, I needed to nudge it around and clone a bit of it to nestle nicely into its new spot. To do a smooth transition I added a mask, and with a soft brush I painted away a bit of the replacement.
Before and after cloning:
Sky replacement
The next step is the sky replacement. The sun went down behind me camera left, so I need a sky from my sky library with the same lighting conditions. Sometimes it happens when you are at home, and you can take an image in your backyard 🙂 After you find the right sky you need to select the sky on the original image. Sometimes it can be easier than in this image, but this is also not too complicated.
Step by step:
1. Select everything and merge them on a new layer (Shift+Ctrl+Alt+E) and go to the Channels palette
2. Make a copy of the blue channel (This had the most contrast between the house and the sky, it may be different for your image if following along on your own) by dragging it down to the ‘new layer’ button and releasing it.

3. Make the image more contrasty as before (Ctrl+M for curves)
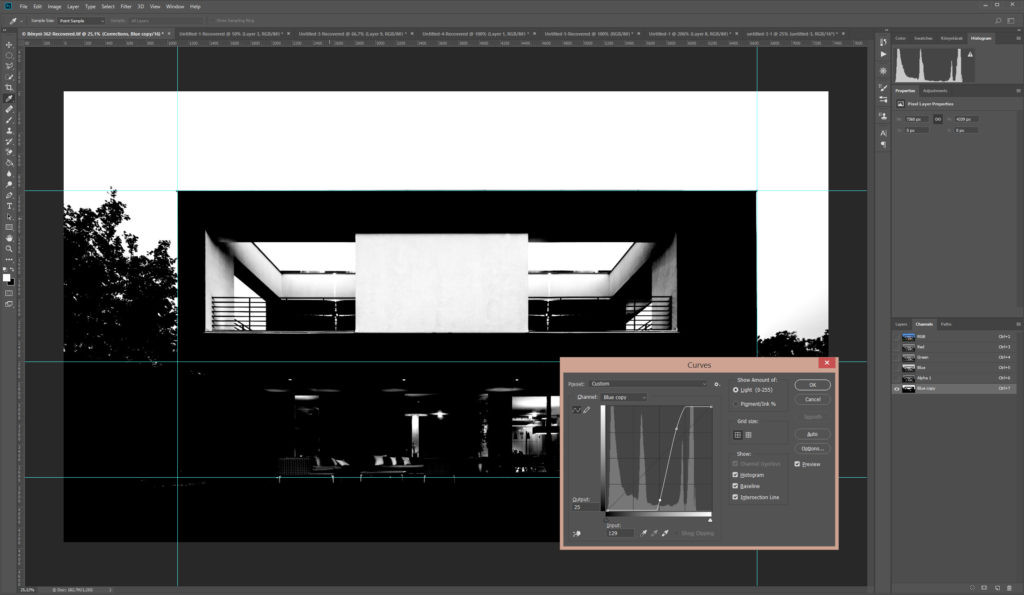
4. Make a selection with the pen tool precisely where the house and the sky meets, and paint over the house with black to separate it from the white sky behind.
5. Right-click on the “Blue copy” layer to make a selection, and feather it by 1 pixel (Shift+F6 for feathering).
6. Go back to “Layers” and apply the mask on the sky.
7. A little fine tuning is always needed, you can refine the mask where it looks a bit funky or reduce the opacity of the sky to get a better blend.
Final touches
Almost there! I merge everything together on a new layer, and use a specific plugin: Nik’s Color Efex Pro. I use this for only the Pro Contrast, which removes some stubborn color cast beautifully. The sliders let you see everything instantly, so you can be really precise with this, and you can tweak it until you are satisfied with it.
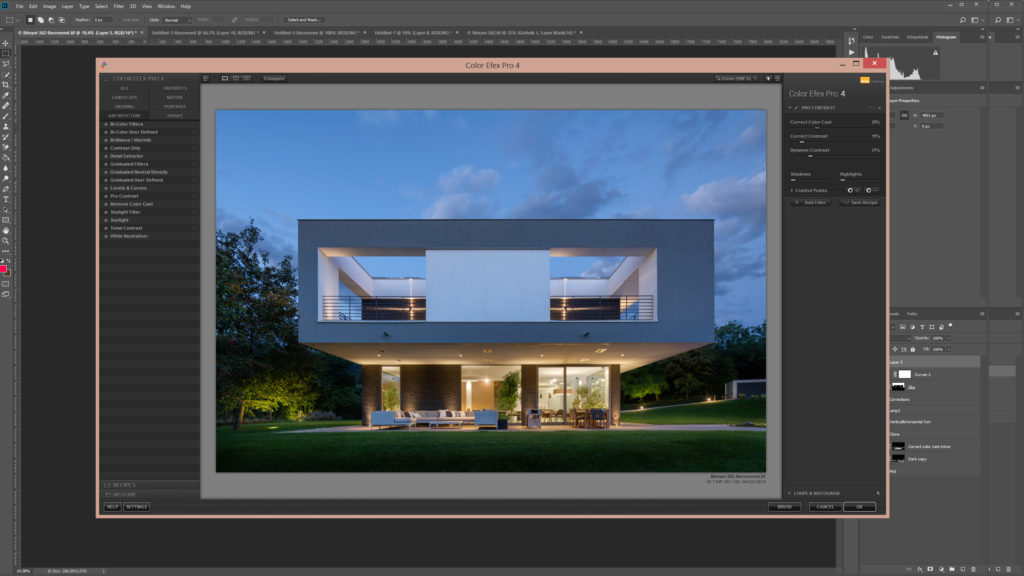
I always try to toggle in and out this layer to see how much I need it and play with the opacity a bit (70% in this image worked great.)
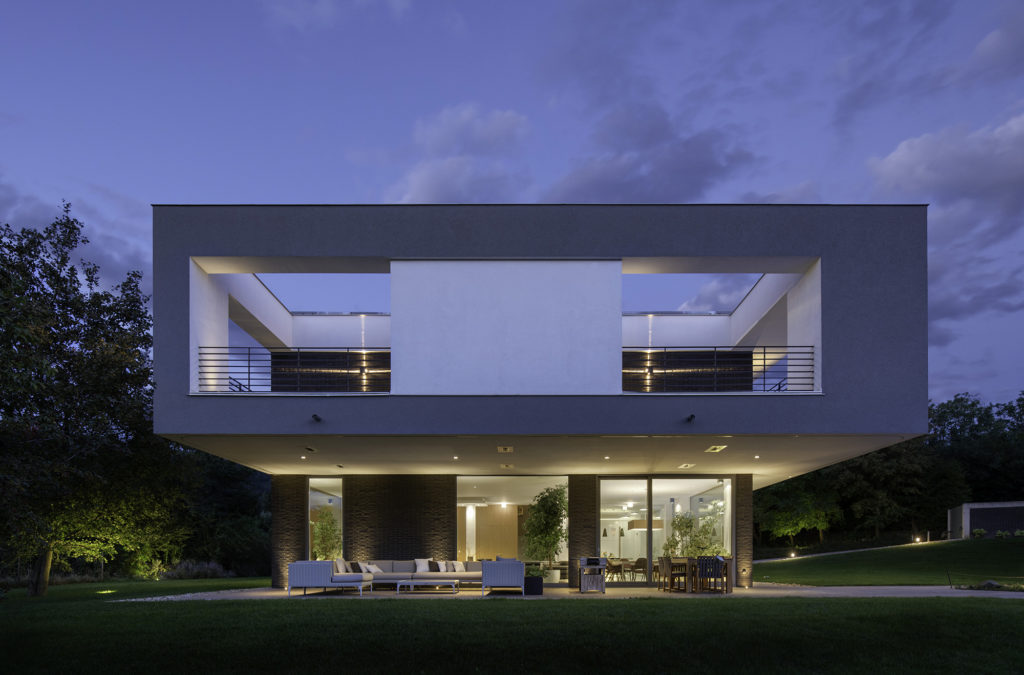
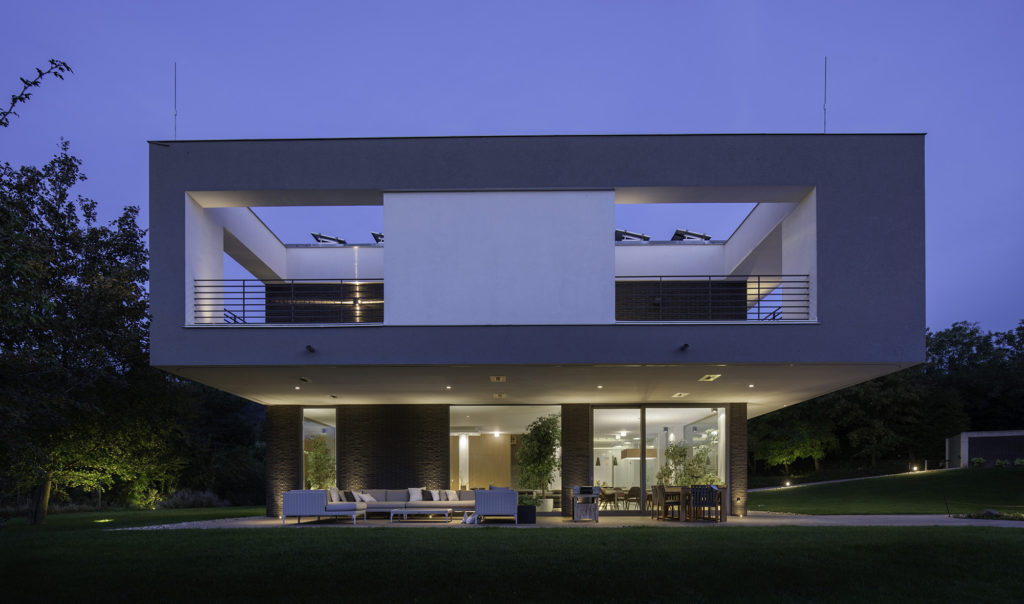
And voila! There is the finished image. It may seem like a lot of work but with a little practice, is not very complicated compared to some other pictures which involve lighting and more complicated blending.
Thanks for reading my first article – I hope you were able to learn something new. I’d love to hear your thoughts in the comment section if you are able to share.