Tall Towers and Tilt-Shifts – Which Lens Should You Use?
Do I need a tilt-shift lens to photograph tall buildings? It’s a question I get a lot. The quick answer is pretty straightforward. Do you want to do it professionally? If so, yes, you need one (actually you need two). Do you want to do it as a hobby? Then no, you absolutely do not need one.
I decided to put this opinion to the test by heading out in my adopted home of Shanghai and taking some imagery of tall buildings with a few different lenses.
Below is a series of image comparisons that should help illustrate why I believe you absolutely need one to do this professionally. I decided to compare the 24mm and 17mm tilt-shift lens, along with a 16-35mm zoom lens as this is a relatively common wide-angle lens a hobbyist might have in their kit. All images were taken on a Sony A7rii body. Most of the images below are far from portfolio-worthy and are taken for the sake of this article. The images are taken with auto white balance and are straight out of camera unless otherwise noted.
This article expands on a lot of the points Usman made in one of our previous posts from last year, so if you haven’t already done so, you’ll definitely want to check that one out as well.
Scenario A – When you cannot back up to get the shot
A1 – The Big Three
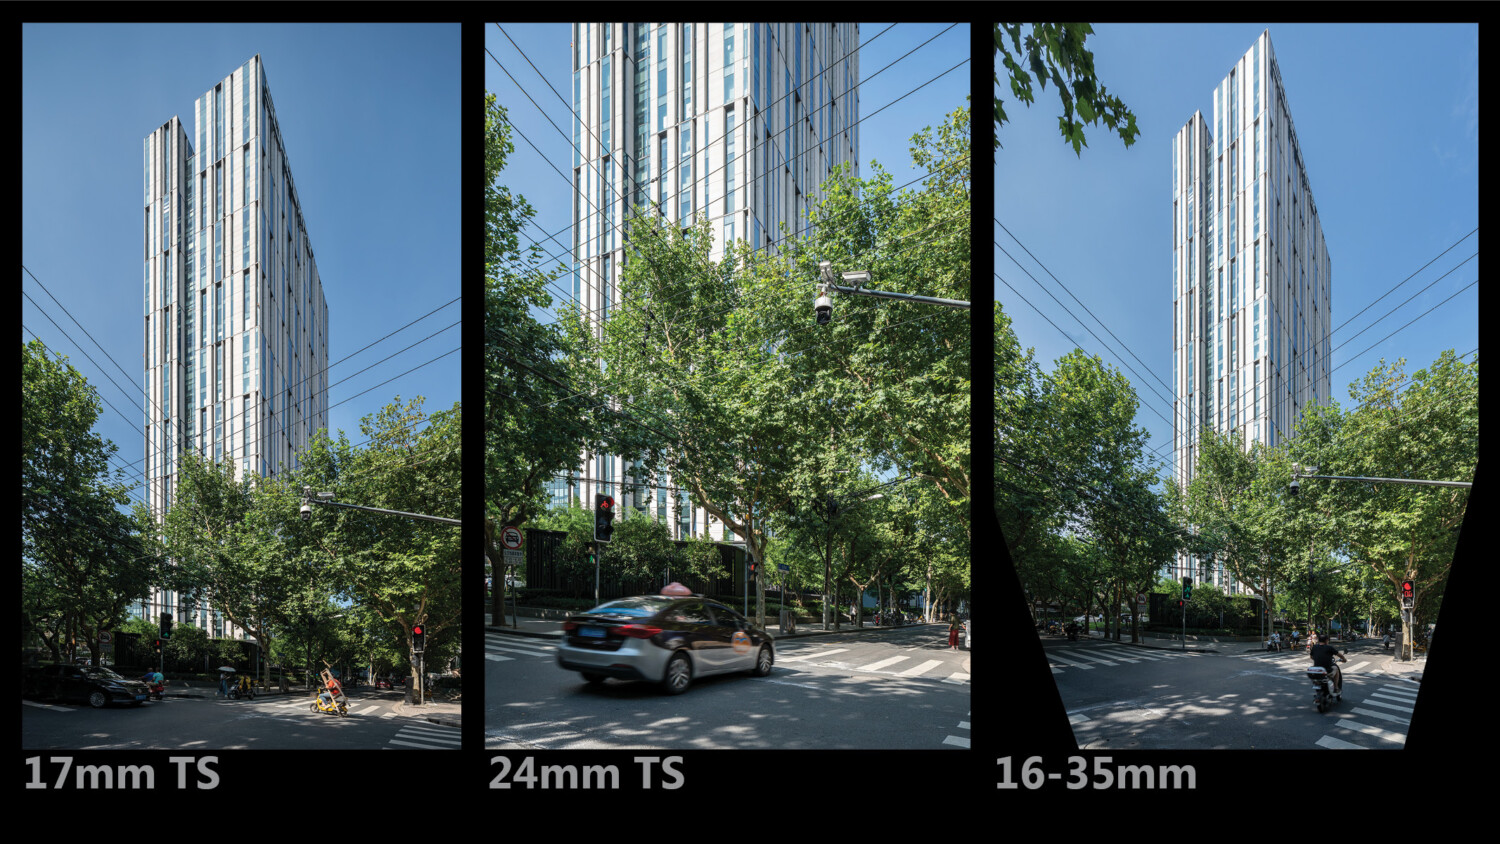
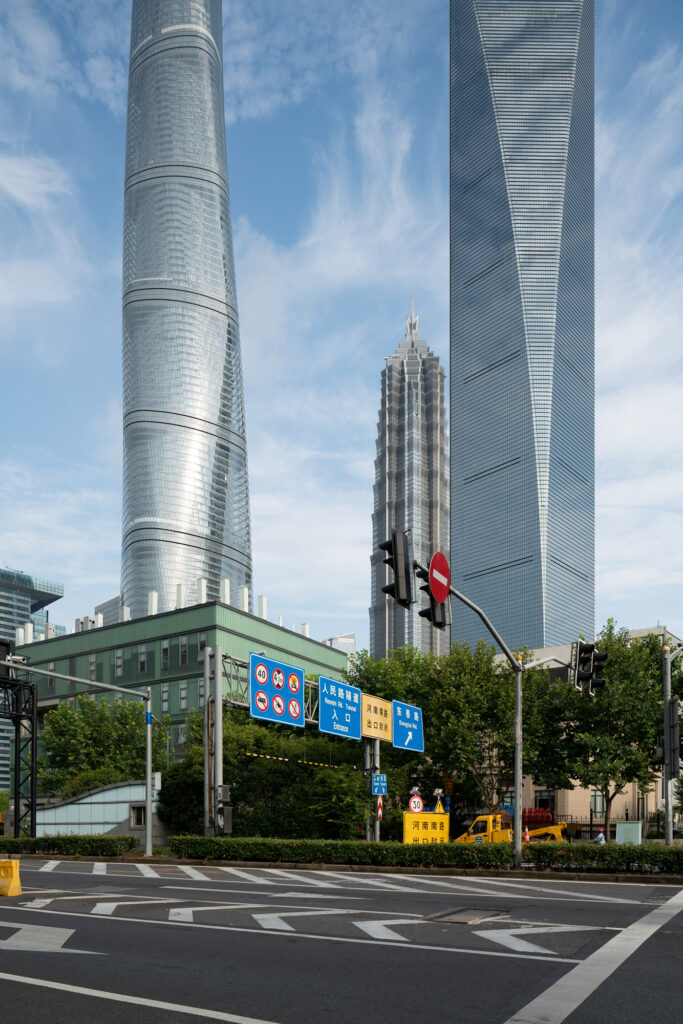
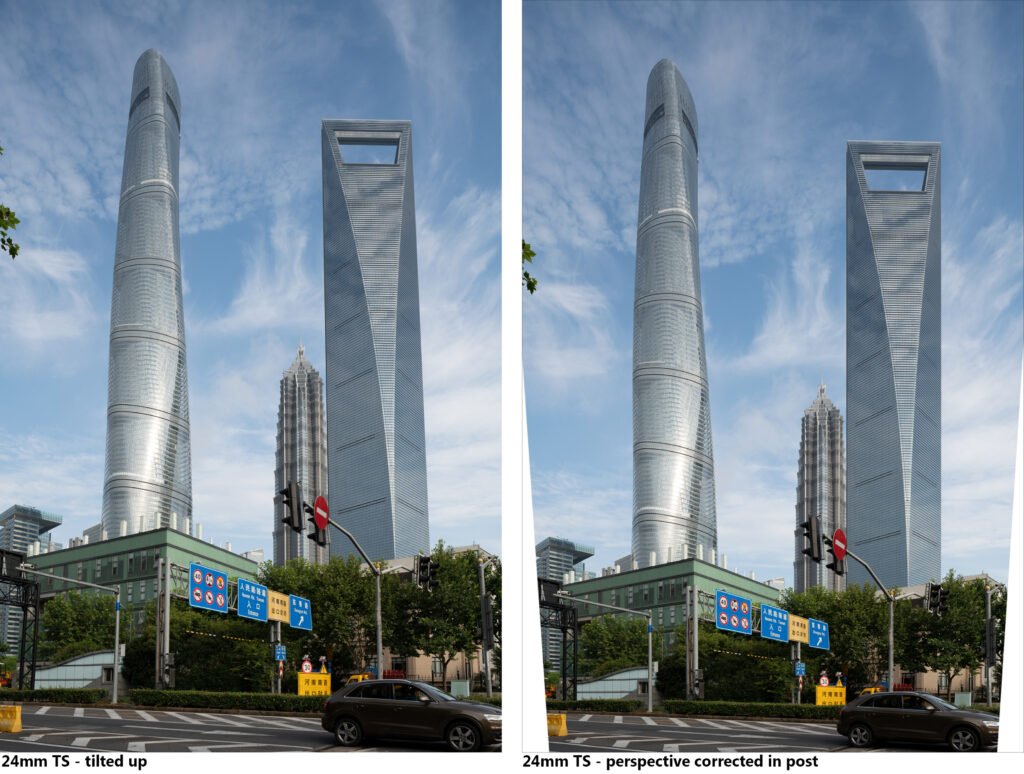
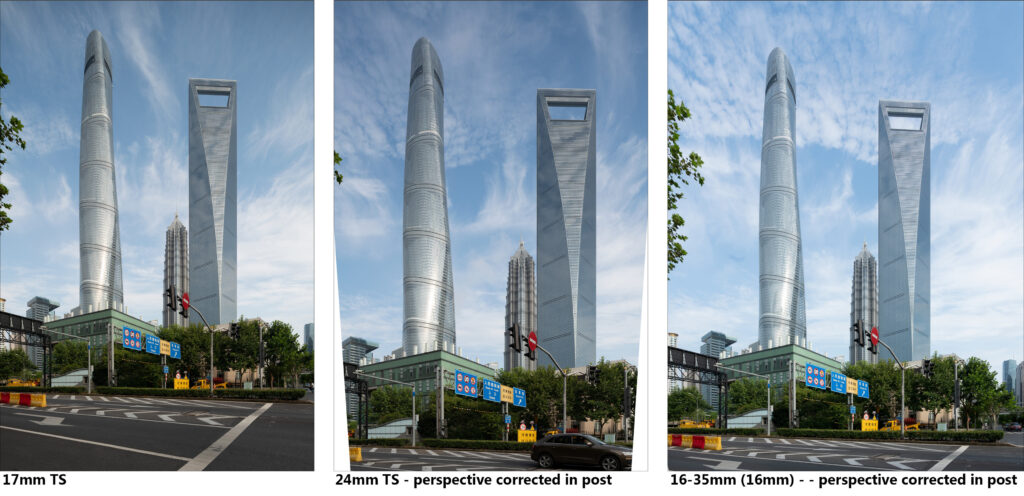
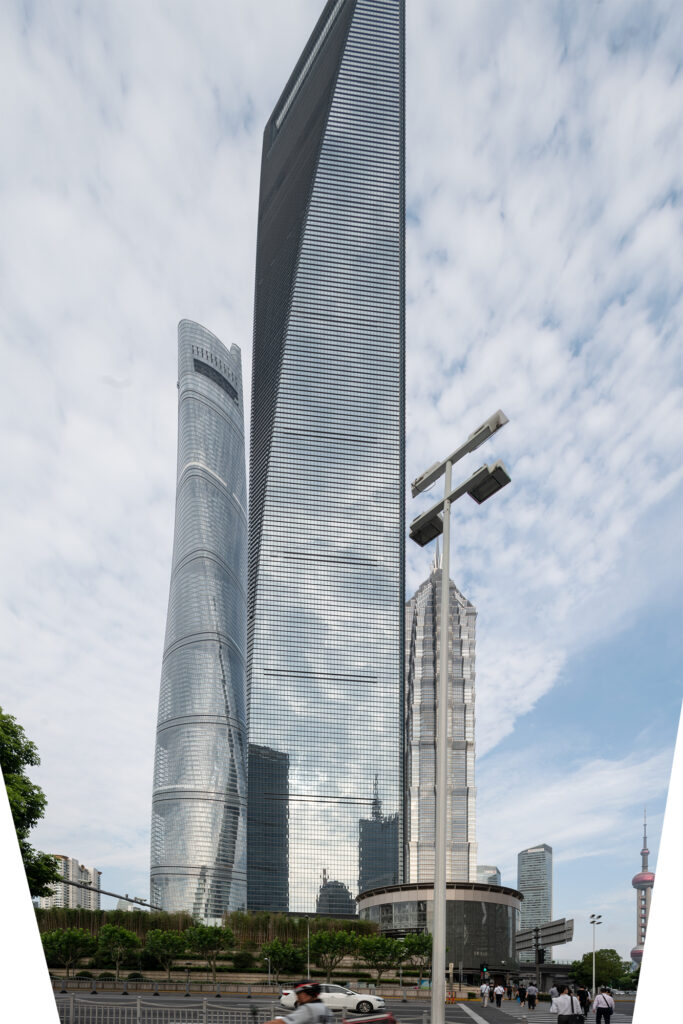
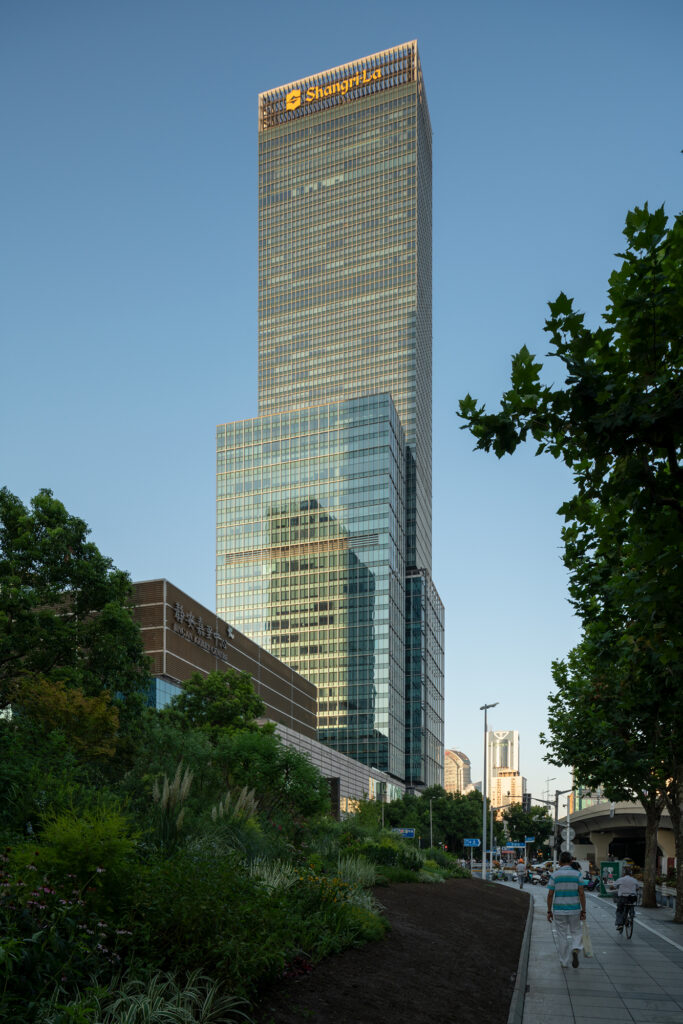
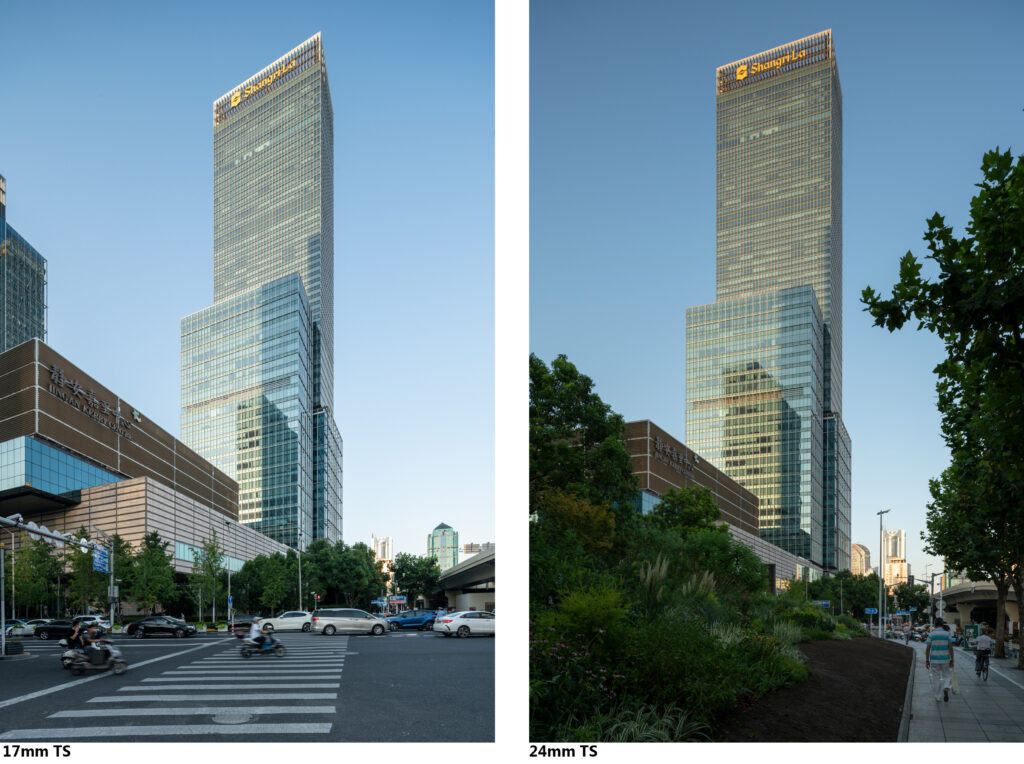
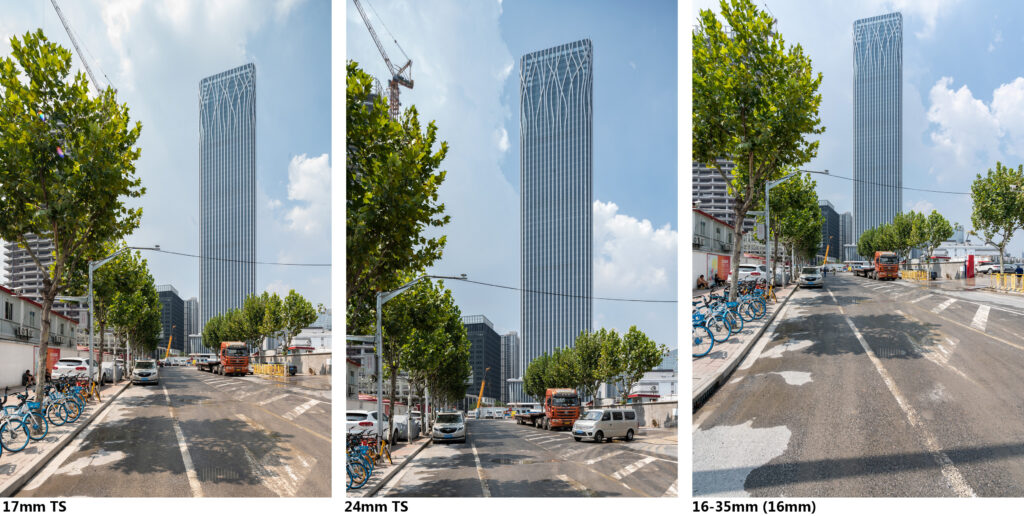
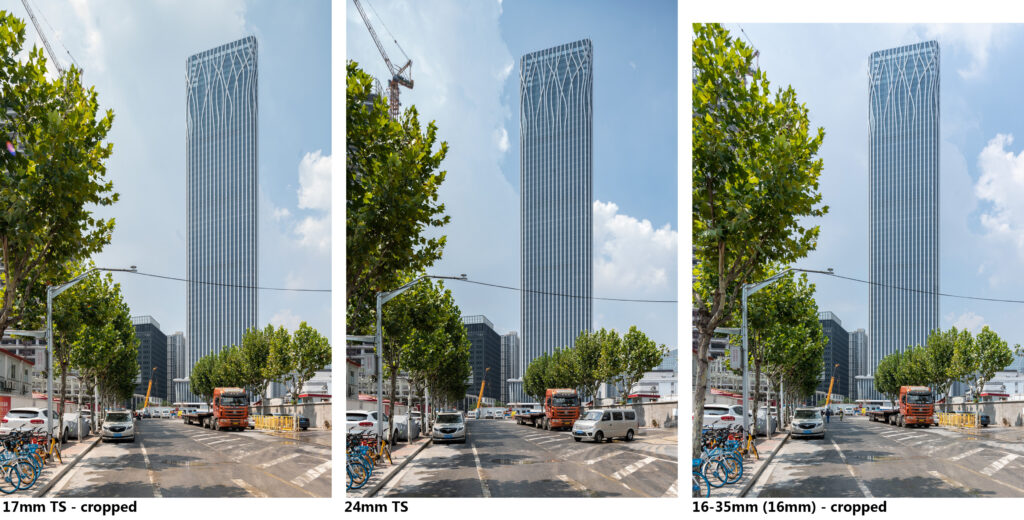
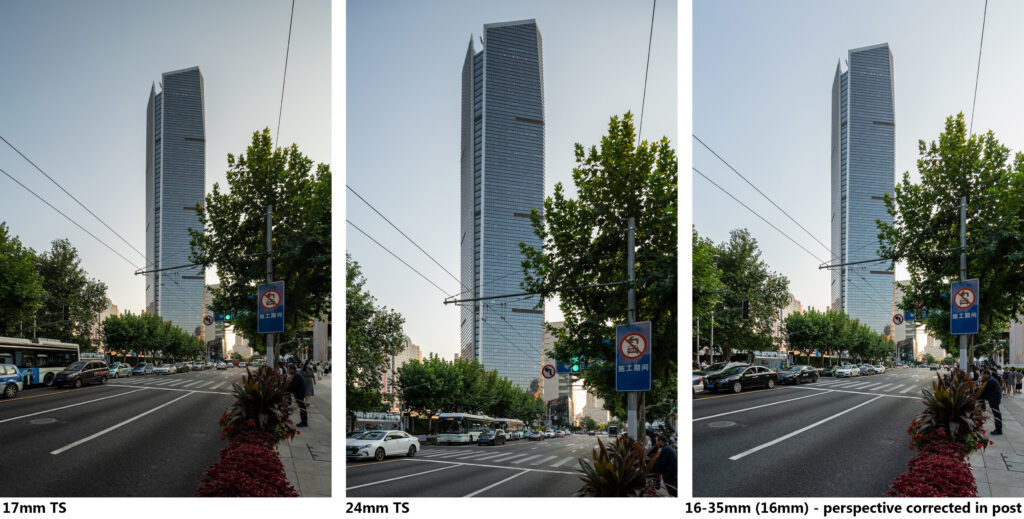
First, let’s head straight to the three big boys in the heart of Shanghai’s financial CBD. The 632 meter tall Shanghai Tower, the 492 meter tall Shanghai World Financial Center, and the 421 meter tall Jinmao Tower. While this is not the most flattering view of these buildings, it’s a good place to start our comparison. This first image below is taken with the 24mm tilt-shift, shifted all the way up with the lens/sensor perpendicular to the ground. As you can see, the height of these towers causes them to be cropped off at the top. Assuming we cannot back up further to get the shot, this presents a problem.
In this situation, because we are far enough back from the buildings, if you didn’t have a wider lens with you, you could simply tilt your lens up to capture the full buildings in the frame. A relatively minor amount of keystoning could be quickly remedied with a perspective correction inside your editing software of choice. This transformation will however cause you to lose the bottom corners of your image – as you can see in the image on the right below. You would then need to either crop in further, or try to pull some content-aware fill or clone stamping magic. Not ideal, but doable.
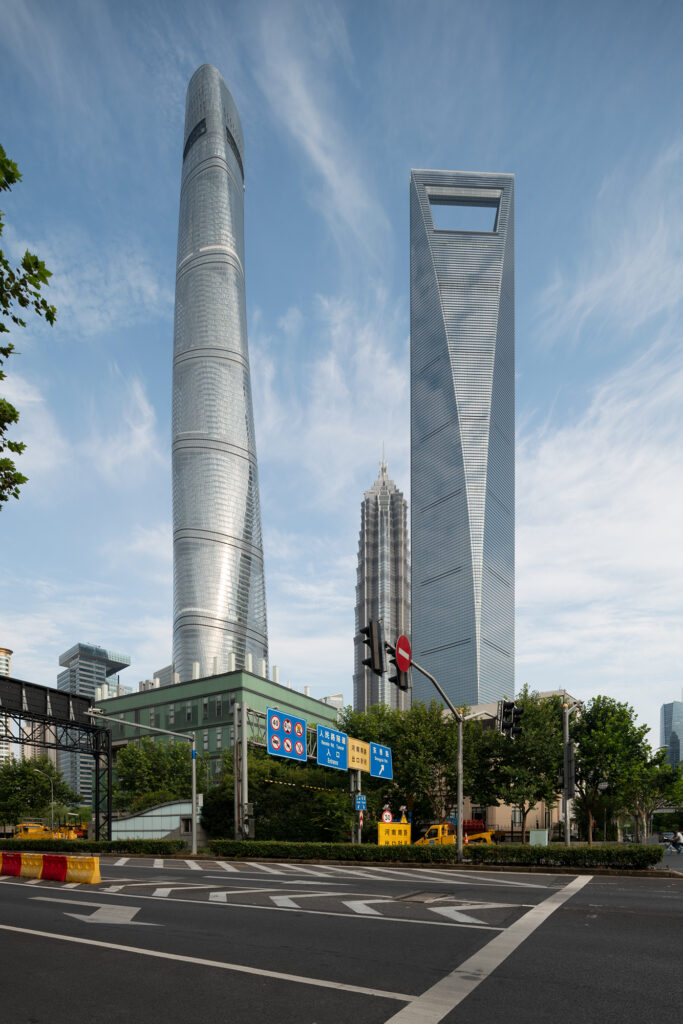
This is where the 17mm can be a life-saver. In the image below, we’re able to easily get three of the tallest buildings in the world in frame, while still getting a good amount of surrounding context as well.
Now let’s take a look at what we can achieve without a tilt-shift lens. Shooting at 16mm, you’ll need to tilt your camera up quite substantially to get the buildings in frame. This will require a more drastic perspective correction in post. Importantly, capturing tall buildings in this way requires quite a bit of foresight to anticipate how much of your image (as well as resolution) you’ll lose due to the perspective correction.

So to summarize this first example, we’re more or less able to get a usable image with any of the three lenses that we’re testing. The 17mm TS causes no issue and affords more flexibility in framing. The 24mm TS requires a tighter crop to deal with the missing bottom corners caused by fixing the keystoning. And in this particular case, the 16-35mm provides us a perfectly usable image.
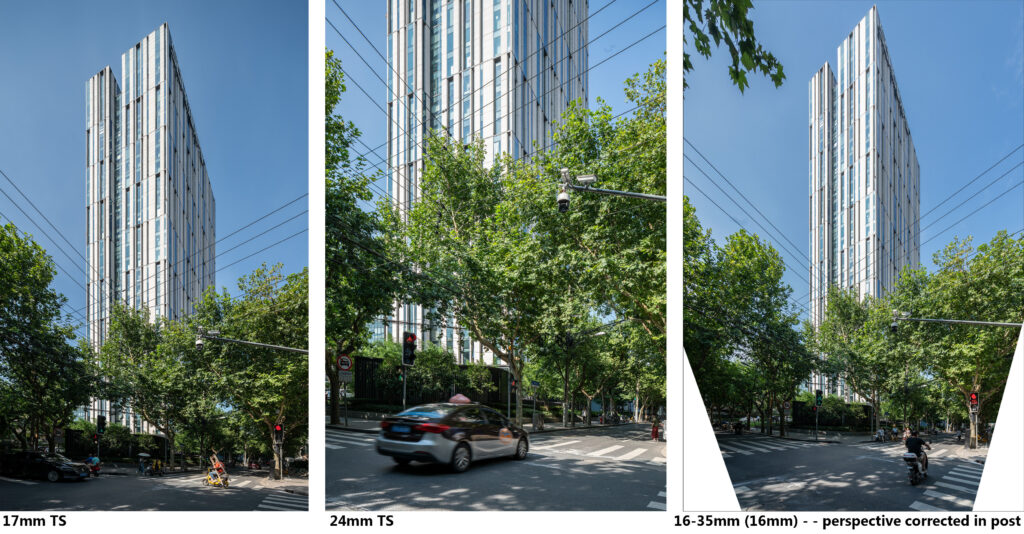
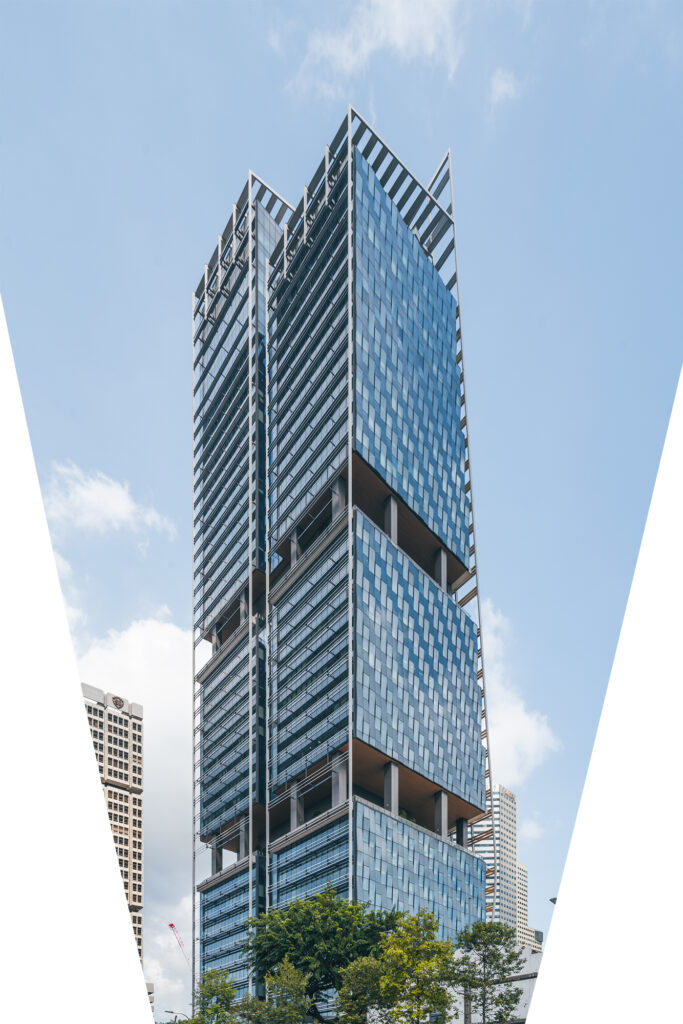
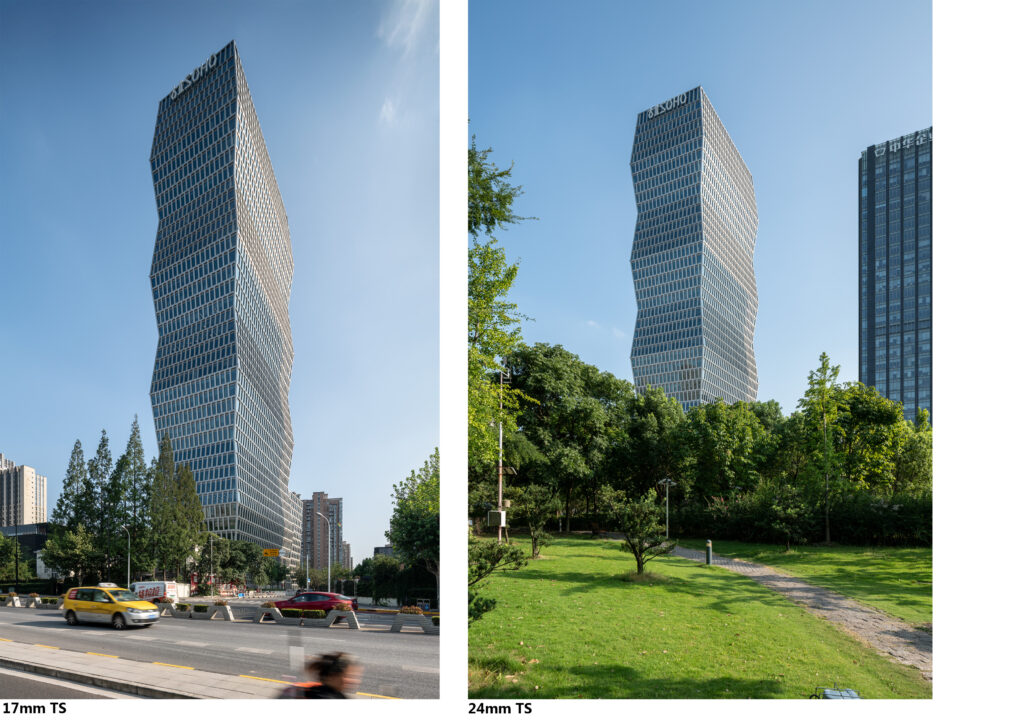
A2 – SOHO Fuxing
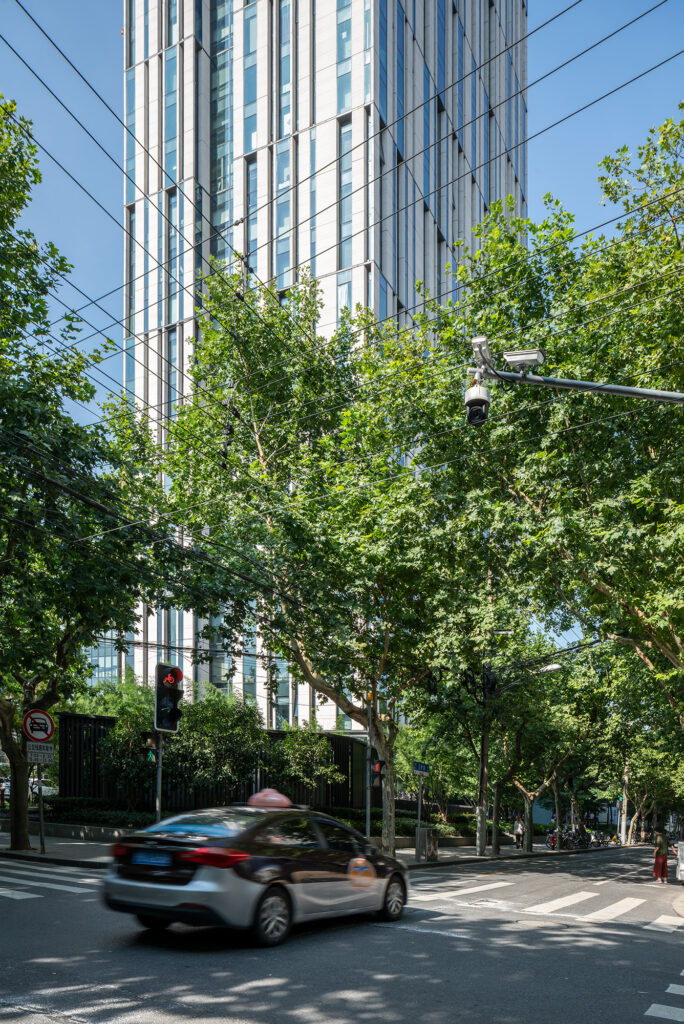
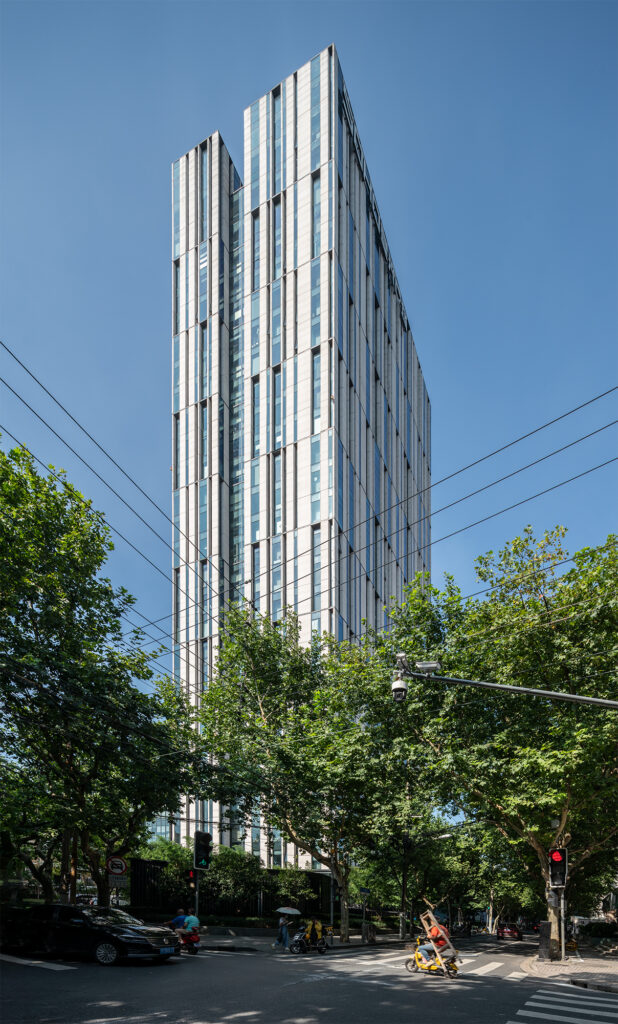
A 100 meter office tower anchors the SOHO Fuxing’s mixed-use development in Shanghai’s Xintiandi area. This tower sits along a tree-lined intersection. Again, it is not feasible to back up any further to capture this shot. Let’s take a look at the results.
Again we start out with the 24mm TS. Because of the proximity to the building, it’s simply not possible to capture the entire building in frame with this lens, even if you were to tilt it upwards.
This situation shows exactly how indispensable the 17mm TS can be. Even in such tight quarters, we’re still able to get the entire building in frame, as well as capture a good amount of foreground – a tree-lined intersection that is quintessential Shanghai.
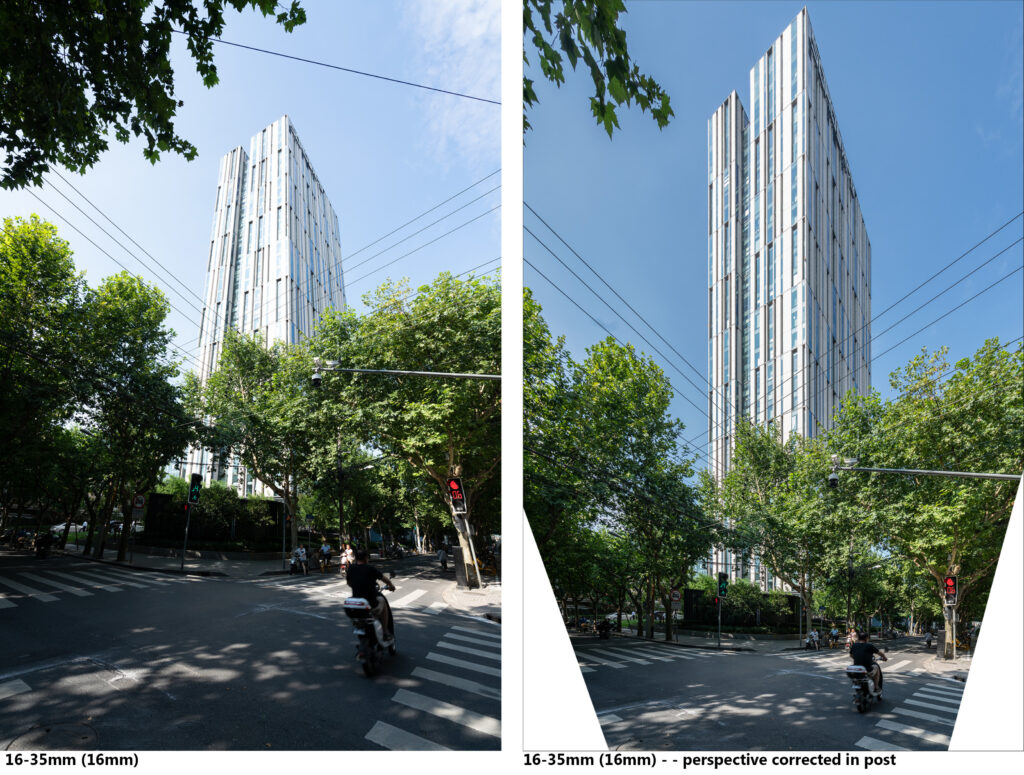
Alright, let’s take a look at whether or not the 16-35mm can make it happen or not. Cranking it all the way 16mm and tilting up, you can see that, after correcting the perspective, we just barely get the top of the building in frame and we’re left with a couple of sizable gaps at the bottom corners. Your options at this point would be to crop in very close and miss out on highlighting the intersection in the foreground, or spend a lot of time trying to fill in those corners and hope no one notices how bad it’ll probably look.
If you had a zoom lens that is even wider, say 14mm or 12mm, you could probably get a usable image here. But the bigger issue is, what happens if you’re doing this professionally and you have a client breathing down your neck? Well, my guess is it would go something like this . . .
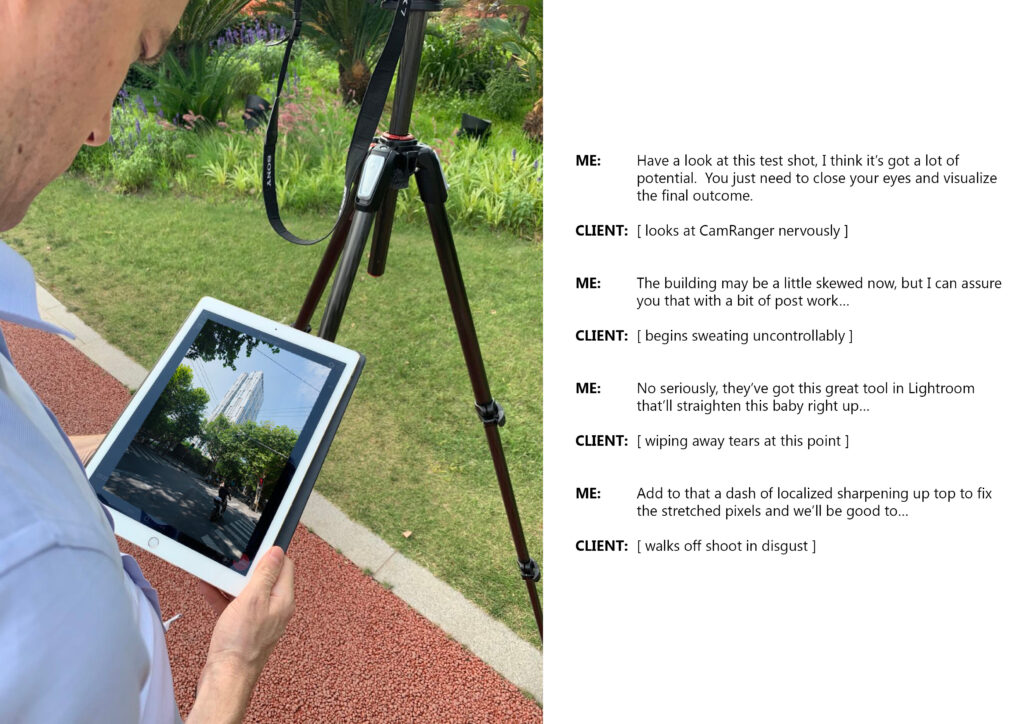
Even if you’re able to eventually get a usable image, you aren’t going to instill very much confidence in the client if she/he is on-site with you. Your process is as much an indication of your expertise, as the final images themselves.
To summarize this scenario, here’s the three image comparison:
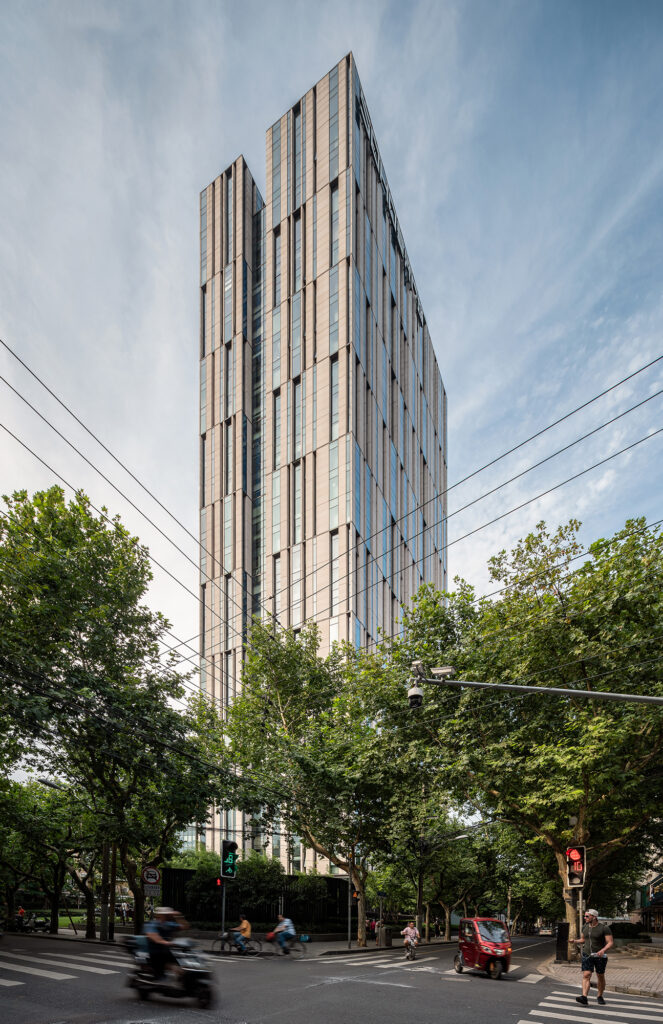
I actually circled back around later in the afternoon, when the light was better and there was some nice cloud cover, to capture this image, which does have a place in my portfolio.
Before moving onto the next scenario, let’s take a break for some comic relief and look at some images I found in my catalog from before I owned a tilt-shift lens, or was out and about without one. These didn’t work out so well.
16-35mm Outtakes
Scenario B – When moving back is no problem
Alright, let’s move onto a scenario where you have the luxury of being able to back up far enough to use either lens. There are a couple things to consider. Firstly, the building will typically look taller and more dynamic when using the 17mm TS over the 24mm. However with the 17mm, things can get distorted quite easily, especially if they are off-center in the frame, or close to the camera. Something else to consider when you’re in this situation are the foreground elements. With tall buildings, sometimes the distance you need to back up to fit the building in frame with a 24mm TS (versus the 17mm) can be significant, and thus what’s in the foreground may be completely different. Let’s take a look at a couple examples.
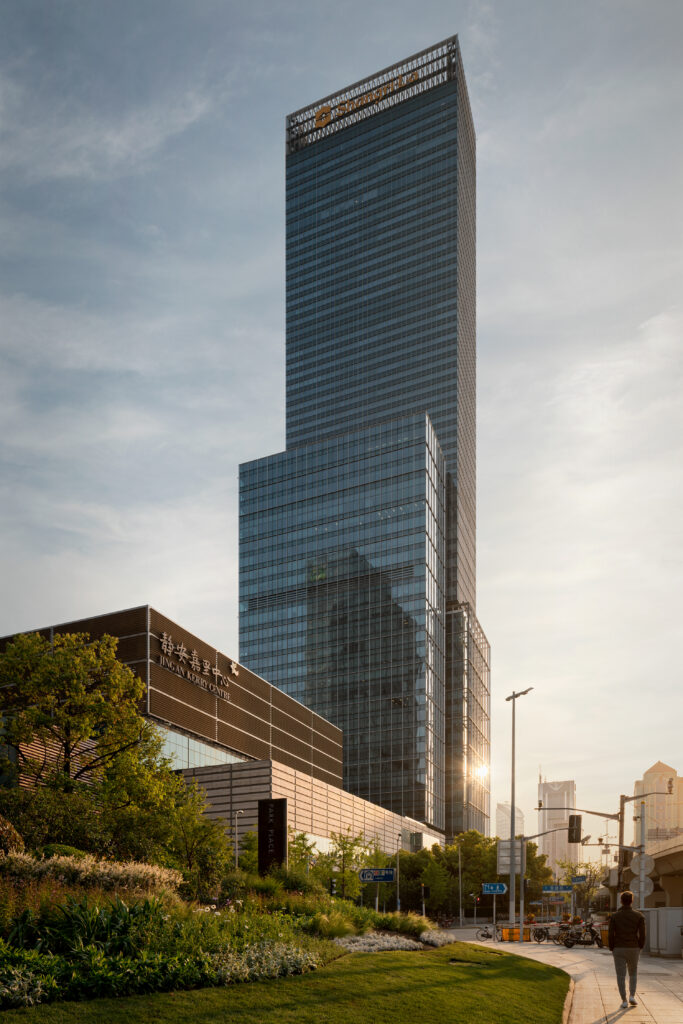
B1 – Jing’an Kerry Center
In the first image below, taken with the 17mm TS, the tower, which despite having a relatively simple, boxy massing, comes off looking quite dynamic because we are so close to the actual building. A lot of architects will prefer to see it this way. The downside is that the podium in the foreground, because of its proximity to the camera and the edge of the frame, gets stretched and elongated which looks unnatural.
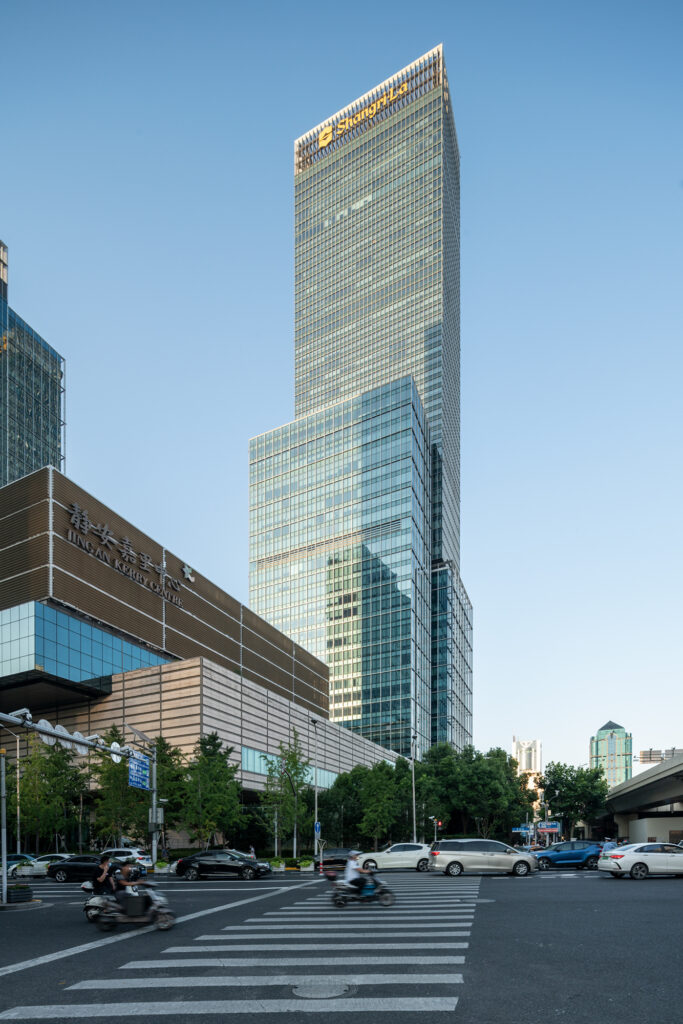
Now take a look at the image taken from further away with the 24mm TS. As you can see, the tower looks more static, but the podium of the building is more realistic. Importantly, rather than seeing road in the foreground, we now see a sidewalk and some landscape.
A side-by-side comparison highlights those differences well. The foreground elements in particular create two vastly different images.
In the end, I decided to come back the next morning to catch the building in early golden hour light. For me, the most interesting aspect of this building is the stacked-box nature of the massing, rather than the form of the tower itself and I chose to shoot it at a time when the light would be reflecting off the ‘side’ of the building. I actually shot this (with the 24mm TS) from in between where I shot the two test images the day before, which required me to tilt the camera up slightly to get the tower in frame. This enabled me to find a bit of a happy medium in the tower’s perspective while keeping the podium looking natural and capturing some of that nice landscape in the foreground.
B2 – Gubei SOHO
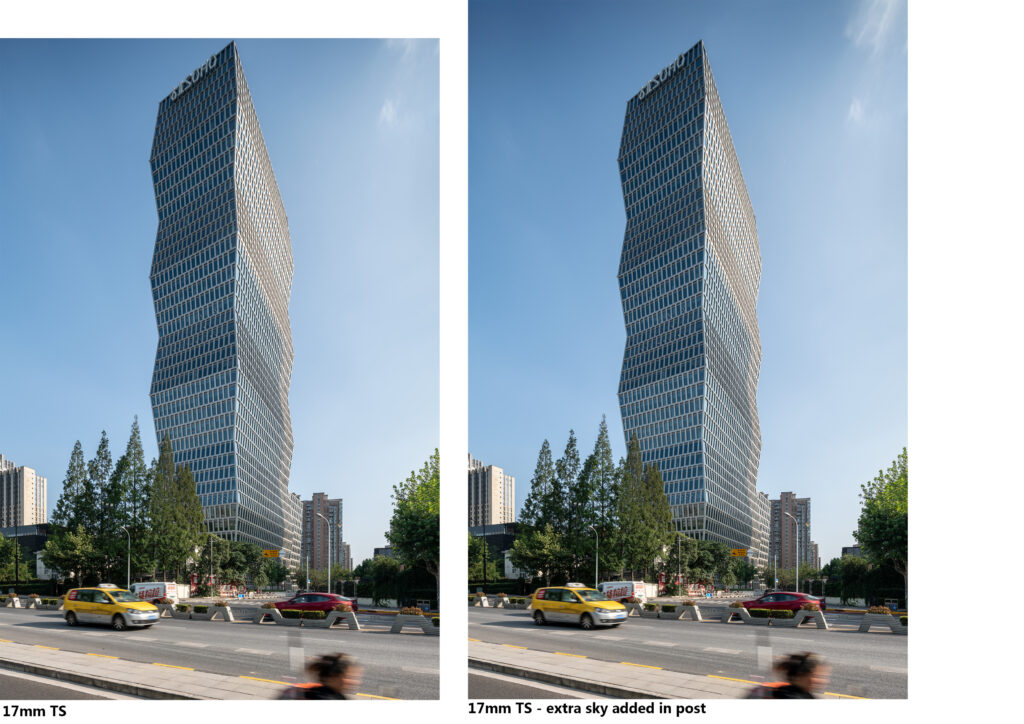
A second example uses the 170 meter tall Gubei SOHO office tower as our subject, and showcases the pro/cons between the two lenses even more dramatically.
The shot taken with the 17mm TS really accentuates the height of the tower. It looks quite statuesque. Again, just as in the last example, we have a busy road in the foreground.

Adding a bit more sky into the frame above the tower is an easy fix in Photoshop.
For the shot taken with the 24mm TS, we back up quite significantly to place the building in context, adjacent to its neighboring park.
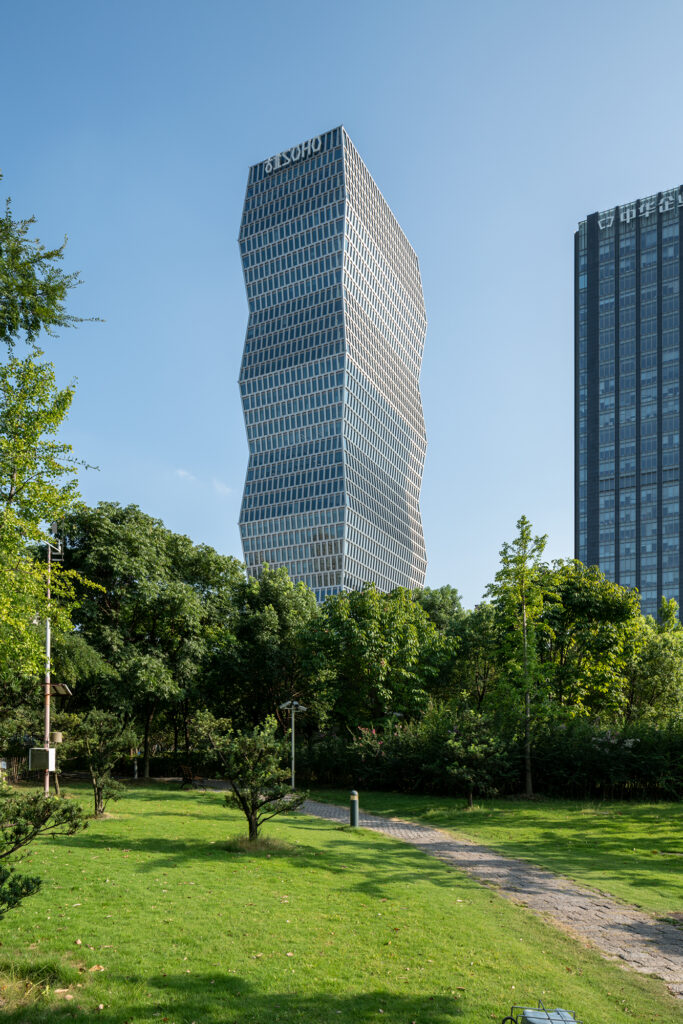
A comparison of the two shows the same building shown in two distinctly different ways. One is about isolating the tower and emphasizing its height. The other tells a very different story and places the building within its immediate surroundings. Both of which I believe have merit and could be post-processed into a solid image.
Scenario C – Shooting from the same spot
Finally, we’ll take a look at the impact different lenses have when shooting a tall building from the exact same spot with no issue fitting it in the frame.
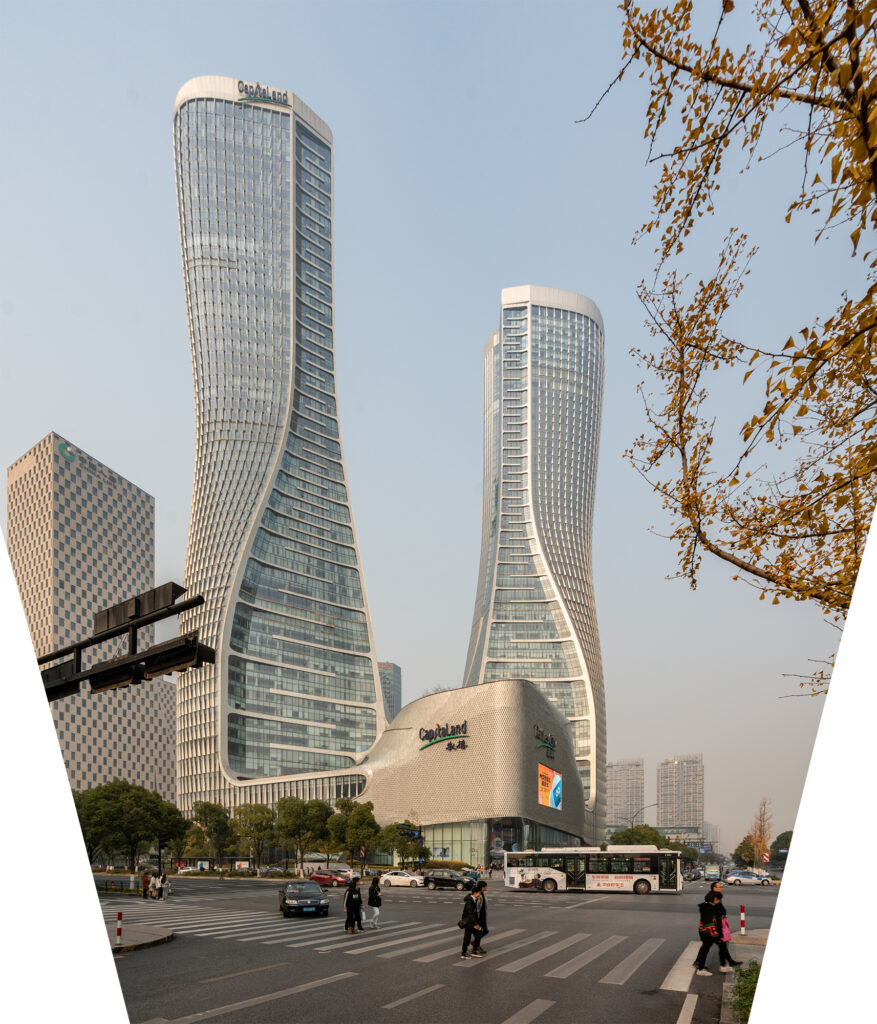
C1 – Qiantan Tower
In this example, we are far enough away from the building to easily fit it into the frame with any of the three lenses. The comparison below is straight out of camera with no crop, all shots with the camera level with the ground.
On a side note, I’m not really sure why I chose to head down to this developing area of Shanghai during the height of summer . . . at midday . . . and during a heatwave. We here at APAlmanac put it all on the line to get you the info you need.
After cropping, we actually get pretty similar results (the difference in resolution not withstanding).
C2 – Wheelock Square
One final comparison shows similar results. The tower looks good in all three. The 17mm TS and 16-35mm provide the most flexibility in cropping, with the ability to show more or less context.
Hopefully, this very un-scientific set of comparisons helps provide some insight into how best to go about capturing tall buildings, and the challenges you may face depending on which lens you’re using. Tall buildings are a fascinating building typology and can be a joy to shoot.
Do you have any thoughts or experiences you’d like to share regarding capturing tall buildings? Let us know below in the comments!