Tilt-Shift Lenses vs Fixing it in Photoshop: Which is better?
Tilt-shift lenses are by far my favorite types of lenses; they offer so much versatility, especially when you’re shooting architecture… I wouldn’t shoot with any other type of lens! However, up until recently I had never actually compared the results you can produce with a dedicated tilt-shift lens vs correcting distortion from a conventional lens in post. Maybe I’m just being snobby, so let’s find out how both methods compare to one another.
Now the title of this article says Photoshop, but I used Lightroom too. The features in camera raw are basically identical so I hope this doesn’t become a point of contention.
For the first comparison, I shot both images with the Canon T-SE 24mm f/3.5L II lens and the Canon 5DSR. This is my go-to lens for a number of reasons. The image quality is superb and the control you have to correct perspective is invaluable. It’s probably the best 24mm lens ever made I think Mike agrees, too… am I coming across biased at all?
To compare both methods, the first image I took was shot without any shift applied and I simply tilted the camera up to see more of the building. The second image was shot with the camera leveled correctly and the shift feature from the lens applied. This allowed me to photograph the building and keep all the vertical lines correct and true. Obviously, it’s difficult to have the same composition for both shots but I tried to keep things as close as possible.
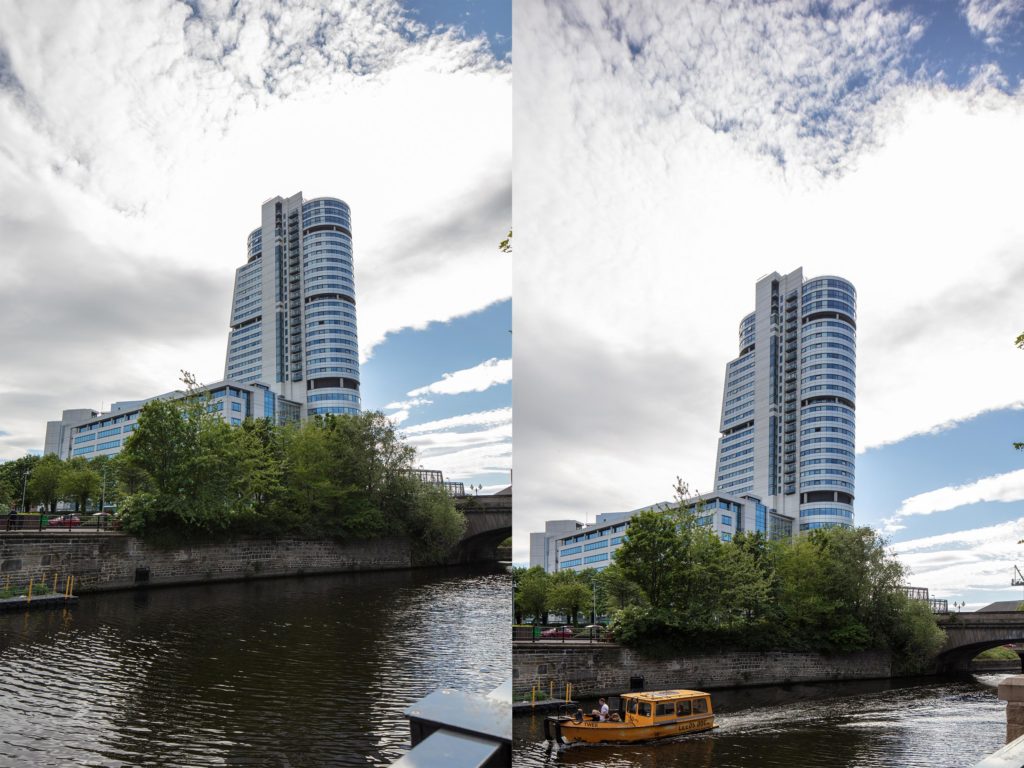
I feel like if they trimmed back some of the trees and bushes the building might look a little bigger.
There are some clear differences between both images, for one, there’s a yellow boat in the shifted image. Also, you’ll notice how the first image is now stretched awkwardly with a greater emphasis given to the bottom section of the frame. The building also looks smaller and looks as though it’s falling backward. This precisely what you’d expect to see if you tilt the camera.
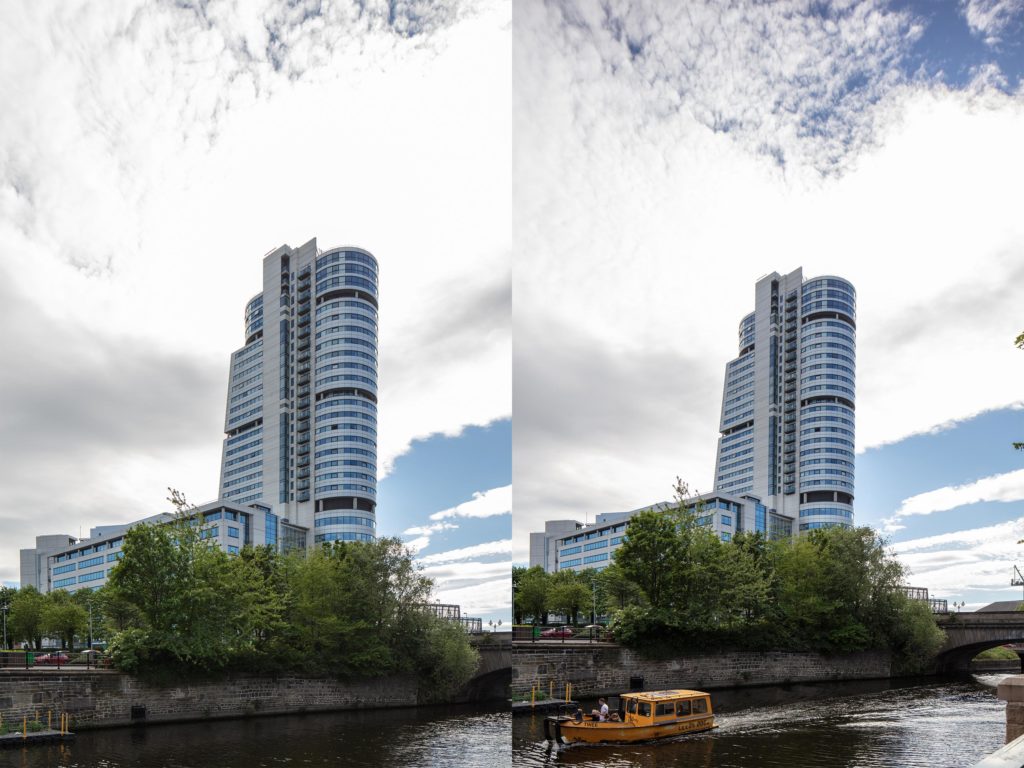
Now that I’ve corrected the non-shifted image it actually doesn’t look that bad, in-fact it actually looks pretty good. The correction applied to this image really works. There a few issues though: for example, the image has lost almost half the resolution. The original file was 50mp but after the corrections were applied I had to crop into the image and this this left me with a 29mp file. If resolution is important to you then this may not be ideal but honestly for most people even a 29mp file is more than enough.
If you were shooting with a lower resolution camera, then losing almost half the megapixels could cause a few issues. The angle of view is also slightly different which is to be expected when you’re required to crop files. Essentially if you’re not using a tilt-shift lens and you require corrections in post then you have somewhat of a crop factor to contend with. Your 24mm lens isn’t necessarily going to give the angle of view of a 24mm lens. At the end of the day though, I don’t consider these issues significant by any means – you could get away with just shooting a little wider.
For the second comparison, I wanted to see if you could overcome the crop factor issues. The best way to do this is to shoot with a wider angle lens, as mentioned above. The images below were shot with the Laowa 12mm f2.8 zero distortion lens and the Canon T-SE 17mm f/4.0L lens.
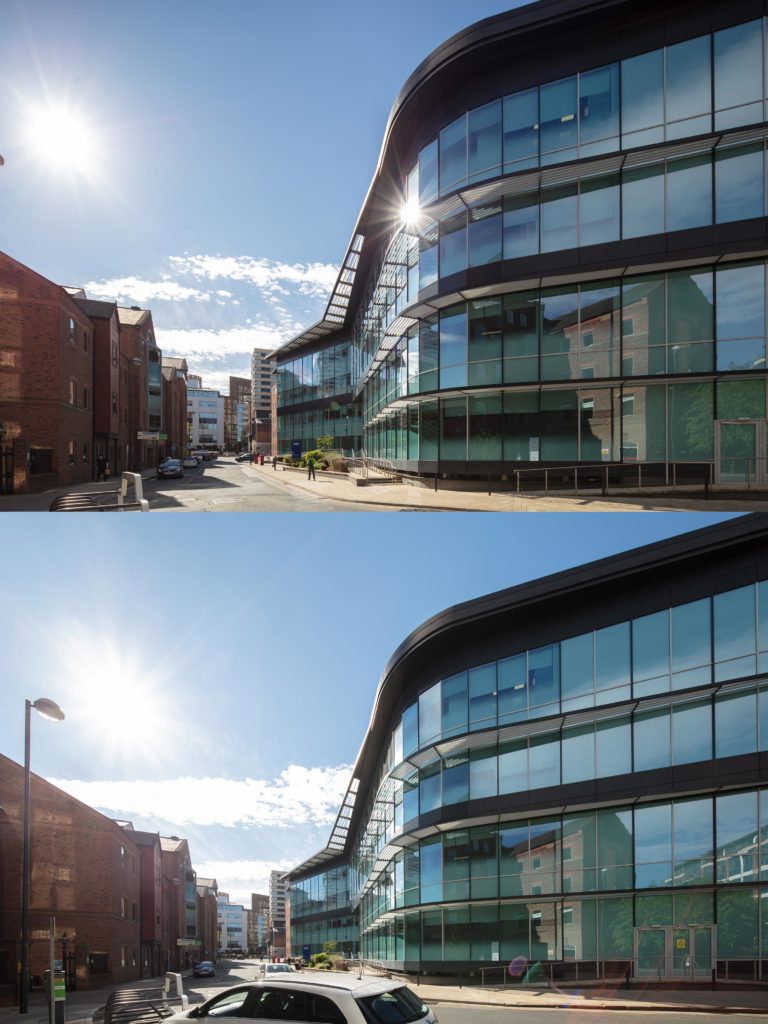
Comparing image quality is difficult because I did use two different lenses, however it would seem that shooting with a wider angle lens can work. The vertical lines are much better than the original image before corrections were applied. I still needed to heavily crop the file but the angle of view is now wider than the 17mm image. Resolution wise, I lost a little under 20mp which is better than before but still a significant amount. The major issue is the fact that it’s difficult to compose correctly when shooting to correct in post. The composition on the 17mm lens is better and if I wanted to get more of the building I could simply shift up the lens and stitch multiple images together.
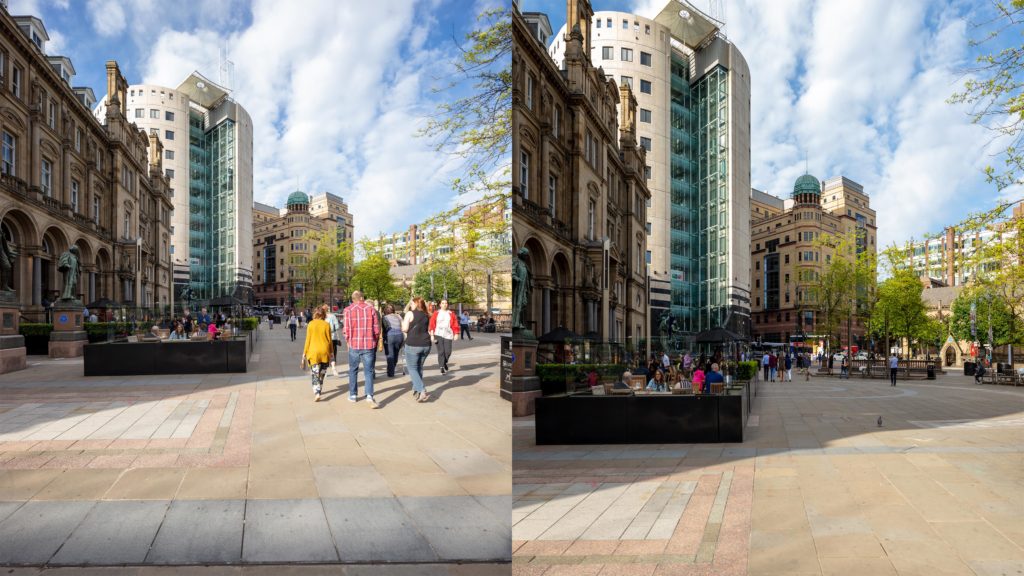
For the final comparison I wanted to see what panorama would look like between the two methods. For this test I used the 24mm tilt shift lens and there’s a clear winners. There’s no way to quickly correct images in camera raw and using the shift features to create a panorama is a far more effective method.
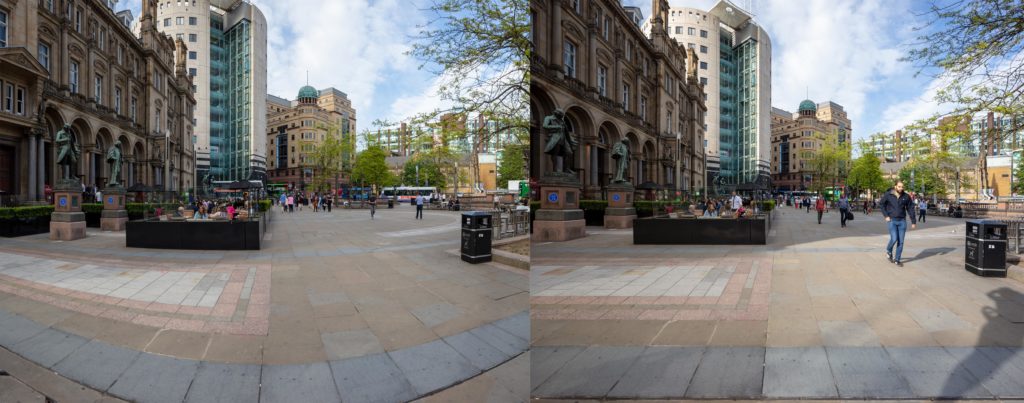
This is also true if you’re shifting the lens vertically to create panoramas. Correcting the vertical lines in post for a vertical panorama isn’t an effective solution because you’re either left with a severely warped image or you end up losing far too much of the image view and resolution.
Final Thoughts
If you’re someone who only shoots architecture casually, then sure, correcting in post is a perfectly reasonable thing to do. As long as you ‘re aware that there are a few drawbacks like loss of resolution and the fact that you may need to shoot with a wider angle lens it should be perfectly acceptable based on your personal standards.
Panoramas without a tilt-shift lens will also require far more effort and many more images (and much more patience!) to create. If you don’t mind those issues then there’s very little reason to buy a dedicated tilt-shift lens.
However…if you are shooting architecture professionally then correcting in post is not an alternative. You absolutely do need to shoot with a tilt-shift lens. Correcting in post forces you to guess what the composition is going to look like and this is kind of ridiculous, especially if there is a client on set and you’re shooting tethered. Composition is the most important factor in architectural photography and you simply cannot compromise this specific area. I appreciate the fact that tilt-shift lenses are expensive but they are definitely worth the money. Renting lenses for specific projects is a great way to start and it’s something that I did too.
Ultimately it comes down to what your requirements are. If you shoot architecture casually then you may not need to buy a tilt-shift lens. For professionals, however, it’s unquestionably a requirement.
