Garett Buell Walks Us Through Photographing a Tiny Home on an Amish Apple Farm
I love the expansive scope of what architecture photography can be. Garett Buell of StudioBuell‘s work is a prime example. Some days he’s in Nashville shooting “Gilly Huts,” other’s he photographing penthouses downtown, but today Garett is taking us on a fun departure from sprawling mod mansions and skyscrapers to a snowy Amish apple orchard in Pennsylvania. Garett is showing us around the Luna tiny home designed by David Latimer of New Frontier Design built by Liberation Tiny Homes. Fortunately, Garett took the time to spell out so much of his process for us, from making custom equipment out of old drum hardware to the advice he would give anyone getting into photographing this style home.
“I spent almost 20 years living in tour buses nearly year-round in my previous life as a musician, and my love for the simplicity and organization that road life forces really draws me to the Tiny House movement and especially David’s homes for his attention to flow and problem solving, meticulous storage design and always adding a flare that most tiny homes lack,” Garett explains.
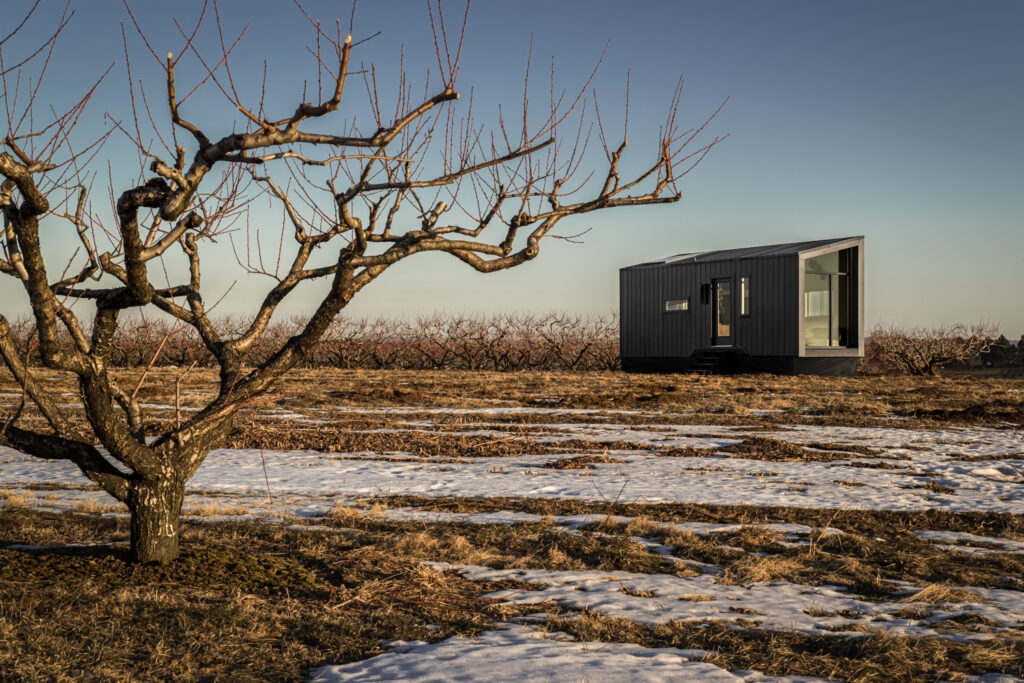
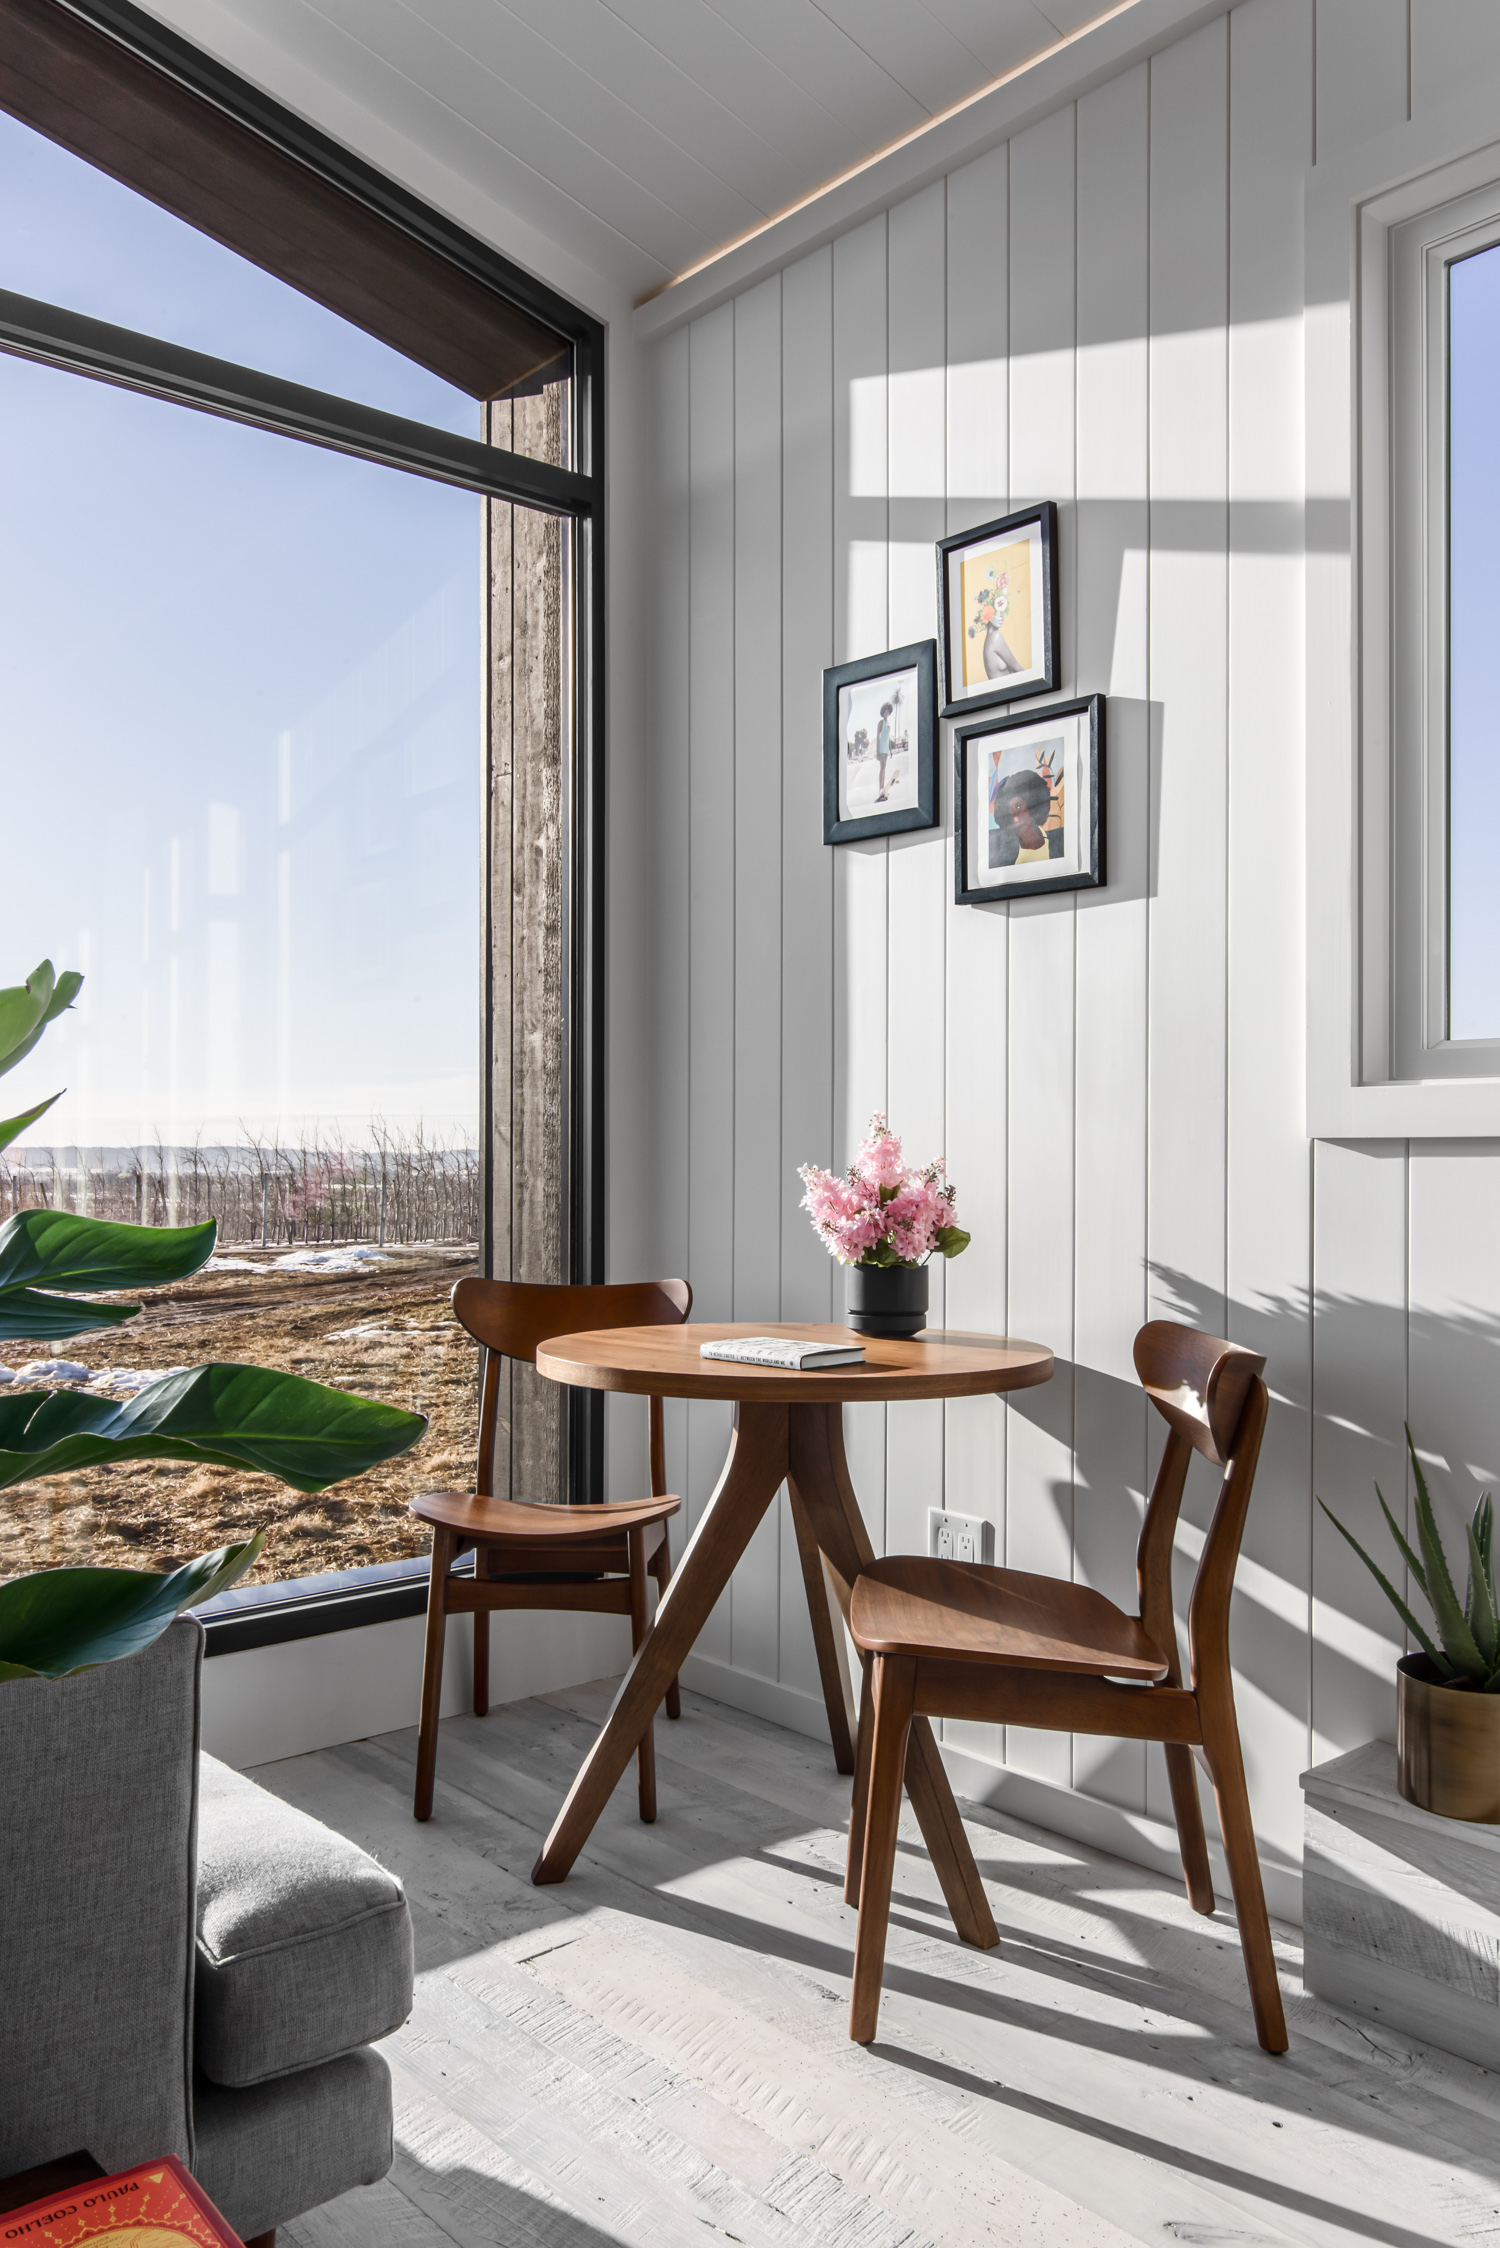
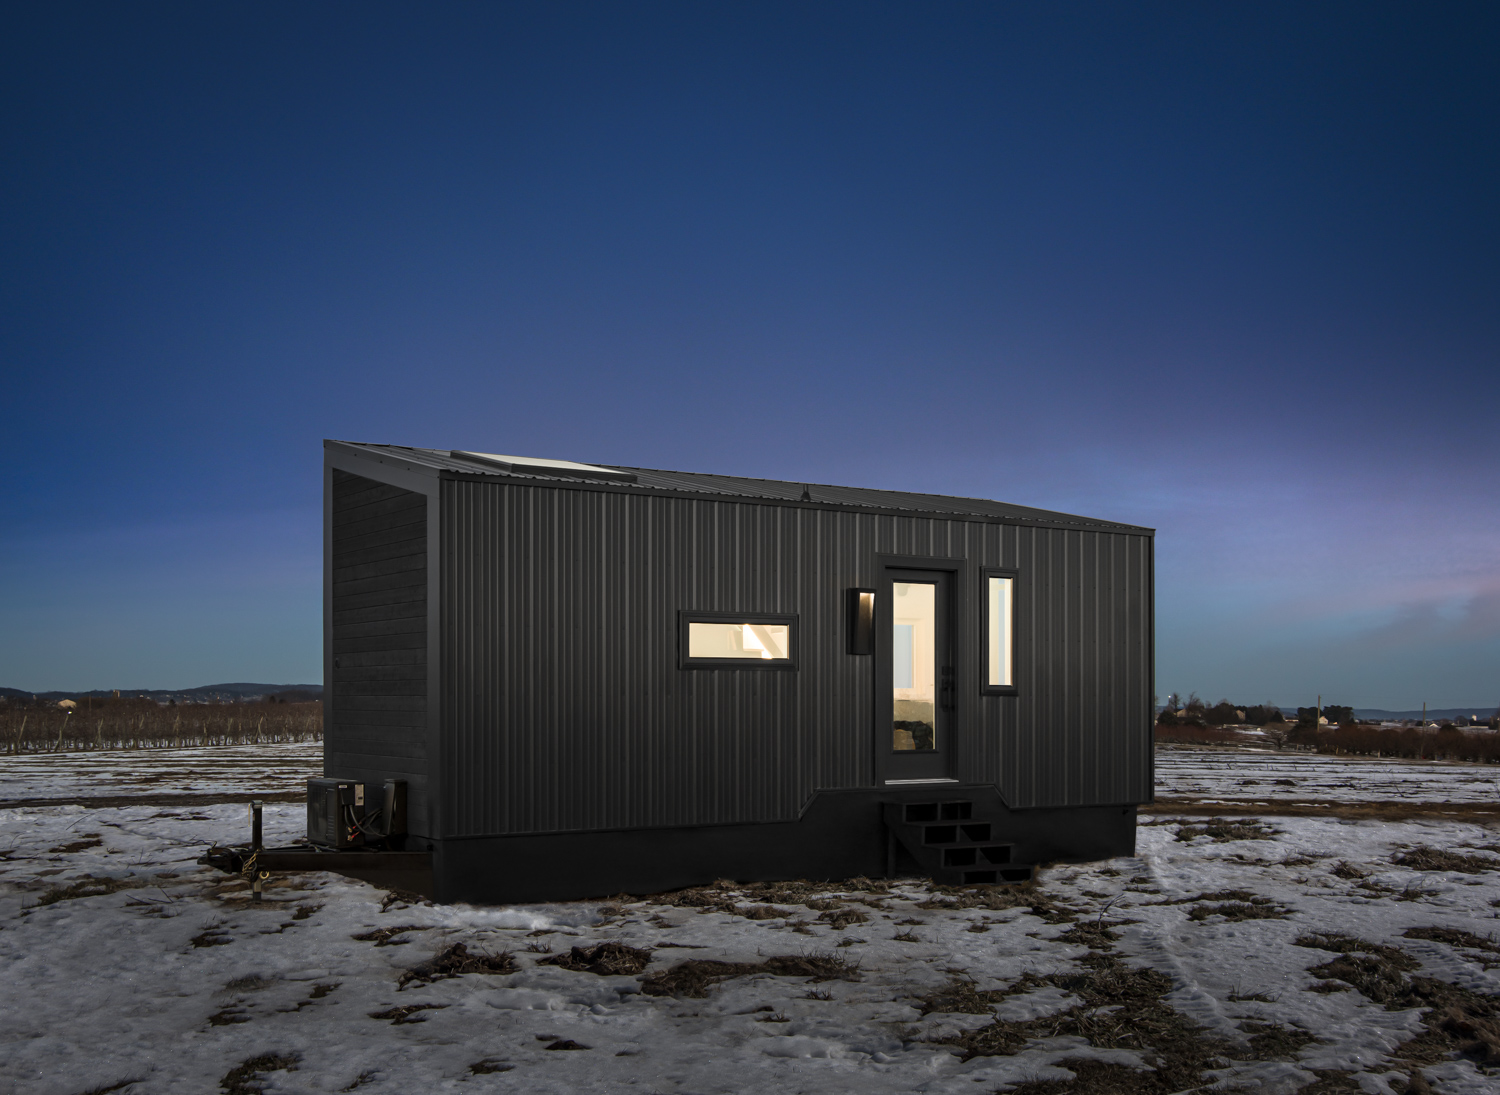
Photographing the Luna required that Garett spend two days in a cold open field between the groves of trees. As someone who lives at the tippy-top of Maryland, almost in Pennsylvania, I can attest that the winters are cold and windy as can be. My hands are turning purple just thinking about it! In this photograph, Garett alludes to the nature of the tiny house, showing that it can exist anywhere.
“I learned that shooting tiny homes are definitely challenging in almost every aspect. One would think because they are small, they should be equally quick to shoot…but once you start trying to manage the camera placement and lighting, staging etc, it becomes clear from the first shot that it’s not going to go by quickly. Exteriors are not too bad although it can be a challenge to be creative with the subject placement in the frames when the set is not ideal.
Just getting a tripod in place takes some planning as well as keeping it free from bumps and movement…and there is plenty of movement in and out of the home to place/replace staging items, turn on and off lighting, adjust pillows, faucets, bedsheets, etc. The available space is usually either tight or nonexistent! I don’t like to shoot anything wide so I work hard to find compositions that bring it as close to reality as possible and when you have nowhere to go with a full-size tripod, it gets difficult and time-consuming. I try to utilize doorways like the front door, bathroom doors, side doors. In some setups, the tripod is placed half inside and then the other half balancing on steps or a ladder outside —anything we can utilize — so imagine finding the best angle and realizing that you have to not only balance the tripod but also find a way to get to the camera for adjustments. Also, the homes move ever so slightly when walking in them as they are on trailer beds with wheels – so there’s another challenge, especially when the process involves masking together comps in PS during post.”
Garett shared that he uses a barrage of ladders and tripods — both full sized, table top tripods, and “alternate tripods utilizing drum hardware multi clamps (from my previous life as a musician) made of metal to attach a monopod to light stands, drum stands, or the ladder.”
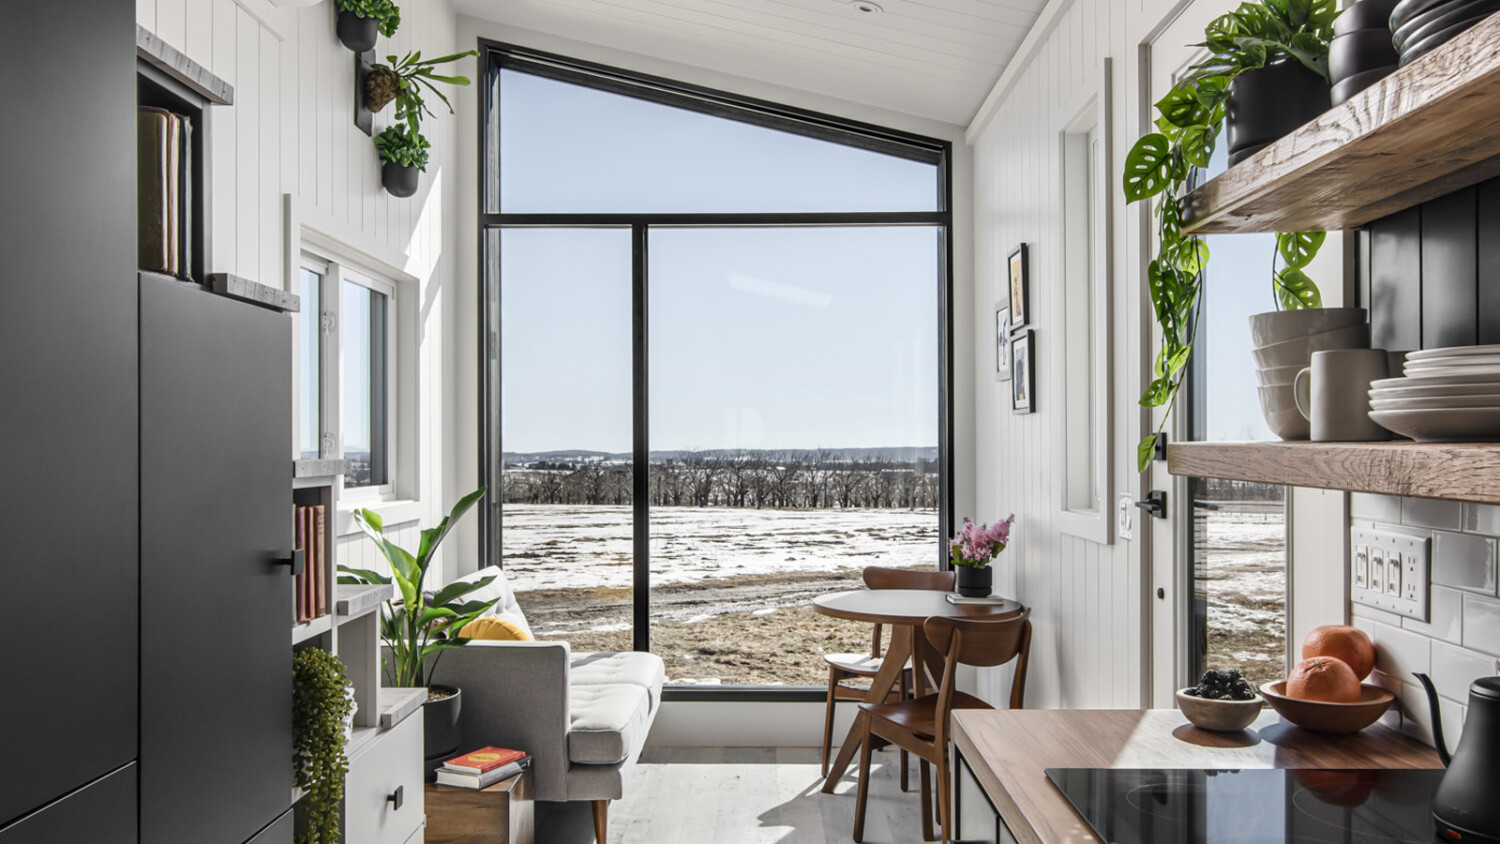
He continues “So with all that in mind, this home, the Luna was actually harder AND easier than previous models. The Luna only had one normal-sized door on the side, right in the middle, so getting any shots from there was rarely possible. It had a large full wall window on the living room end that was really the only ‘view into’ the entire home, so I was able to utilize that angle from the outside well, although for the interior focused shots, they had to be done closer to evening to minimize reflections on the glass. (I had a great idea of taking Large amounts of blackout cloth to hang on a backdrop stand to aid for some day shots, but the conditions of the site, cold, snowy, and then quickly muddy made it near impossible to get it all put together and balanced so I decided against it and to just shoot a couple of setups later in the day.”

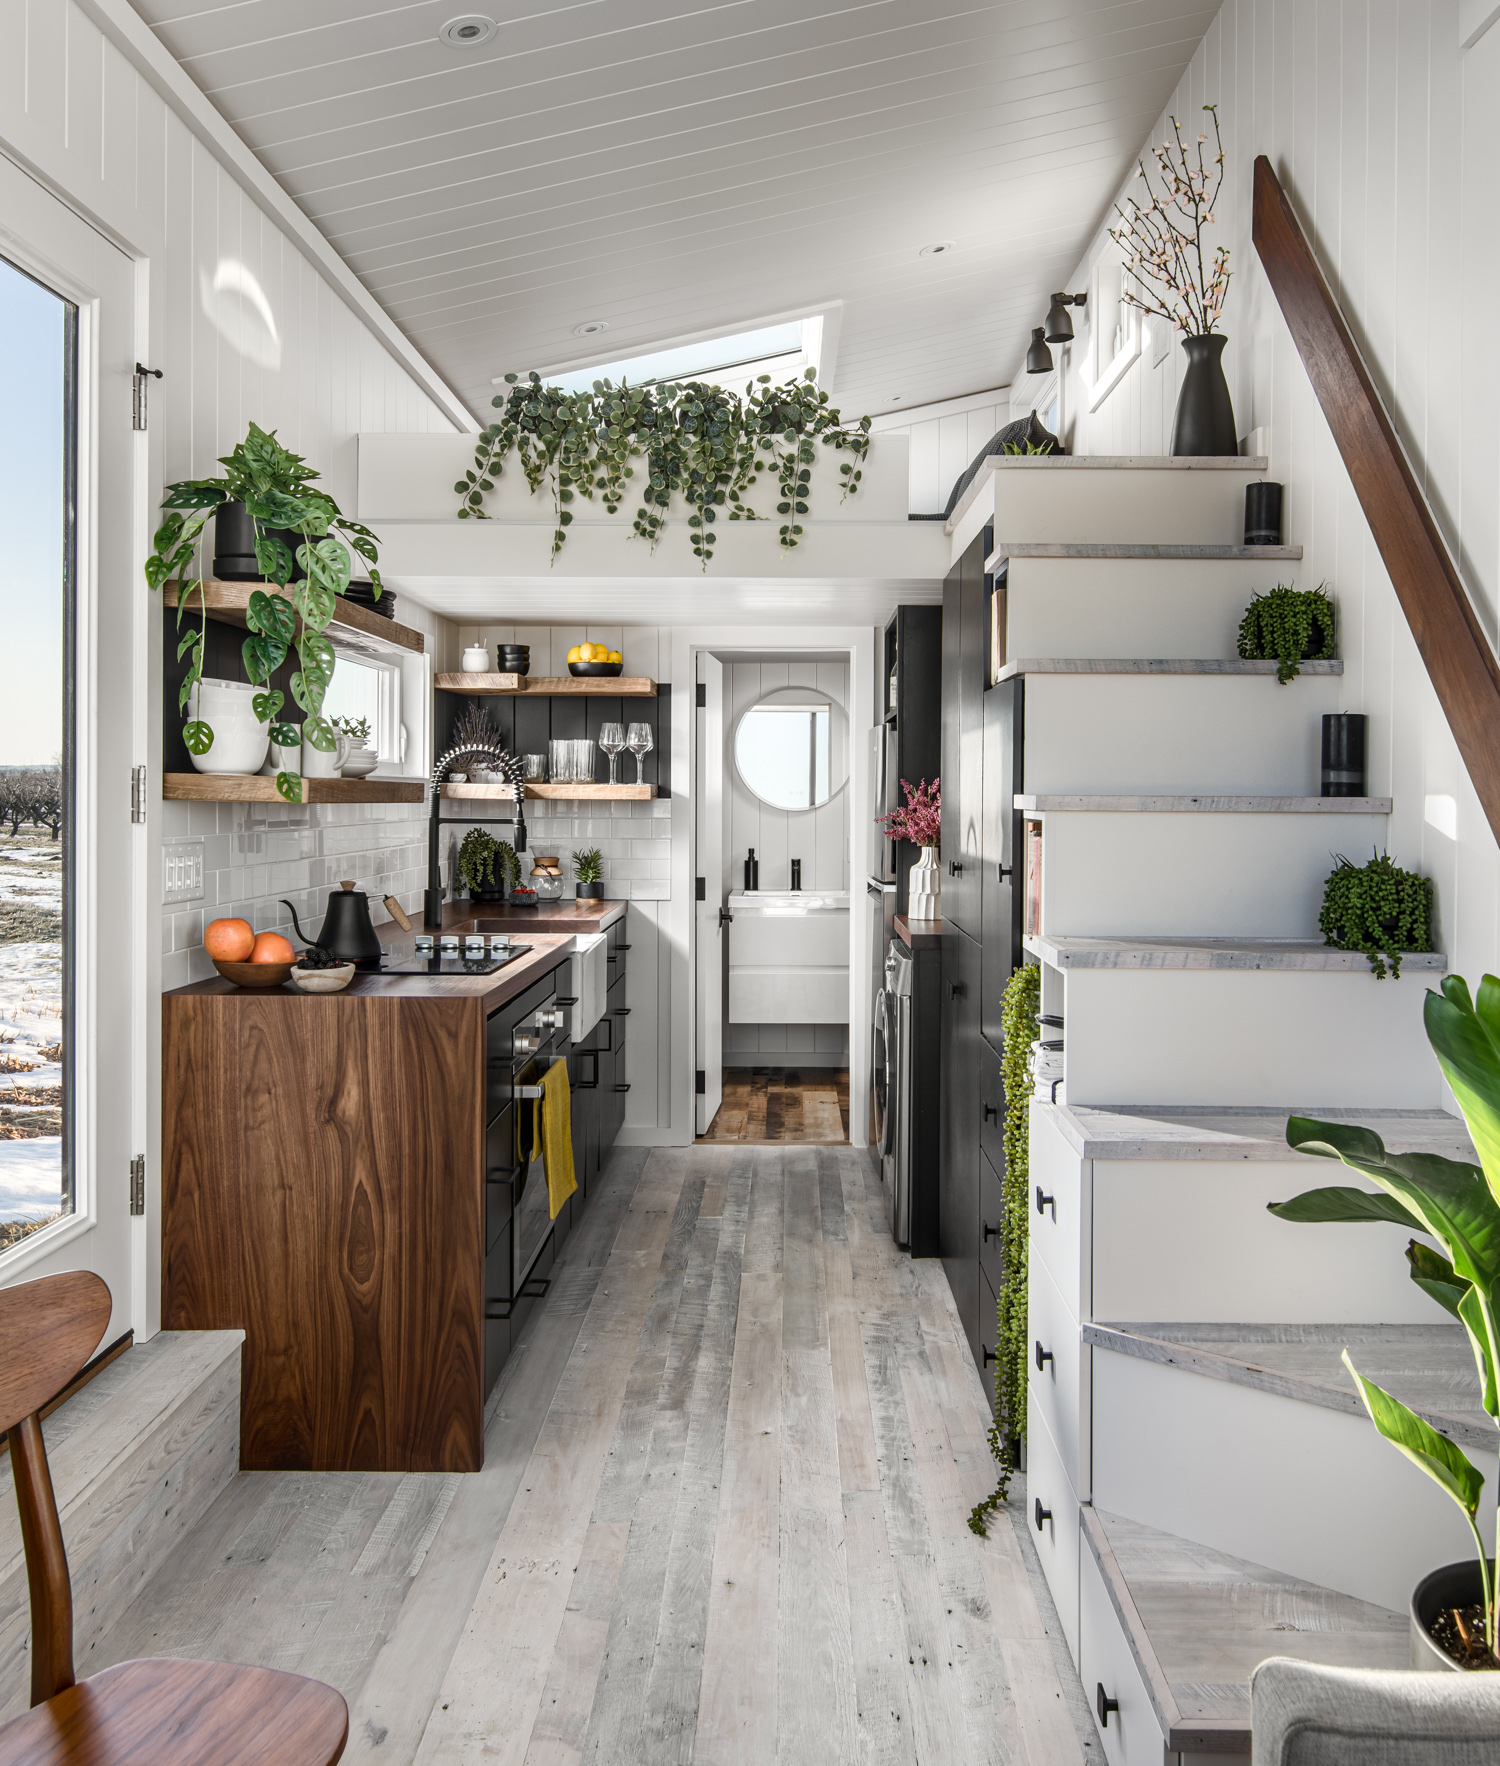
“It was easier,” he goes on to tell, “because it was well laid out with lots of floor space and the loft had an actual staircase built into the design so I had a place to set up without needing to construct a lift for the camera position. Also, with the way the interior of this home was designed — being able to see everything from one end to the other — my main setups could be squared off and shot straight down the center from both sides, so it was actually lots more fun and quicker paced than most of the previous homes.”
This one-point perspective, rich with leading lines, visually lengthens the Luna. Our eyes are driven through the frame, picking up on all the details and intelligently designed uses of spaces. Another thing I particularly like about this photo — and really all of Garett’s work — is his color management. His whites are crisp but not eye-watering or overbearing. There is good contrast and still a sense of warmth in the browns, greens, and yellows. All in all, his photos read as clean and tidy but still rich and lively.
I was extremely curious about Garett’s methodology when it comes to lighting and processing these images. It was pretty evident to me that he used some kind of supplemental lighting to craft these incredibly clean, well-polished scenes…but what does that actually look like in a space this tight and unforgiving to work in?
“I do 99% of my work now through compositing,” Garett shares. “I shoot ambient frames, as well as strobe lit frames with moonlights and speed lights and I almost light every shot no matter what. Not only do you benefit from lighting to help even out dark and dim areas in a scene but you can also control color, bring out the texture on surface treatments, and add shadows or help shape a flat scene if you don’t have blackout materials or the time to use any. In the Luna, the shots taken from the living room side looking to the back were all lit heavily by the full window that was at my back. I could have covered it but then ALL the light disappears and the small side windows and door window is all that’s left — it just wasn’t enough and it is the main light source built into the home so I just left it open and tried to shape utilizing the strobes.
For the strobe lit frames, I use a one light method in these homes almost every time now as it really gives me the most control in post-production for clean frames without light bleed or any of my stands in the shots. It’s even harder to try to hide lights or utilize stands with virtually zero space, so I will light paint a scene together with the key lighting emulating the natural light flow from the windows and adding in a few extras for artistic use, and some opposing bounces to give me an easier masking task in Photoshop.
Most of the time shooting is setting up the scene and getting the camera pointed in the best direction and then shooting goes quick with me walking around with the monolight by hand. Sometimes I have an assistant or in this case, the client, hold the flash outside a window for some extra ‘sunlight.’ If I know I’ll need those in most shots then I’ll leave them on stands and turn them on and off if needed. I move quickly, just a wireless remote for the camera shutter and wireless on the strobes so it’s simple and efficient. I’m so used to doing it now that I just guess and check before I move on. I don’t always use CamRanger but on the Luna, I did since my main lens lost its ability to autofocus on the second day (at all times…in the middle of a field on an Amish Apple farm…of course) … but, oddly it would autofocus with CamRanger for some reason.”
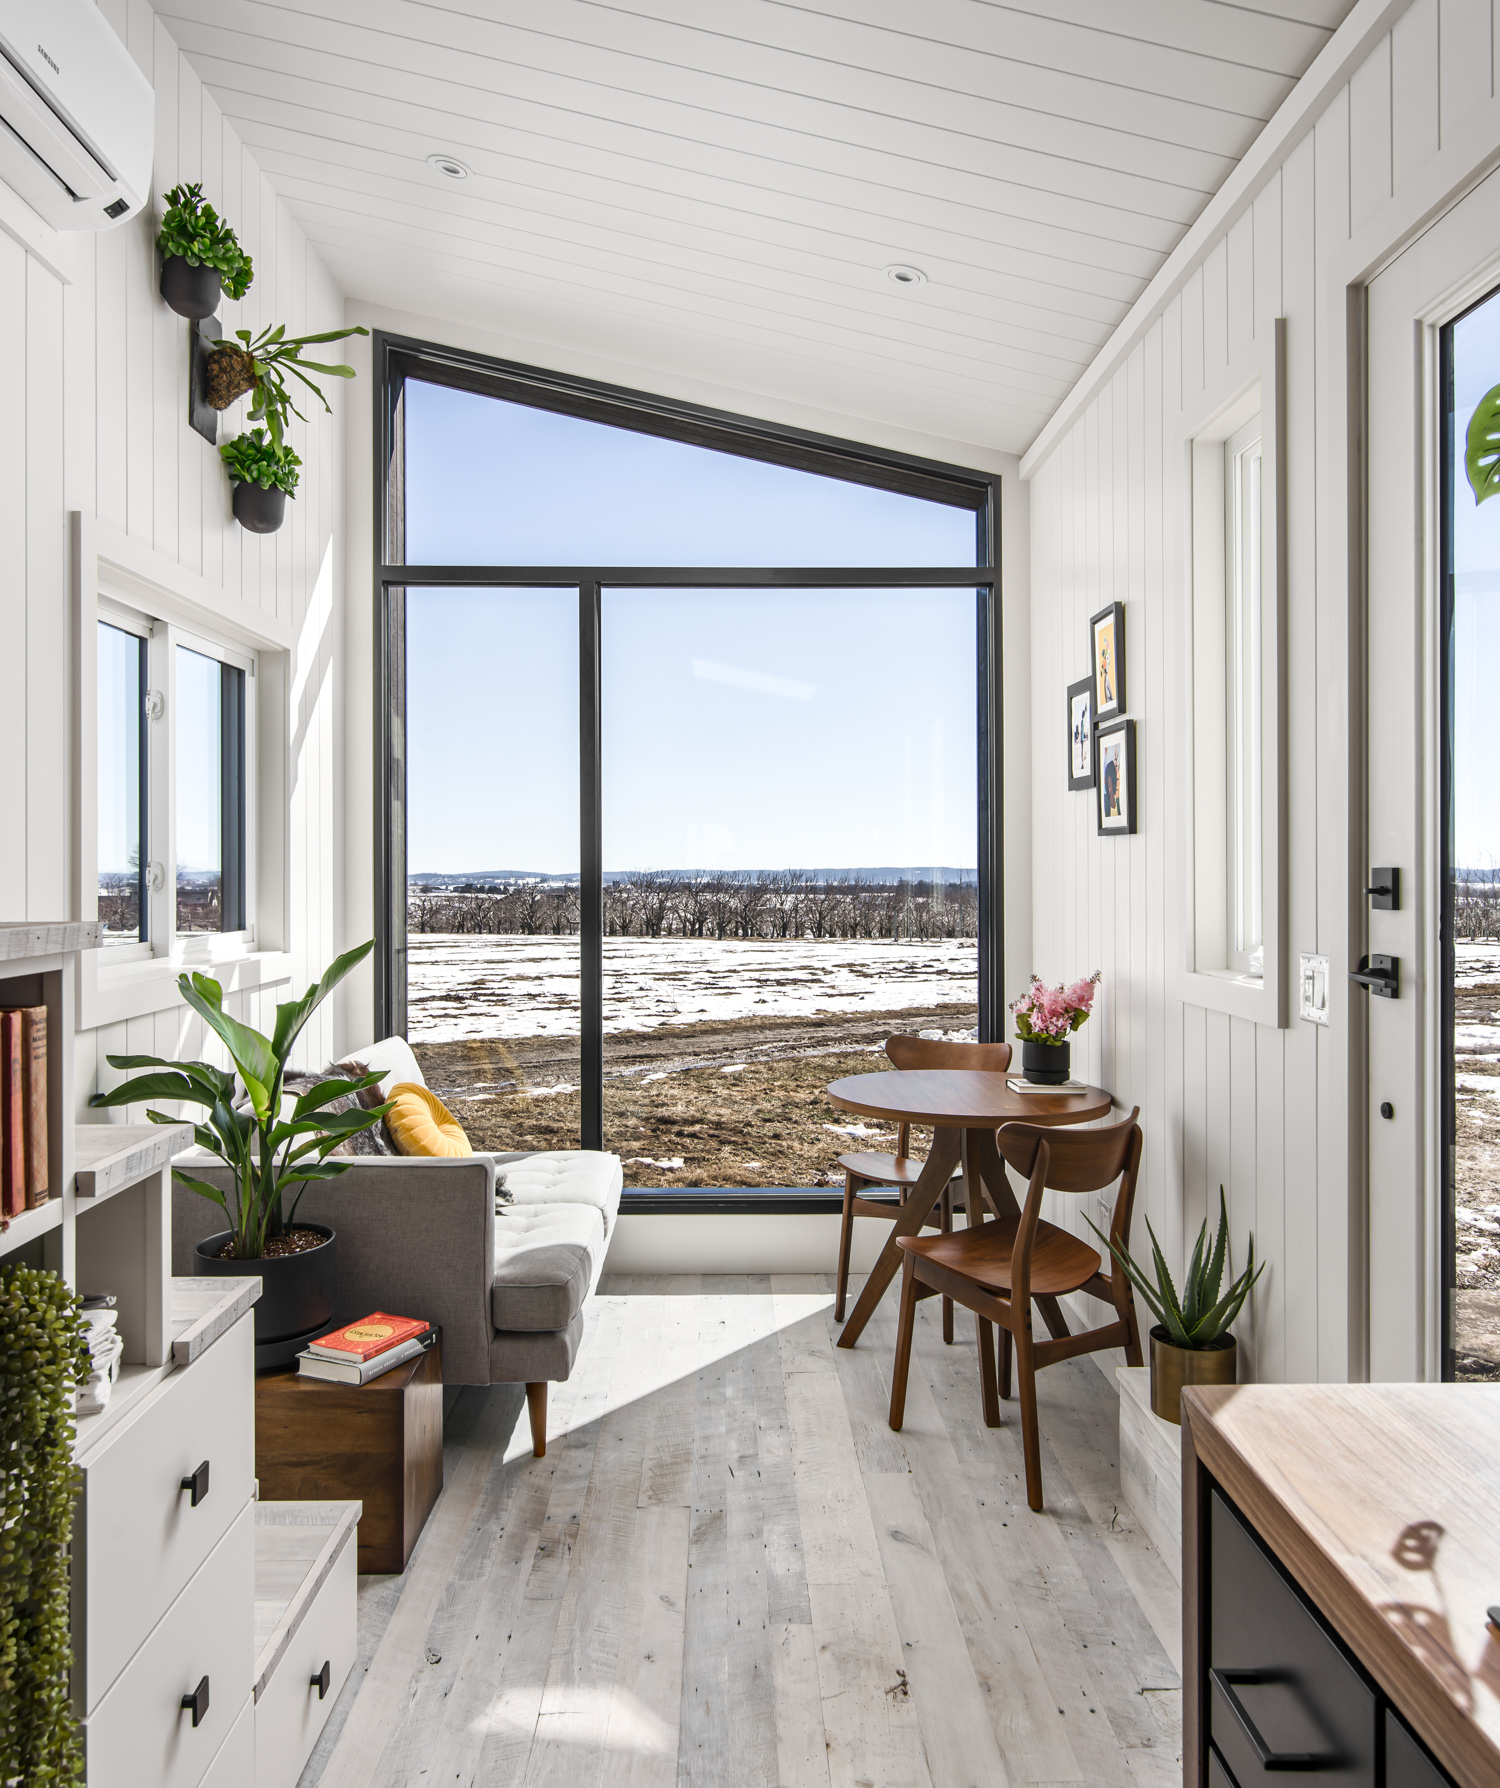
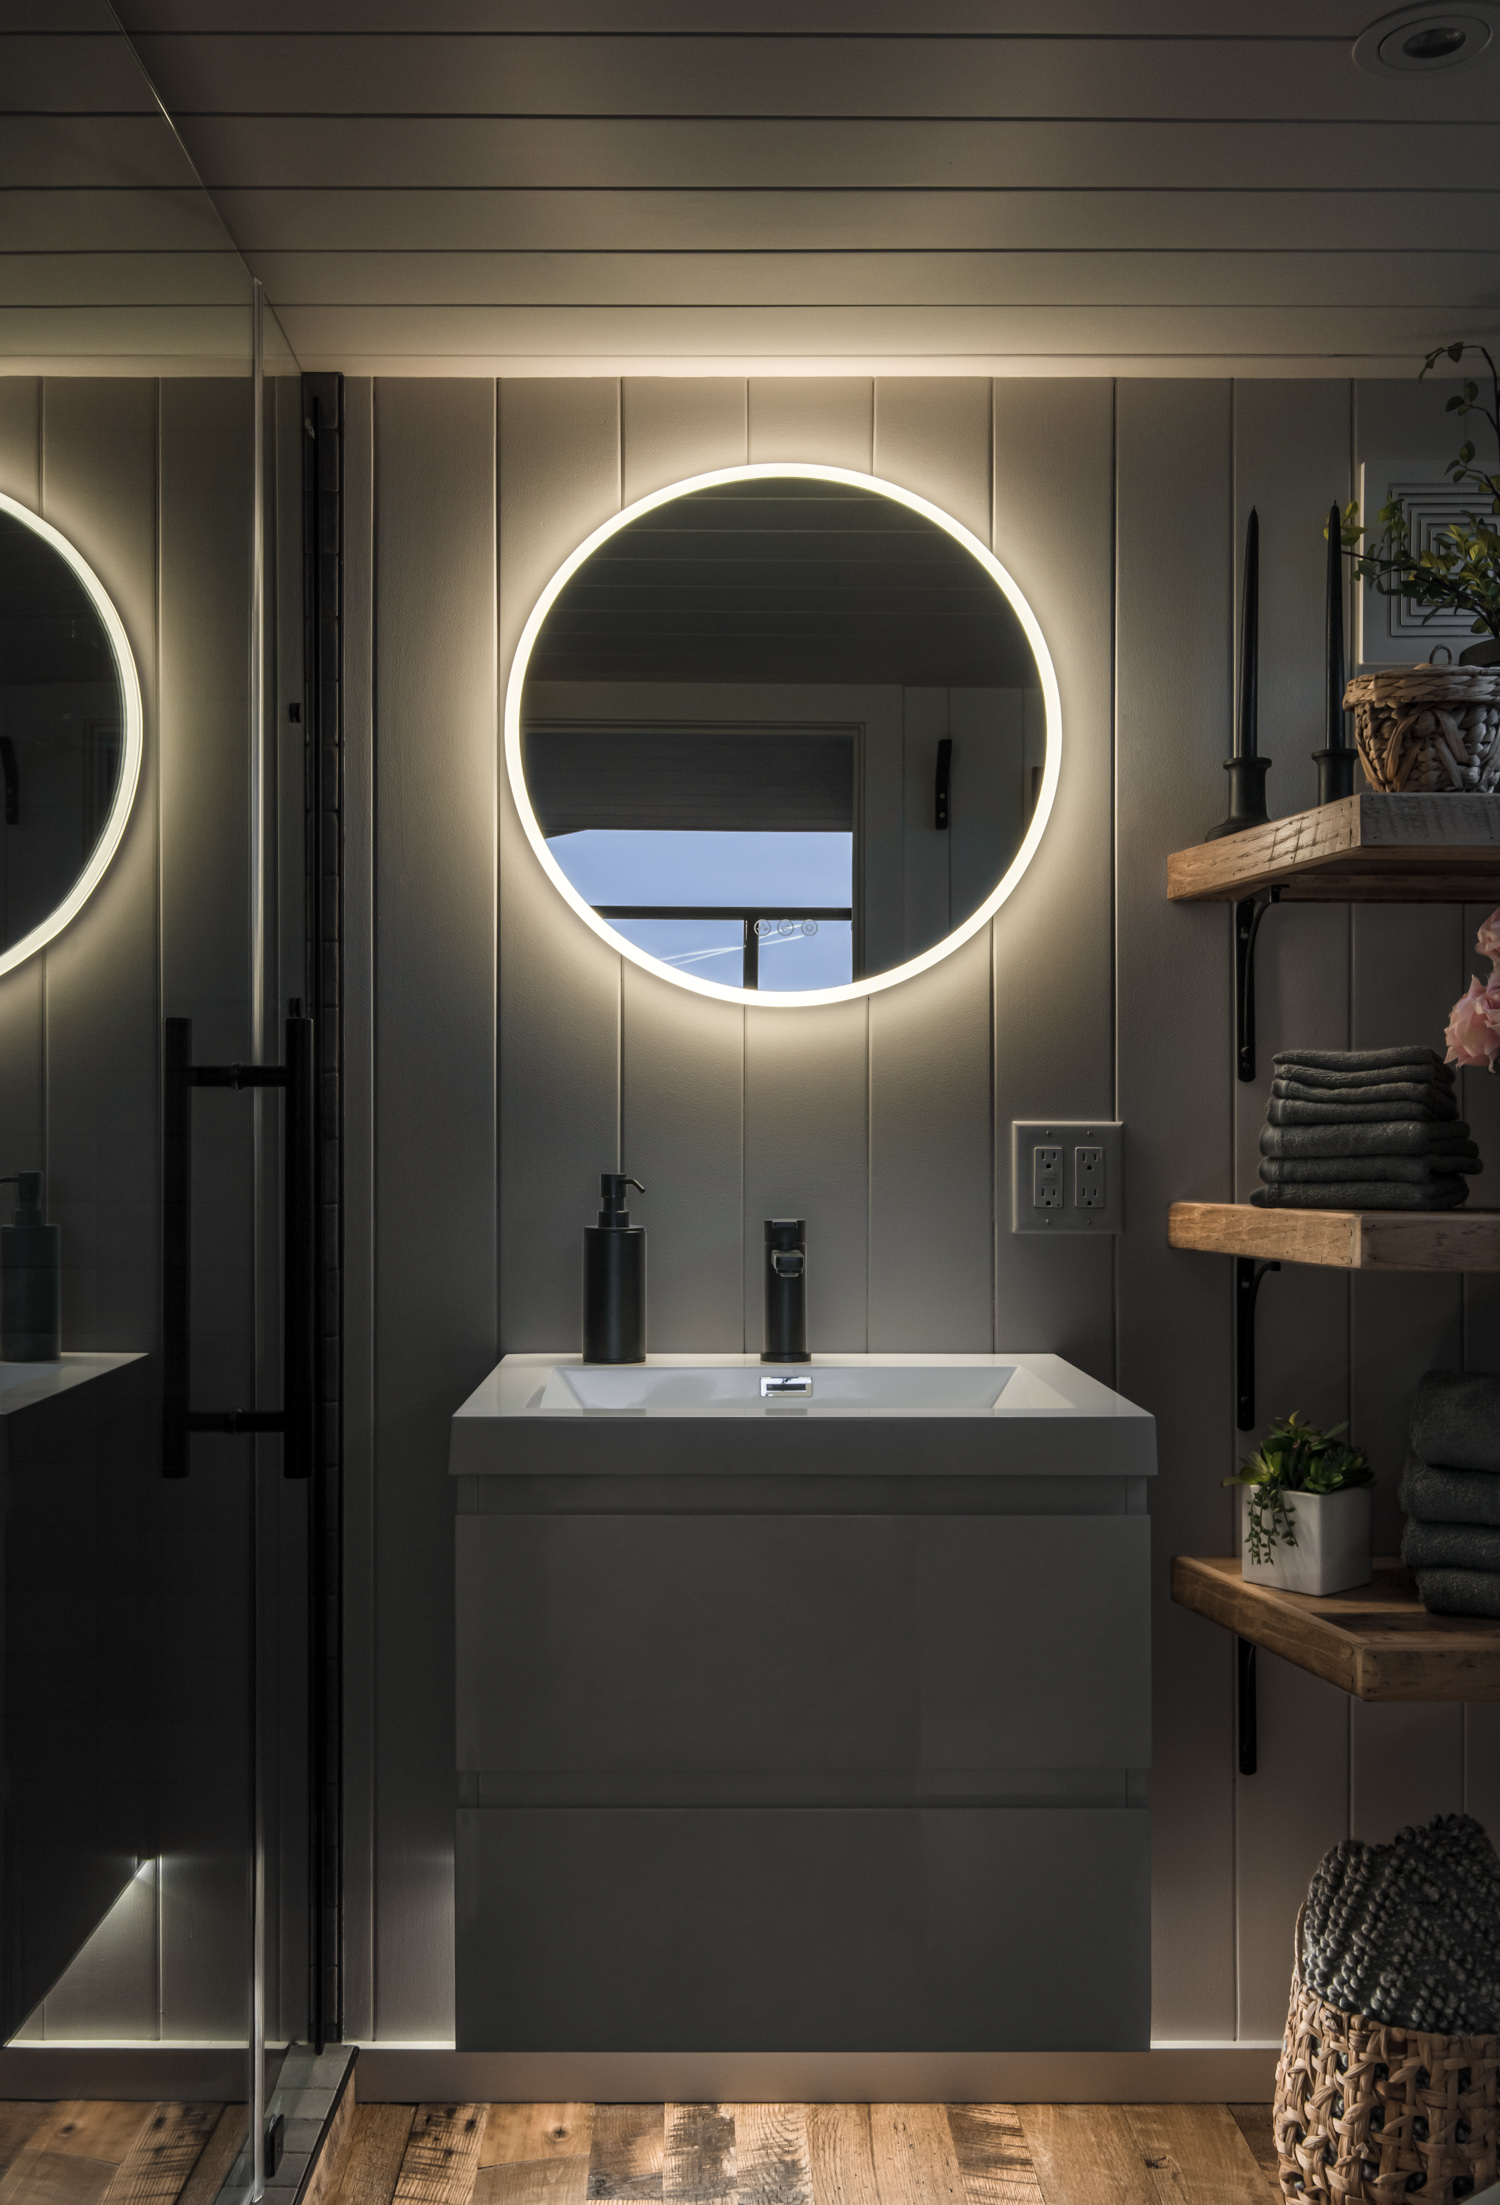
Long crisp shadows give dimensionality and character…and maybe even the illusion of a bigger space. Shifting himself from the wider one-point perspective, Garett creates a new “space,” showing us the dining area with an intimate feel.
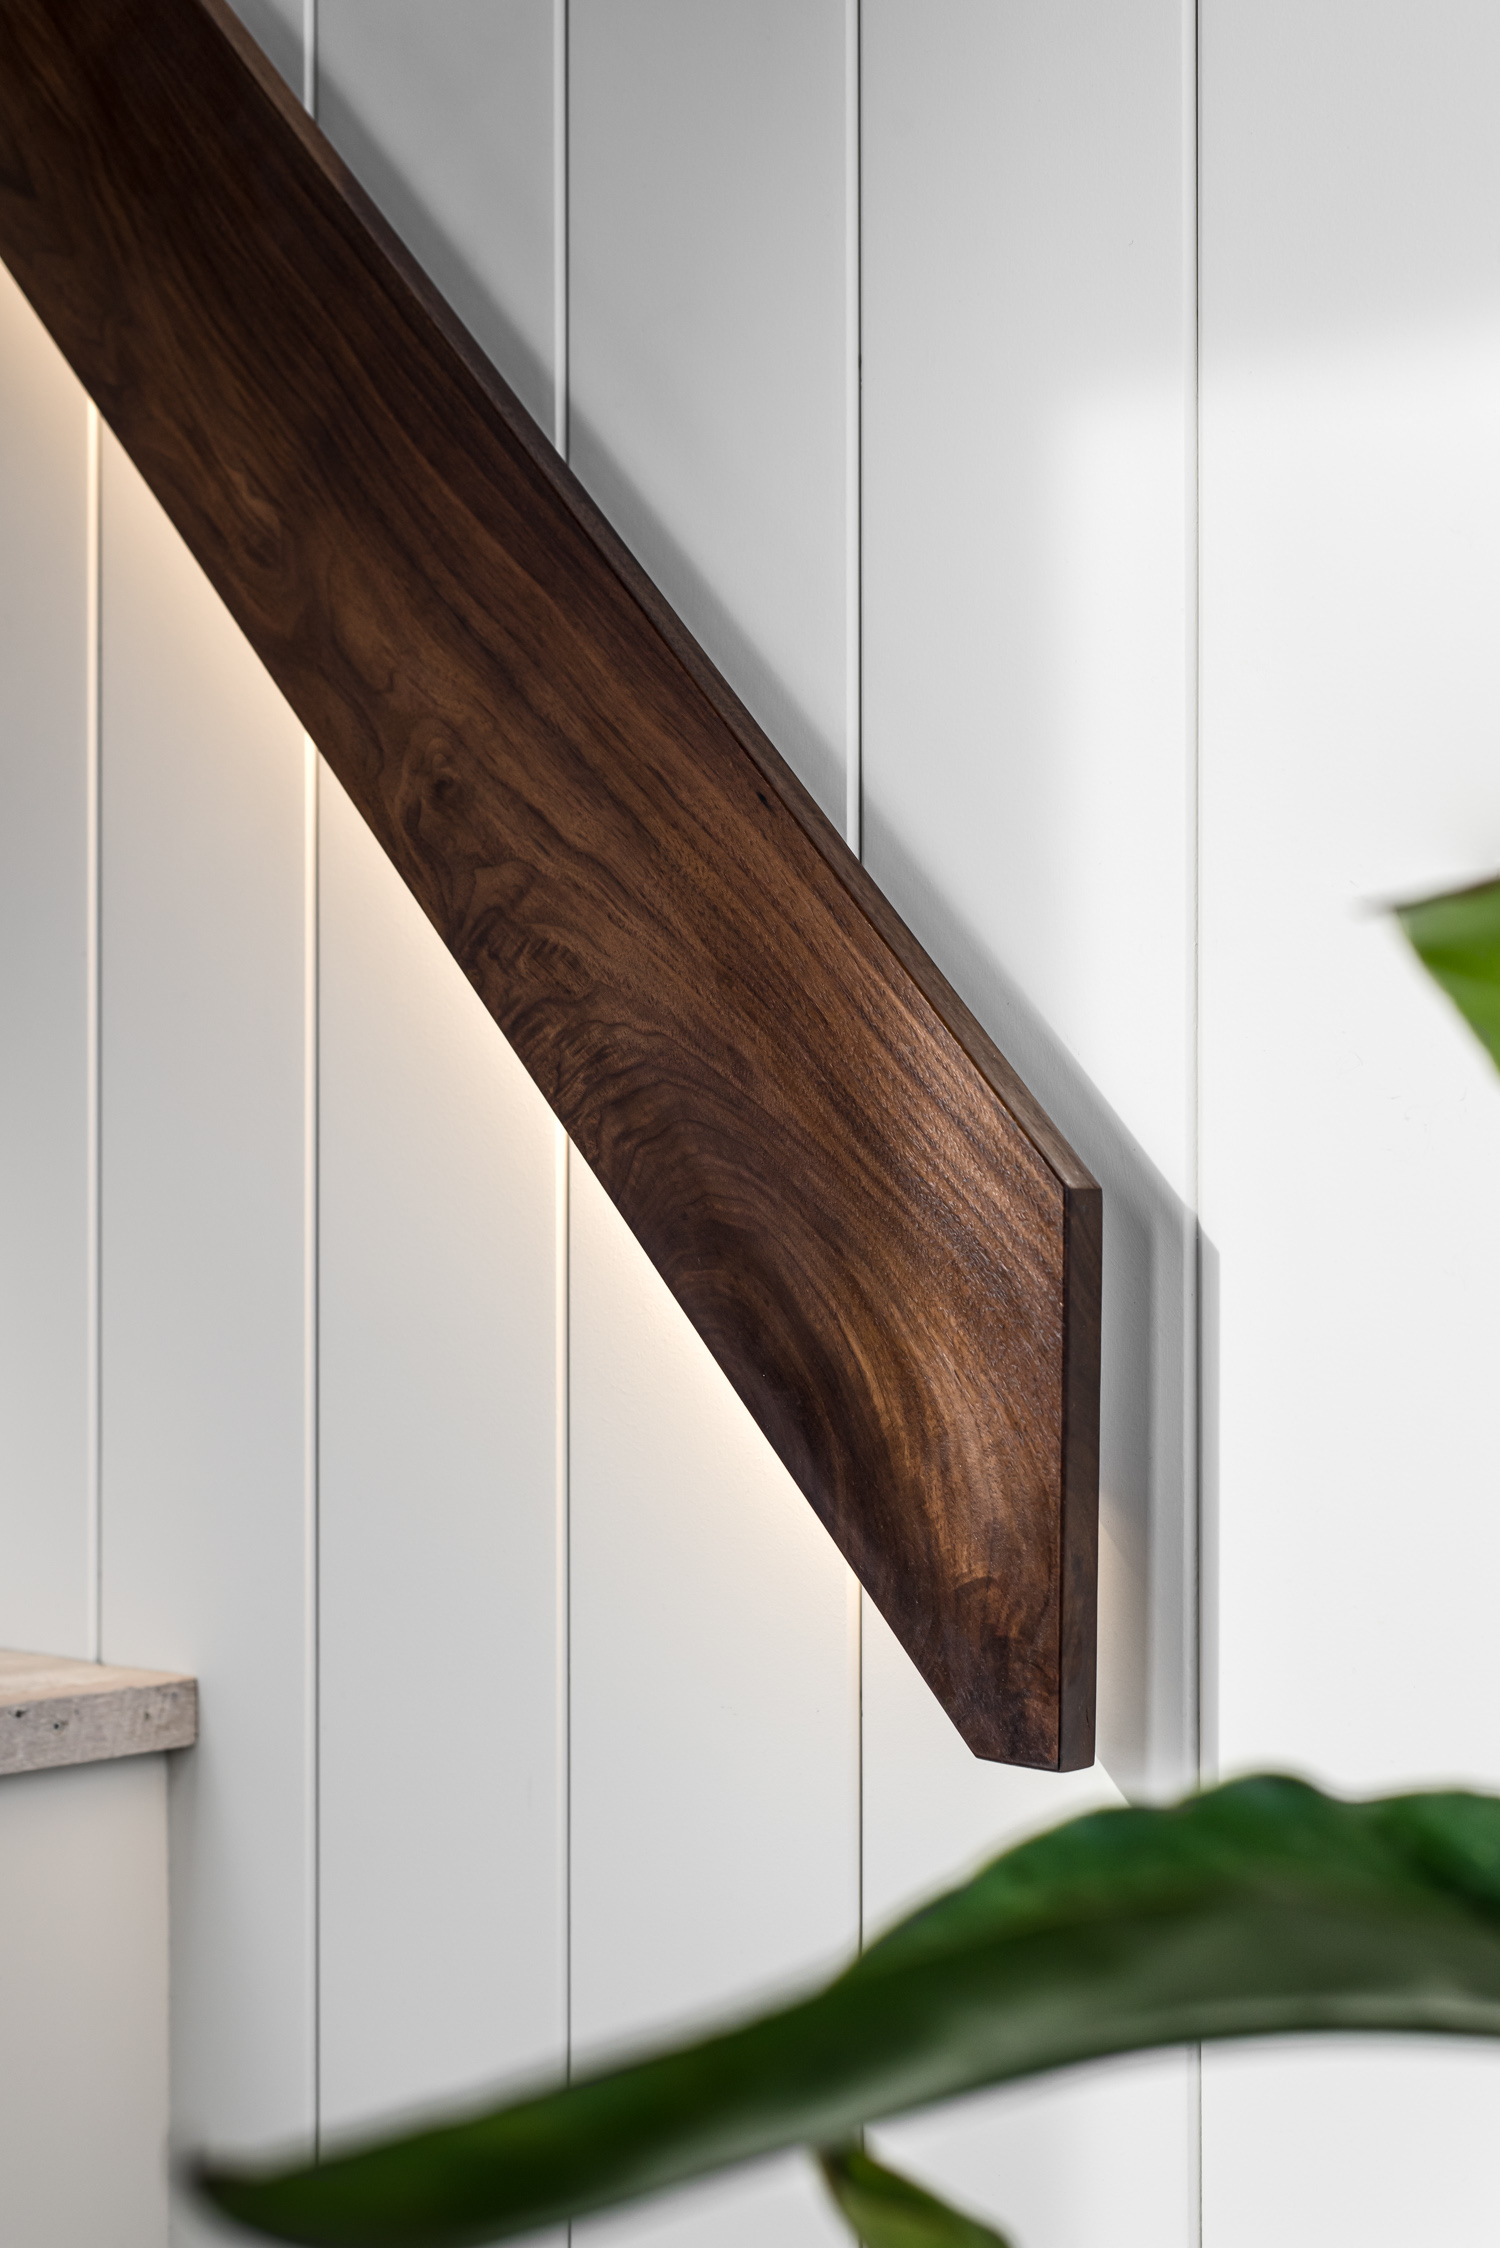
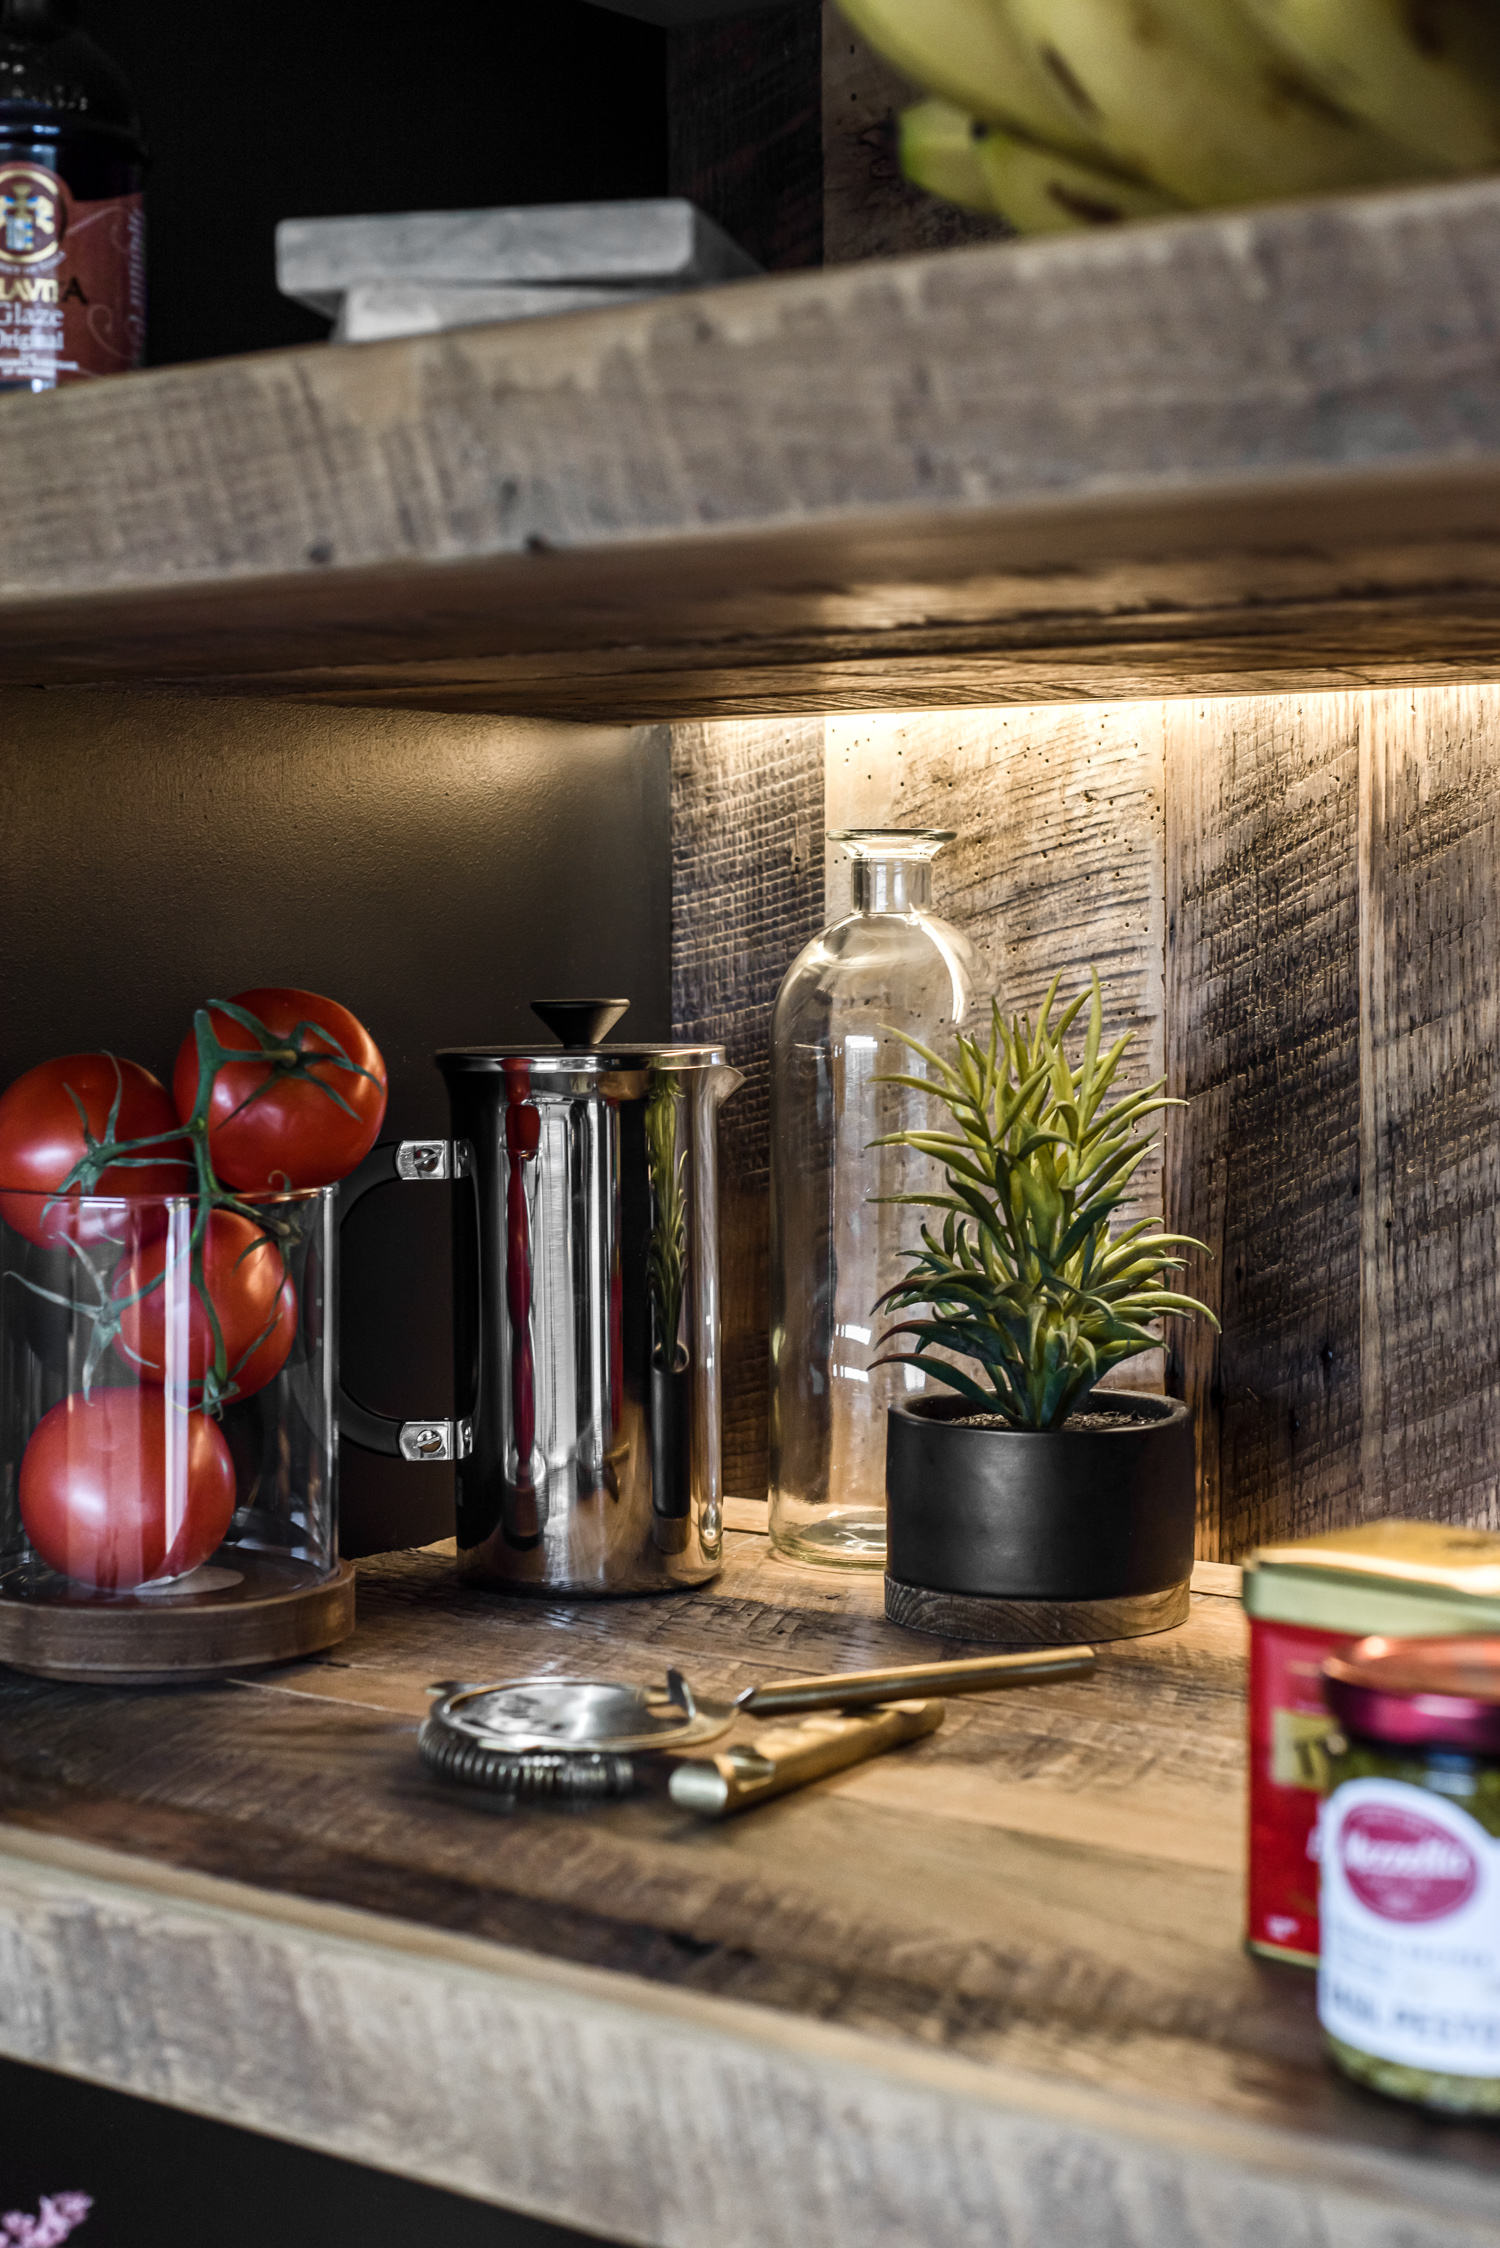
Garett’s vignettes flesh out the project. Here, gorgeous directional light pulls out the texture and ever so faint specular highlights in the wood — showing off its grain and stain.
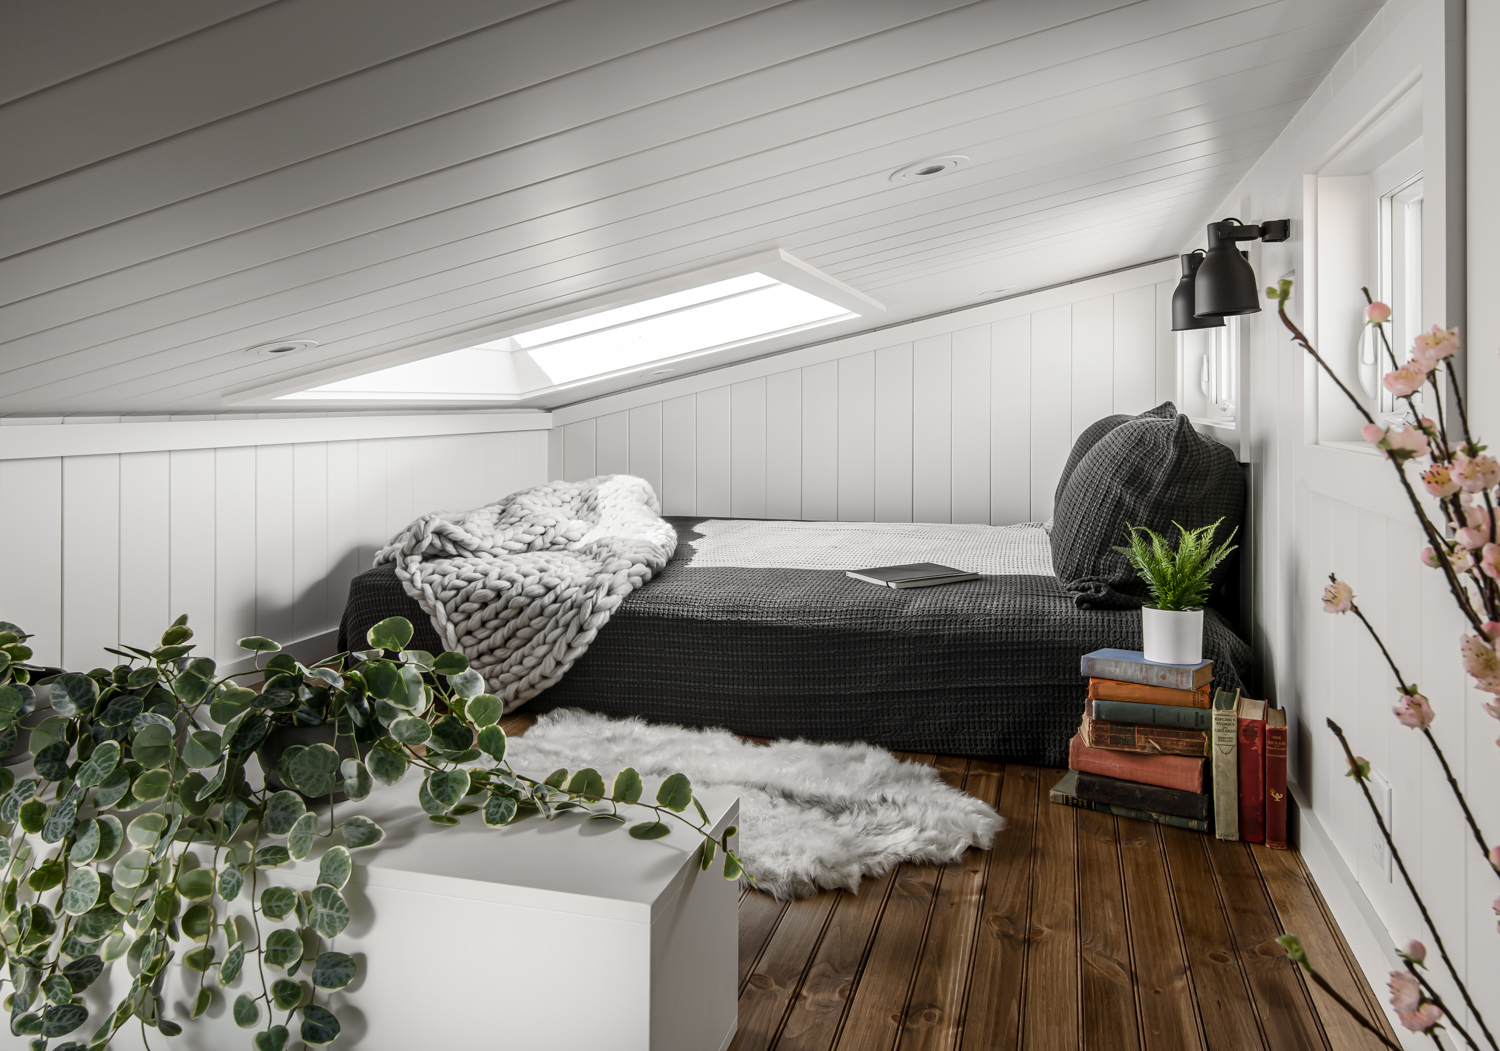
I’m envisioning Garett doing some tripod yoga to get himself set up on the narrow stairs leading to the loft. The angle works well and shows us the cozy and peaceful air about this sleeping space.
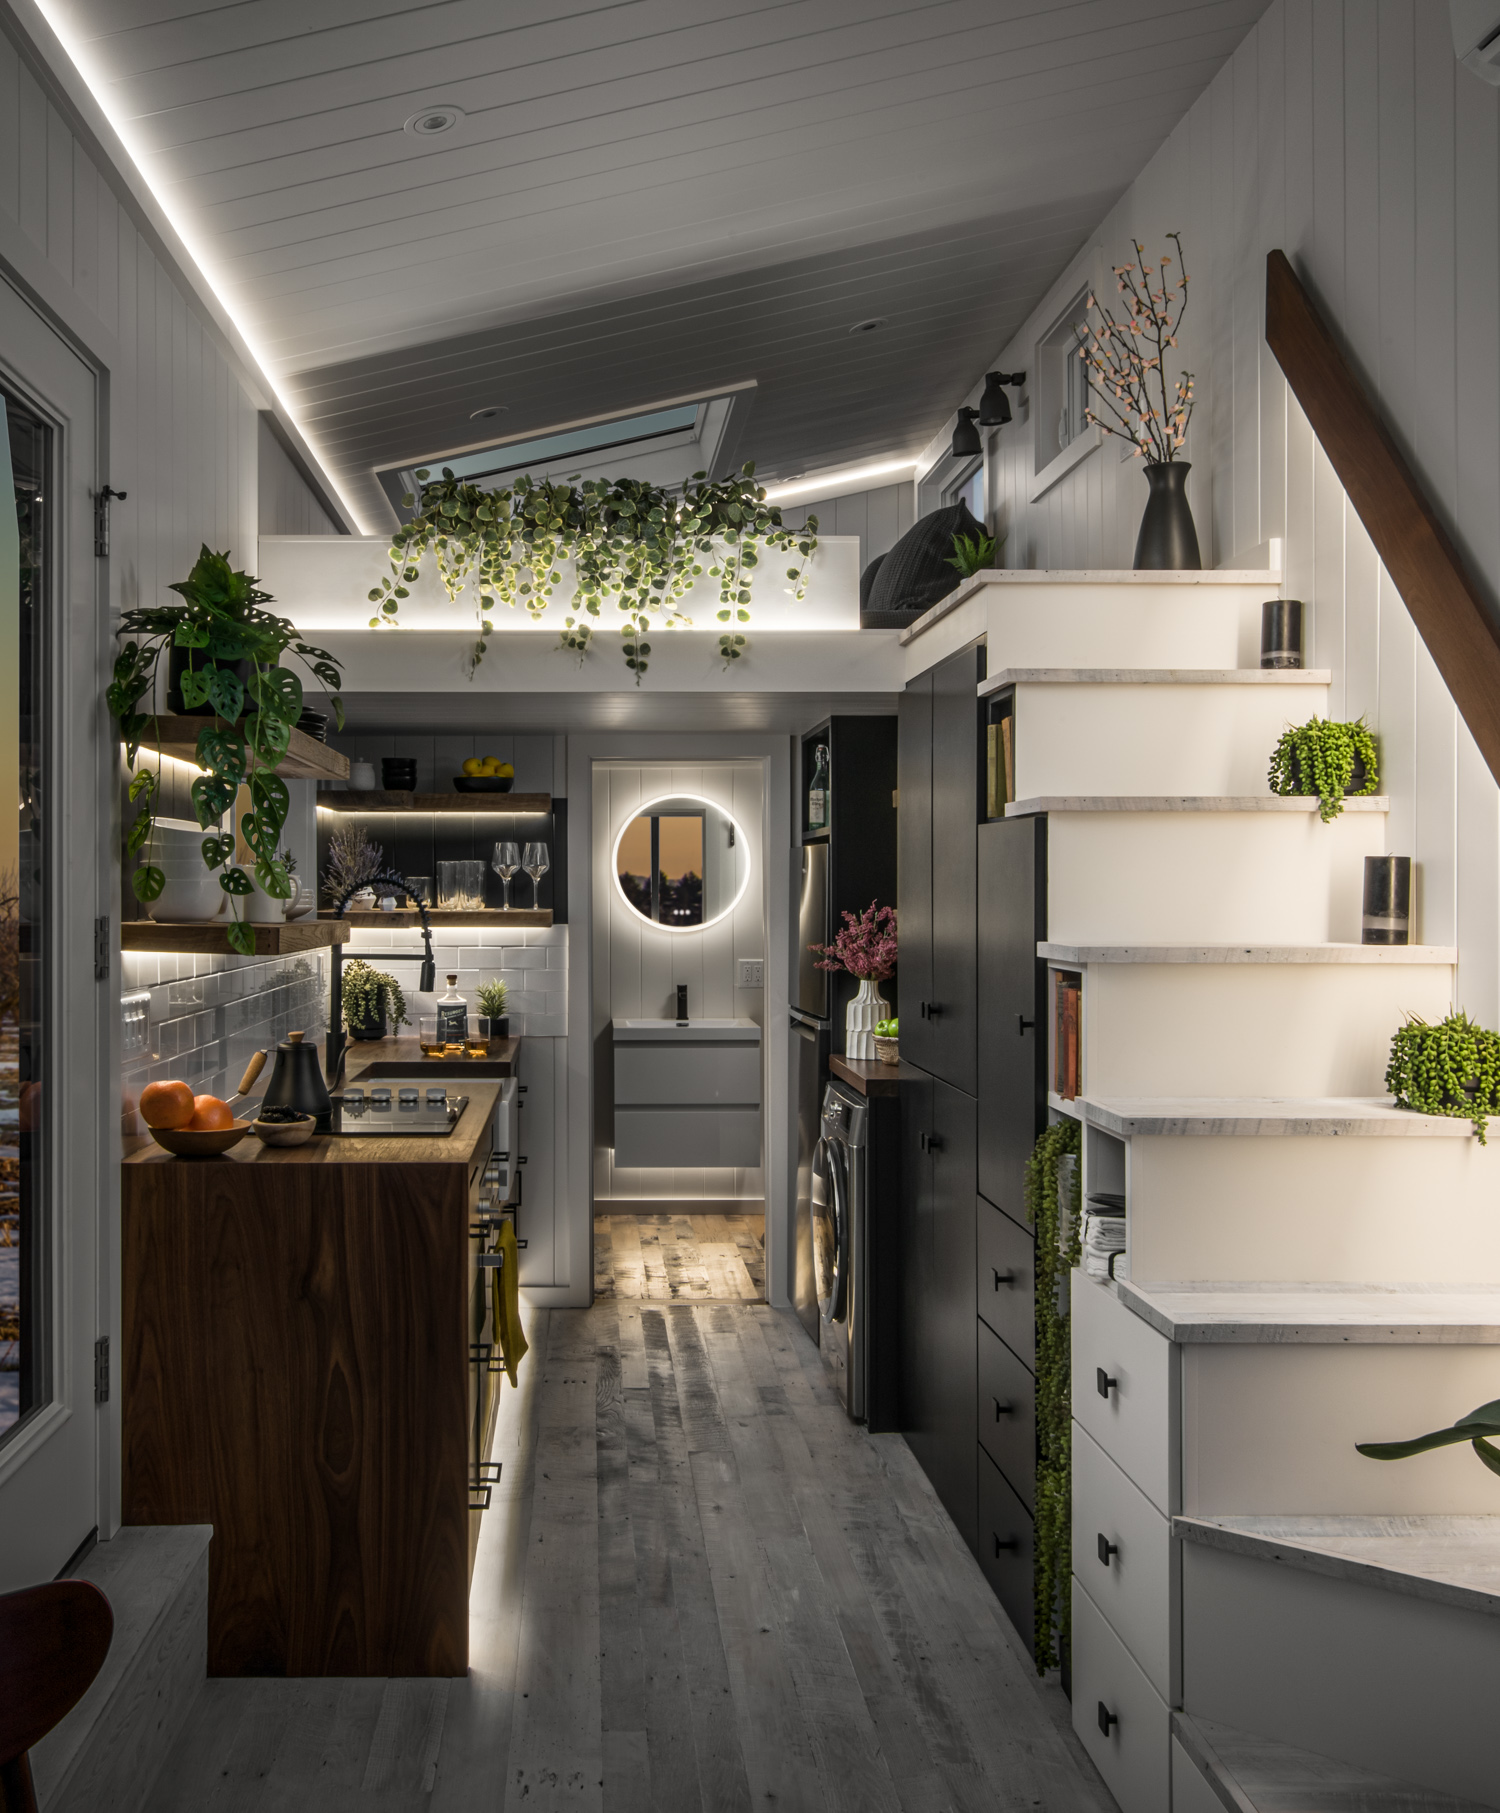
As night falls, the Luna comes alive with impeccable lighting design. Garett showcases the recessed LED strips and channels in this moody scene. It’s dark enough to emphasize the lights working, but light enough to translate how this well thought out design illuminates the space without washing the whole house with light from those overhead.
Continuing his explanation on his process, Garett shares “In post I use Lightroom for all raw developing and organizing. I pick the frames I need to mask together for the composite and make some basic adjustments to the ambients and pull up the exposures in the flash frames since they are all shot exposing for the highlights. Then it’s off to Photoshop for masking together the composition.
I start with creating a flash composite and then utilize the ambient at the end in the areas that it was working the best for the scene. Then I hop back to Lightroom for some extra adjustments as well as cropping and straightening and organizing into the final delivery collection.
I think a big benefit to this type of processing is that it allows for managing the scene on-site to be predominant and then I have focused time (with coffee and a chair) to put together the photo with no pressure or clients waiting and I can tackle more photographs overall on a project. It’s lots more to do in Post, but I love that part and feel like it is an invaluable piece of the process as a whole.”
Outside against a bold winter sky, Garett lights the Luna’s black facade with just enough light to draw attention and pull out the texture of the metal and wood, while leaving some mood and depth.
I asked Garett what advice he would give to photographers who are tasked with shooting small living spaces like tiny houses. His powerful insights are:
“So, I’ve learned many lessons shooting these tiny homes (many have lead to my process and some of the tools I use as mentioned earlier) and the experience allows each one to get more efficient and allows me to be more creative…but like anything it takes practice and I’m fortunate to have been able to shoot many of these as some of the techniques I utilized have found their way into shooting other projects.
My biggest piece of advice, above all, is don’t shoot super wide! It will be tempting. Take your time and find your compositions based on what the main subject is at each angle. These homes are so long and skinny that you’re already going to be dealing with too much in the edges of your frame in a majority of the shots. These homes are tiny and they definitely shouldn’t look like a football stadium. Think about what you are trying to show and then figure out how to set it up to make it happen.
Also remember that these homes are usually on trailer beds, so, it is possible that it could be moved to favor the light (although, as was the case with the Luna, the snow and mud in the field pretty much killed that option for us). It allows you to pick a great location for the shoot allowing you to think through your options for both exterior and interior window views. What if every building or home you shot could be moved to another direction just for you? Moved by a lake, a field, or into a forest, or a city parking lot…there are so many great options for this type of subject that are unique.
My last bit of advice is to make sure you take the time to be prepared. Think through the obstacles (and potential obstacles) that may arise and have a workaround ready even if it doesn’t come to fruition. It’s going to be working against you in every way, but there are many tools available, especially now that you can utilize technology to help. CamRanger or any wireless tethering can be very helpful even in aiming the camera. Along with a geared head and an iPad or smartphone, you can get the camera placed in areas that are not possible when you have to get your head behind the viewfinder to see (think, the camera is up against a wall or in a bookshelf on the counter…or on a ladder that is a little shaky and you don’t want to disturb the camera position). Also, it can help you get out of reflections and mirrors and keep your shadows from encroaching into a scene by even allowing you to stand outside the home while you take some shots. Like I said before, I’m glad I was forced to use my CamRanger on the Luna because I was able to realize so many more benefits than I had not previously considered.”

What an awesome project! A massive thank you to Garett for sharing this unique home with us along with giving us such an in-depth look at his process! He is the coolest guy, so go see more of his work at studiobuell.com or on Instagram @garettbuell!
If you have a project you’d like to be considered for Project of the Week, you can submit it here.