The Magic of Lightroom Export Presets
I have recently discovered the power of Lightroom export presets, and wanted to be sure to share them with you! It is an easy way to export images for various usages, and sizes in almost one click. I personally have made three presets that I use all the time: Web, Instagram, and Print.
It’s easy to set up your own presets (you can see my settings below). You probably already have a good idea of which settings you like to use when exporting your pictures from Lightroom.
When all your settings are as you want them you click “Add” in the bottom left corner, under Presets. Give your preset a name you recognize later. Repeat for all the different presets you find that suit your workflow.
Some tips when setting up your presets
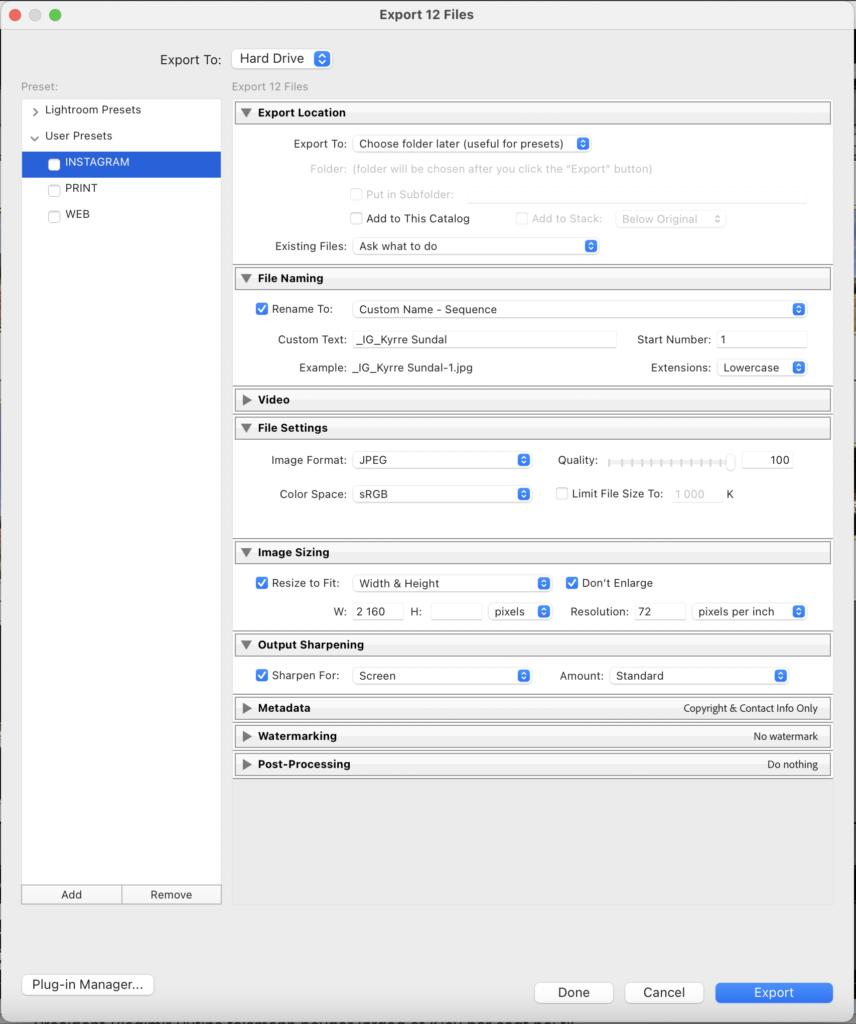
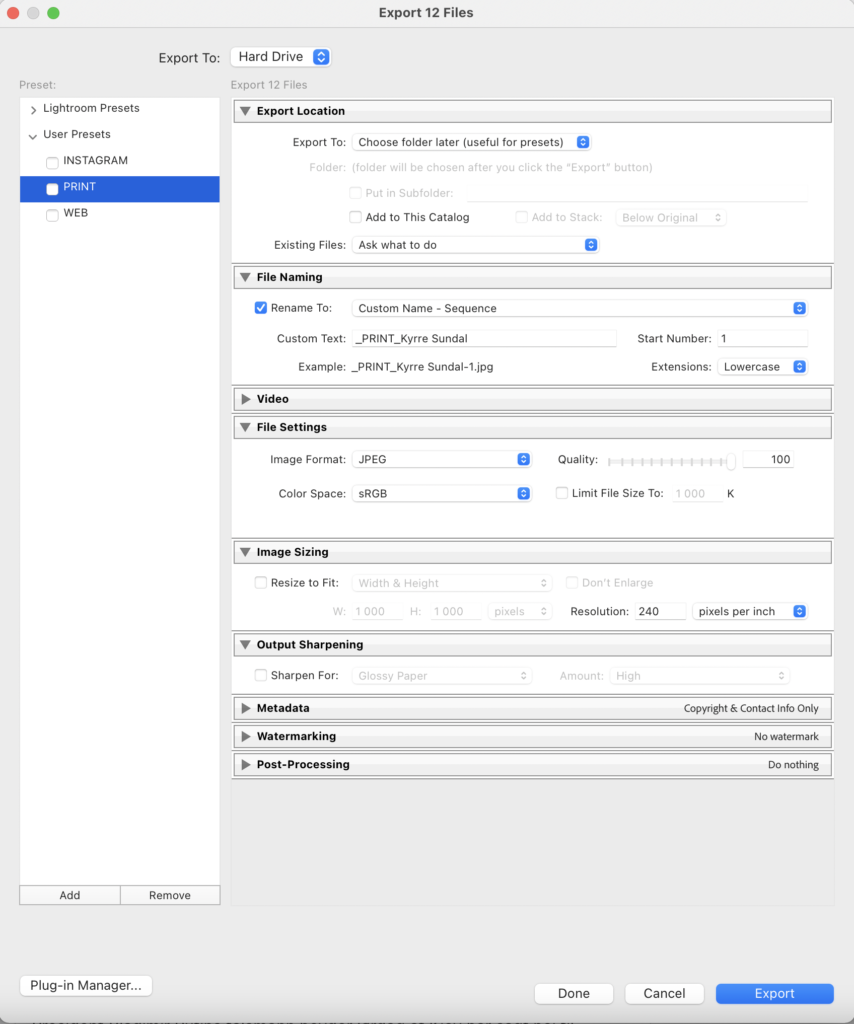
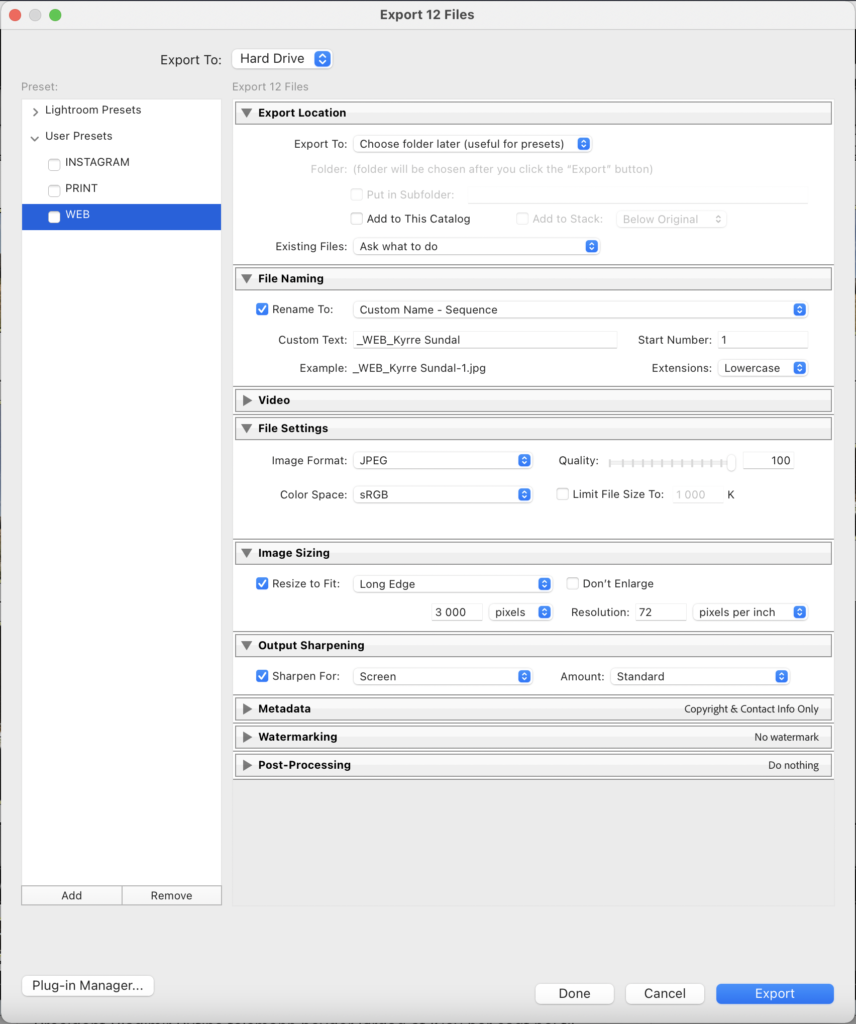
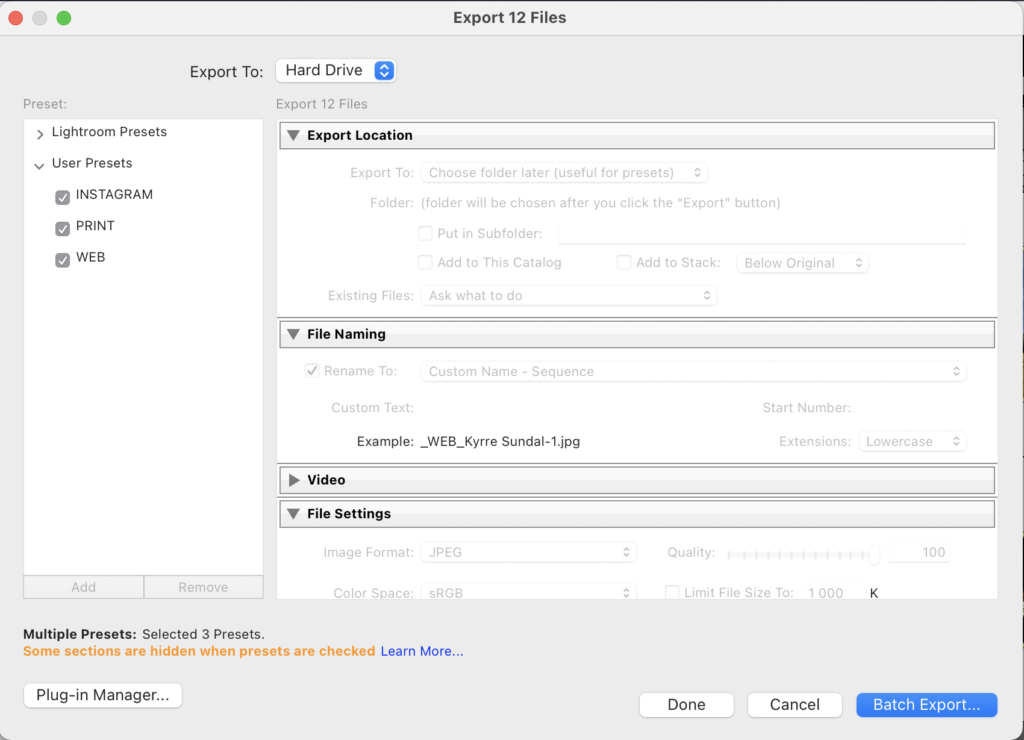
One tip I have is to choose the “Choose folder later” option in Export Location -> Export to. This will make the preset more flexible and usable later.
Another tip is to rename your pictures using “Custom Name – Sequence”. I like to put the project name first, then the output purpose, and finally my name. Ie: La Caracola_IG_Kyrre Sundal. In the preset I only write _IG_Kyrre Sundal. When you export you are able to write the project name.
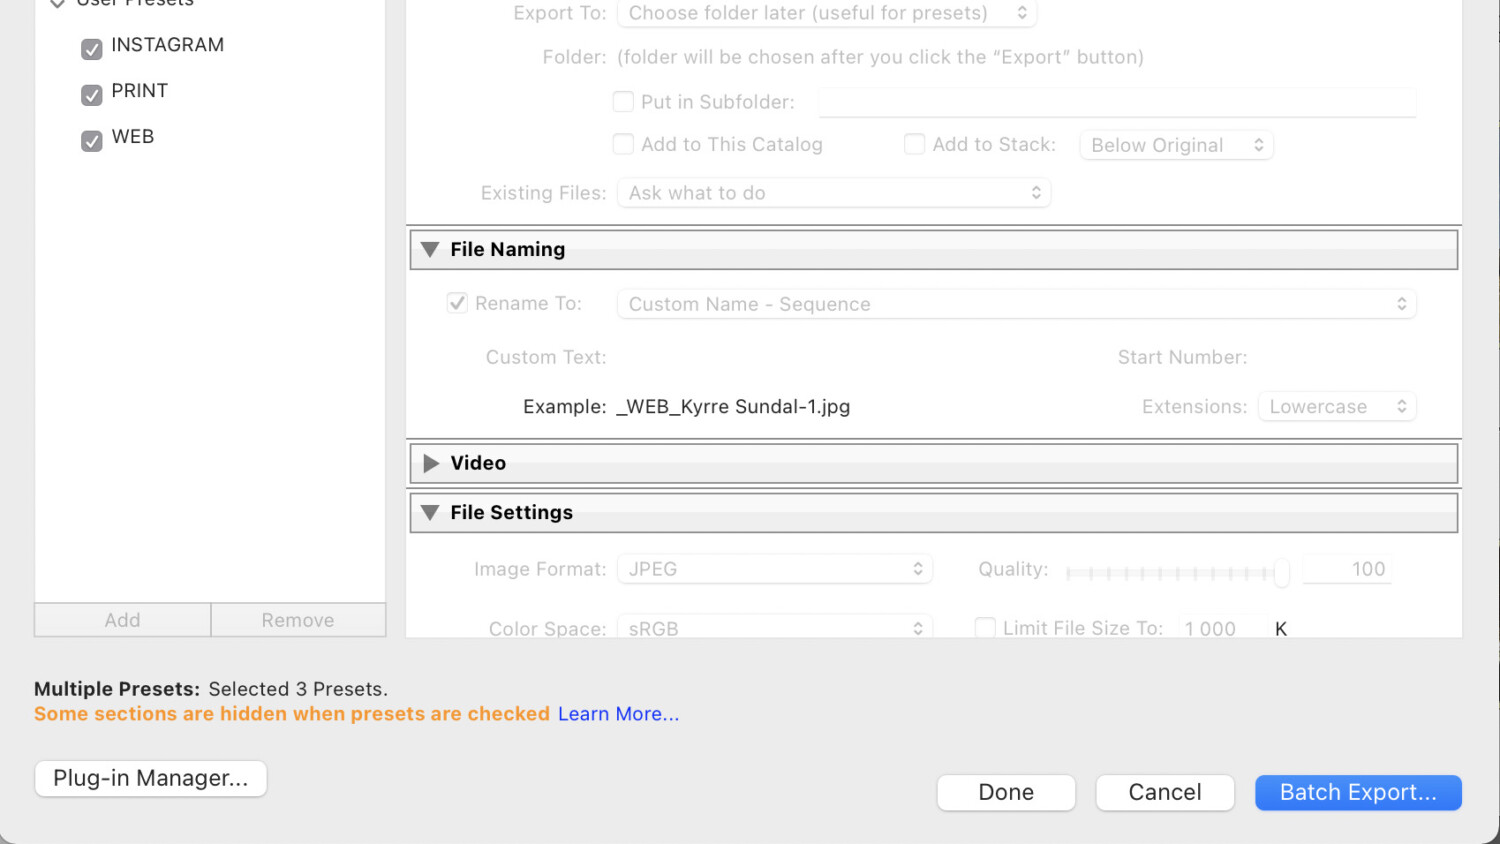
When all your presets are done, and you are ready to export your images, just check all the presets you want to export to, and click “Batch Export”. All the settings will be grayed out.
A new window pops up.
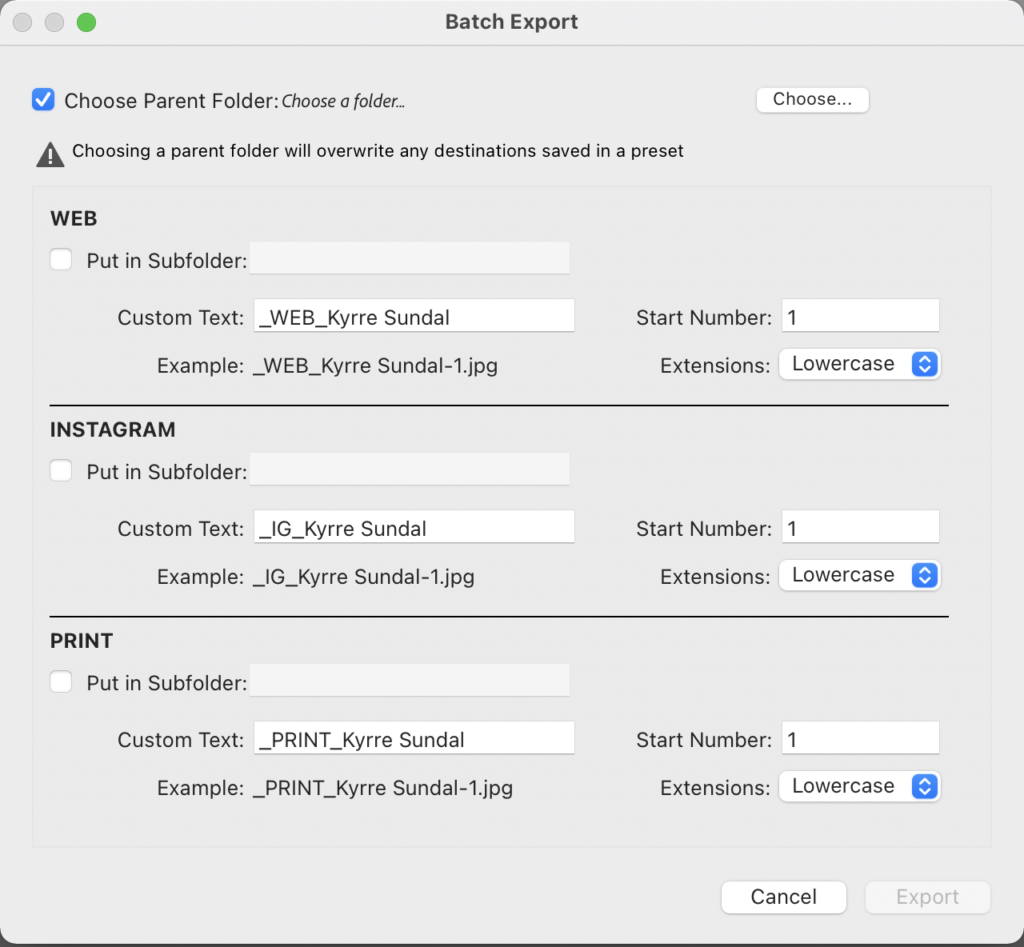
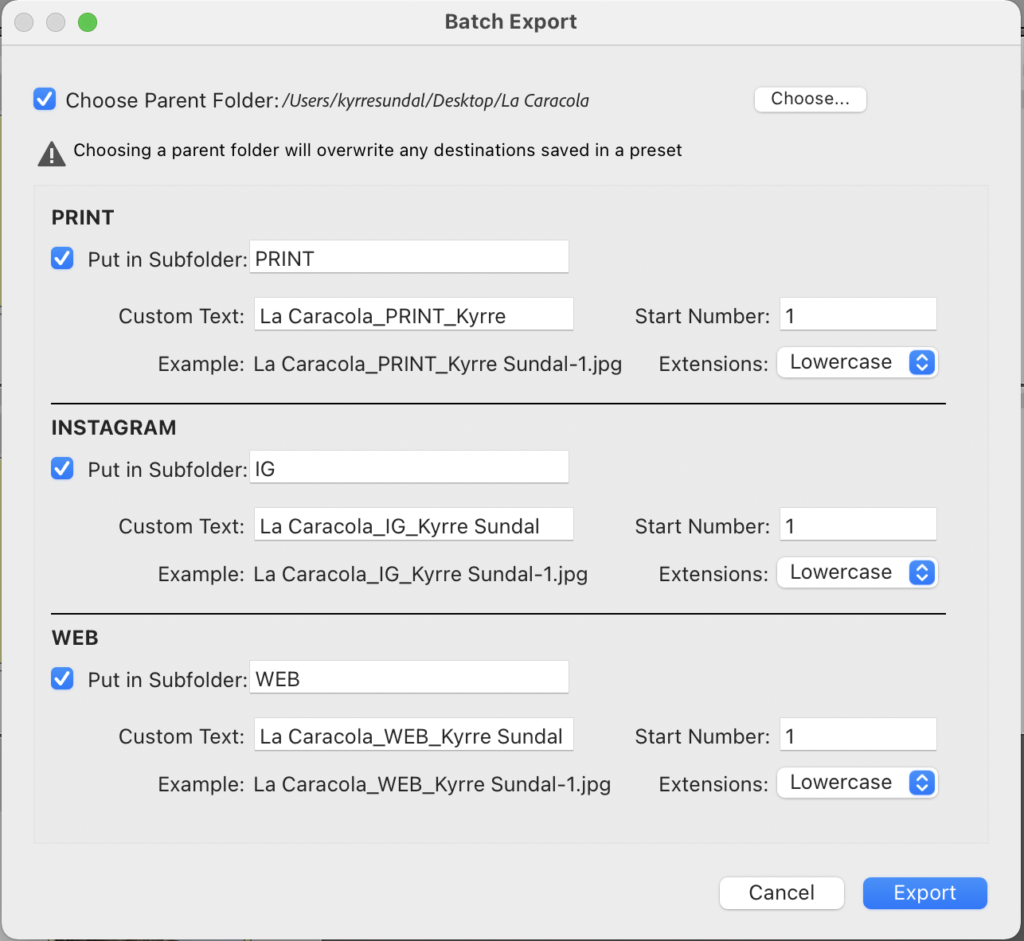
Here you choose the parent folder for all your images. And you have the option to export your various presets to separate subfolders. Here I also write the project name in Custom Text under each preset used.
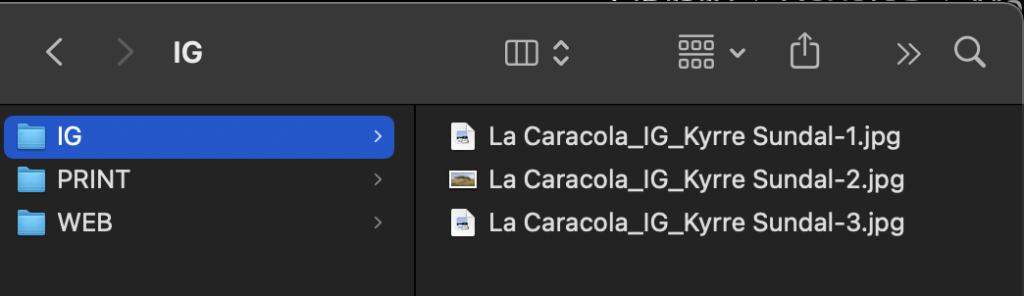
When the export process is done you will find your pictures in the subfolders you chose.
I hope that helps you make quicker and more consistent exports from Lightroom!
Which settings and presets do you like to use?