Adobe Lightroom or Capture One? A Subjective Comparison | Part Two
In the first part of this series, where I discussed my subjective reflections related to photo post-processing in Lightroom and Capture One, I covered topics such as types of licenses, program interfaces, tethering, and the difference between a catalog and a session. The last topic was revisited in your comments, so I decided to revisit it and also mention three seemingly small but, in my opinion, very important things: annotations, history, guides, and selecting images by filename.
Catalog or Session?
I conducted a small survey on social media among architectural photographers, asking how Lightroom users organize their photos into catalogs. I understand that a sample of several dozen people may not be representative, but it confirmed my suspicions that the majority of individuals treat a Lightroom catalog similarly to a Capture One session. This means creating a new catalog for each assignment. In itself, this is not a problem, but with such a division of photos, the lack of the ability to open a catalog from a network drive and the inability to simultaneously open two or more catalogs in separate windows becomes a significant limitation. It’s important to remember that Lightroom doesn’t provide the option to browse photos that haven’t been imported into the program. This makes tasks like creating a portfolio or searching through material from different assignments more challenging. Let’s hope that Adobe is listening and will introduce changes to address these issues.
Annotations – collaboration with external post-production
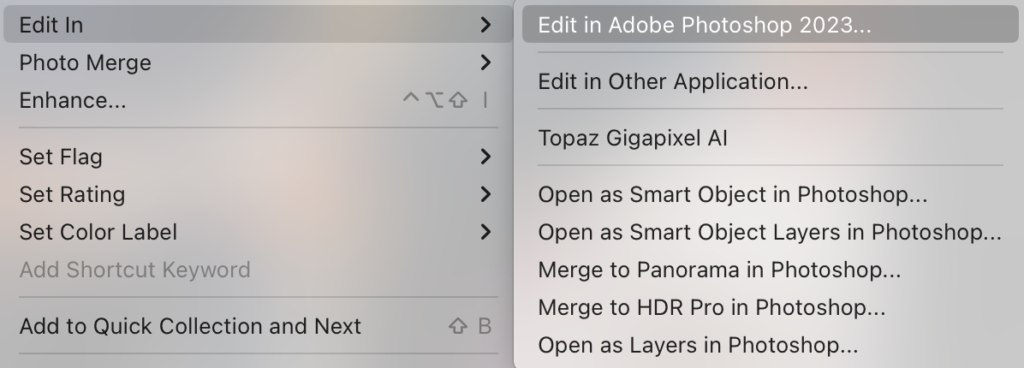
In Capture One, we can directly proceed to editing in Photoshop or another external program. You can export a TIFF file or open a RAW file in Camera Raw for further editing in Photoshop. In Lightroom, there is greater integration with Photoshop, allowing you to open individual photos as layers in a Photoshop file. For obvious reasons, Lightroom is better prepared for photo editing, but in practice, it’s a matter of convenience and workflow efficiency.
When outsourcing post-production work to others, a very convenient option is the annotations feature in Capture One, which is not found in Lightroom. This feature allows for non-destructive annotations or drawings on the image. You can quickly mark areas for retouching or corrections, for example. This function can also be useful for making notes during a tethered shooting session. You can annotate client feedback in real time, which will be considered during post-processing. Moving annotated images from one session or catalog to another is easy. RAW-based annotated image variants can be packaged as EIP files. Annotations can be included in the image as a layer when processed as a PSD file.
History panel
In Capture One, there is, of course, the ability to undo a recent action, but we do not have access to a full edit history. The “undo” and “redo” commands only work immediately after an edit and become inactive after closing the session file. In contrast, Lightroom has a separate, transparent tab that displays the complete edit history of a file. This history also includes all exports made from a particular image, along with dates.
This is a significant advantage in favor of Lightroom. I don’t understand why a history panel has not been added to Capture One yet. All RAW processing programs, of course, do not alter the original files, and we always have access to the untouched originals and can see all the adjustments made. In Lightroom, I mainly use the history to compare how a file looked at different stages of work. This allows me to review each export along with its date. It’s a very convenient feature when I need to revisit archival sessions. I can verify which file I saved as a proof, which one I exported to the client, whether I made changes, and what changes I made while preparing a file for printing or Instagram.
I remember that while organizing a Capture One workshop led by Mikołaj Rygier from the Daylight Studio in Warsaw (Mikołaj is a Capture One beta tester and translator), all participants were using Lightroom, and their biggest surprise was the absence of a history feature in Capture One. I hope people from Capture One are reading us. Please, finally add a history panel!
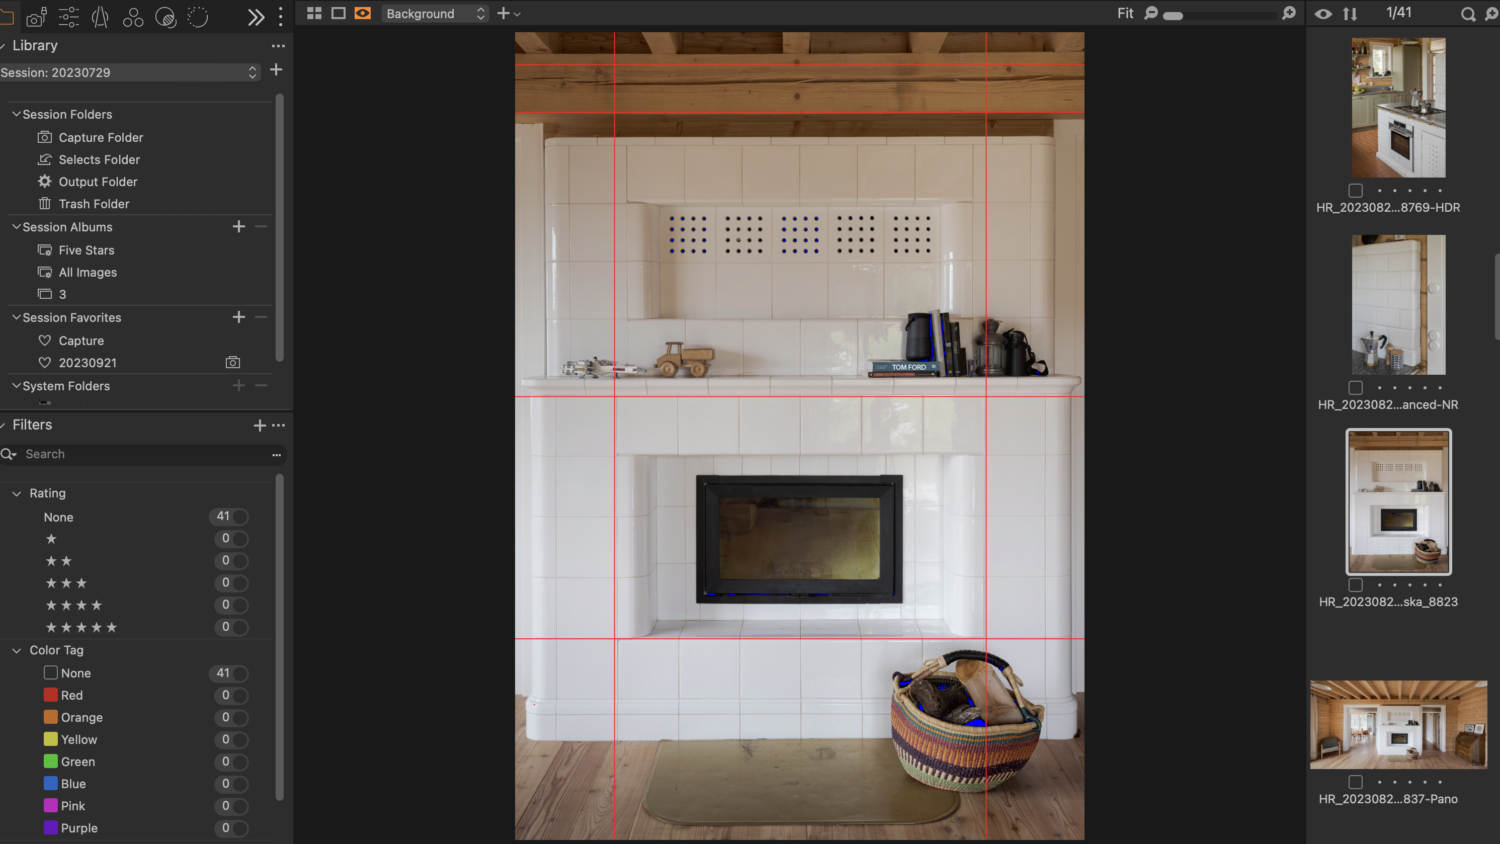
Guides
Seemingly a small thing, but so crucial in architectural or interior photo post-production. When dealing with curvature, distortion, or lack of parallelism, lines that you can add anywhere on the screen, just like in Photoshop, are very helpful. For me, it’s a game-changer!
If you want to assign a keyboard shortcut command to toggle the visibility of the Guides on and off, select Edit -> Edit Keyboard Shortcuts… and find the Guides command. Note that you can also assign additional keyboard shortcuts to other related Guides commands under Customize Guides in the Edit Keyboard Shortcuts dialog box.
https://support.captureone.com/hc/en-us/articles/360002583897-Working-with-Guides
We can add multiple horizontal and vertical guides and move them freely across the screen. It’s worth noting that lines can also be overlaid on the live view mode during tethered sessions. Multiple guides may be added from the main menu by selecting View -> Customize Guides -> Add Horizontal Guide or Add Vertical Guide. Also useful is the easy ability to change the color of the lines. You can select one of the six available Guide colors to ensure that they will be easy to see against the image subject.
In Lightroom, unfortunately, we don’t have the option to use guidelines, but I have a workaround for this. You can create a new mask using the linear gradient tool while holding down the Shift key. This way, you’ll create a perfectly vertical or horizontal line that you can use to check if the lines in the photo are parallel to the frame’s edges.
Selecting images by filename
It’s time for my favorite feature in Capture One, and perhaps one of the lesser-known ones. It may seem unnecessary to many, but my standard workflow looks like this: after a session, I prepare proofs, which are small, pre-edited files from which the client selects the final photos. Imagine the client sends an email with attached files. These are the photos they want to purchase. You’re in luck if they haven’t changed the file names. In Lightroom, you have to search for each file by name. “Each file separately. It’s a bit of a hassle with a few files, but with dozens, it can be quite a bit of work.
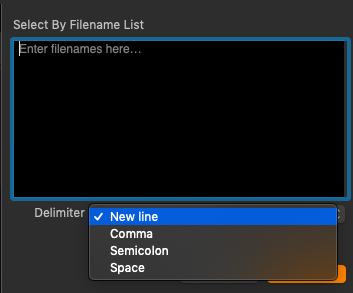
Here’s my protip for using Capture One. In the Mac OS Finder, select all the files you want to find (command+a), and then copy them to the clipboard (command+c). Then open a text editor (e.g., TextEdit), switch to plain text mode (command+shift+t), and paste the copied files (command+v). Of course, the files won’t paste as images; only their names will. Now you have a list of selected files. It’s time for Capture One. In the main menu, choose Select -> Select By -> Filename List. A dialog box will open. When searching a list, select the appropriate method to distinguish between file names from the Delimiter fly-out menu. The file names can be separated by: a new line, comma, semicolon, or space.
Summary
To sum up another article in the series about Capture One and Lightroom:
We want a history panel in Capture One! We want guides and a grid in Lightroom!
What about you? What features do you consider indispensable in the software you use?