Adding Light Trails and Removing Objects With Exposure Stacking
It’s no news that we’ve all been subjected to various levels of lockdown thanks to COVID-19. Restrictions on routine activities have given many of us plenty of time to learn new skills and techniques.
APA reader Roy Engelbrecht used his spare time in the pandemic to try out exposure stacking to satisfy a particular client request.
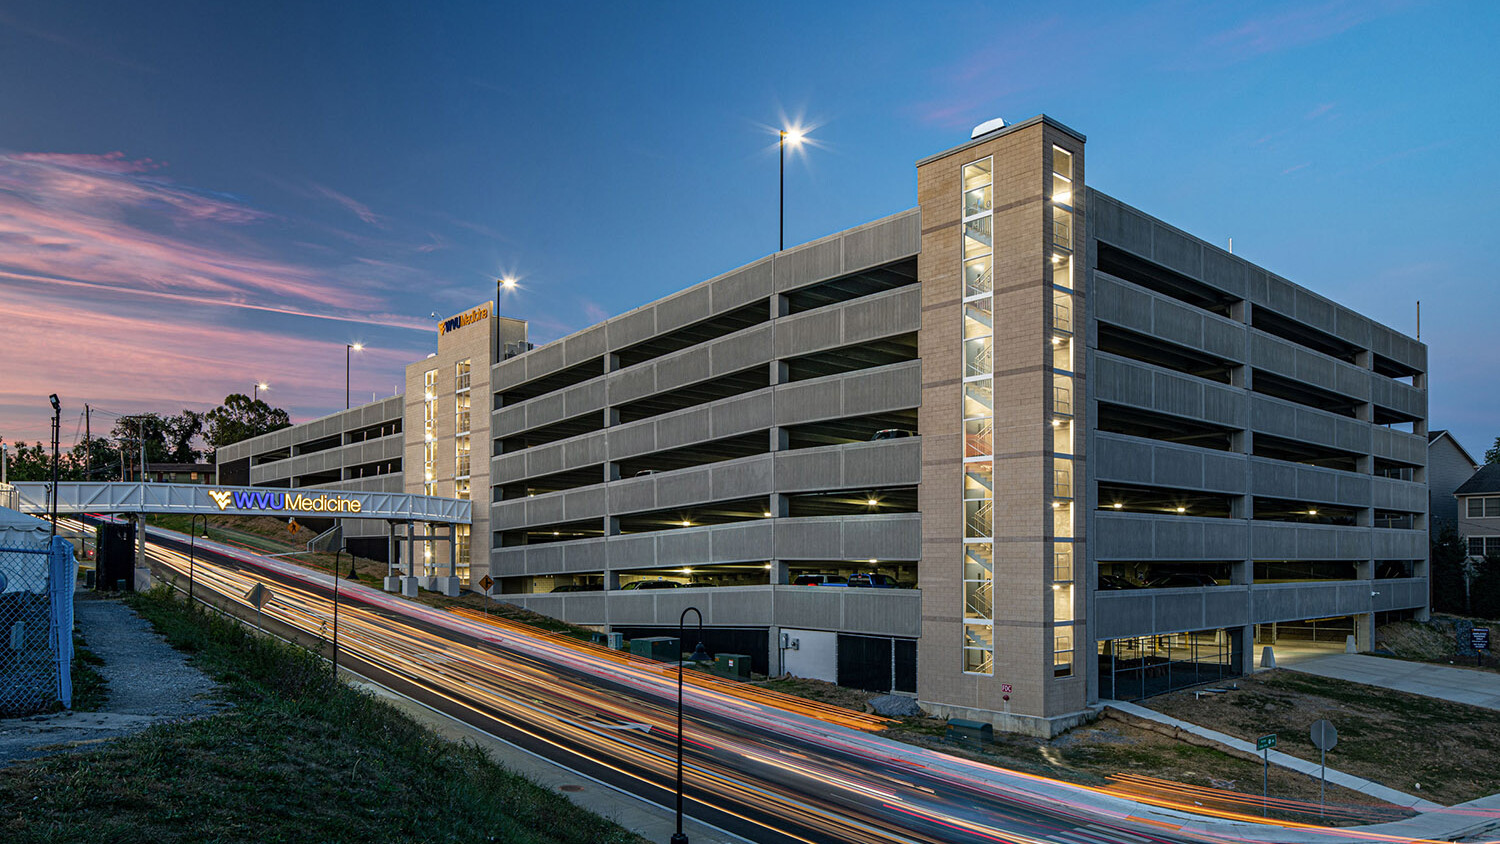
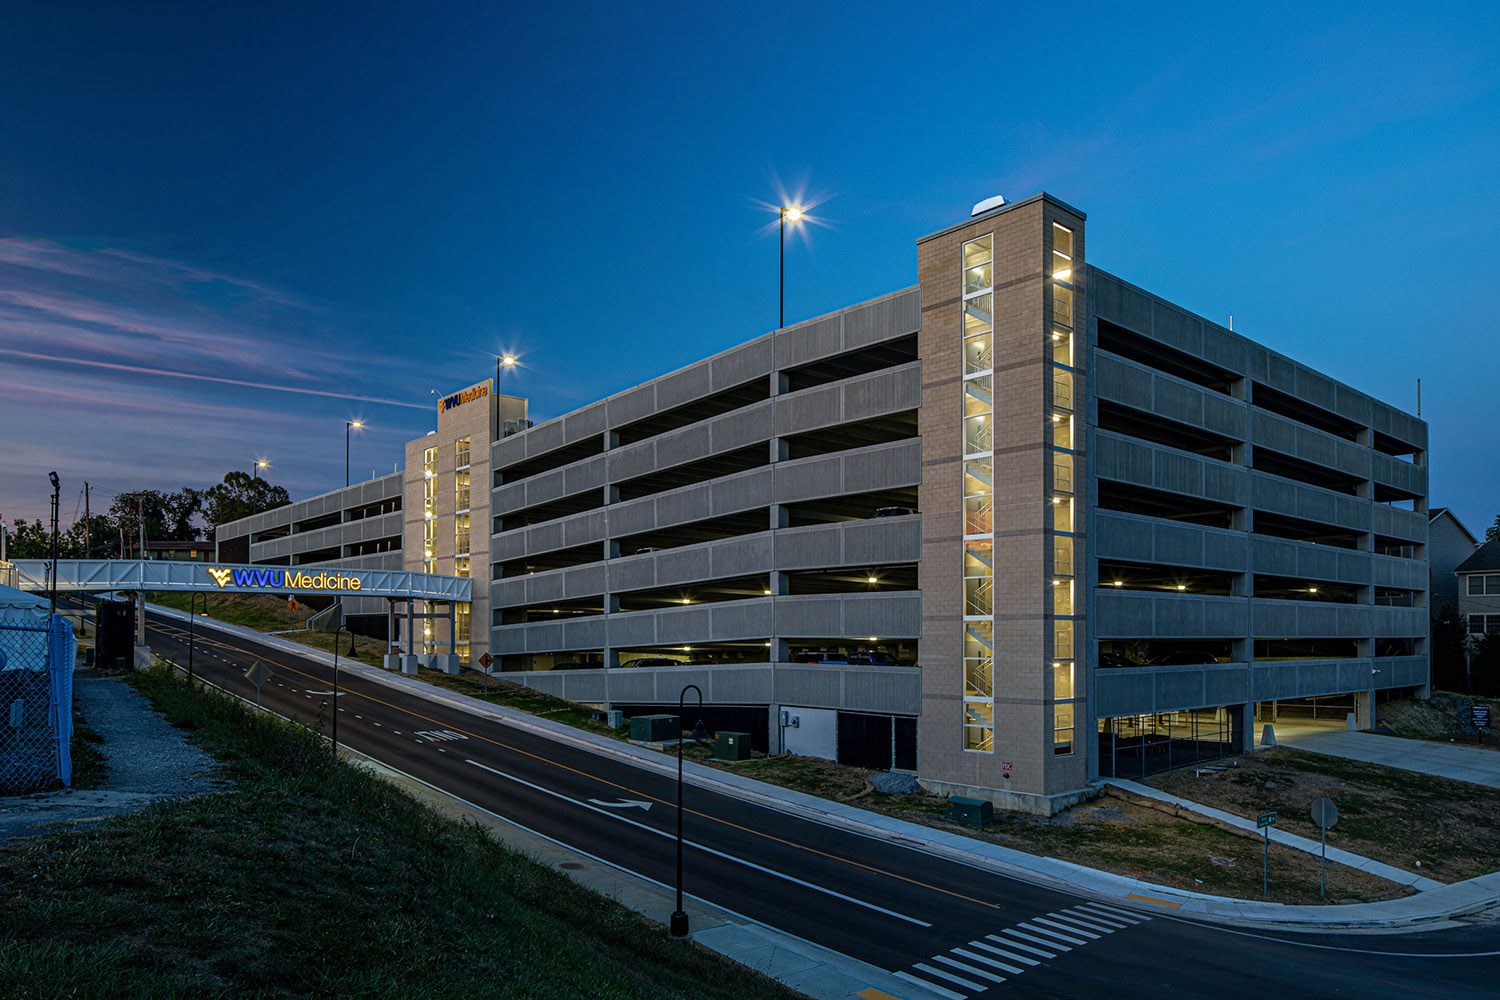
“One of my clients specializes in building parking garages. They had recently finished a nice-sized facility close to a university hospital. They wanted it photographed showing traffic. Alas there was virtually no traffic at all.“
After setting up the camera on a tripod on location and capturing a 2-3 second exposure each time a car drove by, Roy ended up with a set of around 25 images of which he selected 12 to be used in his final image stack.
This and similar problems can be solved by using photo stacking in Photoshop. Here’s how to do it:
Once in Lightroom and with all the images selected right click, select Edit in > Open as Layers in Photoshop. This will open up all your files as layers in one document.
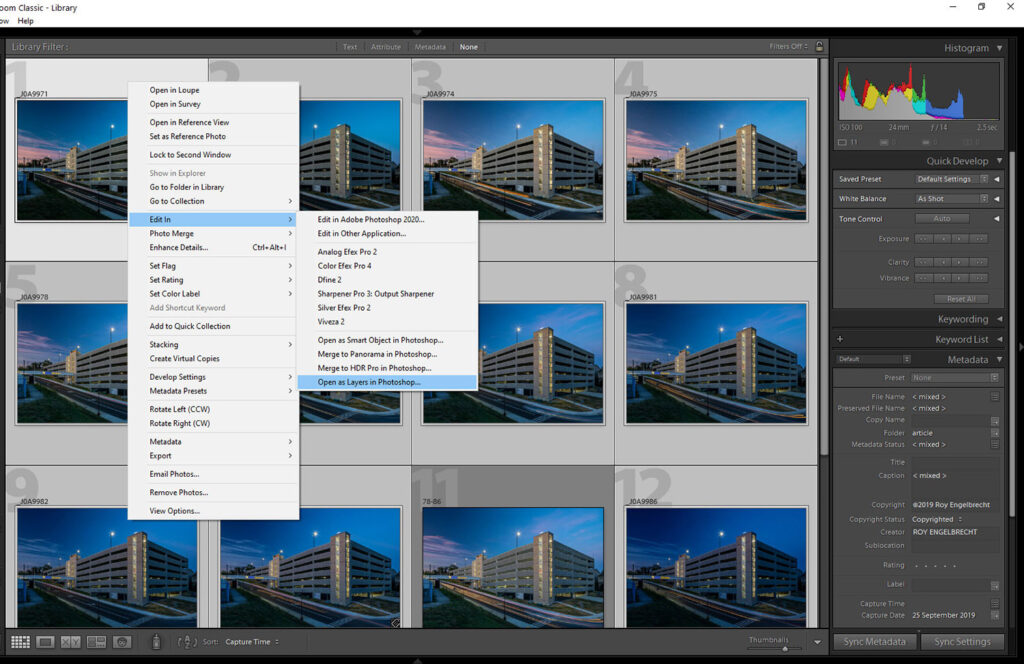
Once in Photoshop carry out the following steps:
- Make sure all the layers are aligned by selecting all the layers and going to Edit > Auto-Align Layers
- Go to Layer > Smart Objects > Convert to Smart Object. This groups all the layers non-destructively into one smart object. This allows you to go back into the layers and add or remove any layers as required.
- Next is the key step. With the smart layer selected, go to Layer > Smart Objects > Stack Mode > Maximum
And Voila:

Using this stack mode, Photoshop shows the brightest value from every pixel in your stack of images which in this case results in all the streaks of light showing up in the combined final image.
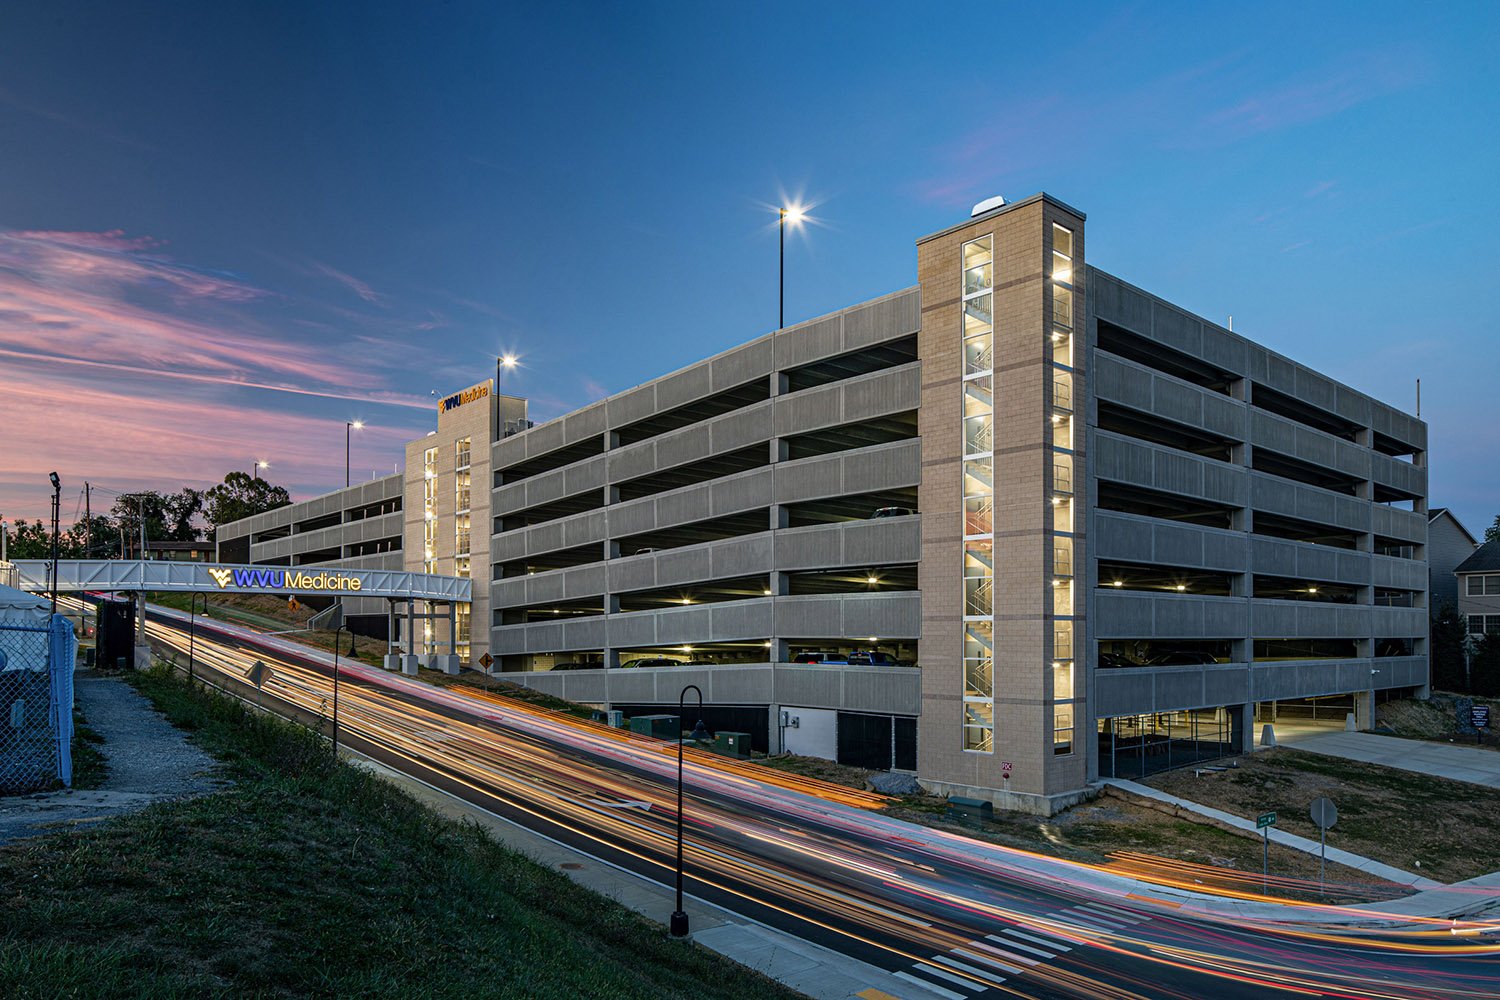
Using different stack modes this technique can also be used to have the opposite effect. Switching to Median stack mode with the exact set of images gives the following final product:
The result is a perfectly clear street with no light trails, despite the fact that all the images in the stack had some form of vehicle or light trail in the street. The way this stack mode works is that whichever tone is dominant in any part of the image will show through, which effectively means that any moving object in your composition will be removed in favor of any non-moving items.
There are some issues with the Median blended image above, such as the slightly haloed lights above the parking lot. However it’s a great way to let Photoshop do the heavy lifting as far as object removal goes, then you can always go in and refine as required.
Here’s another example using Median stack mode:
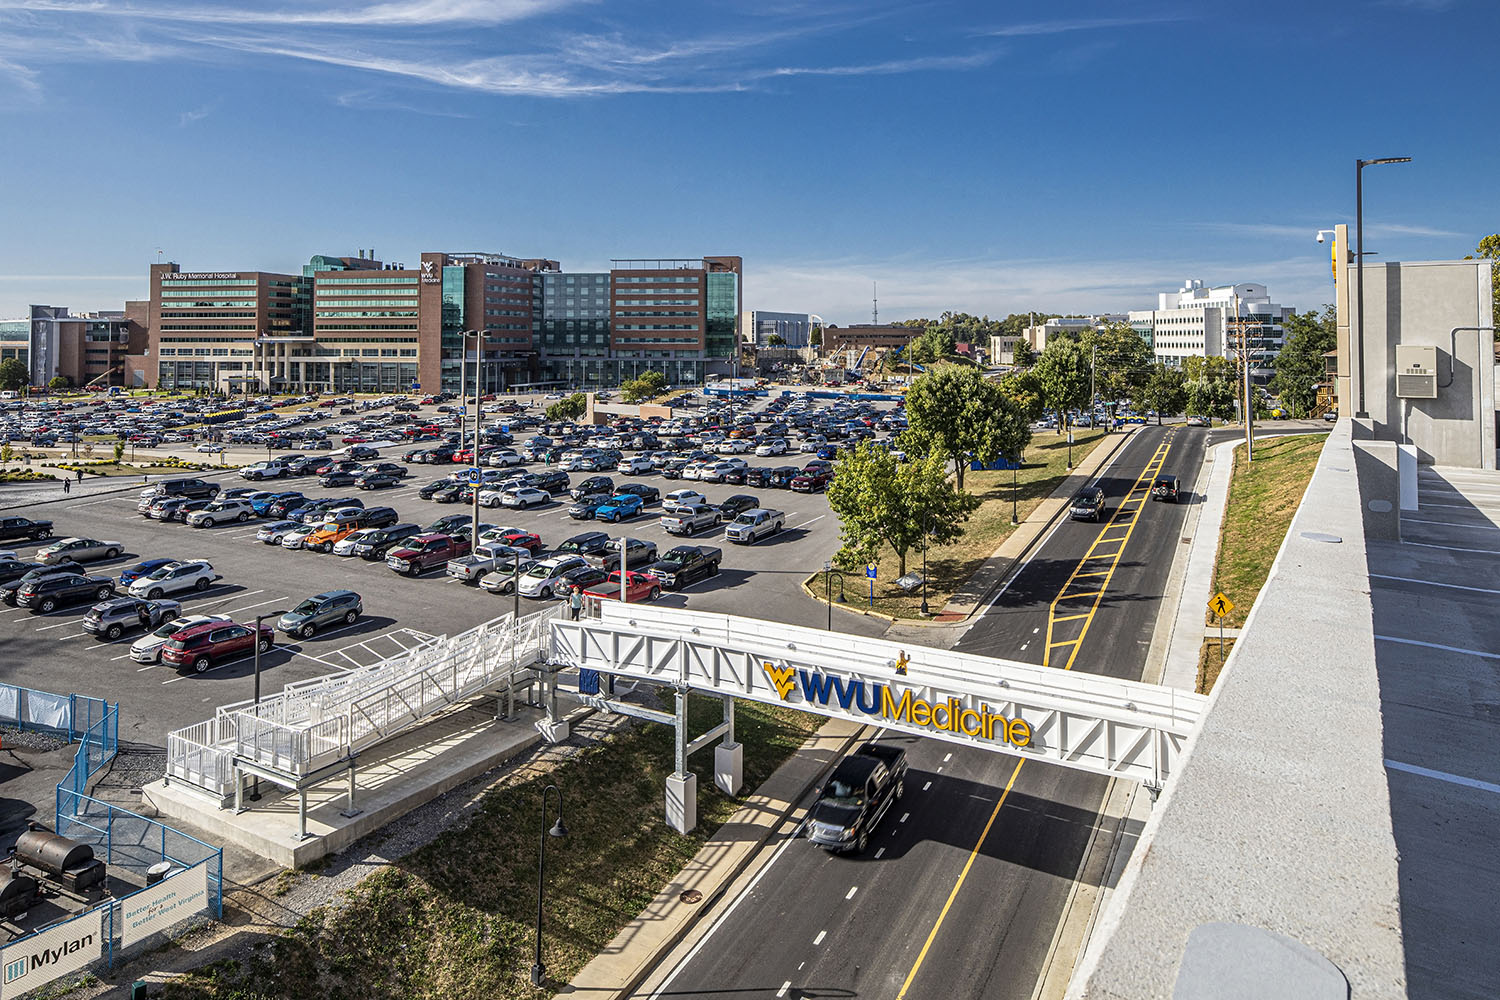

In this example all the vehicles and people that were moving through the frame are removed leaving a perfectly empty street. This can be very useful in busy areas to remove unwanted vehicles, people or other moving objects.
An interesting effect of this stack mode can be seen in the clouds at the top of the image. Using median stack mode also has the effect of simulating a long exposure starting from the first shot and ending at the last one used in the stack. The end result is soft wispy clouds, just like you would get with a long exposure. Noise in the final image also seems to have been improved thanks to the fact that digital noise “moves” from one shot to the next, though this might be of a lesser benefit to us as we rarely shoot at higher ISOs on a tripod.
Ideally, when shooting this way the gap between shots should be kept to a minimum to give the smoothest transition between shots after they’ve been stacked in Photoshop.
This technique also has a number of advantages over long exposures:
- You gain the ability to push your exposure times to very high values even in bright conditions and without the need to use expensive ND filters and consequently eliminating complicated calculations to determine what exposure time you need.
- Camera Shake. Longer exposures carry a much higher risk of being blurred than shorter 2-3 second exposures. Even if you do get it wrong discarding one shot out of many shorter ones is much less of an inconvenience than having to discard say a 15-minute exposure.
- This technique gives you the ability to shape the light just how you want it. Taking multiple shots means you can combine the light trails as required and if any shots don’t fit the rest to your liking all you have to do is discard it. Using one long exposure to capture a lot of light trails gives you very little control over what your final image will look like.
What do you think about this technique, is it something you would use in your work? Are there any other techniques you’d like us to write about? Let us know in the comments below or suggest an article idea on our contact page.
Thanks to reader Roy Engelbrecht for sending in this article suggestion. All the images shown in this article are his.