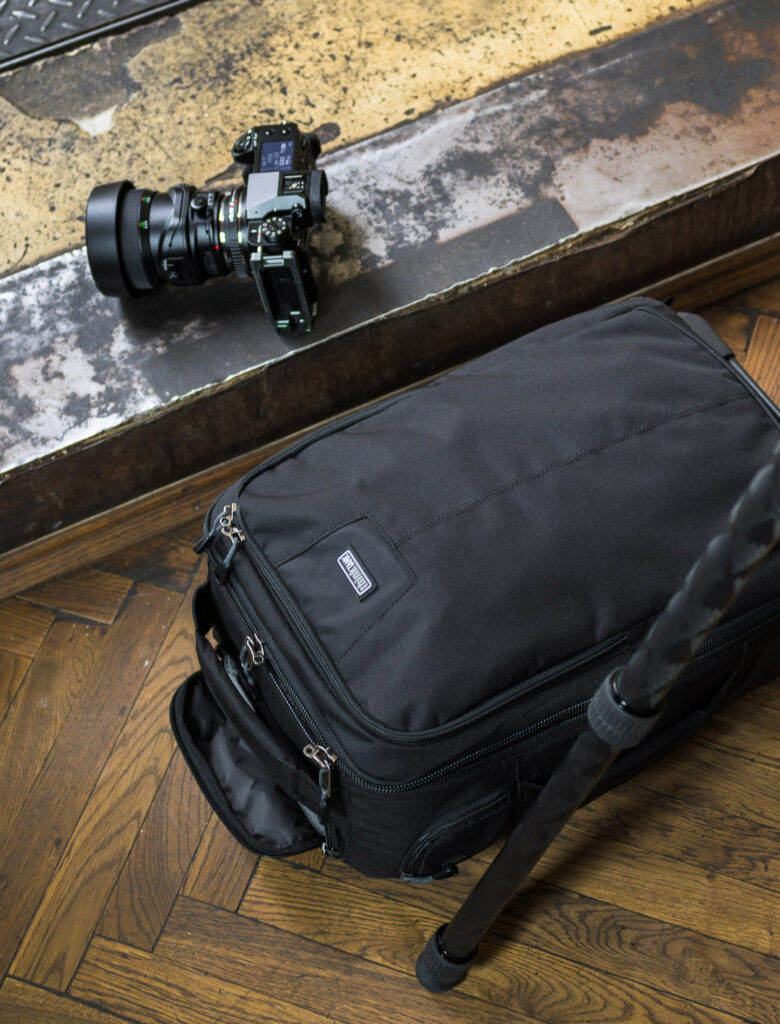
After several months of using rolling backpacks on shoots, here is what I’ve learned
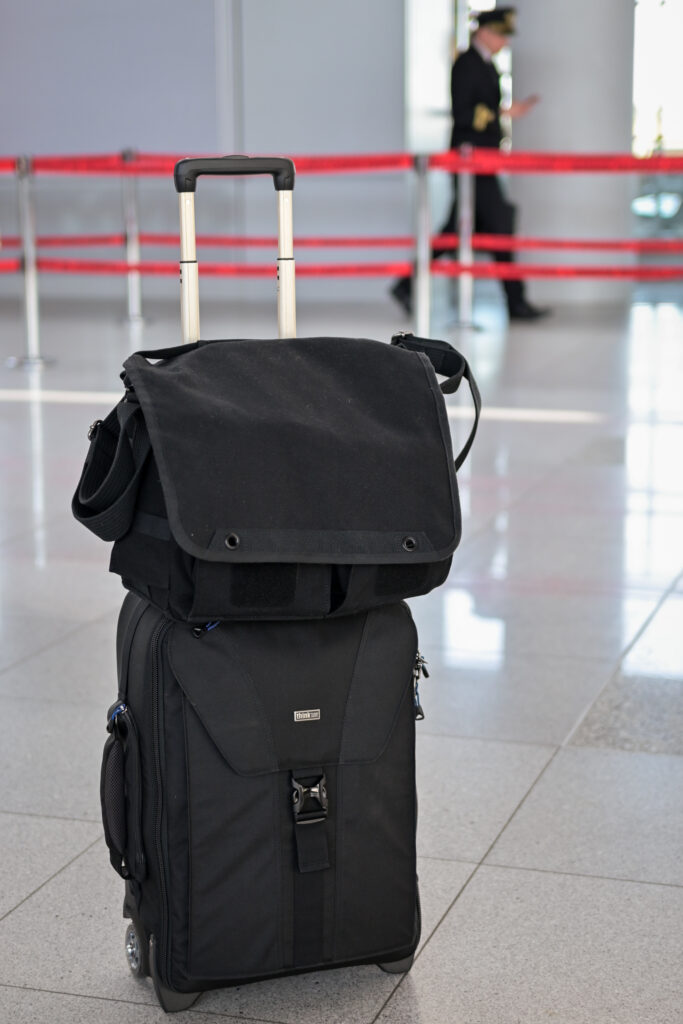
As professional photographers, we need to be able to sell not only our photographs but also ourselves – our image. It’s not just about the clients you’ve worked with, the quality of your portfolio, or the prices and deadlines you offer. Many clients, often unconsciously, are also buying you as a person. Architectural photography is not a fashion shoot in a studio full of various people, but often we have personal contact with the client, architect, or investor. And that’s when the first impression counts. You enter the interior you’re about to photograph, hunched over and weighed down by five bags hanging from you, and when the client extends their hand to greet you, one of the bags slips off your shoulder and crashes loudly onto the floor…
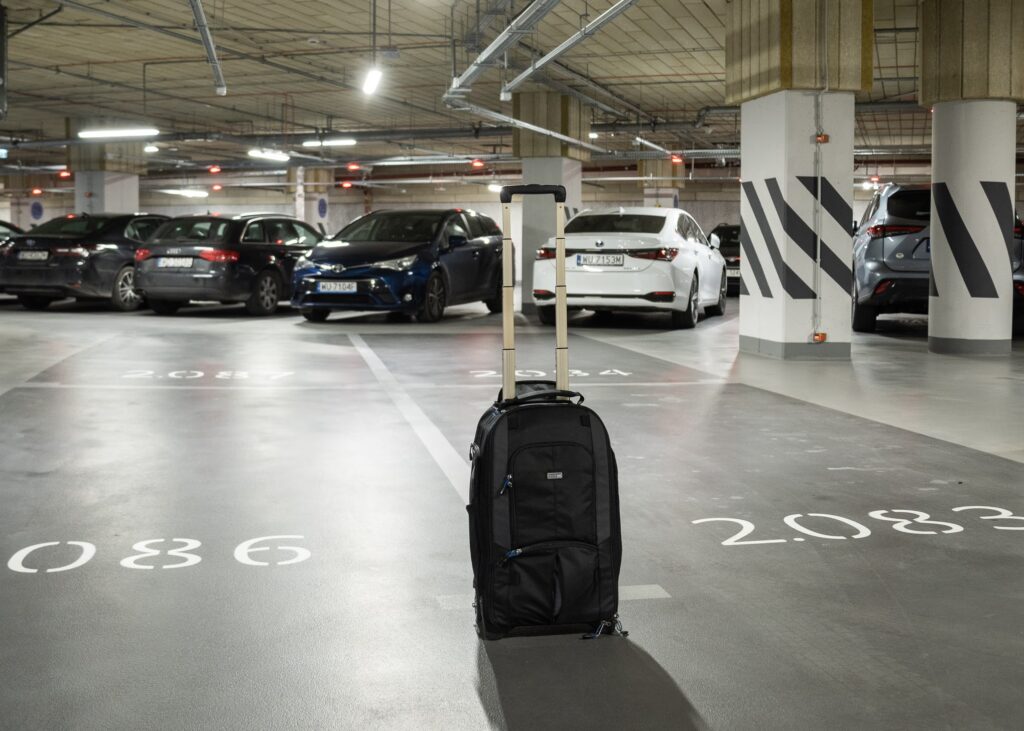
Maybe it’s better to enter with a proud, bouncy step, with a straight back, all your equipment pulling noiselessly in the suitcase behind you? That’s why (but not the only reason) after years of using shoulder bags and a backpack, I decided to see how photographic wheeled suitcases work in practice.
Hard Case with Wheels
My first choice was a durable HPRC 2550W case (it is also worth checking out Pelican cases). I used this suitcase as a carry-on when traveling by plane. You can choose a version with compartments or custom-cut foam. I opted for the empty model. The advantage of this solution is that you can put any bag or inserts inside and take them out of the case upon arrival. I can fit my camera, basic lenses, and a small tripod in the HPRC 2550W, and I know that the equipment is definitely safe. However, when it comes to actual photography, such a case has more disadvantages than advantages. Among the positives, it can be used as a platform or step when shooting from a higher position. However, an empty case weighs almost 5 kg, the wheels are very noisy and unstable, and they roll poorly, especially on rough surfaces. But above all, it’s practically impossible to move around on unpaved terrain. Plastic cases also don’t have any external pockets, which makes it difficult to store small essentials.
So why not just a regular camera backpack? A backpack is certainly a good solution, but if we’re bringing a lot of equipment to a shoot, the backpack simply becomes very heavy. Why not a bag? Because carrying it hurts your back, and you can’t just lift a bag as big as a backpack or suitcase.
ThinkTank rolling backpacks
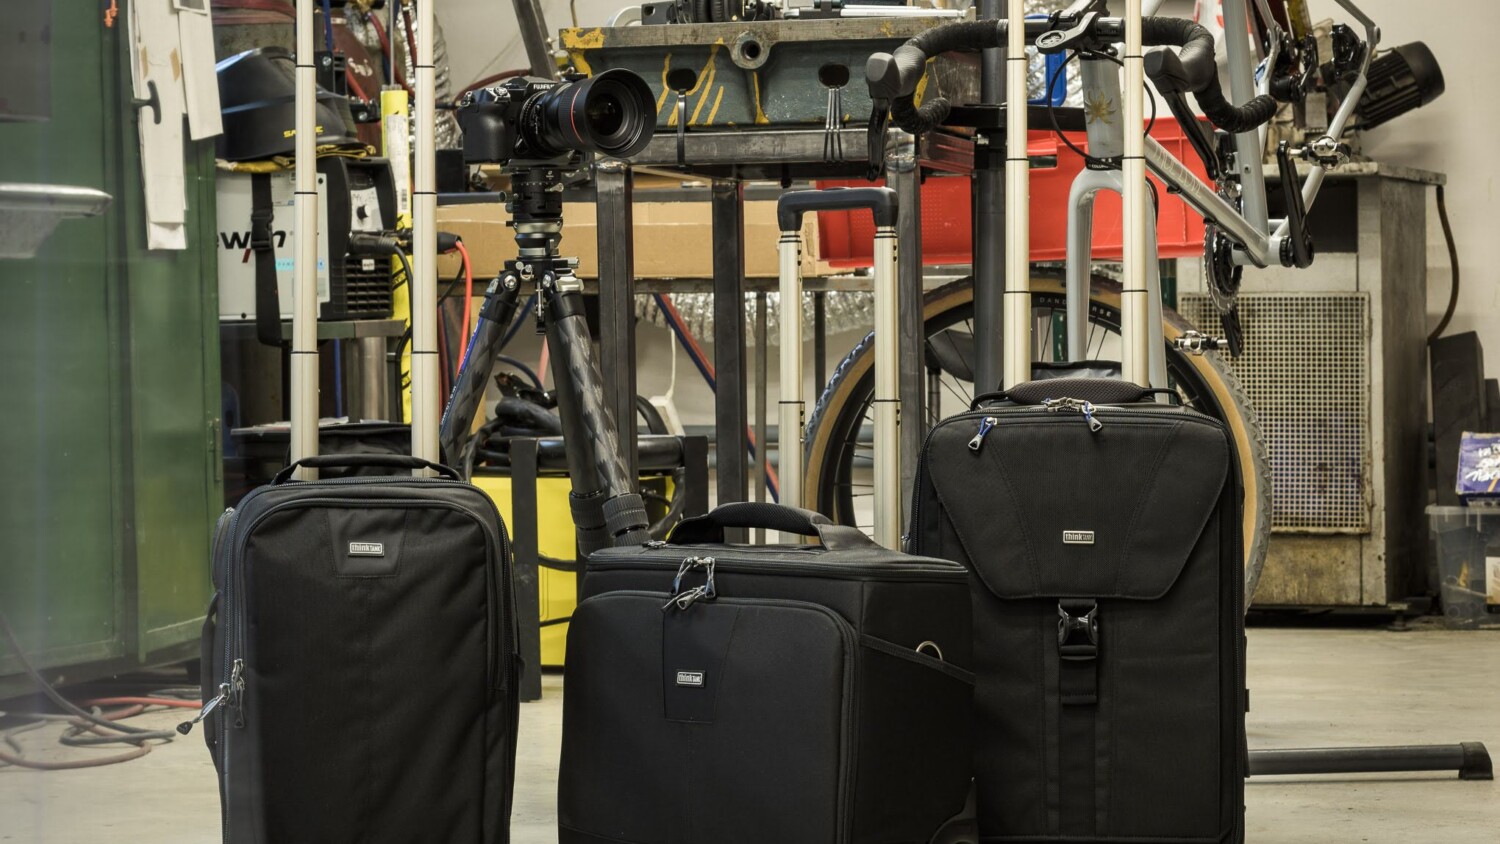
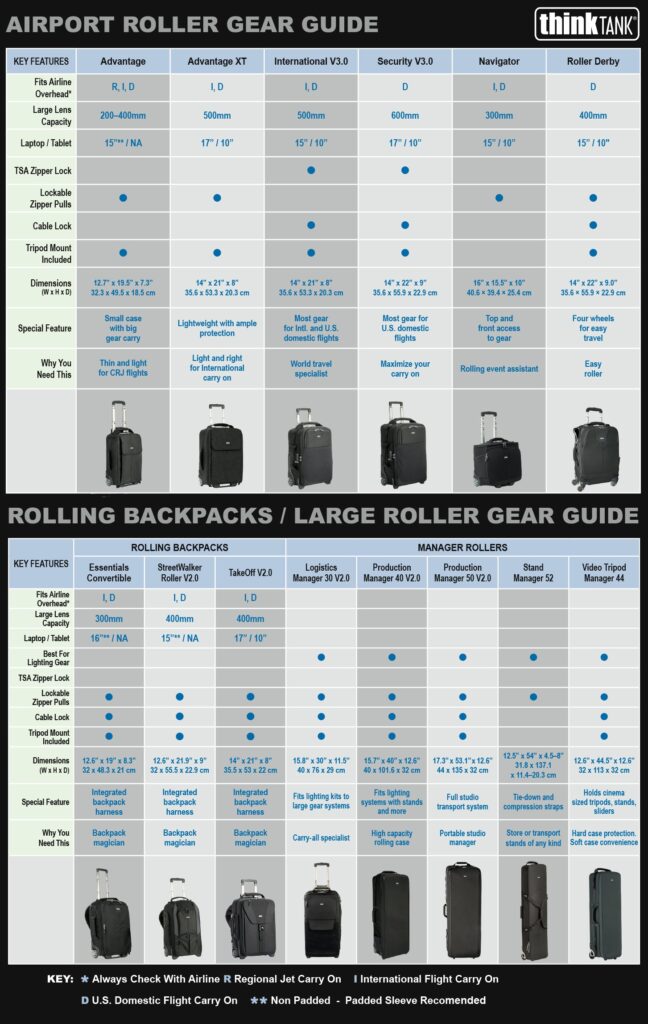
Here we come to the hybrid option, the Rolling Backpack. Will it solve all the problems described above? The products I will describe below are derived from soft suitcases with wheels designed for air travel. Their dimensions and weight are tailored to meet airline requirements. The weight of all the models mentioned below falls within the range of 3-4 kg. Considering that these suitcases have excellent wheels, comfortable foldable handles, internal pockets and compartments, and, most importantly, backpack straps, the weight is not significant. I have compared all the available Think Tank models that combine the features of a suitcase and a backpack:
- ESSENTIALS CONVERTIBLE ROLLING BACKPACK
- STREETWALKER V2.0 ROLLING BACKPACK
- AIRPORT TAKEOFF V2.0 ROLLING BACKPACK
Of course, other manufacturers also offer similar solutions, such as:
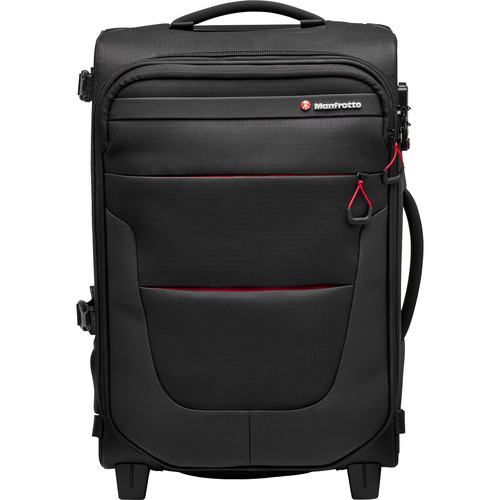
- Manfrotto Pro Light Reloader Switch-55 Backpack/Roller
- Lowepro Pro Trekker RLX 450 AW II Backpack
- Vanguard VEO SELECT 55T Trolley Backpack
- Vanguard Alta Fly 55T Roller Bag
- Tenba Roadie Hybrid Roller 21
- ORCA Wheeled DSLR Trolley Case with Backpack System
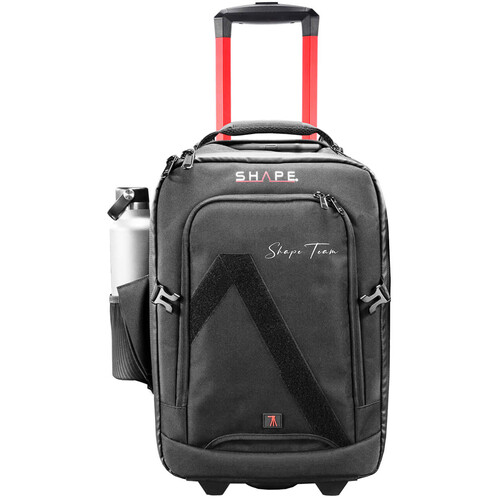
- SHAPE Pro Video Camera Backpack


I won’t attempt to point out which model is the best. However, I will try to assess, using the example of Thinktank products, whether the rolling backpack is a good solution in practice, replacing a regular shoulder bag during architectural shoots. Or perhaps it will turn out that it is primarily an option for transport during longer trips (especially air travel)?
Backpacks converted into a suitcase
Let’s first examine the idea behind the construction of a backpack suitcase.
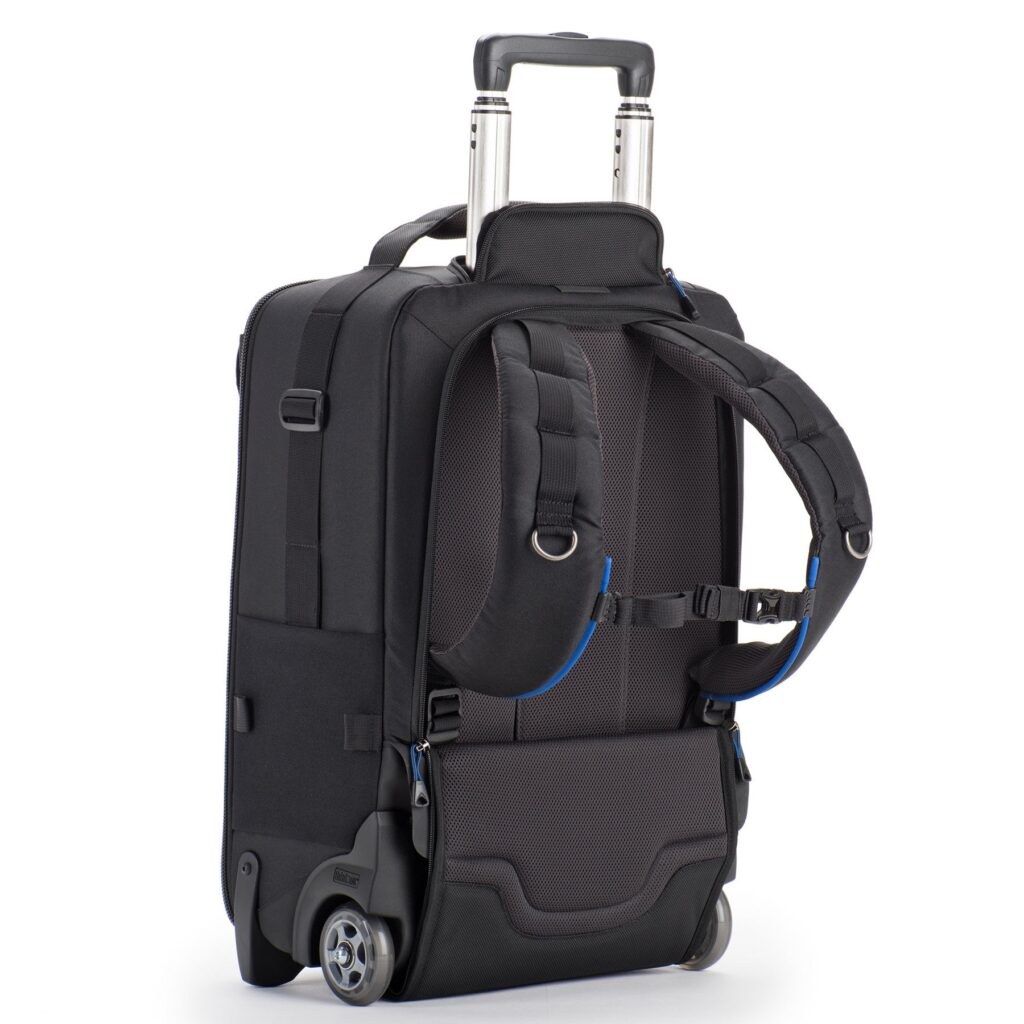
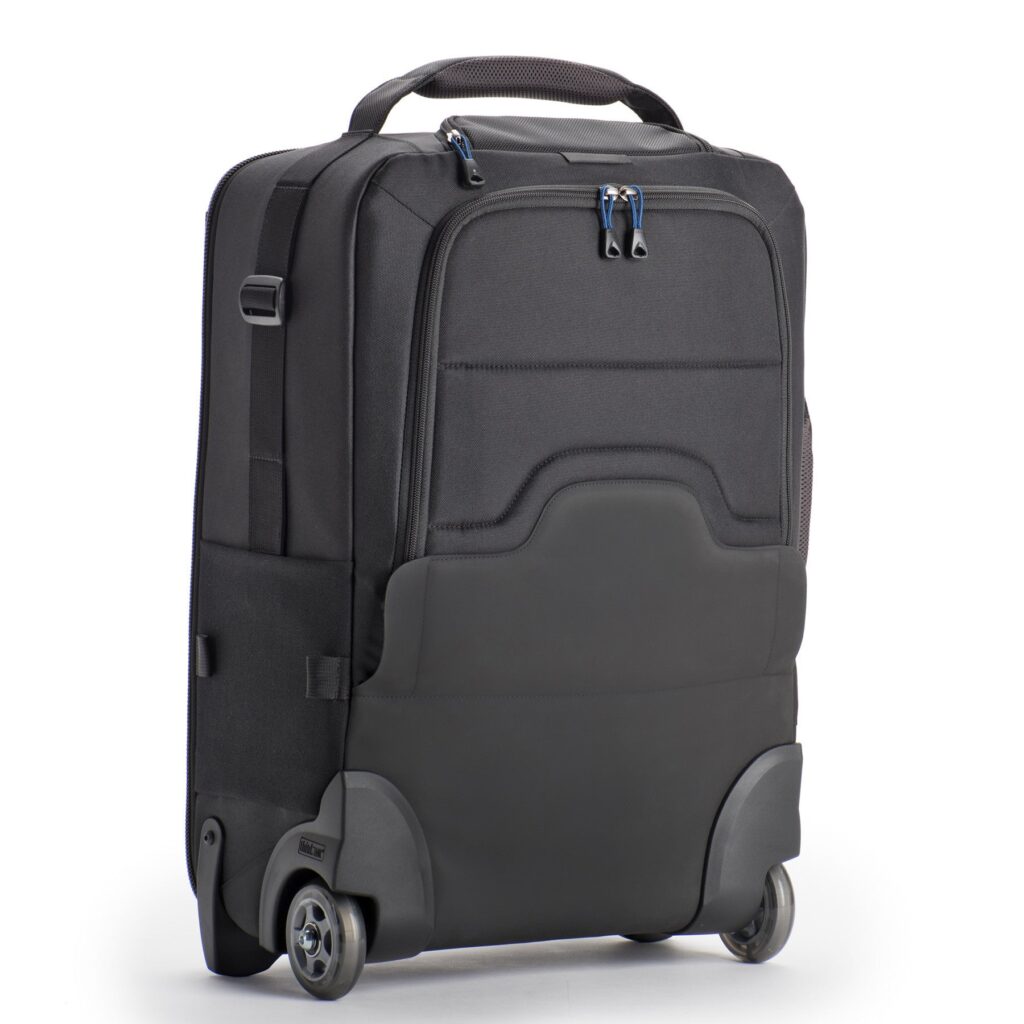
Backpack carrying system: If we take a regular suitcase with wheels and a telescopic handle and simply add shoulder straps to it, we have to consider that it won’t be the most comfortable solution for carrying heavy photography equipment on our backs. That’s why Thinktank has implemented thick, soft foam padding and lumbar support in the described models. The entire backpack-carrying system can be stored in a special zippered pocket. This way, we can avoid getting our backs dirty because we can protect the backpack’s carrying system when the suitcase is on the ground. The only way to access our equipment is by opening the main front lid. Therefore, we need to lay the backpack suitcase on its back (with the backpack carrying system) and then comfortably take out the gear. If we place the suitcase on wet grass or a muddy sidewalk, the shoulder straps and the entire carrying system will get dirty, and we won’t want to put it on our backs anymore.
The ability to hide the shoulder straps is also very useful when we need to fit the luggage into a tight overhead compartment on an airplane. Straps sticking out would make it much more difficult. Unfortunately, the described models do not include a hip belt. It would take up too much space and couldn’t be stored in the pocket designated for the carrying system. It’s important to remember that a suitcase of this size filled with equipment and weighted down with an attached tripod is heavy, and a hip belt would help relieve the strain on the back. But combining a suitcase with a backpack is, of course, a compromise, and we gain something while losing something else.
Smaller internal size: Two out of the three models described here belong to Thinktank’s Airport series. All three suitcases have dimensions that allow them to be taken on board an airplane (of course, it is essential to check the specific regulations of your carrier). Therefore, the manufacturer tried to maintain the external dimensions at the expense of the interior space. The telescopic handle needs to be stored somewhere, so when packing our gear, we will notice a tunnel in the middle of the suitcase that reduces the available internal space. In practice, it is possible to arrange the layout of cameras and lenses in such a way that it won’t be very noticeable because the compartments on the sides have full height, and some lenses can be positioned vertically there, while the body with an attached lens can be placed in the middle. The compartments in the lower corners are also smaller because the wheels are located there, which do not protrude beyond the outline of the suitcase. In summary, a suitcase with a backpack-carrying system will have a shallower interior compared to comparable models without shoulder straps.
Greater weight: Of course, a backpack with the added option of a rolling suitcase will be heavier, and quite significantly so. Let’s compare the Streetwalker V2.0 Rolling Backpack with its counterpart in the non-wheeled version, the StreetWalker HardDrive V2.0 model. Both backpacks have very similar internal dimensions (12.2″ W x 16.5″ H x 4.3-5.9″ D / 31 x 42 x 11-15 cm and 11.8″ W x 19.7″ H x 6.3-7.1″ D / 30 x 50 x 16-18 cm, respectively), but their weight and external dimensions differ significantly. The version with wheels is nearly twice as heavy (8.2 lbs. / 3.7 kg compared to 4.5 lbs. / 2 kg)! Therefore, it is important to be aware that a backpack suitcase will always be heavier and less convenient to carry on your back than a standard backpack.
Access to the interior: None of the models described below have side or top access to the interior. When comparing backpack suitcases with typical camera backpacks, it should be noted that the latter often offers the ability to take out the camera or an additional lens without taking the backpack off your shoulder. In the case of rolling backpacks, access to their contents is similar to that of a regular suitcase. When we open the flap, we see the entire contents. This is very convenient, but only when we have the appropriate conditions and time to lay the suitcase down. We won’t be able to quickly retrieve a single item while wearing a backpack suitcase on our backs.
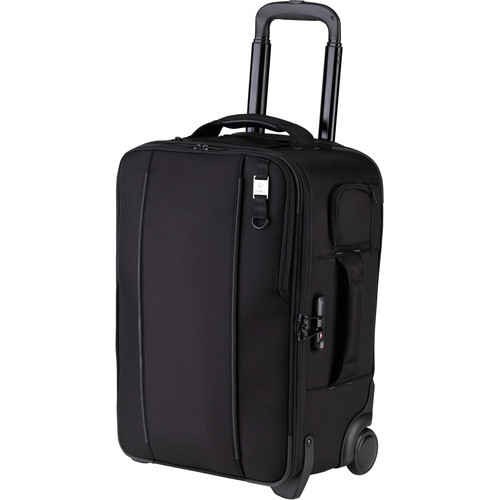
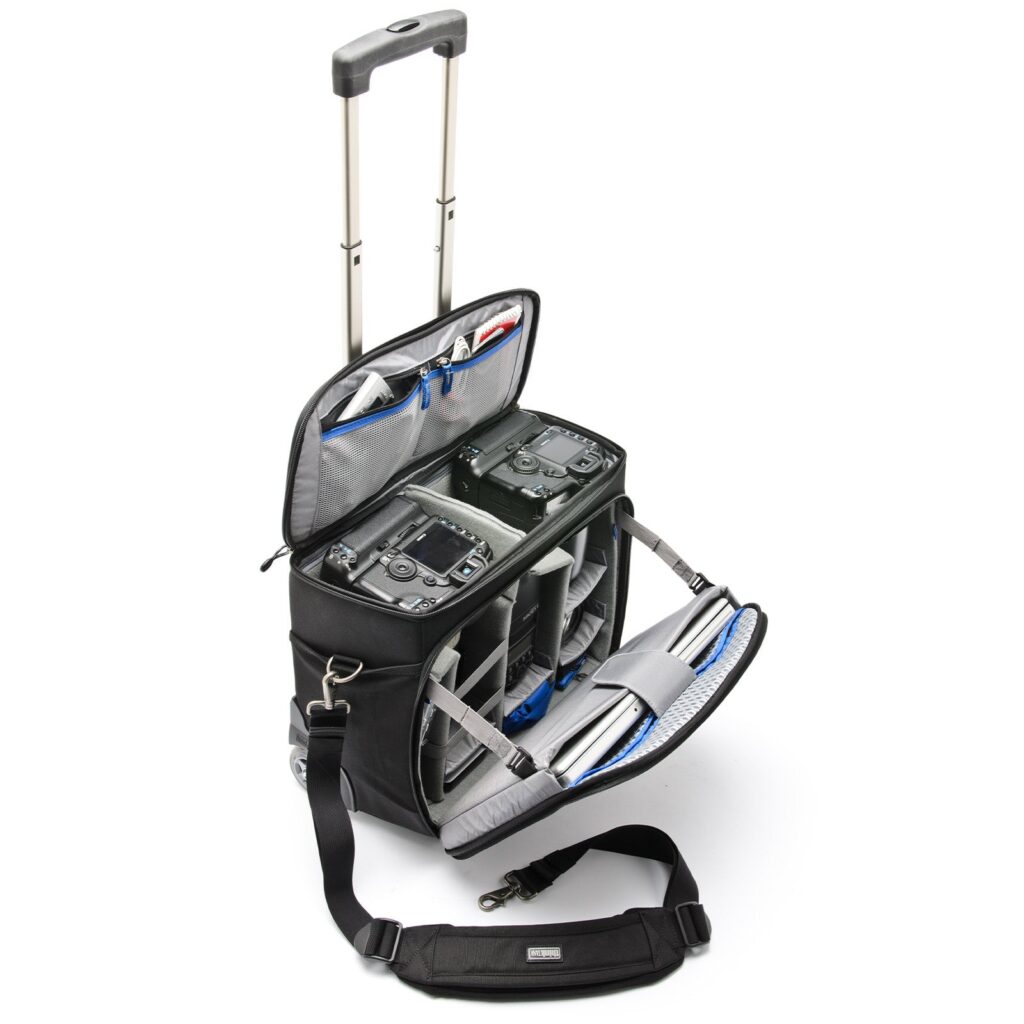
Essentials Convertible Rolling Backpack
It’s the rolling version of the Airport Essentials backpack. Within the described group, it is the cheapest, smallest, and simplest model. I personally like these three features. Thanks to its size, the Essentials Convertible Rolling Backpack is very convenient. Its minimalist design, without unnecessary decorations, makes it discreet and easy to keep clean. The black material with a DWR (durable water-repellent) coating is water-resistant, and additionally, it can be protected with the included rain cover.
I easily fit my standard kit into this suitcase, which includes: GFX100s, GF 63mm, Canon TS-E 50mm, LAOWA 20mm f/4 Zero-D Shift, GF 45-100, Laowa MFC, lens adapters, batteries, accessories, and a laptop. With this setup, there’s no more free space left. It’s important to note that large lenses, like the mentioned Canon with the attached GF adapter, won’t fit vertically. The Essentials Convertible Rolling Backpack has a depth of 15 cm at its maximum and only 11 cm at its shallowest point. The backpack could be a bit deeper, but we should remember that this type of design is a compromise.
Since this is a suitcase from the Airport series, the laptop pocket is located on the top. It can accommodate a 16-inch computer. This allows you to easily access the laptop without opening the main compartment, whether it’s for in-flight use or going through airport security. Inside the mentioned pocket, you’ll find several small compartments for pens, a wallet, or memory cards. Unfortunately, there are no additional external pockets. If you consider this model as a travel suitcase for carrying on board an airplane, this design choice is not surprising or inconvenient since all the equipment is safely enclosed, and pockets for small items can be found inside the bag. On the side, there is a pocket made of thin, highly elastic material where you can secure tripod legs or fit a water bottle, for example. I have concerns about the durability of the material used for the tripod pocket, though.
At the top and on the sides, you’ll find large, comfortable, soft handles for carrying the suitcase by hand. In the bottom part, there’s also a sturdy plastic handle connected to the feet, which allows for a secure grip. These handles come in handy when you need to place heavy luggage in the overhead compartment of an airplane, for example.
For a simple photo session, the Essentials Convertible Rolling Backpack worked very well for me. However, when I had to go on a more complex assignment and wanted to bring additional camera bodies and a flash, I had to carry an extra bag with me.
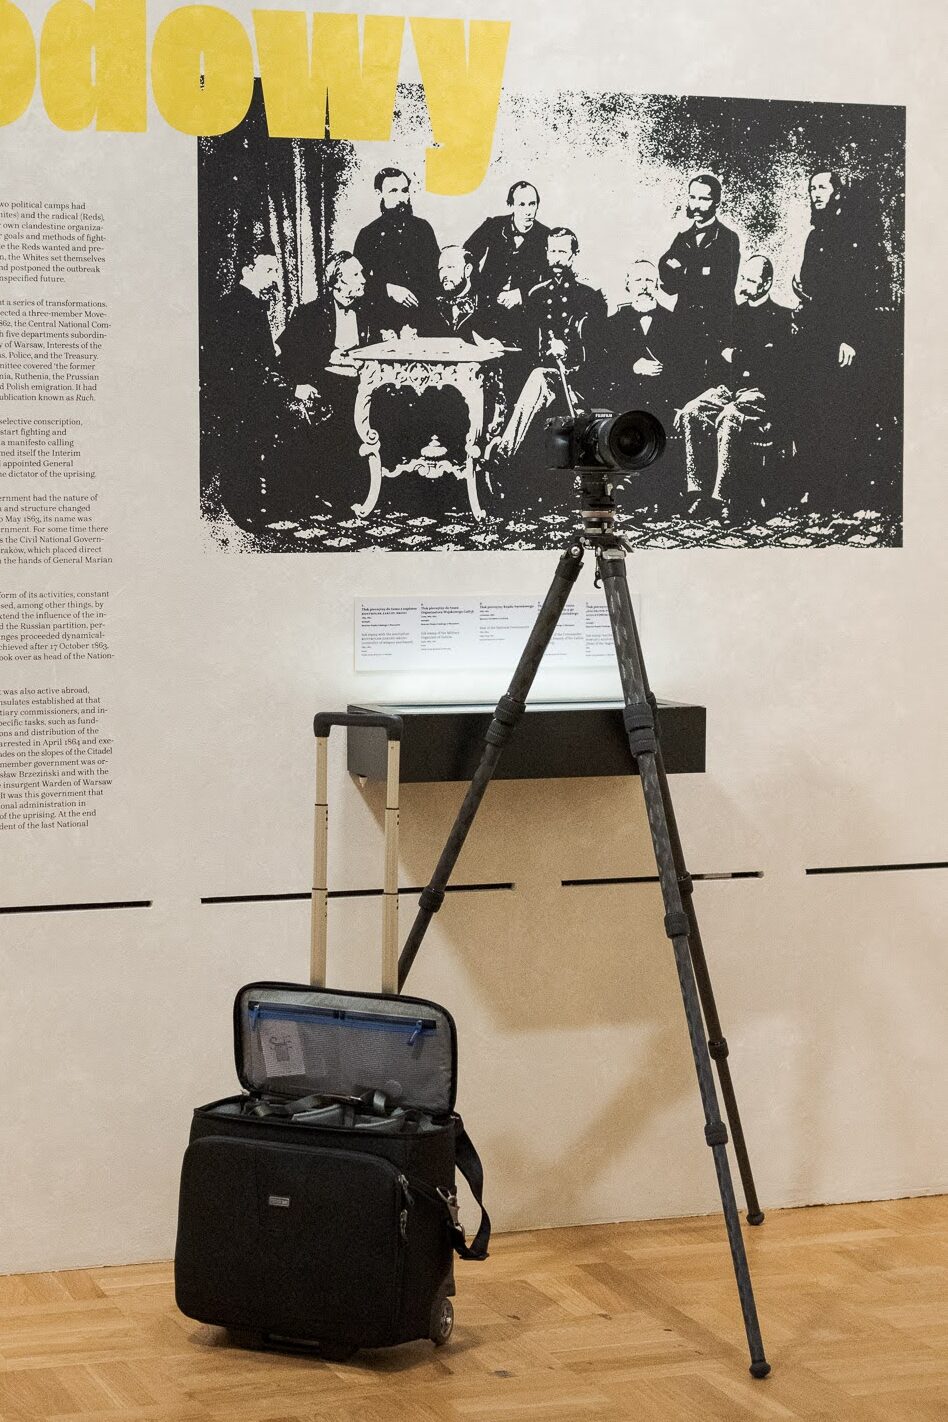
While photographing an exhibition at the National Museum in Wrocław, I was able to freely maneuver the suitcase across the large museum hall with a smooth floor, and the small additional bag didn’t hinder me.
I believe that the size of this suitcase will work well for small, quick photo sessions. The Essentials Convertible Rolling Backpack is a basic, simple model with a reasonable price considering its class of equipment. However, the build quality and materials used are not compromised compared to more expensive models.
In summary, it is an affordable, lightweight (3.3 kg), and handy model that can accommodate a basic photography kit. Its compact external dimensions and comfortable carrying system make it versatile as both a backpack and a suitcase.
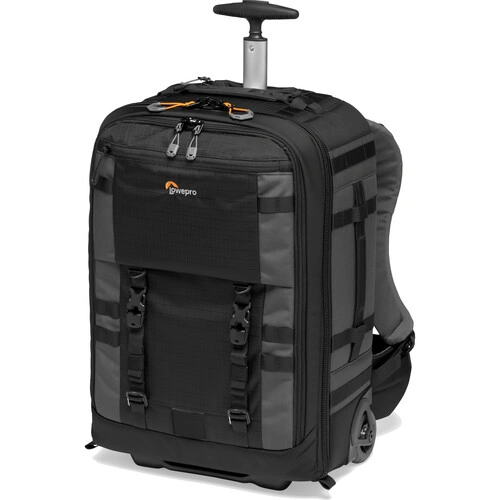
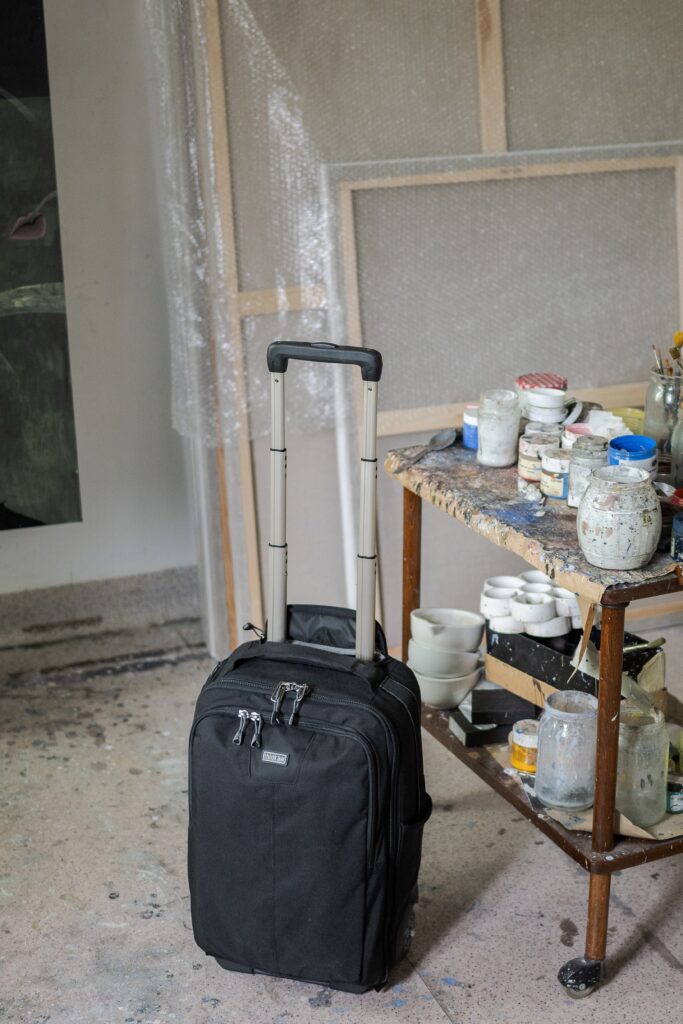
Airport TakeOff V2.0 Rolling Backpack
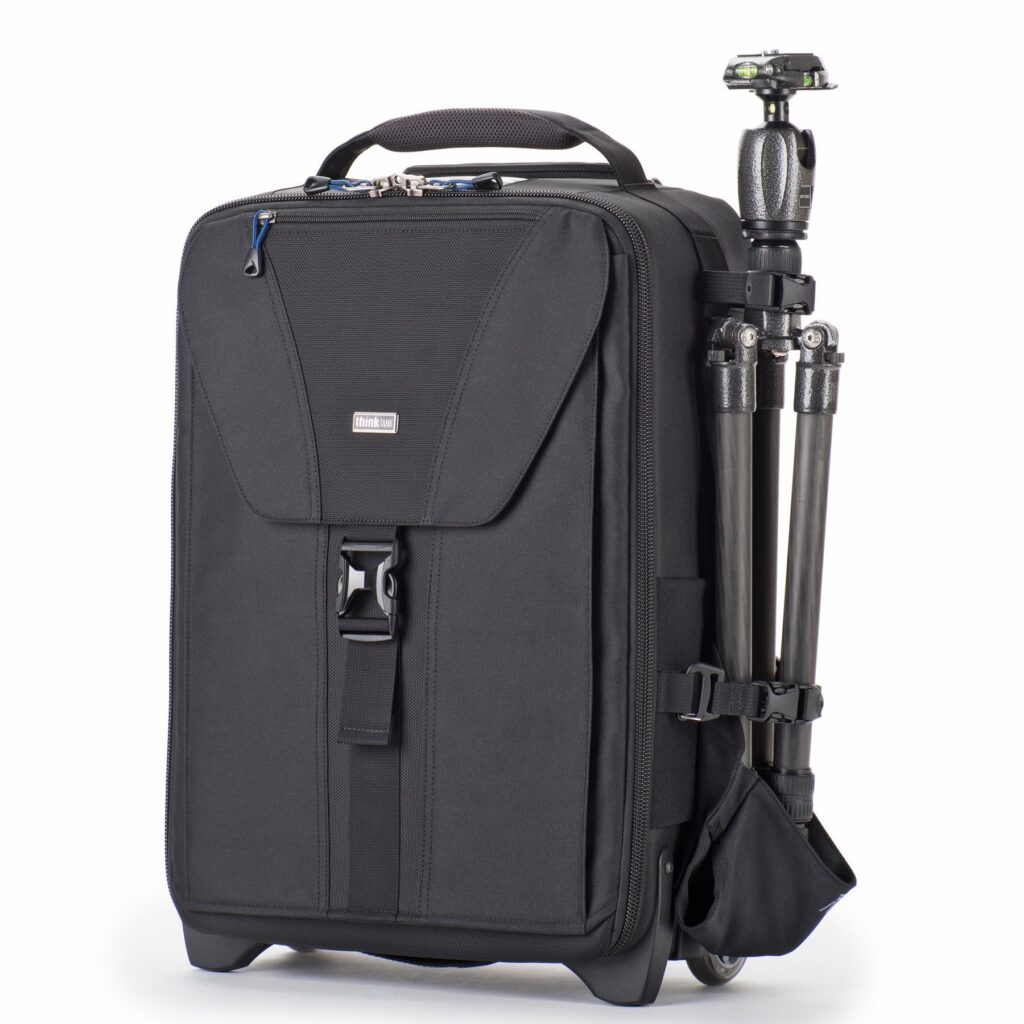
This is the largest and most expensive model among the ones described. At first glance, it is primarily a suitcase. Unlike the Streetwalker V2.0 Rolling Backpack, it is more of a wheeled suitcase that can be used as a backpack in exceptional situations, rather than a backpack that can sometimes function as a suitcase. This model was designed with photographers in mind, especially those who frequently travel with a large amount of photographic equipment. It is the most spacious product in this comparison. The external dimensions are 35.5 x 53 x 22 cm, while the internal dimensions are 33 x 47 x 13-17 cm. In this case, we can see that the backpack straps, telescopic handle, and the thickness of the suitcase walls take up 9 cm in the middle. The backpack is equipped with dedicated pockets for a 16-inch laptop and a tablet with dimensions of 25 x 24 x 2 cm. Since this model belongs to the Airport series, the laptop pocket is easily accessible without having to open the entire suitcase. The weight of the Airport TakeOff ranges from 3.9 to 4.4 kg depending on the accessories used. The suitcase is made of durable 1680D ballistic nylon with a DWR (Durable water-repellent) coating and features internal PU foam for the safety and protection of photographic equipment during transportation. On the side, there is a pocket and straps for carrying a large tripod. However, it should be noted that if the tripod extends beyond the outline of the suitcase, it may exceed the dimensions specified by the airlines.
When flying for two photo sessions in London, I had to pack a lot of equipment. It was important for me to fit everything, including the tripod, in one suitcase. Without major issues, I packed the medium format Fuji camera with a large zoom, four large lenses, a DSLR without a grip (as a backup body), a two-meter Leofoto LQ-365C tripod (I had to unscrew the rubber feet for transportation), a Leofoto G2 tripod head with a leveling base, and another Leofoto LH-36 tripod head into the Airport TakeOff V2.0. Additionally, I easily fit many smaller and larger accessories. I could have also included a laptop, but I was concerned about exceeding the weight limit of the baggage. After placing the described setup on the scale, it showed 15 kg. Quite a lot. The Airport TakeOff V2.0 is truly a very spacious suitcase. However, packing and accessing the equipment would be easier if the interior was deeper. As I mentioned before, the retractable handle of the suitcase takes up space inside the baggage.

TakeOff allows for packing two large camera bodies side by side.
Streetwalker V2.0 Rolling Backpack
ThinkTank Streetwalker V2.0 Rolling Backpack is the rolling version of the StreetWalker HardDrive V2.0 backpack. So, you could say it’s a backpack with added wheels and a telescoping handle, rather than a suitcase with added straps like the previously described models. Therefore, it’s not another representative of the Airport collection to which the earlier models belong. The priority in designing the shape and dimensions of this product was to ensure comfort while carrying and using it as a backpack. We have the largest number of external pockets here, both small ones with zipper closures and larger ones that can carry items like a water bottle. In the Streetwalker backpack, we can also find the most convenient tripod mounting system. We can attach a tripod or monopod not on the side like in the Airport series but on the front of the backpack. Although the Streetwalker V2.0 Rolling Backpack does not belong to the line of airline suitcases, its dimensions also comply with the requirements for carry-on luggage on an airplane. One of the distinctive features of this product is the absence of typical suitcase handles on the side and bottom of the backpack.
The interior of this backpack can accommodate a lot of gear. In terms of capacity, this model falls between the Essentials Convertible Rolling Backpack and the Airport TakeOff. The biggest difference can be noticed in the width, as the Streetwalker is narrow, and we won’t be able to fit two cameras with attached lenses side by side. The shape is less rectangular, so we also lose some space at the corners of the backpack. On the inside of the flap, there is a special compartment for a laptop, which guarantees its safety during transport. However, this arrangement can make packing and arranging the gear in the backpack more difficult and time-consuming. There have been instances where I packed and closed the backpack without the laptop. The contents filled the interior tightly, so when I wanted to add the computer, I found that the flap wouldn’t close anymore. In the case of suitcases with a laptop pocket located on the outside of the flap, the computer fits regardless of how much stuff we cram inside the backpack.
During travel, accessing the laptop may be inconvenient as it requires laying the backpack flat to open the flap. There may be difficulties in opening the backpack vertically, especially if we have a lot of small accessories inside. Apart from this one issue, this model is very functional and allows for convenient transportation of photographic equipment.
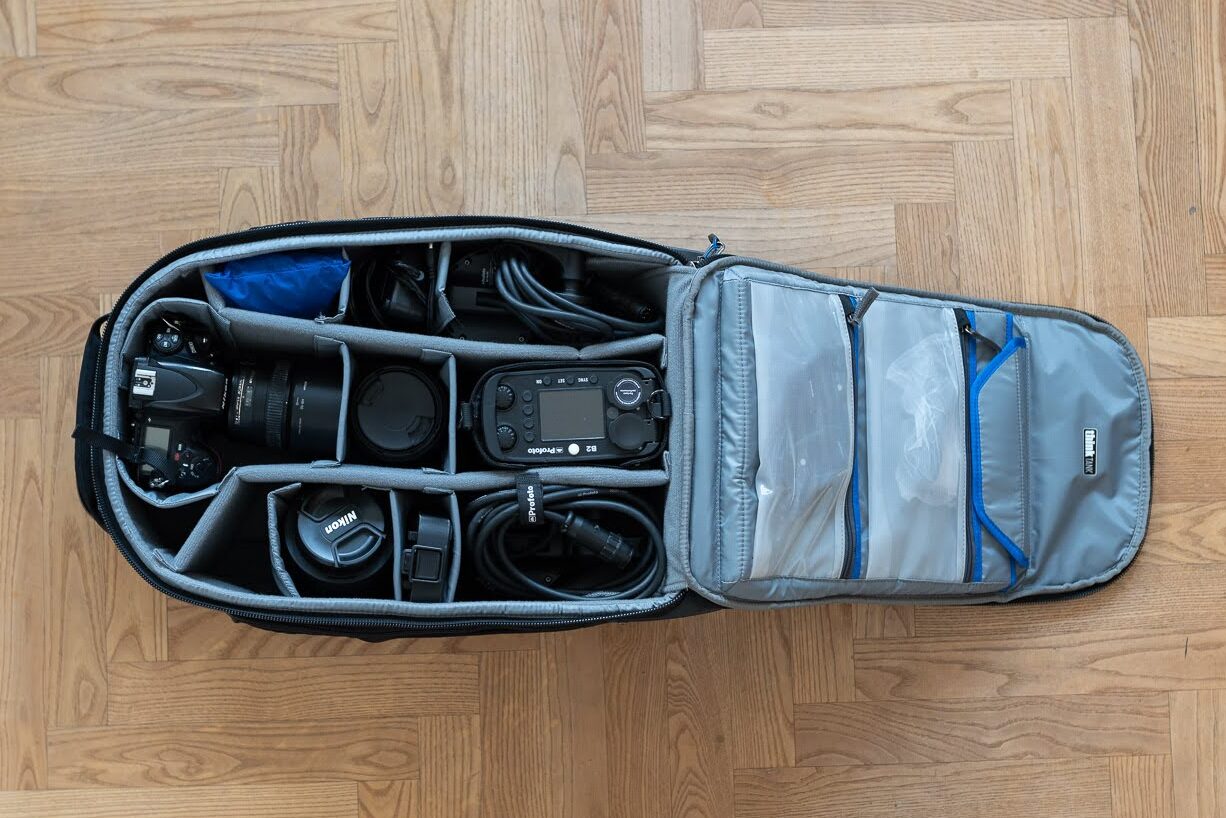
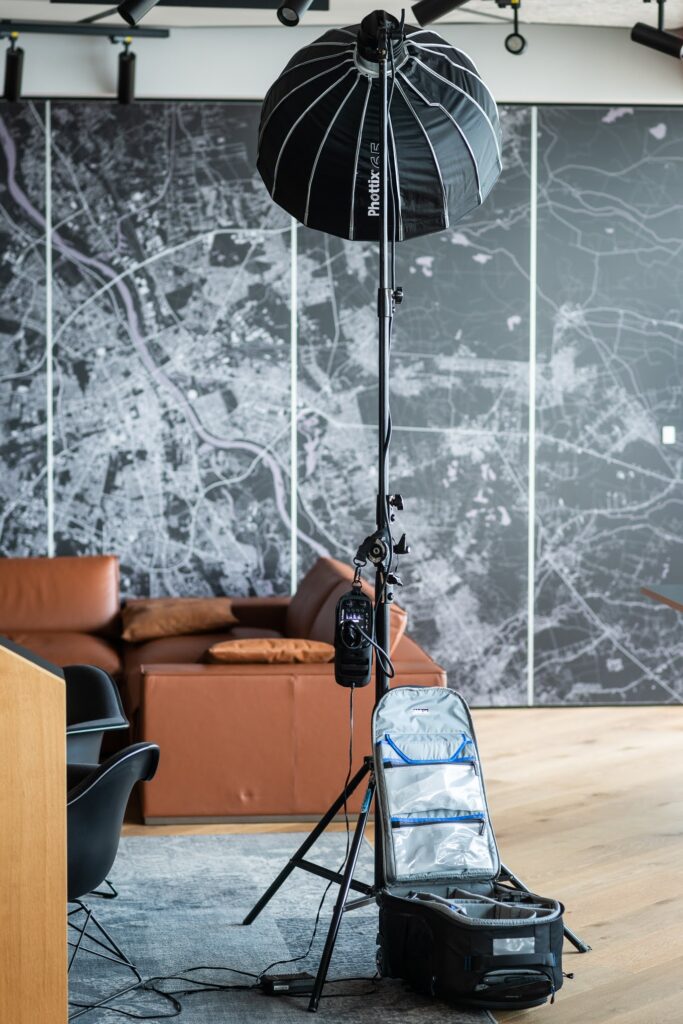
I tested this backpack during portrait sessions held at clients’ locations. I easily packed two cameras, lenses, a computer, and a set of lights (Profoto B2 with two heads) without any problems. I also fit a small softbox and tethering accessories. During the session, I was able to comfortably use the equipment thanks to the wide opening of the backpack.
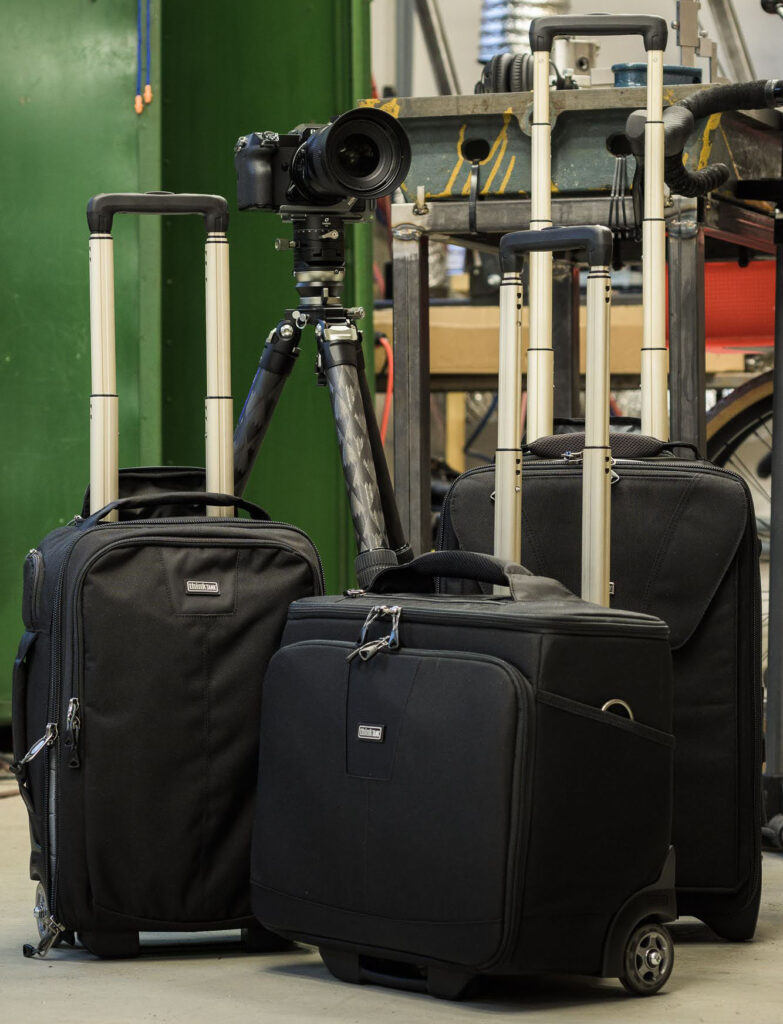
Common features: Streetwalker V2.0 Rolling Backpack, Airport TakeOff V2.0 Rolling Backpack, Essentials Convertible Rolling Backpack
On one hand, we have the Street Walker model, which is designed to be primarily carried on the back, but can also be placed on the ground and pulled, for example, on a train platform. On the other hand, we have the Airport TakeOff, designed for maneuvering in airports, but also equipped with a backpack system in case stairs need to be climbed or uneven surfaces need to be crossed, such as a gravel-covered parking area (a nightmare for any wheeled luggage user). Both suitcases have significantly more capacity than the third model, the Essentials Convertible Rolling Backpack, and can accommodate a similar (substantial) amount of gear. However, the arrangement of packed items will be different due to the differences in the shape of the suitcases. Specifically, only the TakeOff allows for packing two large camera bodies side by side (parallel to the top of the bag), while the StreetWalker can accommodate two bodies, but not side by side due to the narrowing corners. The Essentials Convertible, on the other hand, has a convenient, fairly square shape for packing, but due to its small size, it also cannot fit two cameras side by side.
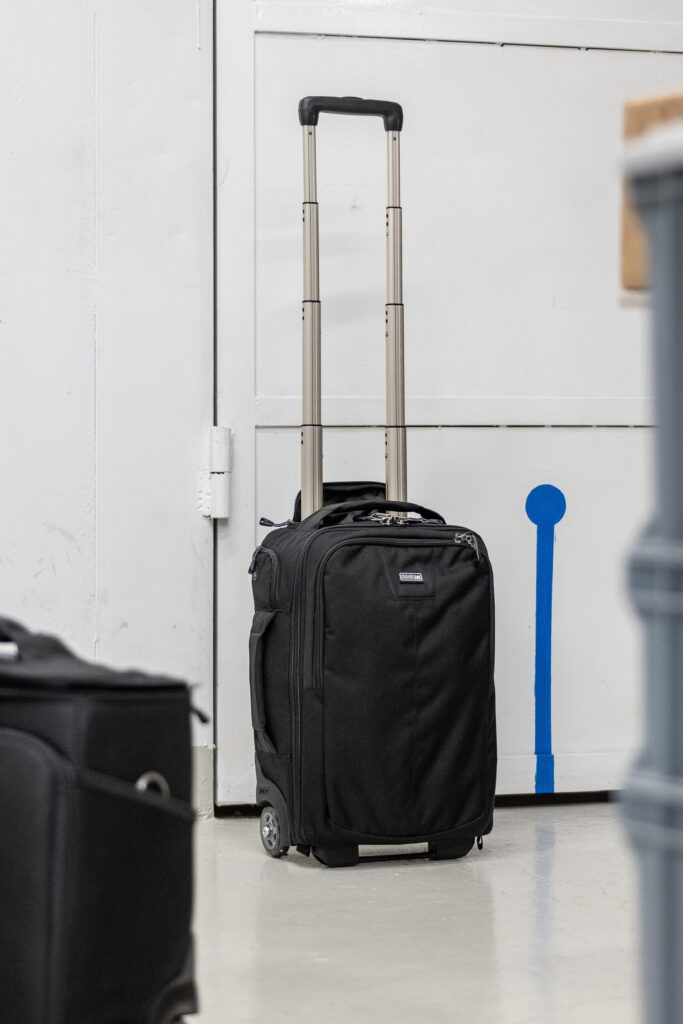
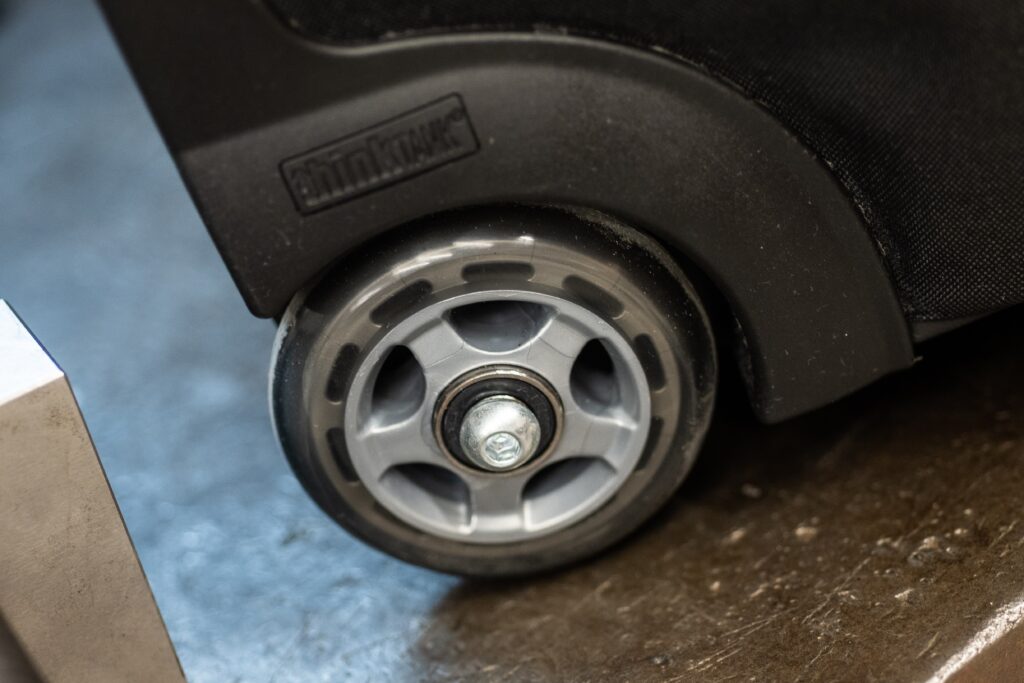
All three Think Tank models have excellent wheels that roll smoothly and quietly. Rolling these suitcases is truly satisfying! I believe the wheels will withstand long-term use, but in case of wear and tear, replacing them with new ones will not be a problem. If I had to point out what stands out the most during the initial interaction with Think Tank suitcases, it would definitely be the wheels. Each of us has had the opportunity to pull a regular rolling suitcase or bag. This is a whole different level!
The bottom part of the suitcases is secured with durable plastic, which facilitates navigating obstacles such as curbs and “parking” them in an upright position. The telescopic, 4-stage handle for pulling extends quickly and smoothly. Folding it back provides great satisfaction. The only inconvenience is the need to insert the hand into a tight compartment, closed with a zipper, where the handle is stored. Like the wheels, the handle is a replaceable part, so in case of failure or wear, it can be replaced with a new one. The described suitcase is equipped with a lock that can be used to secure the zipper locks, and with a steel cable, the luggage can be secured, for example, by attaching it to a bench at the airport. Each Thinktank bag also comes with a standard rain cover, which can be useful during heavy rain or as additional protection against pickpockets. The material, without the cover, withstands light rain well, thanks to the DWR coating.
In crowded places such as airports or public transport, it is more convenient to travel with a suitcase that has four wheels and can be kept close to oneself. The described models have a long handle that keeps the suitcase rolling away from the legs. This has its advantages, but sometimes it can make maneuvering more difficult, especially when the telescopic handle is loaded with luggage. The weight will also be noticeable when covering long distances.
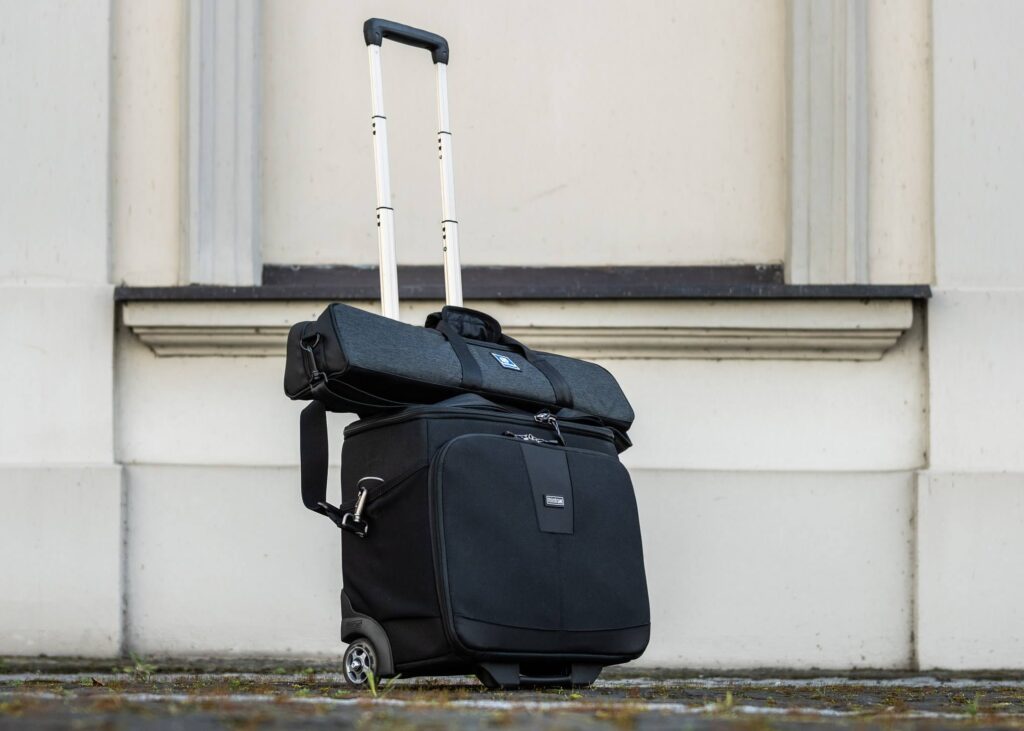
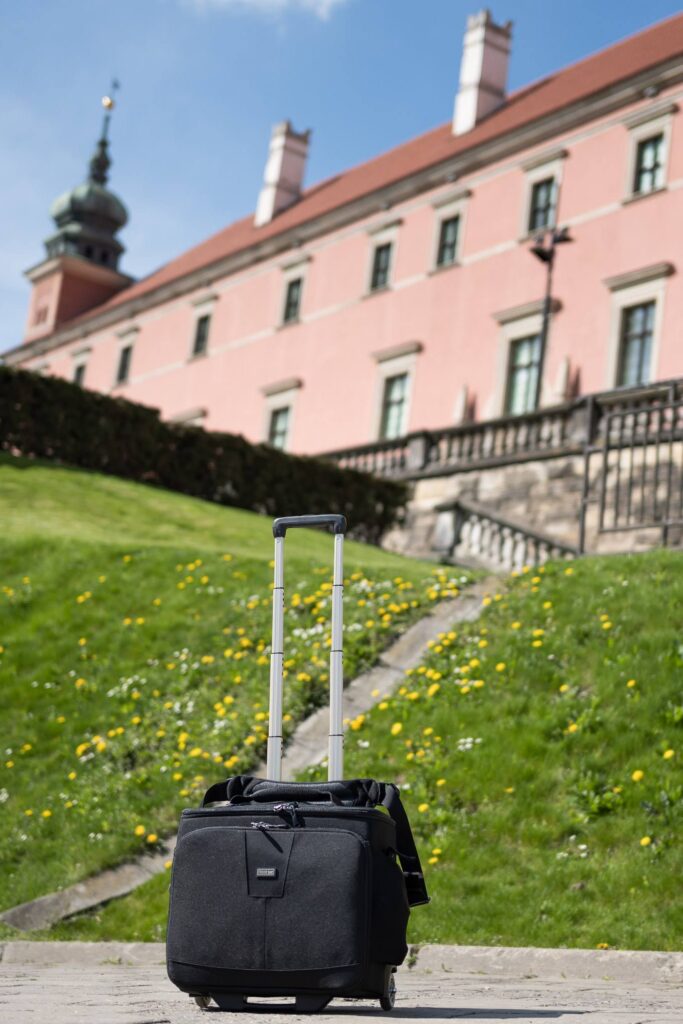
Airport Navigator
I have decided to describe another model. The Airport Navigator has been on the market for a while now, and this suitcase has not yet seen version 2.0. This product differs from the others described here but also stands out among all the Thinktank suitcases. Why am I including the Airport Navigator in this article? After all, it is not a backpack. Unlike the previously discussed products, it allows access to the equipment through the top flap without the need to lay the suitcase on its back. So we have two options for taking out the camera or lens: the standard way, like in any suitcase, and an additional one through the top flap, like in a camera bag. Therefore, the Airport Navigator is a rolling bag. It doesn’t have backpack straps, but it comes with a thick, comfortable shoulder strap. Of course, it’s not the optimal bag to carry on the shoulder, and you definitely can’t carry it that way while shooting, but if you have to traverse uneven terrain while pulling the suitcase on wheels, the strap will come in handy. Thanks to the dual construction of the strap, we can also attach the Airport Navigator to a larger suitcase. The bag has a very minimalist design and unfortunately lacks any external attachment points where we could attach a tripod or additional pouches as pockets.
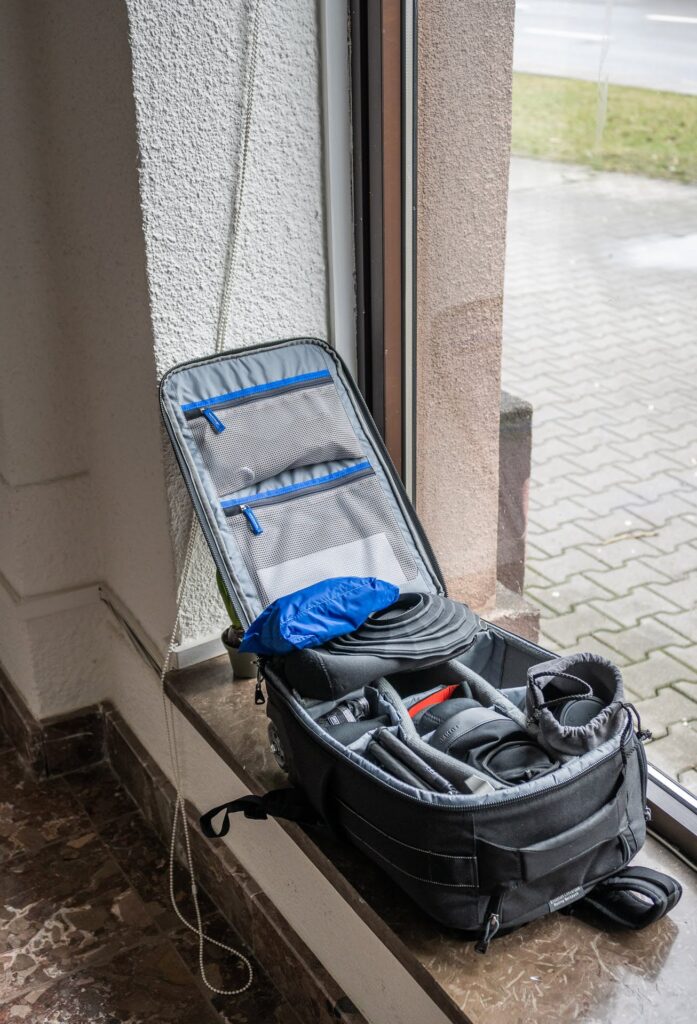
Another important feature that distinguishes the Airport Navigator is the placement of the telescoping handle on the exterior of the bag. This means that there is no tunnel occupying space inside the bag to house the folding handle mechanism. As a result, the actual capacity of this suitcase, despite its small size, is slightly larger than the Essentials Convertible model. It is best to insert one or two cameras with attached lenses from the top, lens down. This provides quick and convenient access to them. The remaining lenses need to be placed underneath and retrieved through the main flap, just like in other suitcases. However, the way the flap opens differs from the previously described models, as it has restraining straps. This allows for safely partially opening the flap without having to lay the suitcase down. Consequently, we can reach for a flash or lens in a faster and simpler manner. Of course, in this case, we don’t have full access to the interior, and we won’t be able to retrieve a large, long zoom lens placed at the bottom of the suitcase using this method. The straps can be detached, allowing the flap to fully open. In my opinion, the system of hooks holding these straps could be more user-friendly. Inside the main flap, we find a double compartment for laptops. The smaller compartment is theoretically intended for a tablet, but in practice, it can accommodate items such as cables, a color chart, and a collection of small flat objects.
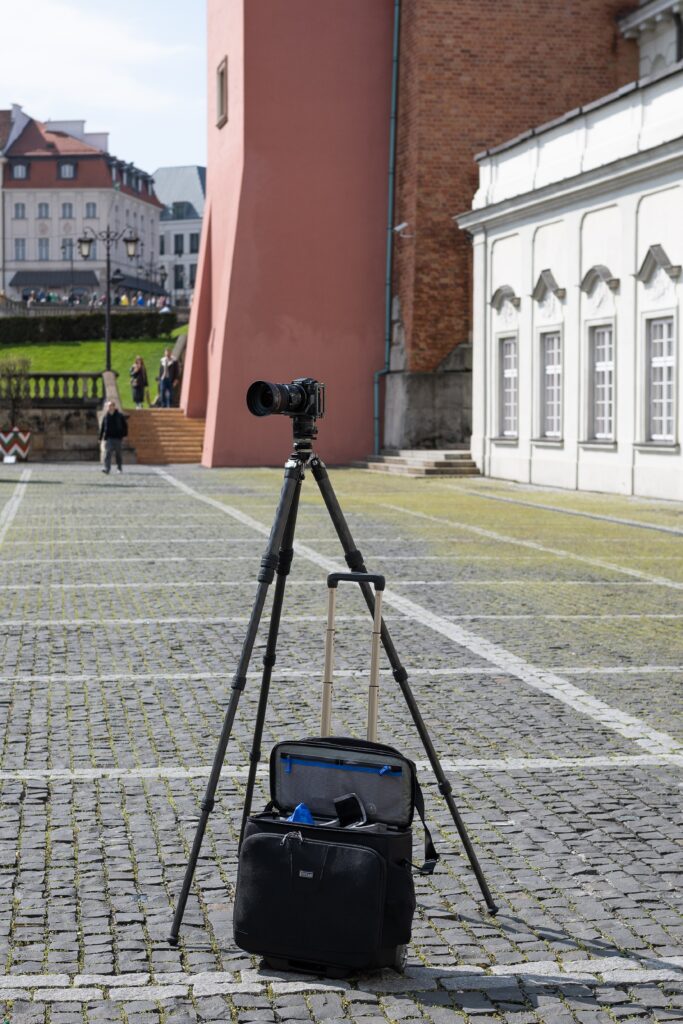
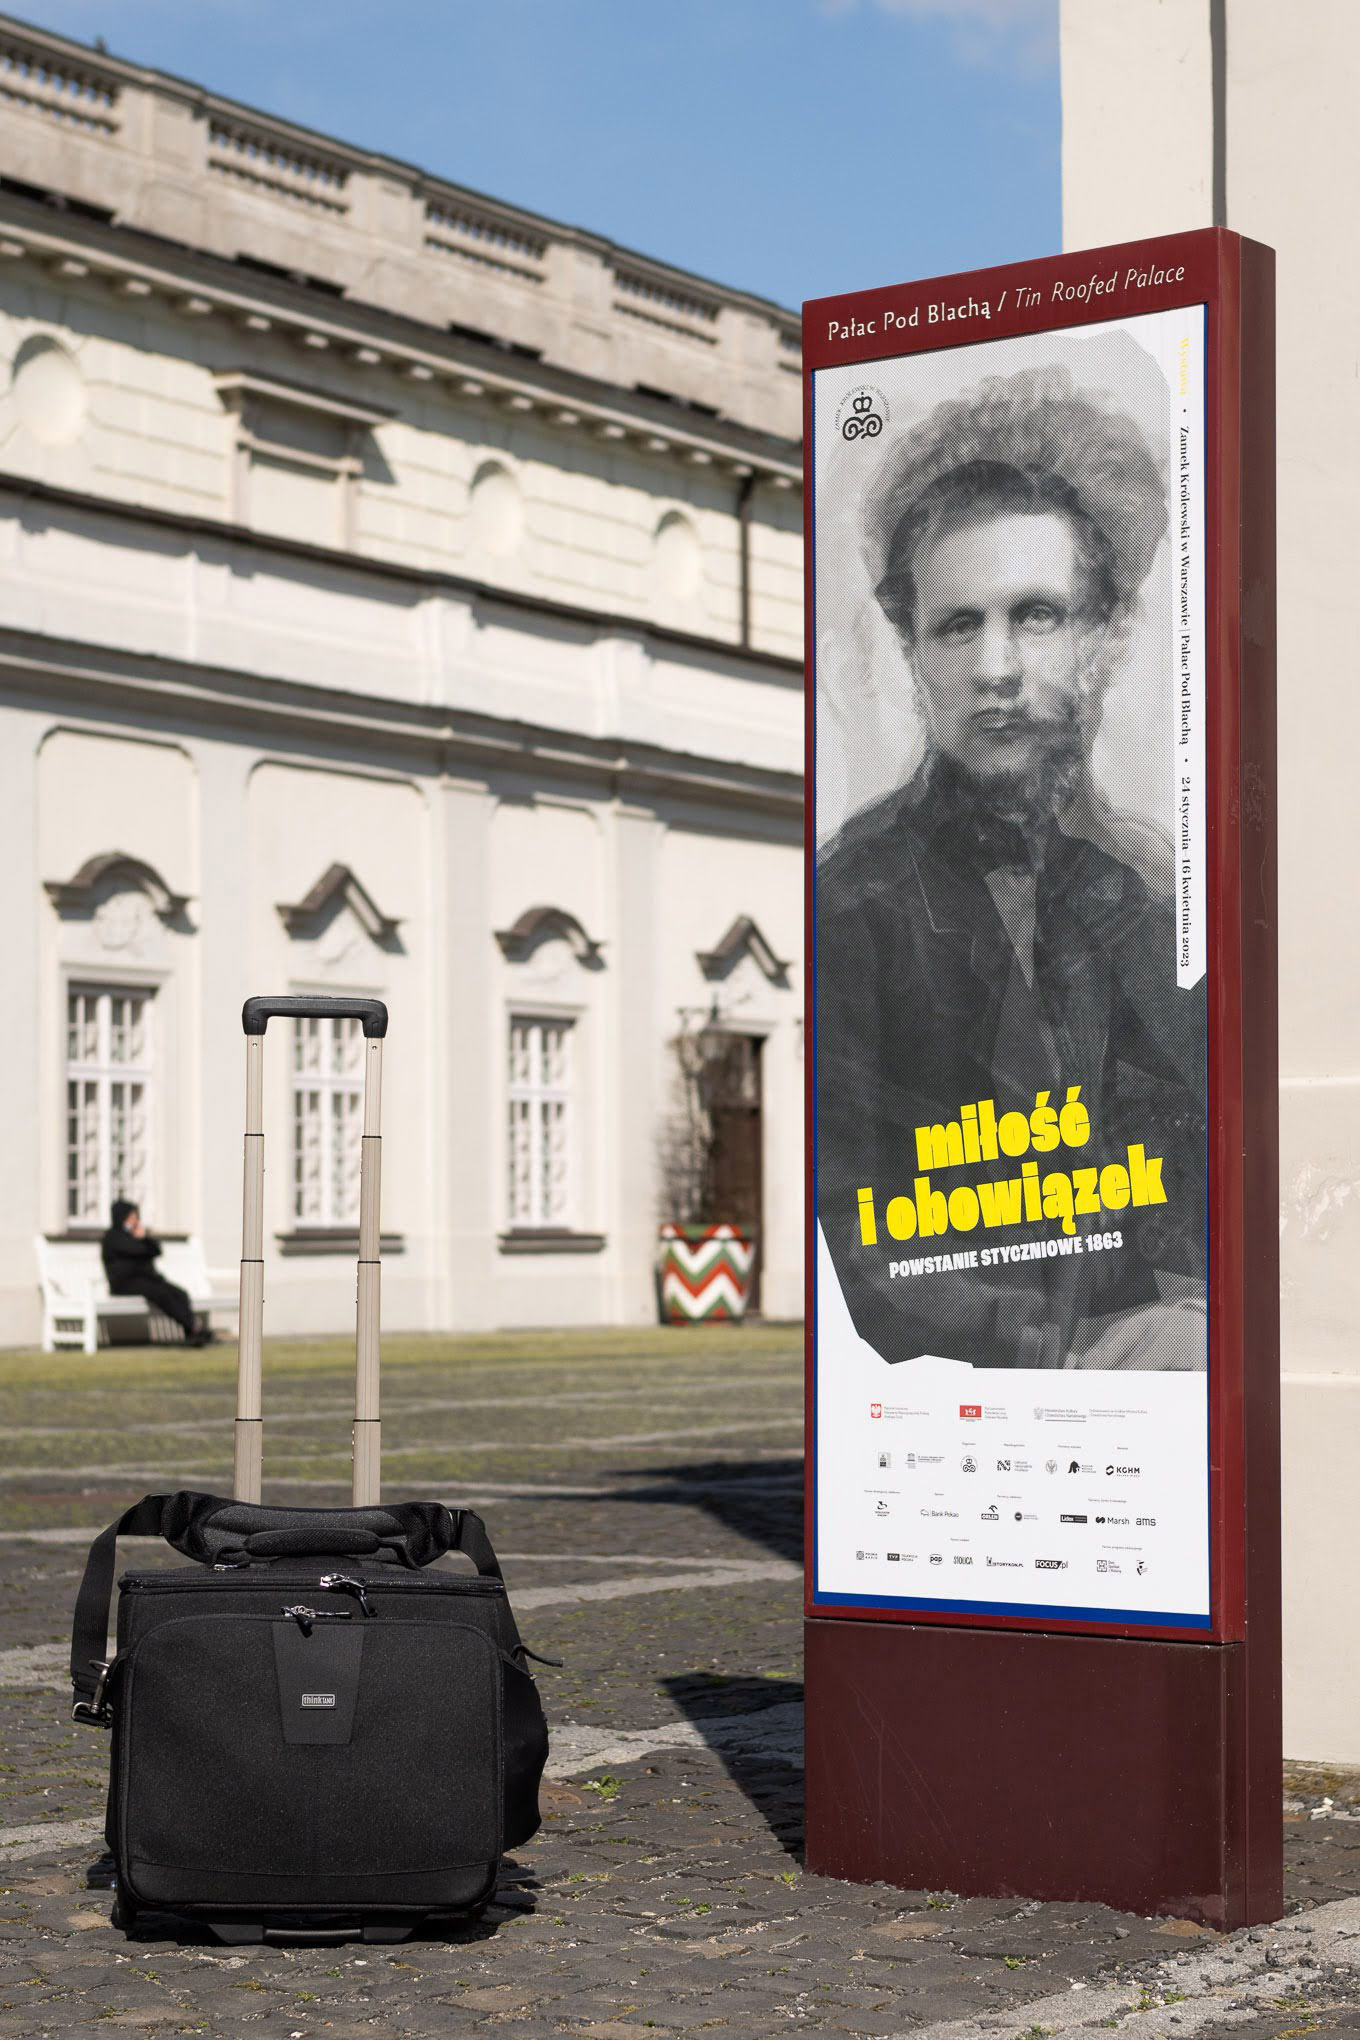
The top flap is equipped with a thick, comfortable handle used for lifting the suitcase. In this model, there is no side handle. The second plastic handle, similar to the Essentials Convertible, is located at the bottom. When removing equipment from the top, we have the option to lock the flap in the open position by sliding the handle through the telescoping handle. This is a very convenient solution during photography. For several days, I documented a large exhibition inside the Royal Castle in Warsaw, and while photographing from a tripod, I maneuvered the suitcase around the exhibition halls.
I always had it open and ready beside me to place the removed lens or reach for a filter or spare battery. The problem arises when we need to momentarily lift the open suitcase, for example, to overcome a few steps. Normally, we would grab the handle located on the flap, but the flap is open and the handle is inaccessible. Of course, the telescoping handle is not suitable for lifting the suitcase upwards. I believe a good solution would be to add two small handles on the sides of the upper part of the suitcase. This would allow for quickly and safely carrying the open bag over short distances. The second issue with the open flap is that if we need to retrieve something from the bottom of the suitcase, which requires opening the main flap, we have to lay the Airport Navigator on its back. This means we have to: fold the telescoping handle, close the top flap (to prevent anything from falling out), lay the suitcase down, and then open the main flap. It can be time-consuming. However, the key takeaway is to pack in a thoughtful manner. Place items that require quick access in the appropriate locations.
The Airport Navigator rolls smoothly! I believe it is the most comfortable to maneuver among all the ThinkTank models due to its low center of gravity. It serves as an excellent base for adding additional luggage, especially one that has a dedicated attachment for transporting on the suitcase (such as the Think Tank Retrospective 30 2.0 bag).
Capacity
Why didn’t I focus on describing the specific set of cameras and lenses that can fit into each model? In my opinion, it doesn’t say much. I have looked at photos of different bags and backpacks online and watched videos about them. Everyone tries to show what can be fit inside, but each time the equipment is different! So how can we compare them? I have the impression that in architectural photography, we use unconventional, less popular lenses. It’s not the standard photojournalist kit like body (with or without grip), wide zoom, standard zoom, telephoto zoom, and a flash. For me, it would be meaningful to show the same equipment in every review! But we know that’s not possible…
When choosing which model is best for us, it’s worth checking how much space we need for our photography gear. Arrange your equipment on a table, compactly, as if you were putting it into a bag. This can help determine the optimal dimensions for a bag or backpack. We can measure the dimensions of the outline that will be formed.
The Airport TakeOff V2.0 Rolling Backpack is truly spacious. It is suitable for large, telephoto lenses or a complete camera setup with a medium-sized tripod. It can also be a good option for those carrying flash units. The Streetwalker V2.0 Rolling Backpack is slightly smaller but still offers ample space, although the placement of the laptop pocket inside reduces its overall capacity. The Airport Navigator and Essentials Convertible Rolling Backpack are the smallest bags in this comparison, but I wouldn’t call them small. Due to their shape and the external placement of the telescoping handle, the Airport Navigator can accommodate more gear.
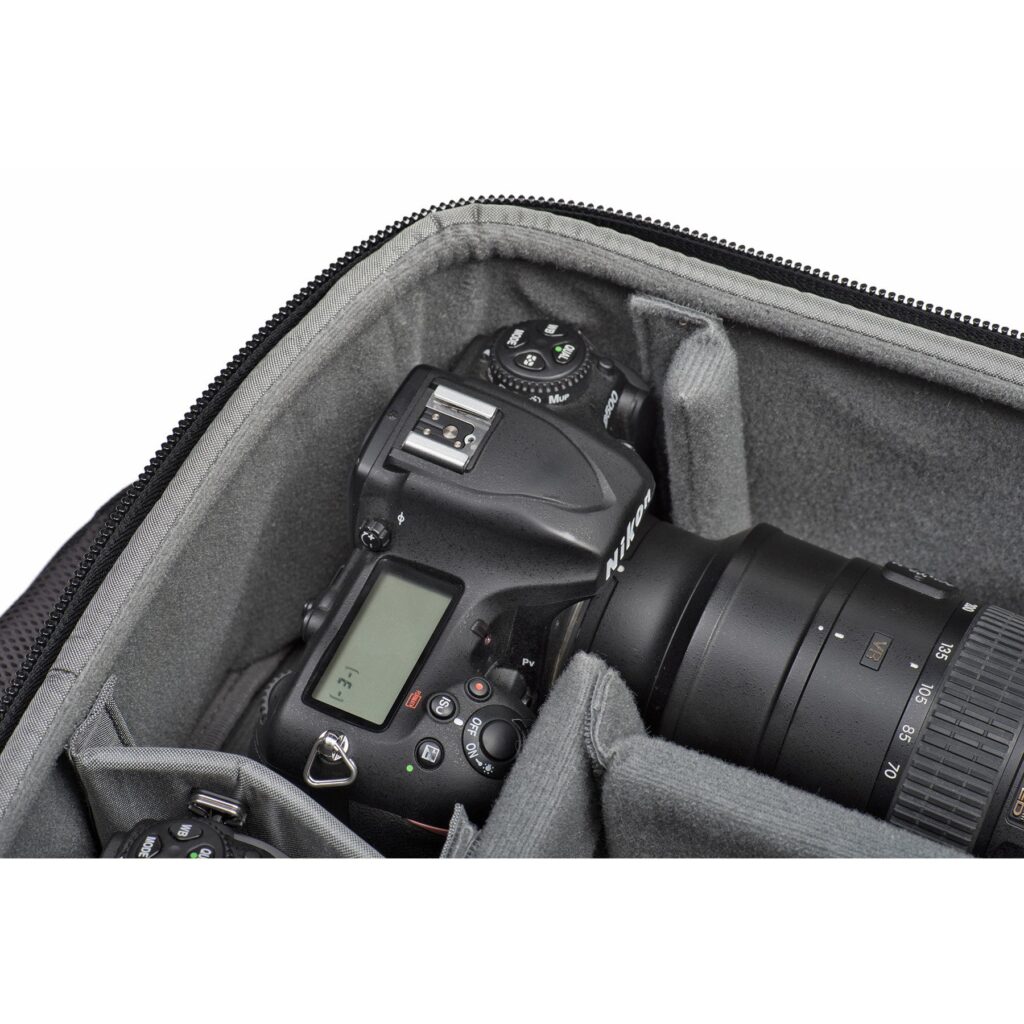
The interiors of all the described bags can be configured in various ways by adjusting the dividers to suit our needs. It’s easy to customize the bag according to our requirements.
The disadvantage of all these bags is the limited number of external pockets. If the pockets were fully packed, it would increase the dimensions of the luggage, potentially exceeding the limits imposed by airlines. However, for carry-on purposes, we usually bring a smaller bag that can be stored under the seat. During a photo shoot, the lack of external pockets can be a bigger issue. When shooting in a static location where we can place the bag in one spot, open the flap, and freely access our gear, it’s not a problem. However, when frequently changing locations, we need to constantly place the bag down and open the flap, which can be a significant drawback. In such situations, the Airport Navigator stands out with its quick access to the interior. Another solution could be the use of attachable external pouches that can be secured to the loops on the sides of the bags, thus providing external pockets.
Style
Opinions on aesthetics are highly subjective, and choosing a bag is a personal matter. Many people consider not only the practical aspects but also their personal taste when making a selection. In my opinion, Thinktank products lean towards a more subdued, elegant, and somewhat conservative style. You won’t find vibrant colors or unnecessary embellishments. Thinktank designers cater to professionals who prefer not to stand out in a crowd. The materials used in their products are undoubtedly durable and age well over time.
Conclusion
Purchasing a bag, backpack, or suitcase is not an easy decision. It’s a highly subjective matter, and with such a wide range of options available on the market, it can be challenging. We have so many possibilities for carrying and storing our equipment that it’s difficult to determine which option is the best. It all depends on our individual preferences and working style. Do we carry a lot of gear? Do we travel on foot over long distances? Do we work alone or with an assistant? Do we frequently fly with our camera?
What have I learned after several months of using the described products in real photography work?
- It’s best to have an assistant who carries everything for us.
- If conditions allow, I always prefer pulling a 15 kg gear on wheels rather than carrying it on my back!
- You can never have too many pockets and compartments. I really appreciated photographic bags where everything is always within reach.
- Flying with budget airlines is a pain! You can have a great suitcase that rolls silently on smooth terminal floors, but if you have to carry it up stairs, fit it into a bus taking you to the plane, and then lug it up the aircraft stairs…
- It’s wonderful to be able to arrange the suitcase in a convenient spot during a photo session and open its lid wide to have perfect, clear access to all the contents.
- A good camera backpack should have the option of side or top access, or ideally both, along with a fully openable back flap. Suitcases lack all of these features…
- Suitcase backpacks are more like suitcases than backpacks. The backpack option is only an additional feature that we can use in challenging terrain.
- Thinktank products are really well-made and durable. I had no concerns about my precious gear when bumping the Airport TakeOff against London curbs or tossing it into the bus luggage compartment.
- When photographing architecture outdoors, it was most convenient for me to take out 2-3 lenses and spare batteries from the suitcase, pack them in a small carry-on bag, and leave the main luggage in the car.
- When photographing interiors, I brought the suitcase inside. This solution worked well. For smaller gear quantities and large interior spaces (e.g., museum exhibitions), the Airport Navigator was excellent. I could comfortably move around with the suitcase.
- Thinktank suitcases roll smoothly! Specially designed, very quiet 80mm diameter wheels with sealed ABEC class 5 bearings are superb.
- Be careful where you place the suitcase while shooting. In one situation, I had to remove it from the photo in post-production…
- Every photographer should take care of a healthy spine.
- See point 1.