Ever Wanted To Take Vertical Photos With Your Drone? Here’s The Work-Around!
Being a newcomer to drone photography, I was quite upset to know that my Mavic 2 Pro was not able to snap vertical photographs right off the bat. Luckily the workaround for the situation is a rather simple one, and one already known by most photographers — creating a vertical panorama.
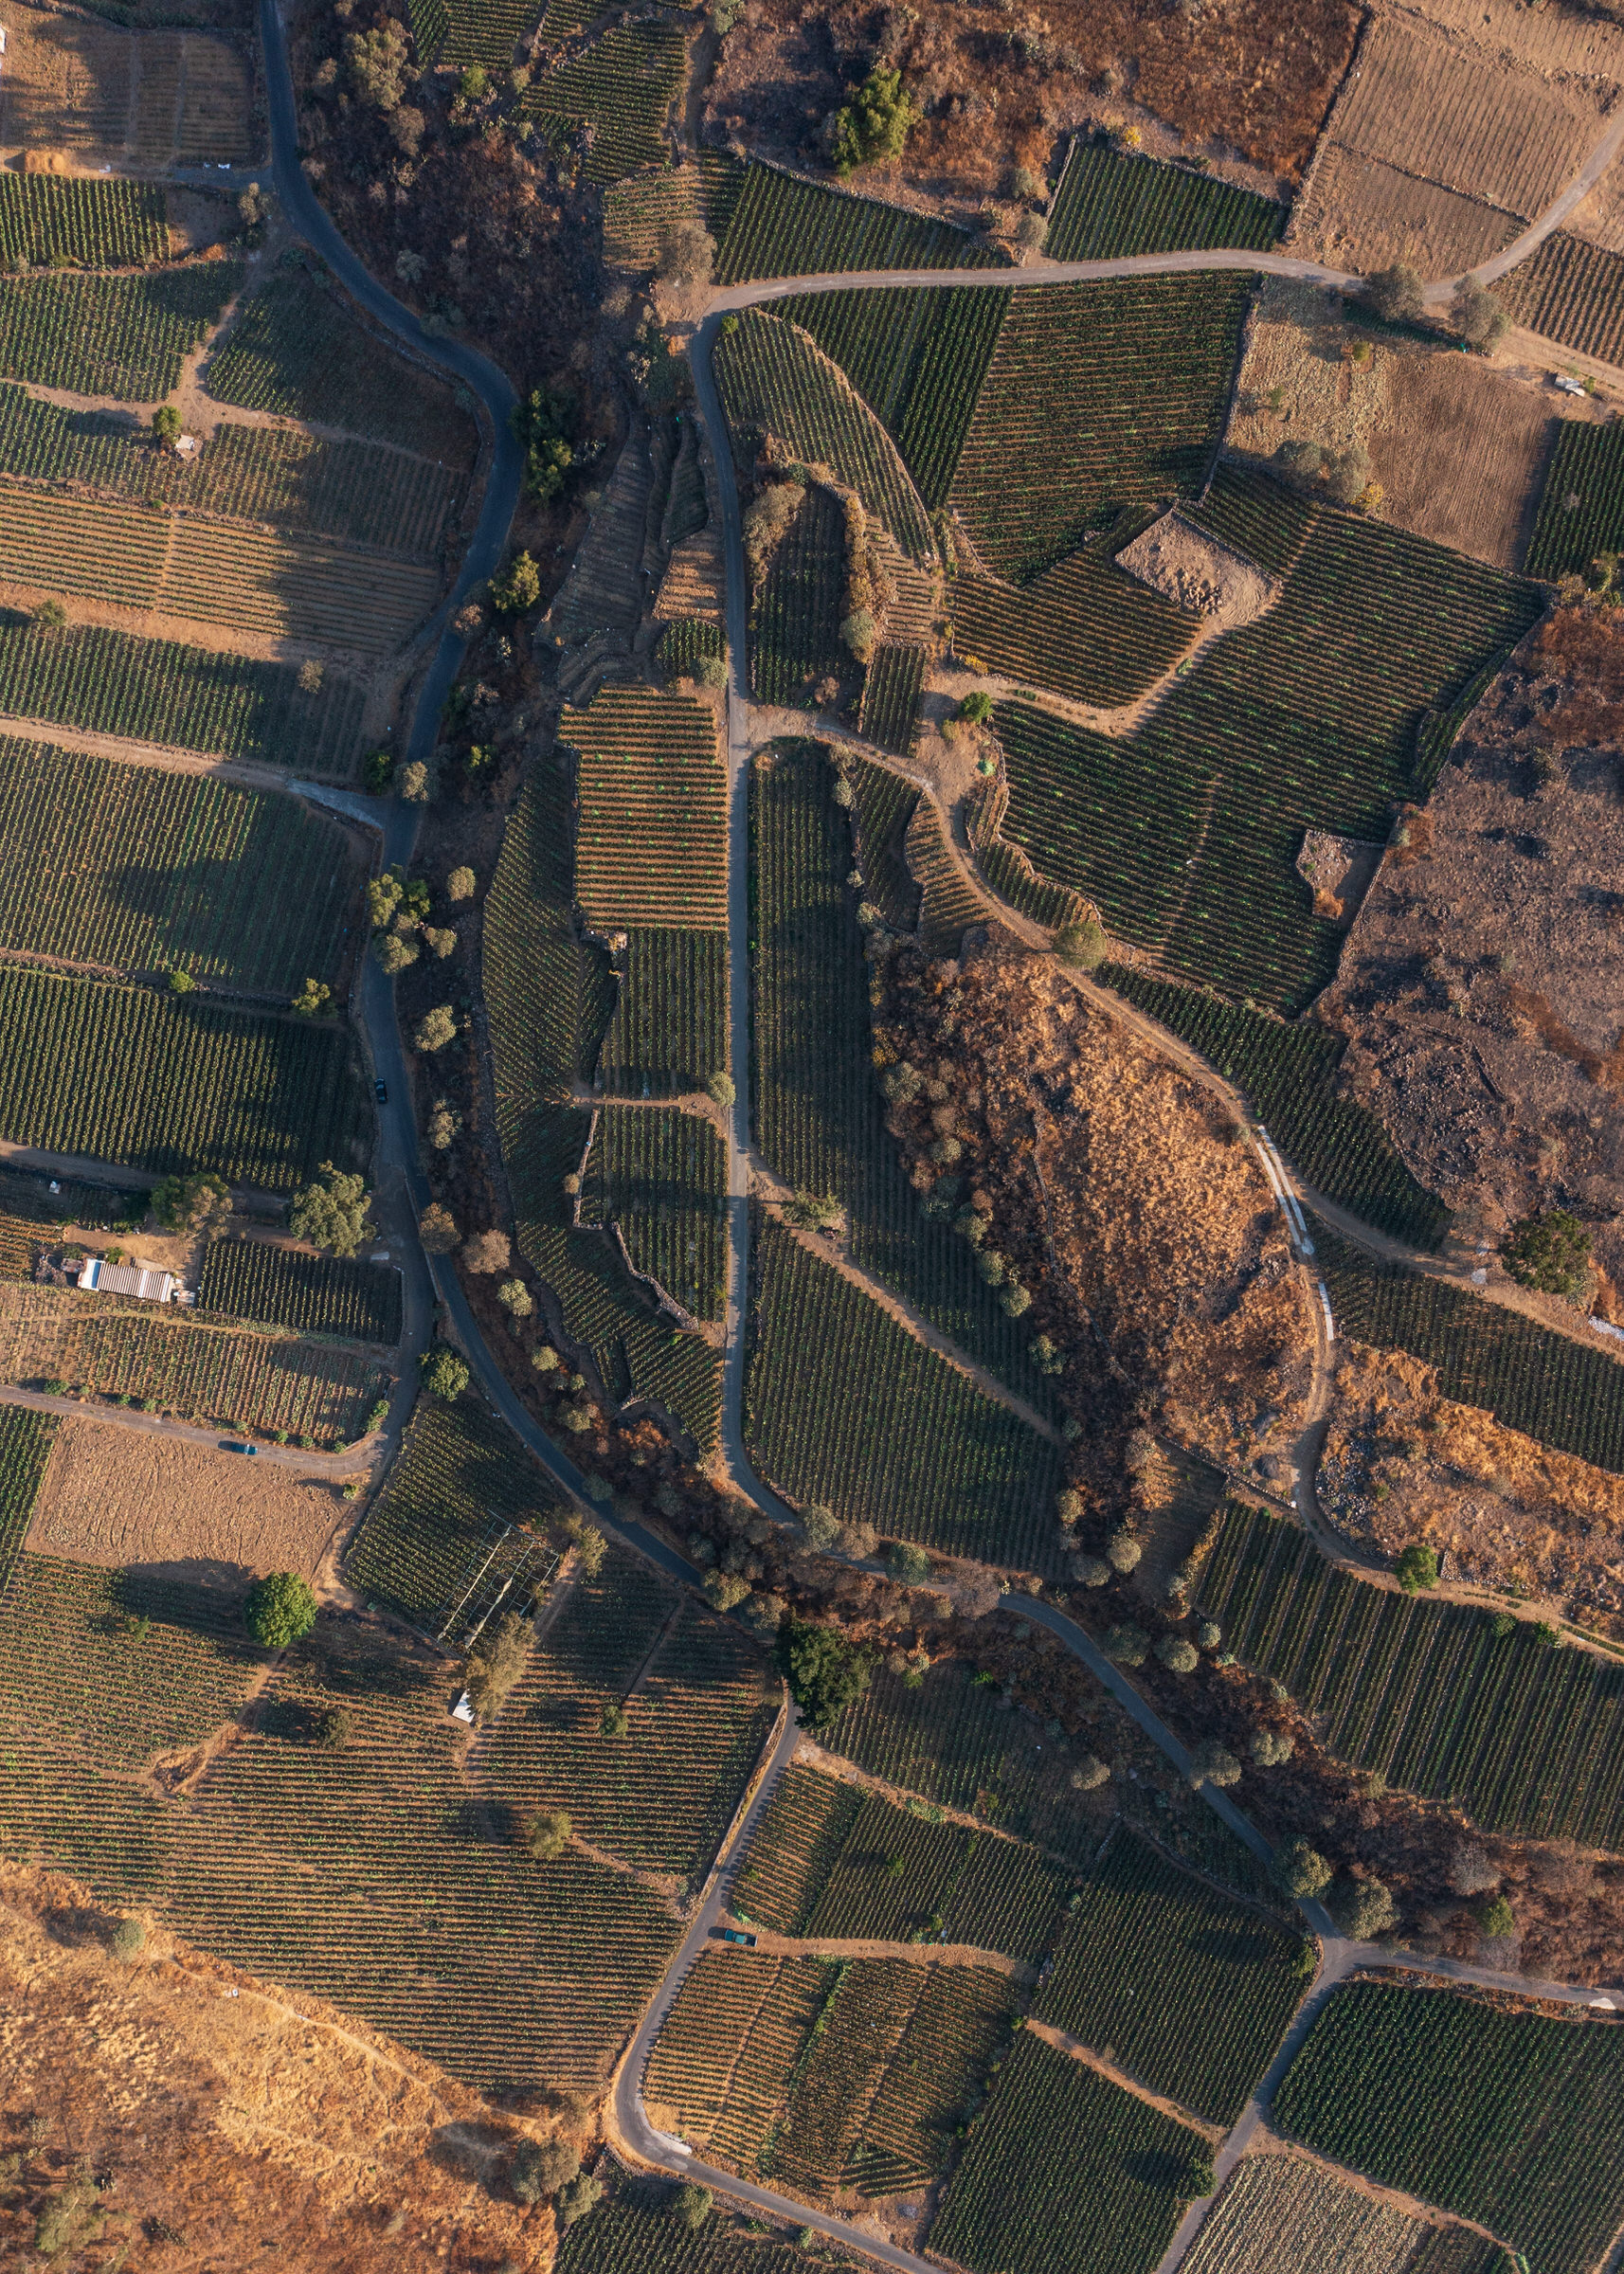
I know that many drones, including mine, have built-in functions for shooting vertical panoramas. However, I would rather share the main aspects to consider for manually creating a drone panorama. I thought It would be nice to take a break from architectural photography so I will be using this volcano as my subject.

Scouting flight
A scouting flight helps me determine the approximate distance and height for the desired shot. Doing these has helped me to gain confidence and peace of mind while flying. Extra batteries are always welcome.
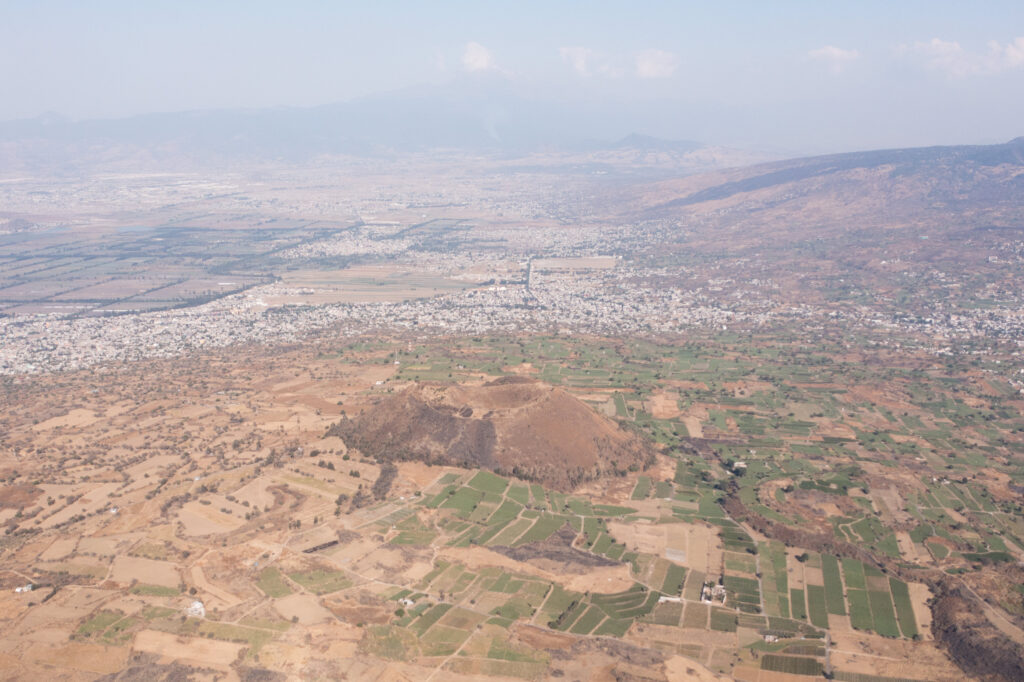
After scouting It was clear that a lower shot perpendicular to the sun would give my subject depth and make for a better photograph. So, 30 minutes later I already knew where to fly.
Turn on the grid
The success of a panorama resides in the amount of overlapping information within the photographs. By using a 3×3 grid I can easily determine (and remember) the horizon and limits within the shots composing a panorama.
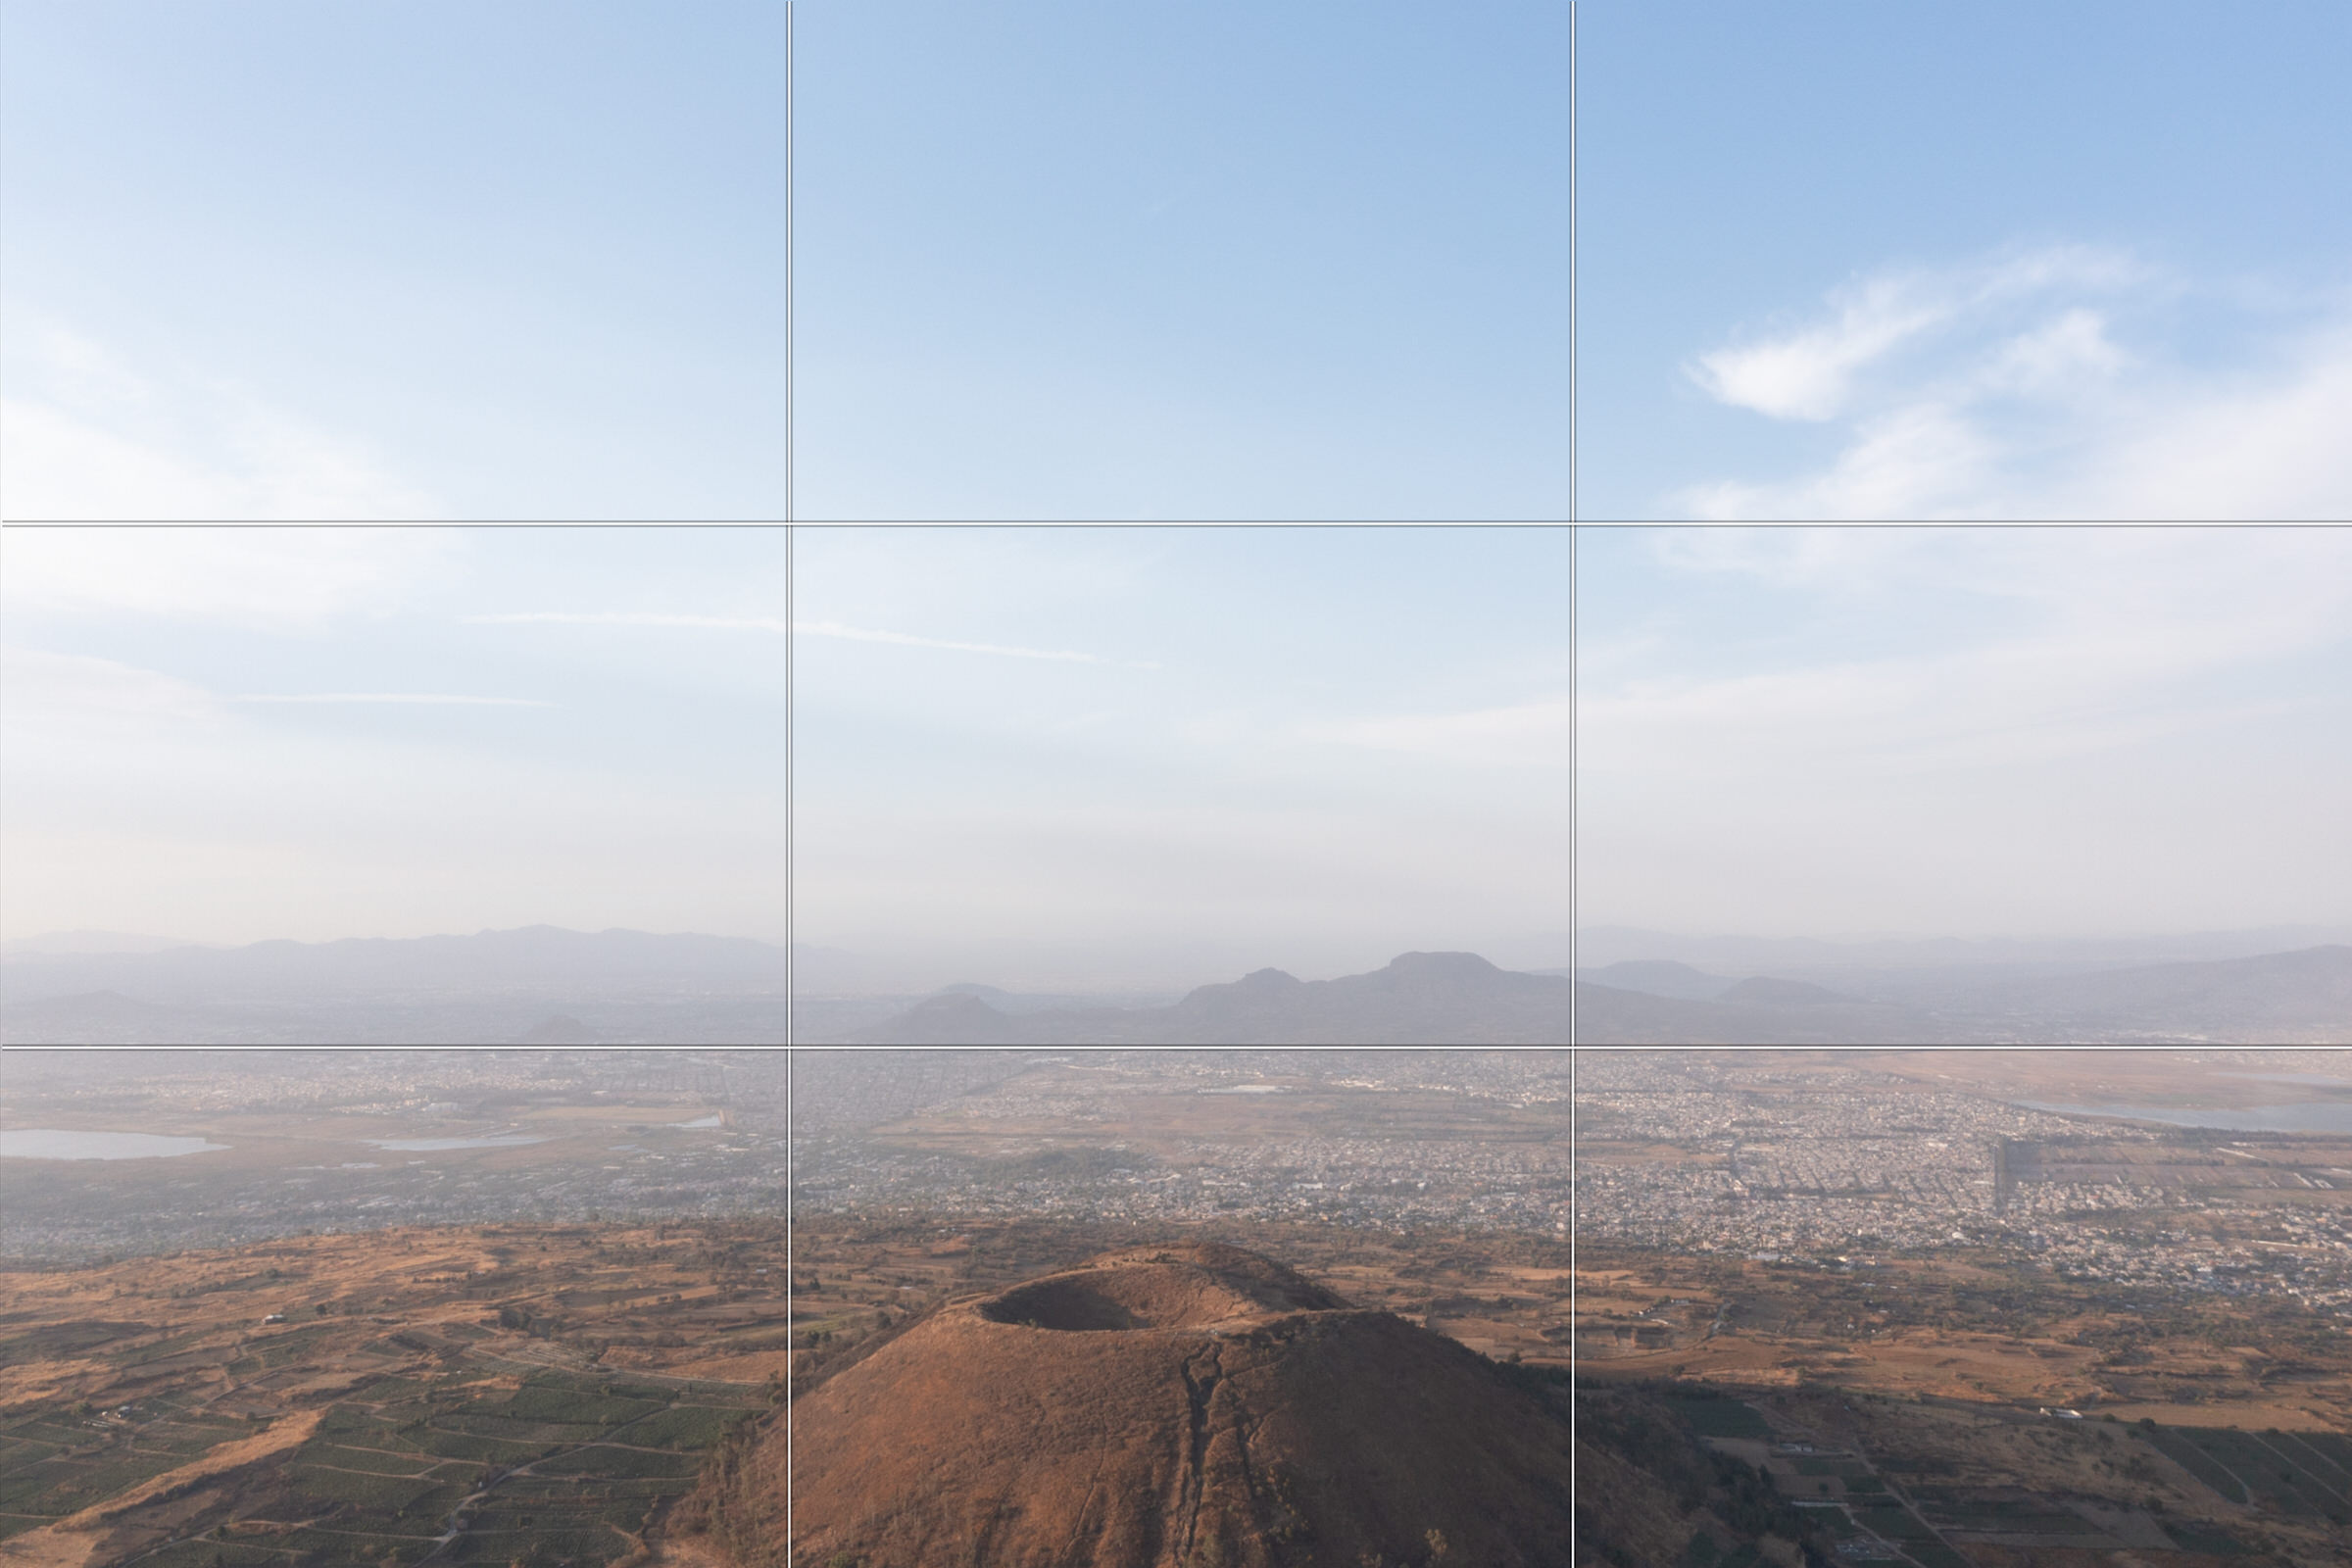
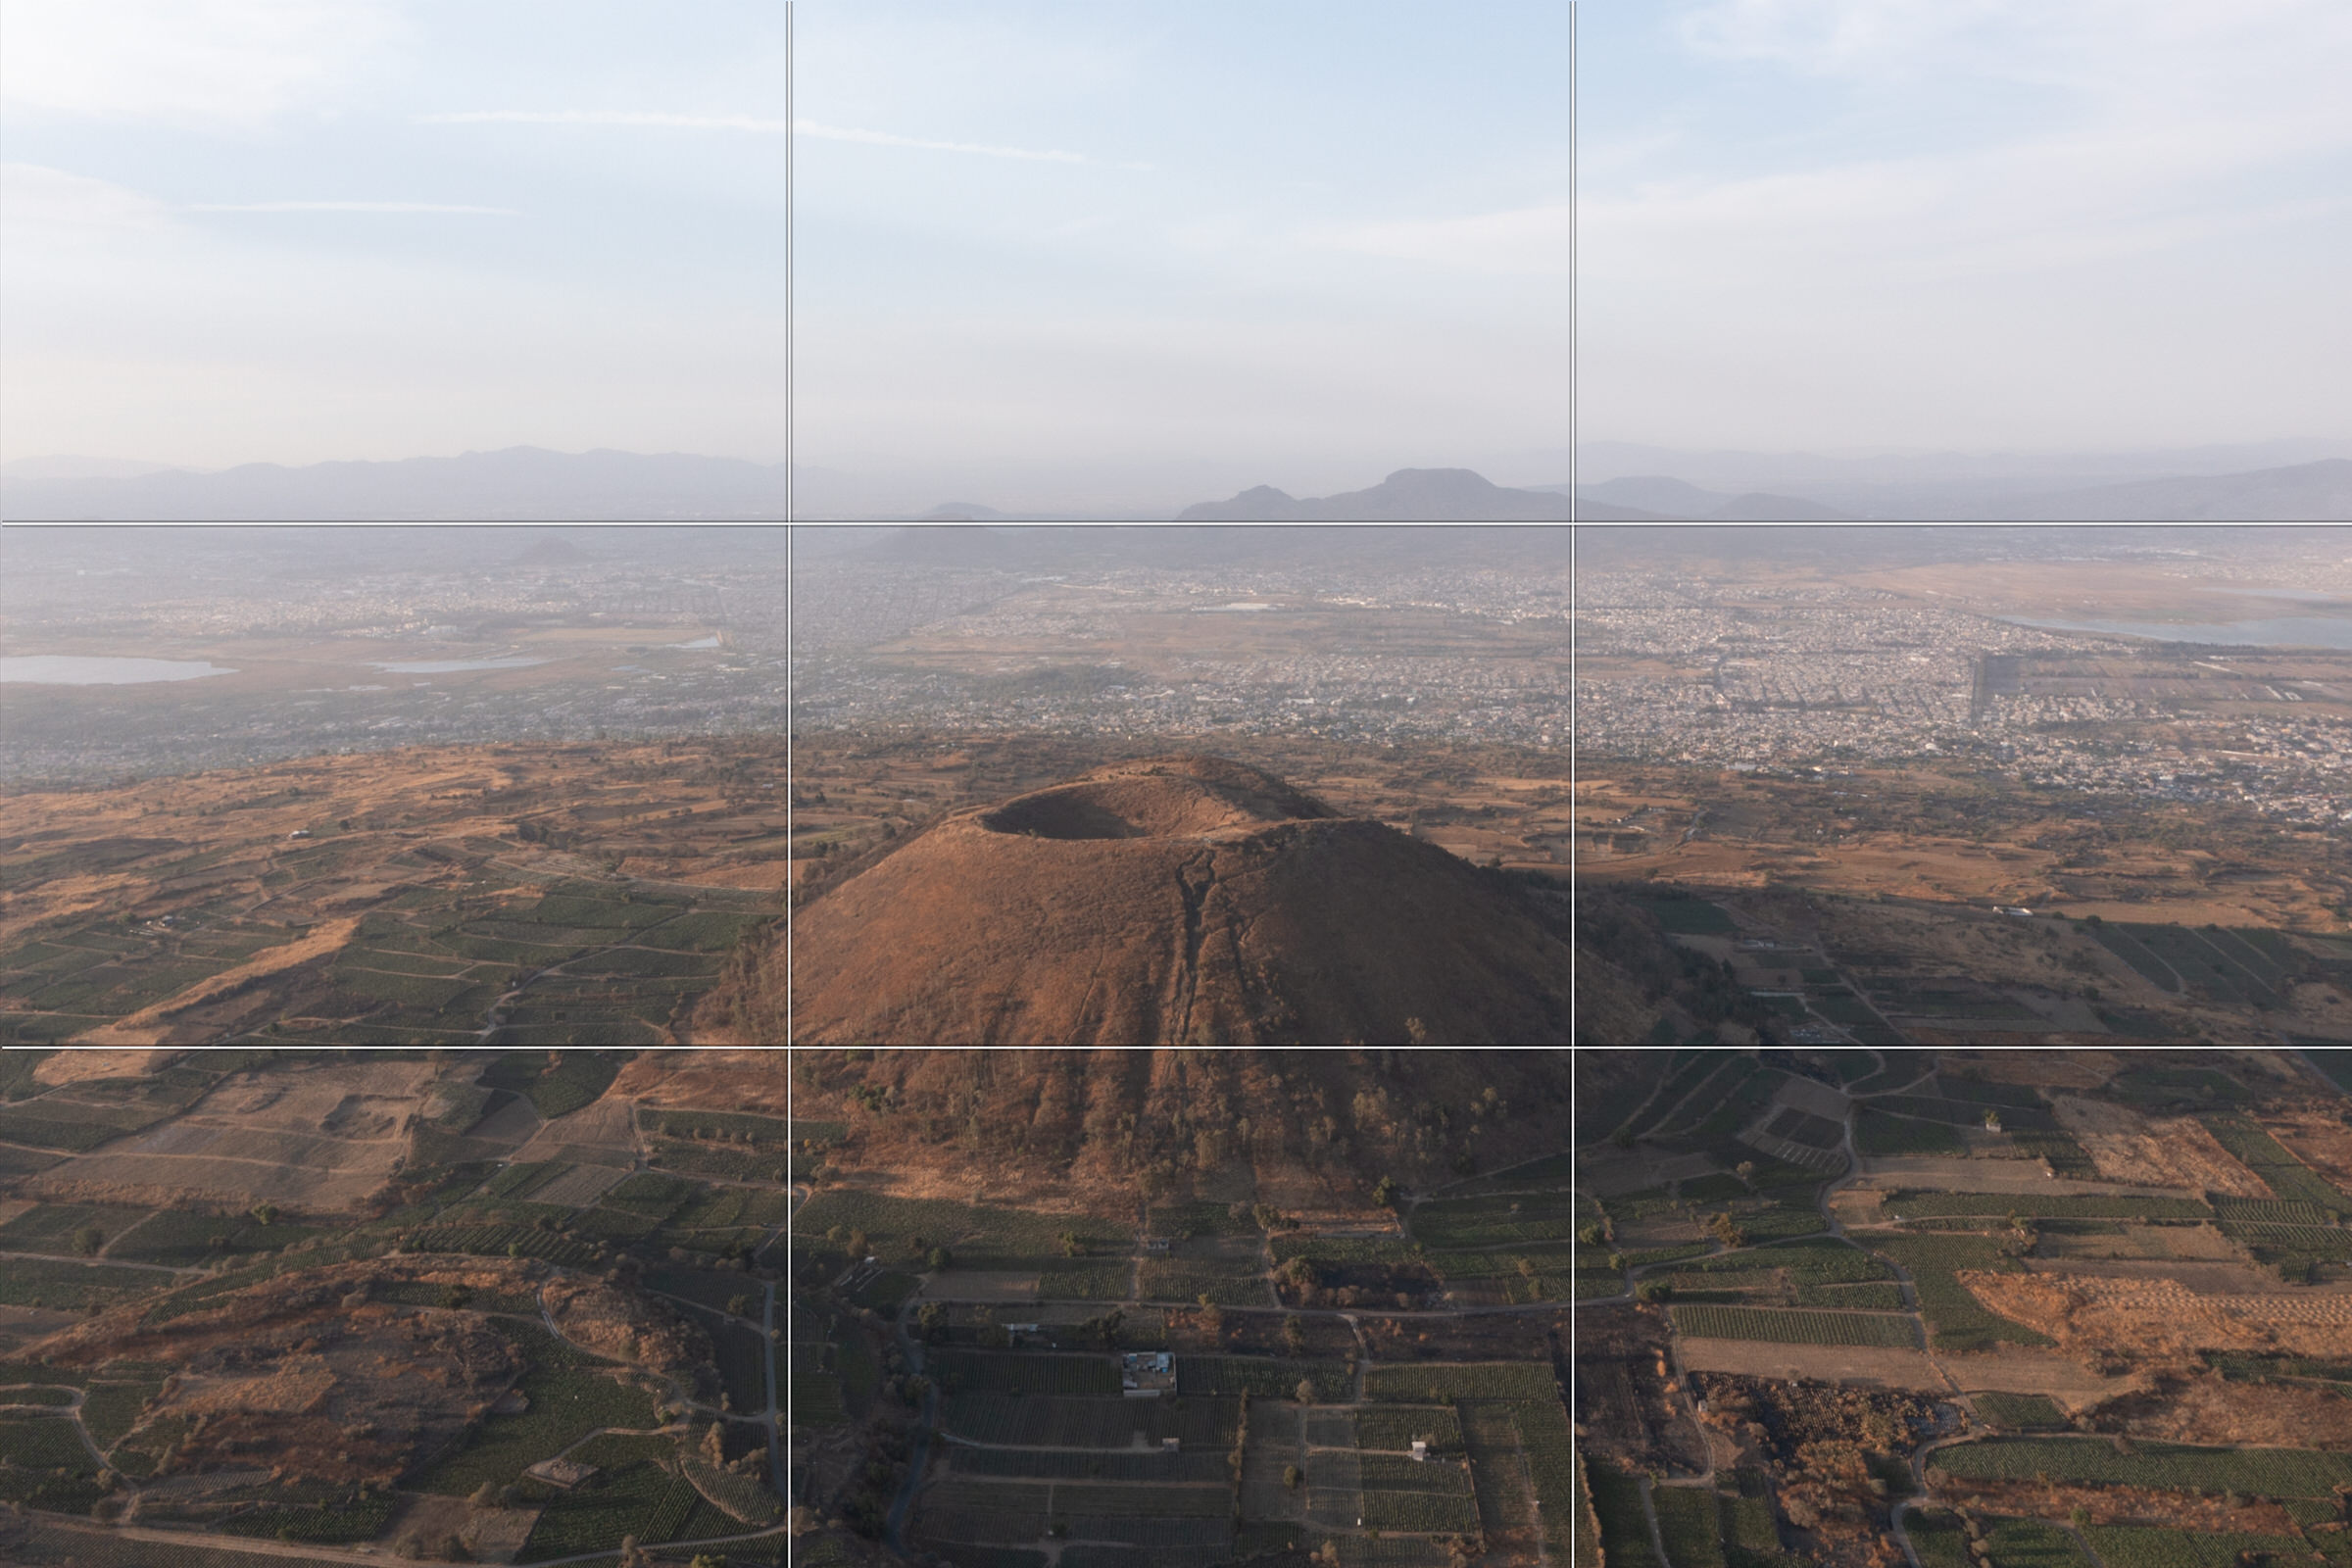
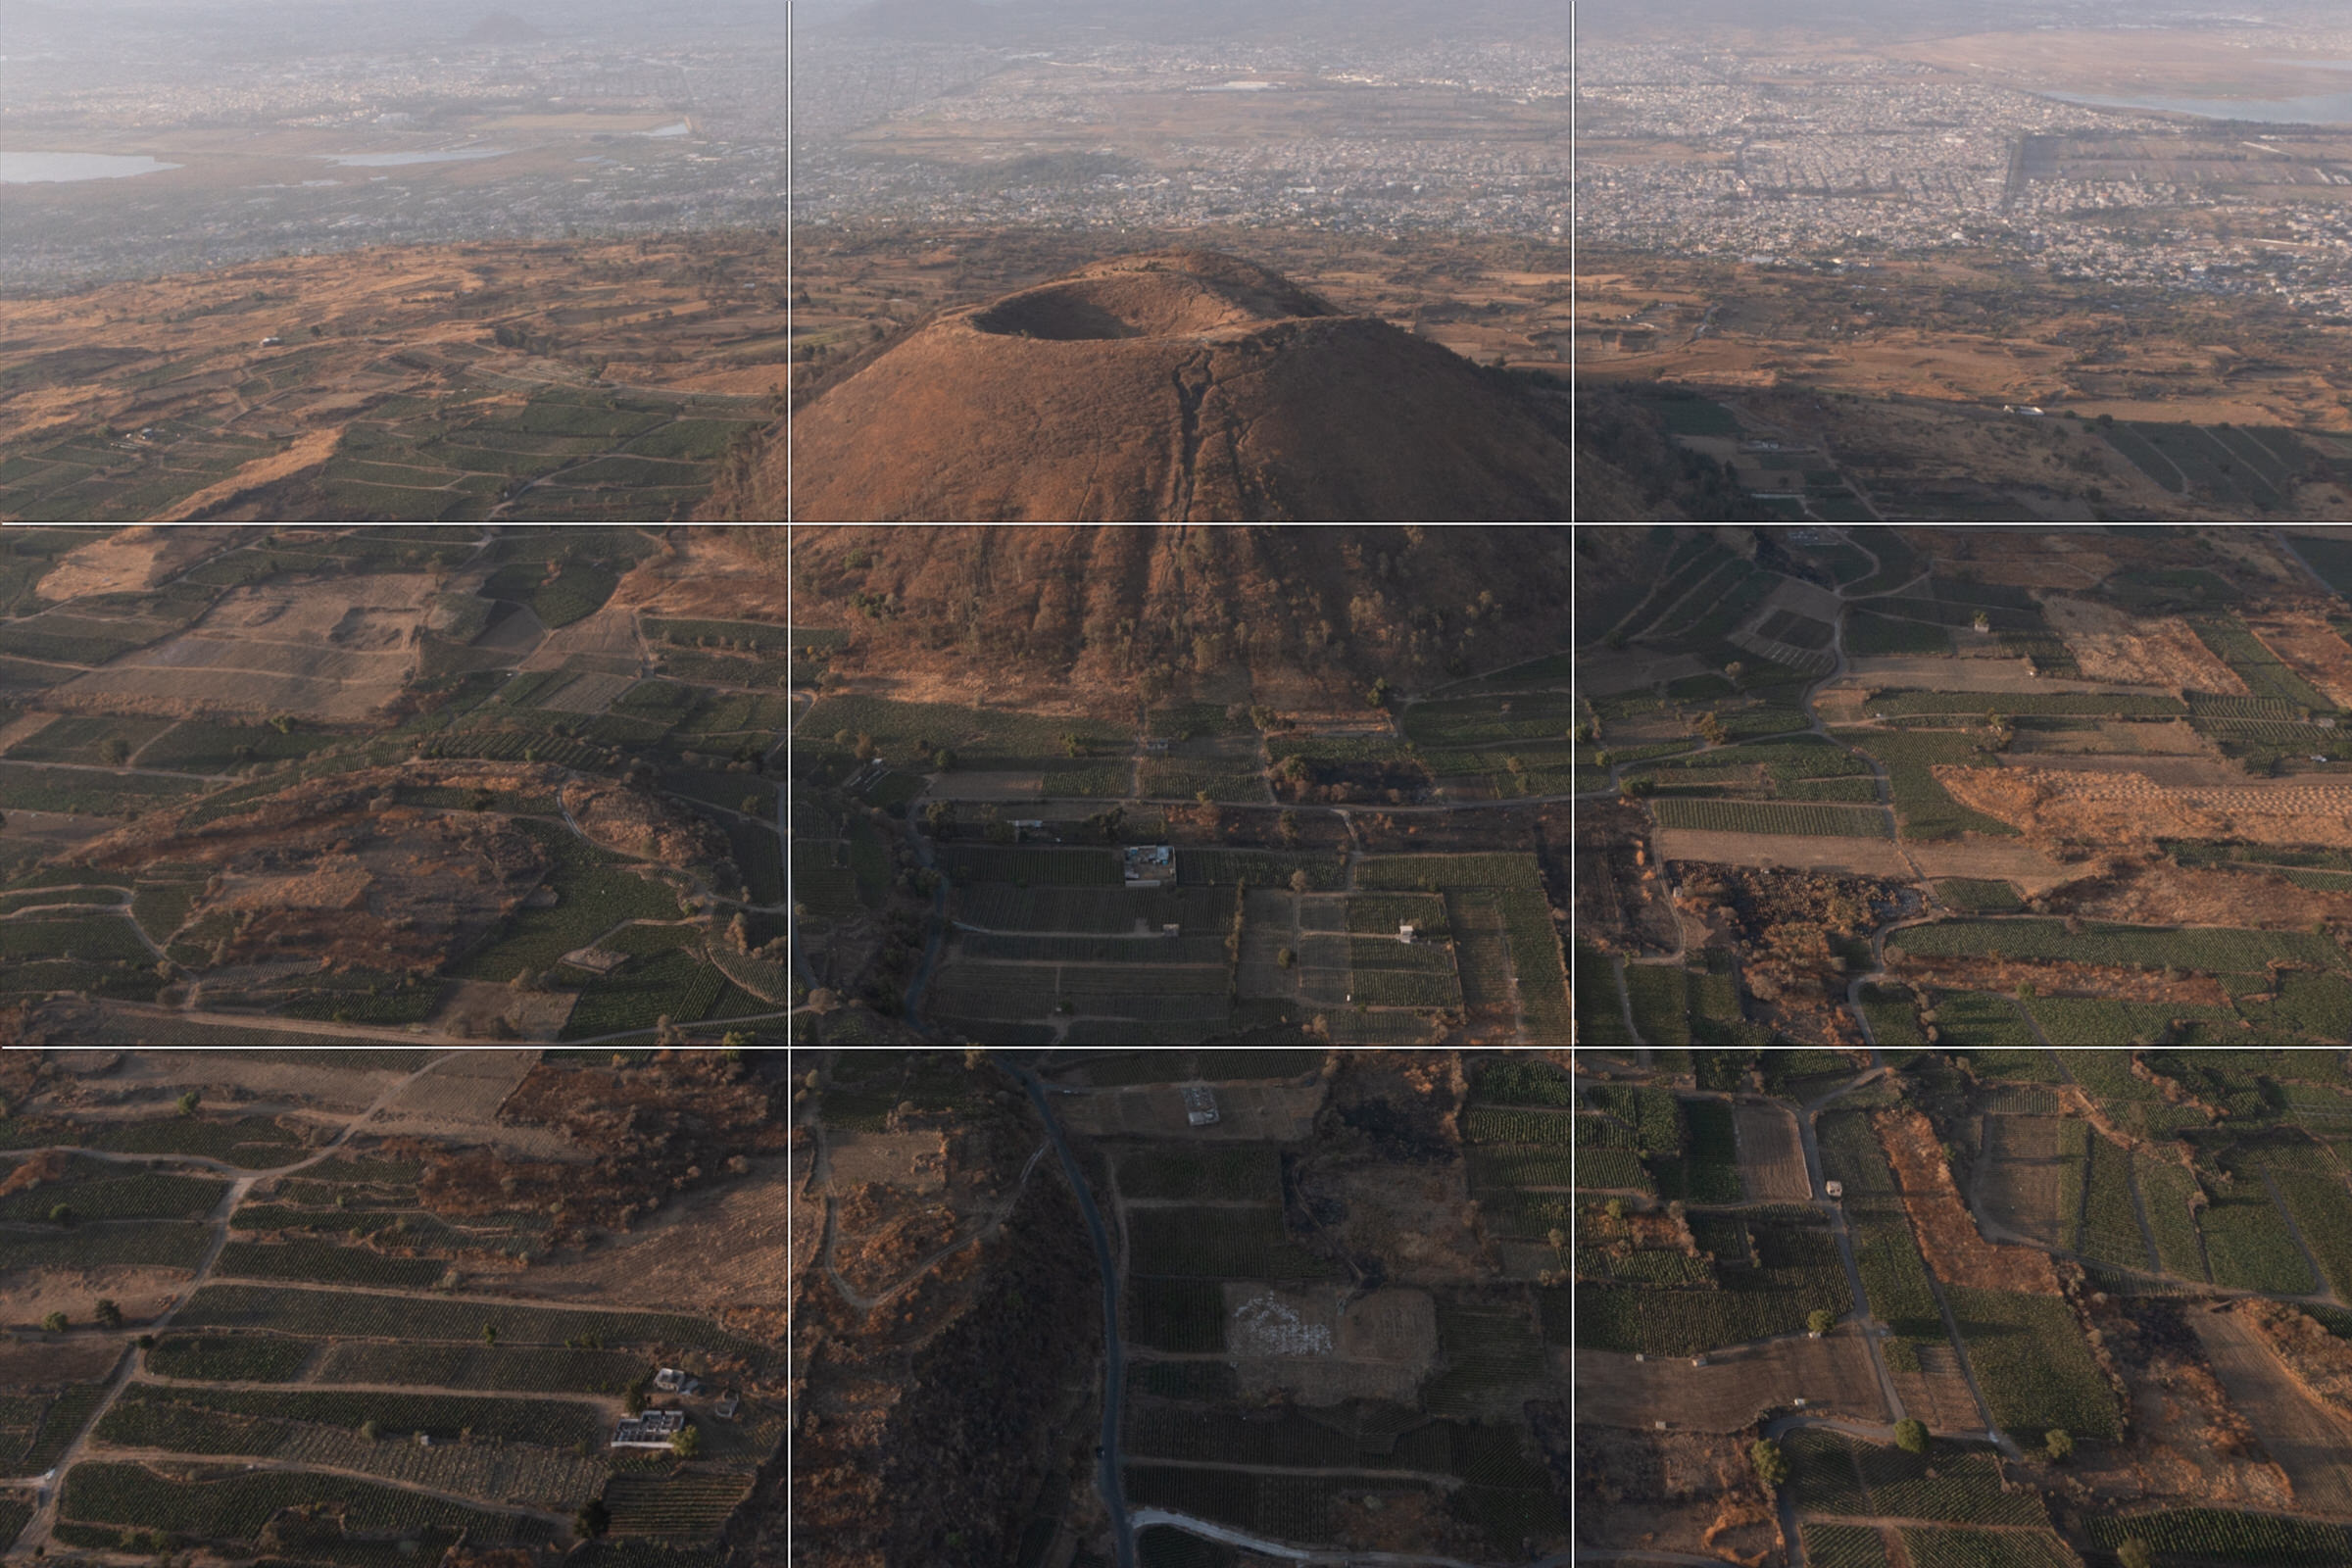
In the example shown, I am overlapping an area equivalent to 60% or 2/3 of the photographs. So that the final composition will be an 8×10 vertical photograph. See diagram below:
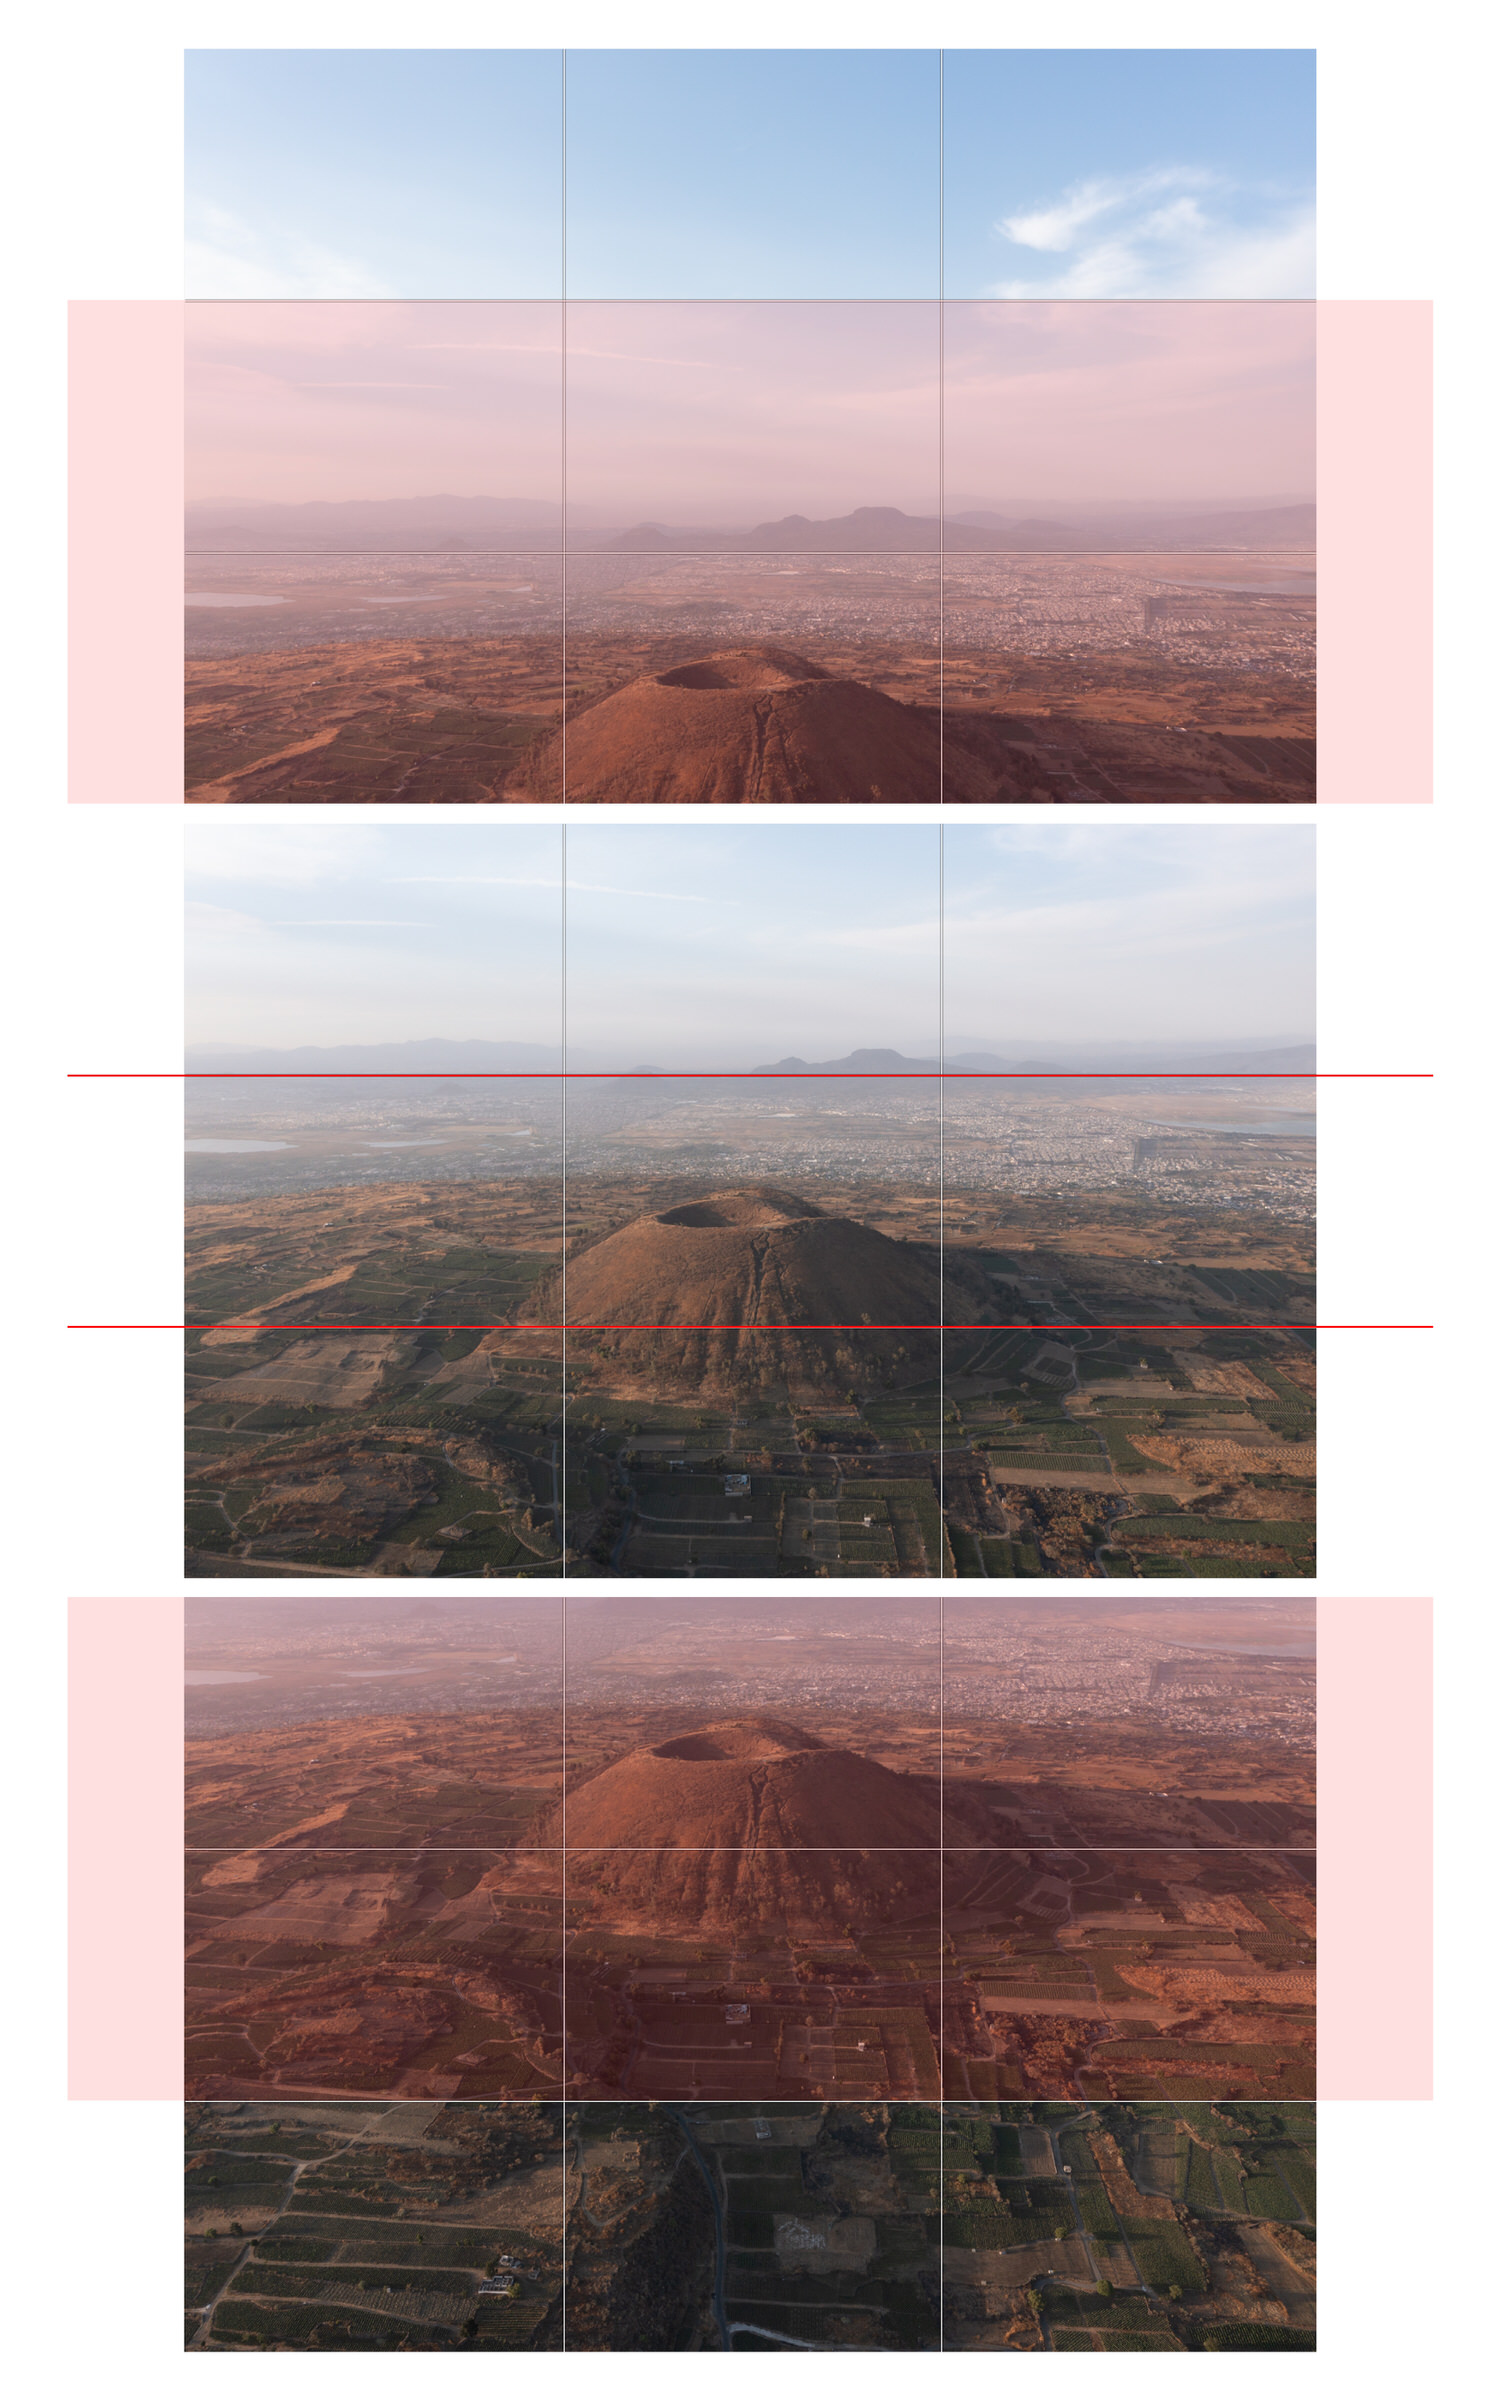
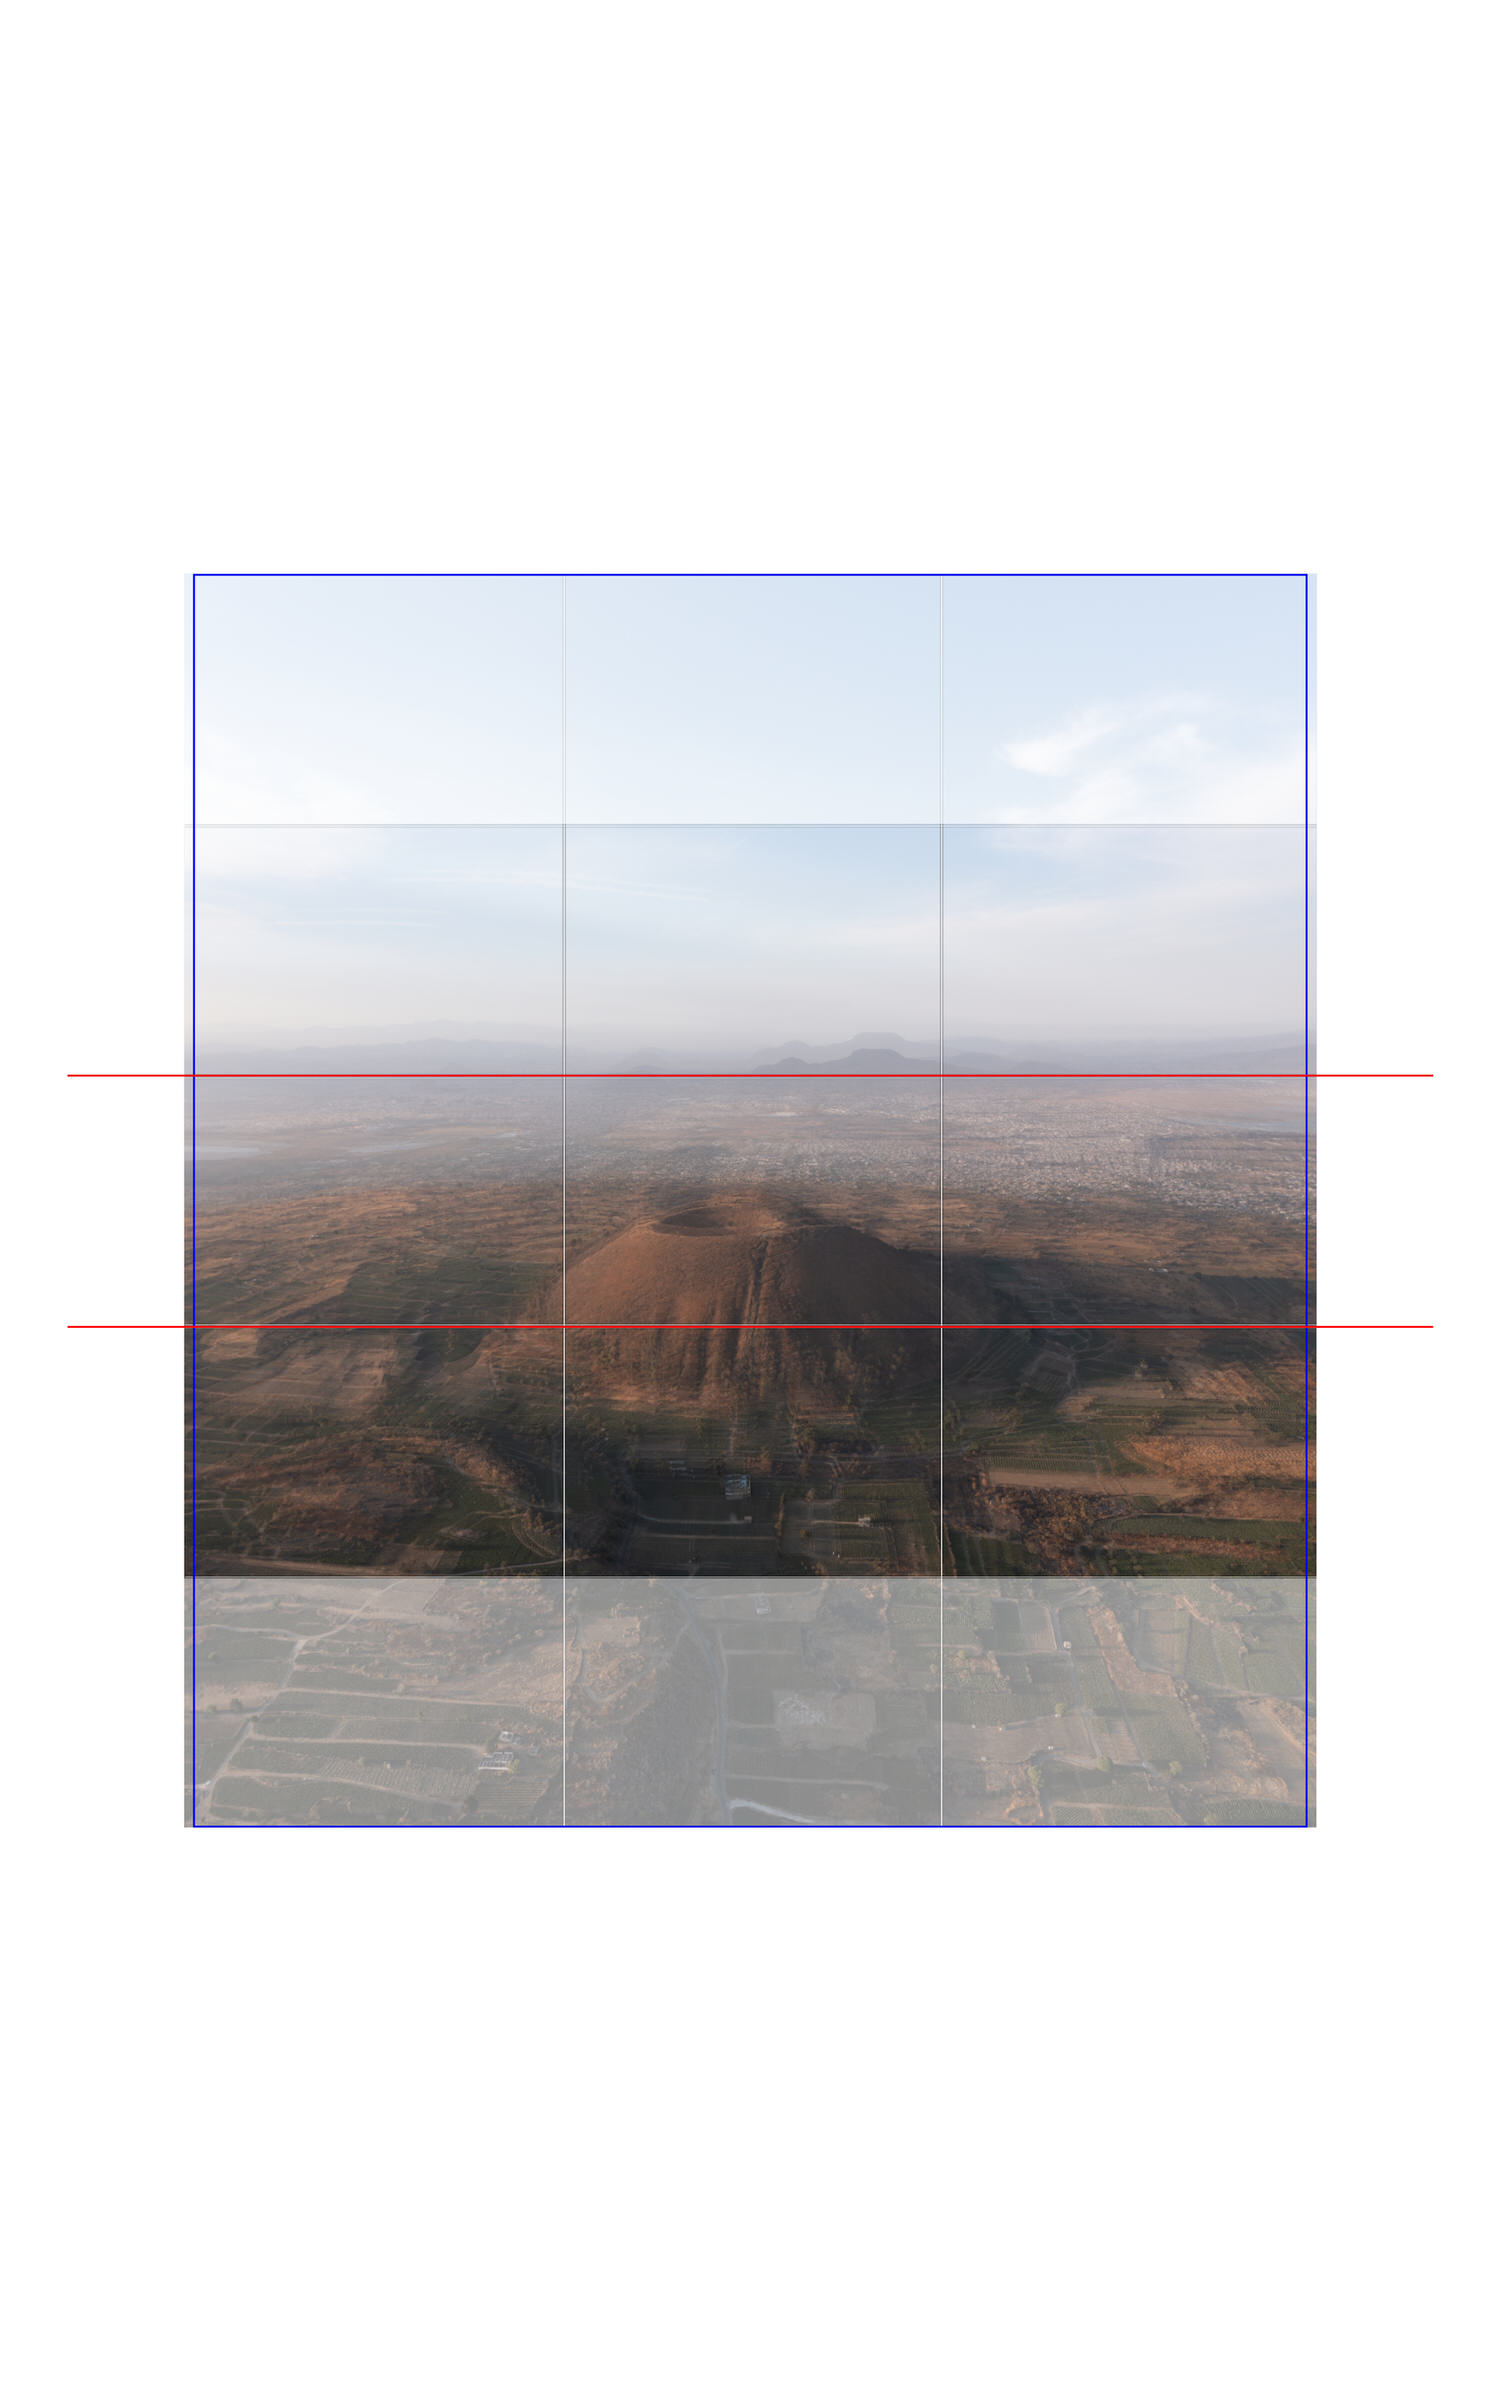
*Note: I recommend overlapping the photographs at least by 40%. Anything below that point might result in noticeable distortion and loss of information.
Use manual and fixed parameters
By using manual and fixed parameters, you can guarantee a constant look and feel through the individual photographs to be merged. The main parameters to check are:
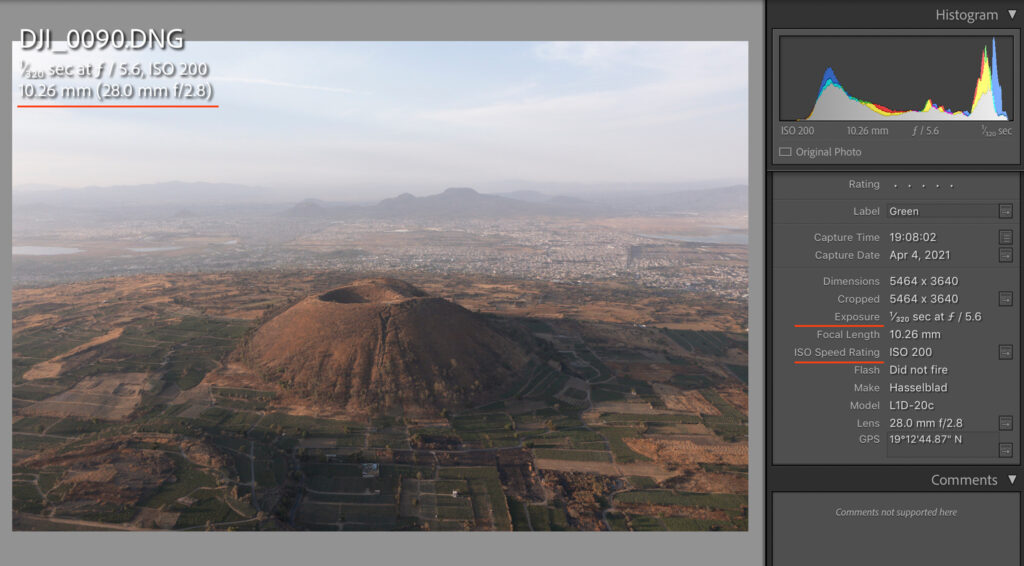
- ISO speed: With my drone, I avoid going further than 200 ISO
- White balance: I usually select sunny but this really depends on each photograph.
- Shutter speed: Because your camera is literally flying I recommend using high speeds between 1/200 – 1/320 of a second in order to minimize undesired movements.
- Underexposure: Setting the EV (exposure value) to -0.3 allows to keep detail on the highlights.
Let the drone do its thing. Focus on your composition.
On the DJI Fly app you can always hide all that flight information by swiping up or down with your finger, this leaves you with a clear screen. After positioning the drone, relax a bit and focus on the already familiar camera settings and composition.
While you are up there snap 2-3 photographs of the same composition. This can come in handy in post-production.
Postproduction – Merging into a panorama
Once the photographs are captured and transferred to a computer you can merge them either in Lightroom or Photoshop. Simply select the merging option that works best and let the software work on it.
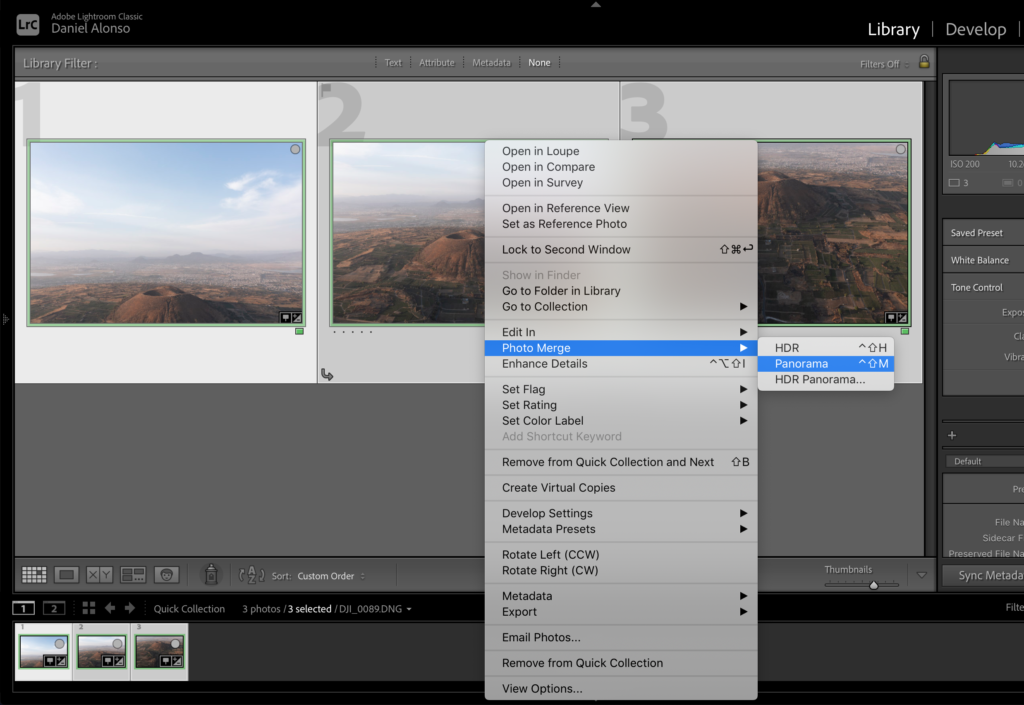
In my case, a spherical projection with a 100% Boundary Warp works best.
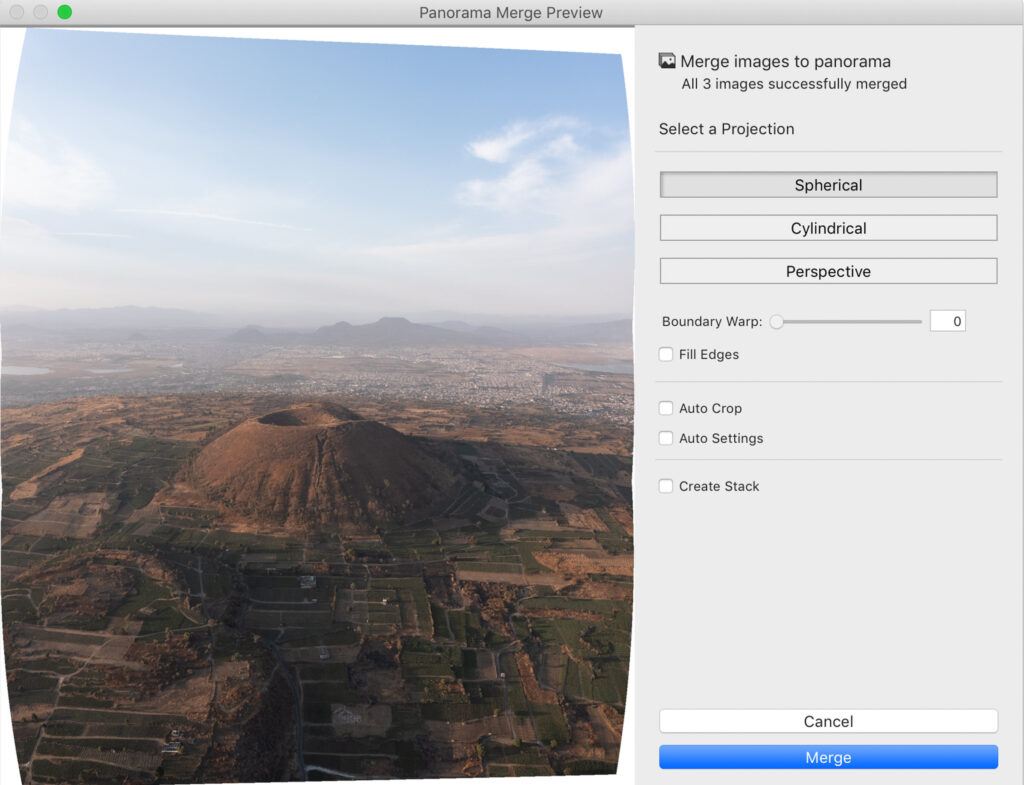
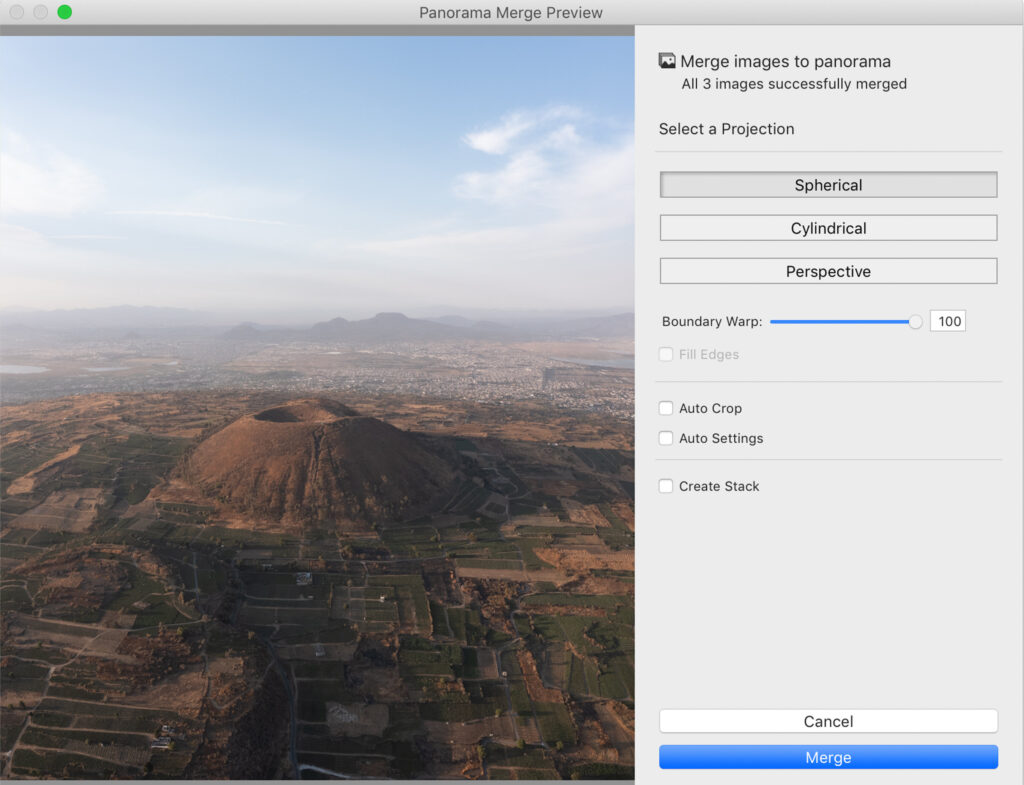
Lastly, here is the comparison of the RAW merged panorama and the final version with minor tweaks. I believe that by choosing a vertical composition there is a more accurate depiction of the specific context that surrounds this volcano. It blows my mind that to know that the urban settlement in the foreground was once a lake.


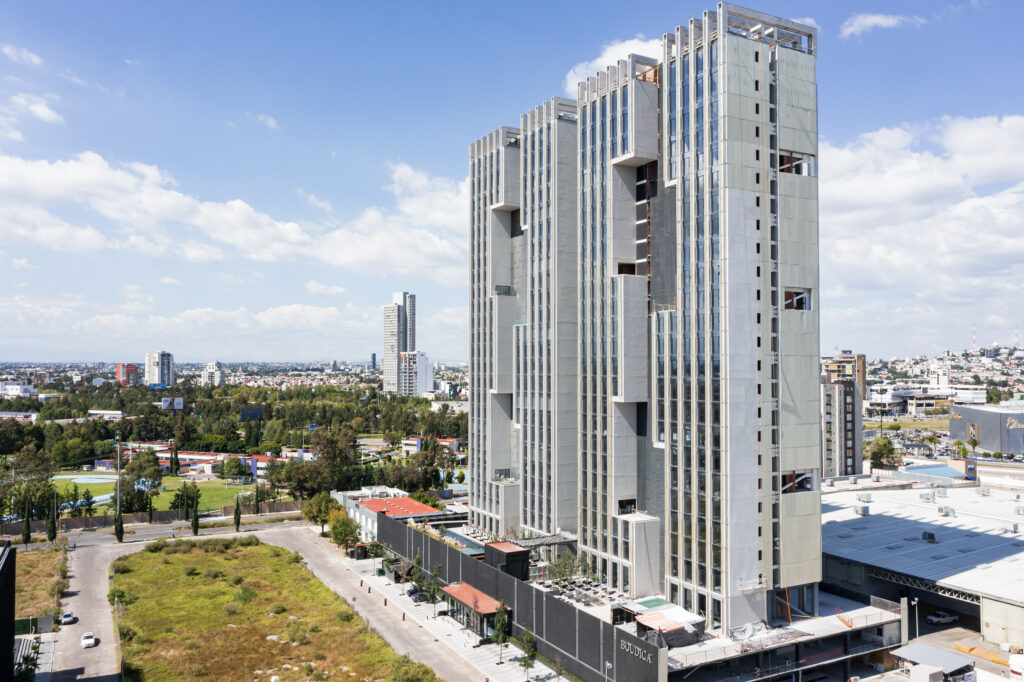
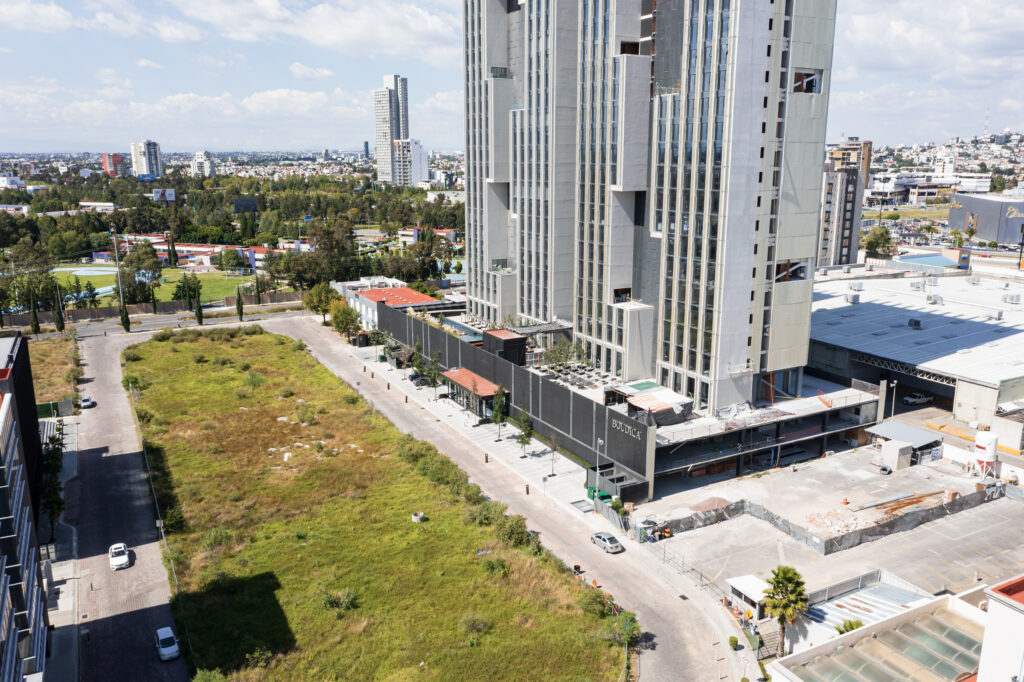
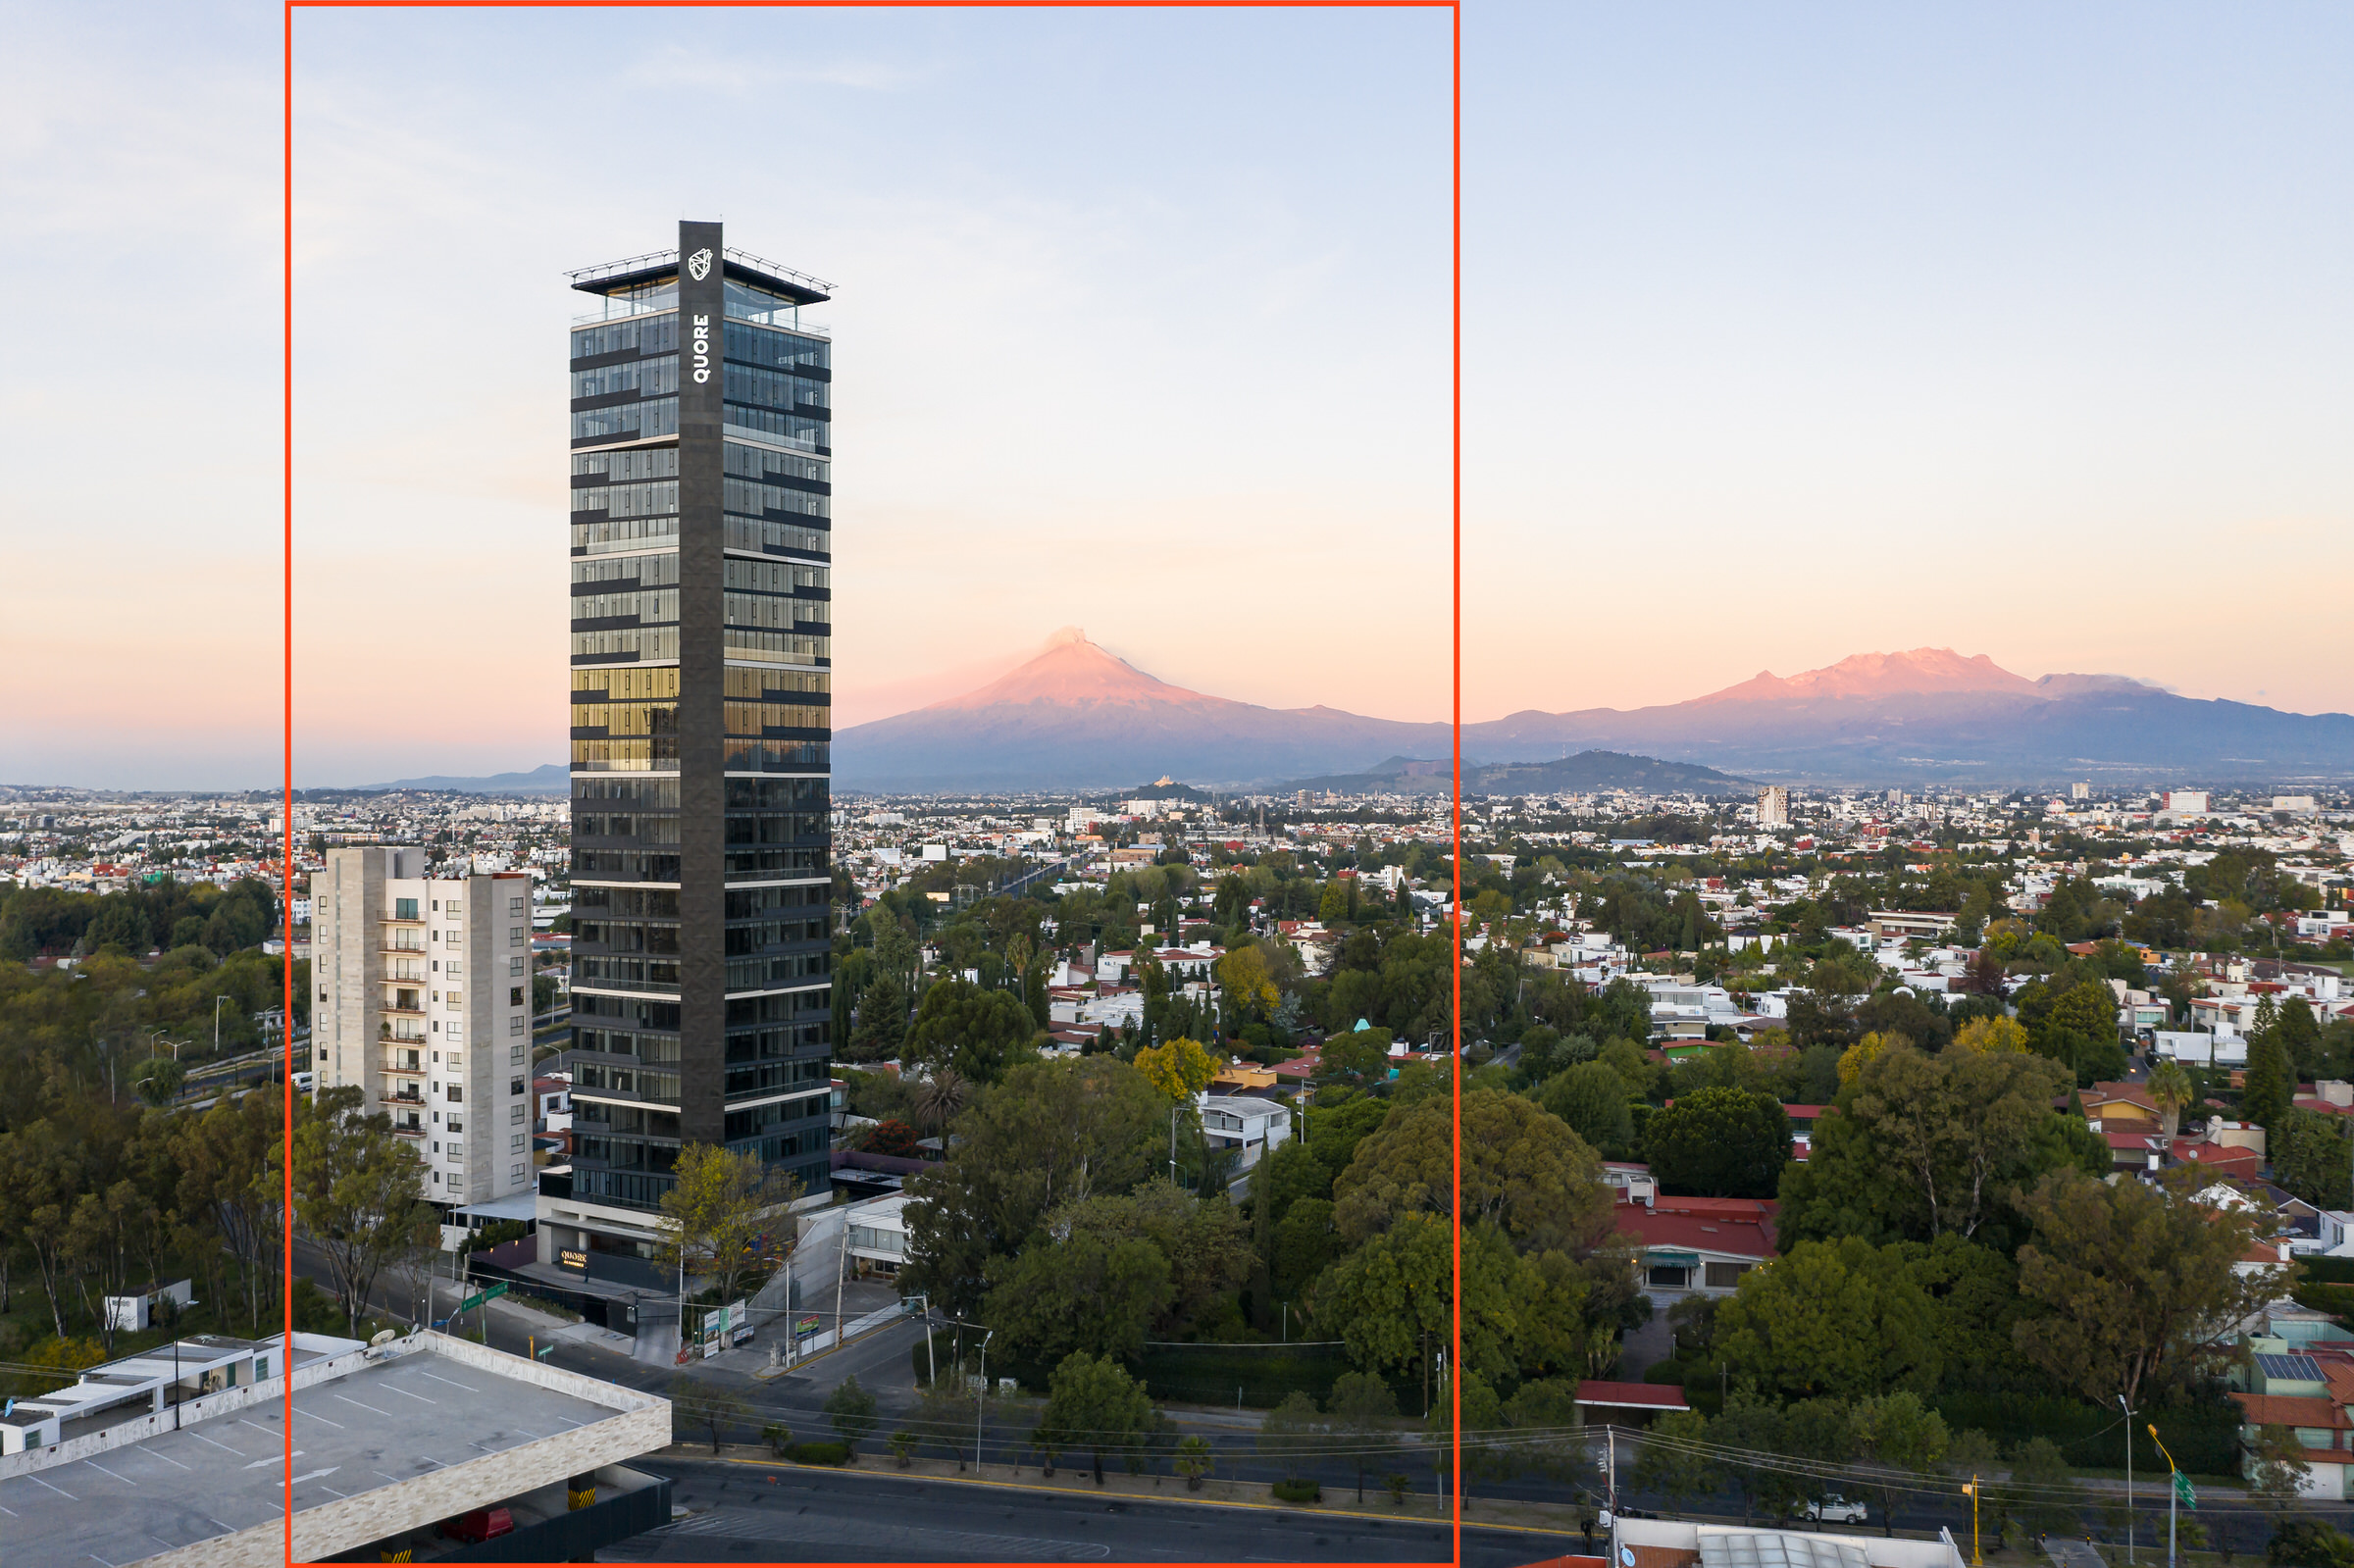
The approach for shooting architecture is practically the same. When creating a panorama in Lightroom or photoshop, choosing the “Perspective” option will keep the verticals straight Here’s a quick example of a panorama from a scout flight featuring an architectural project:
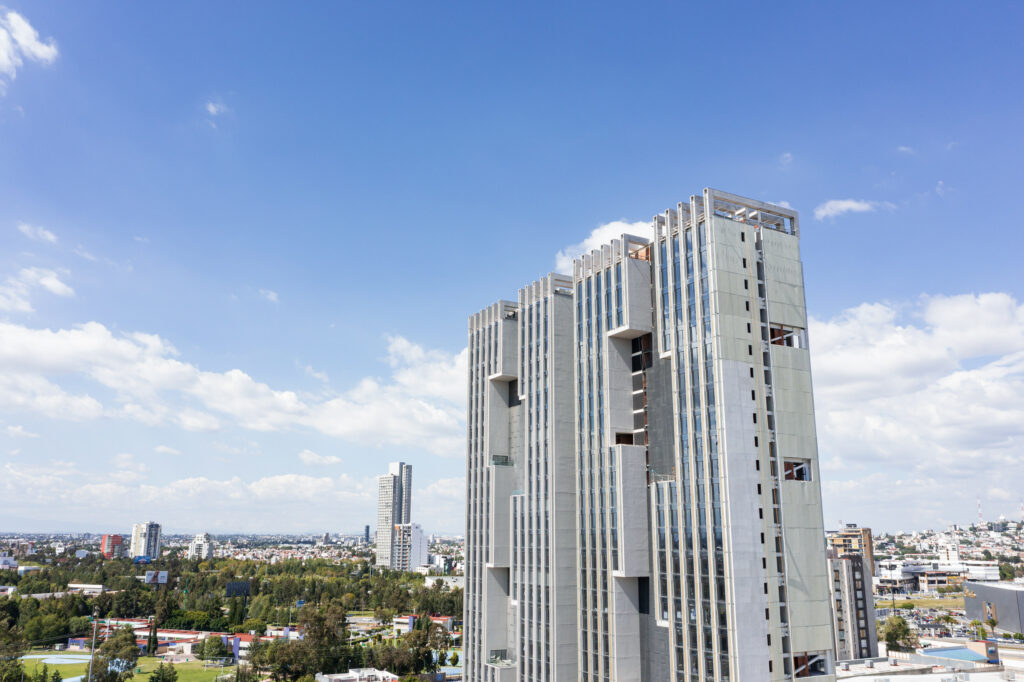
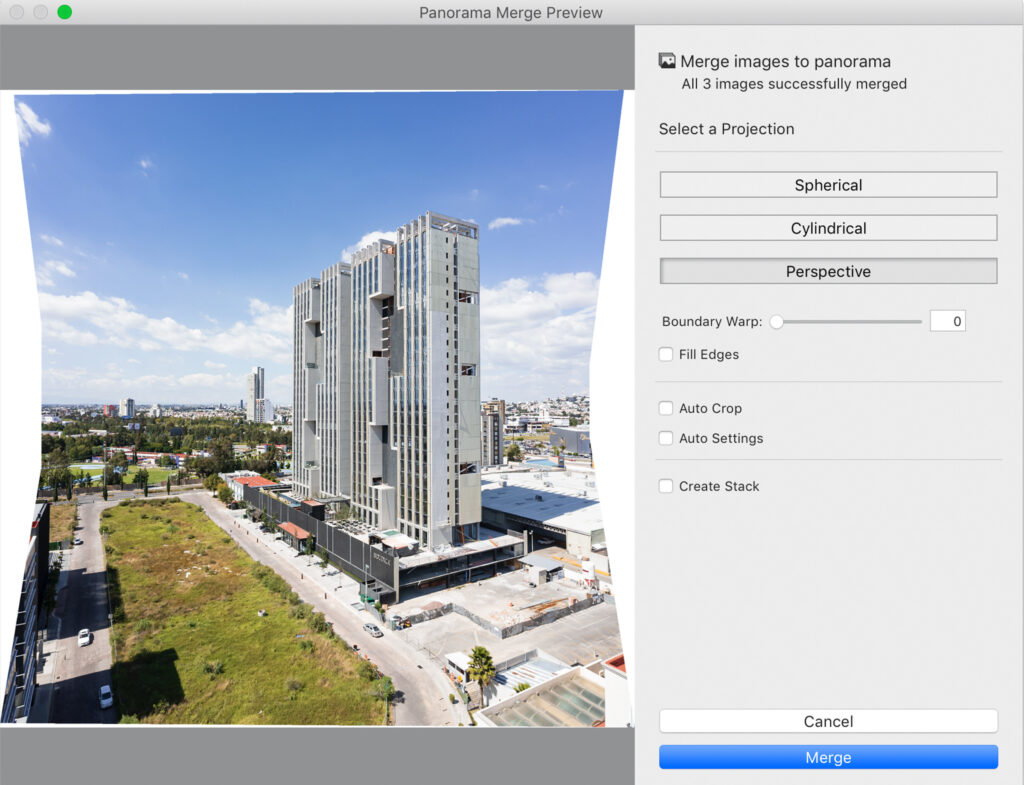
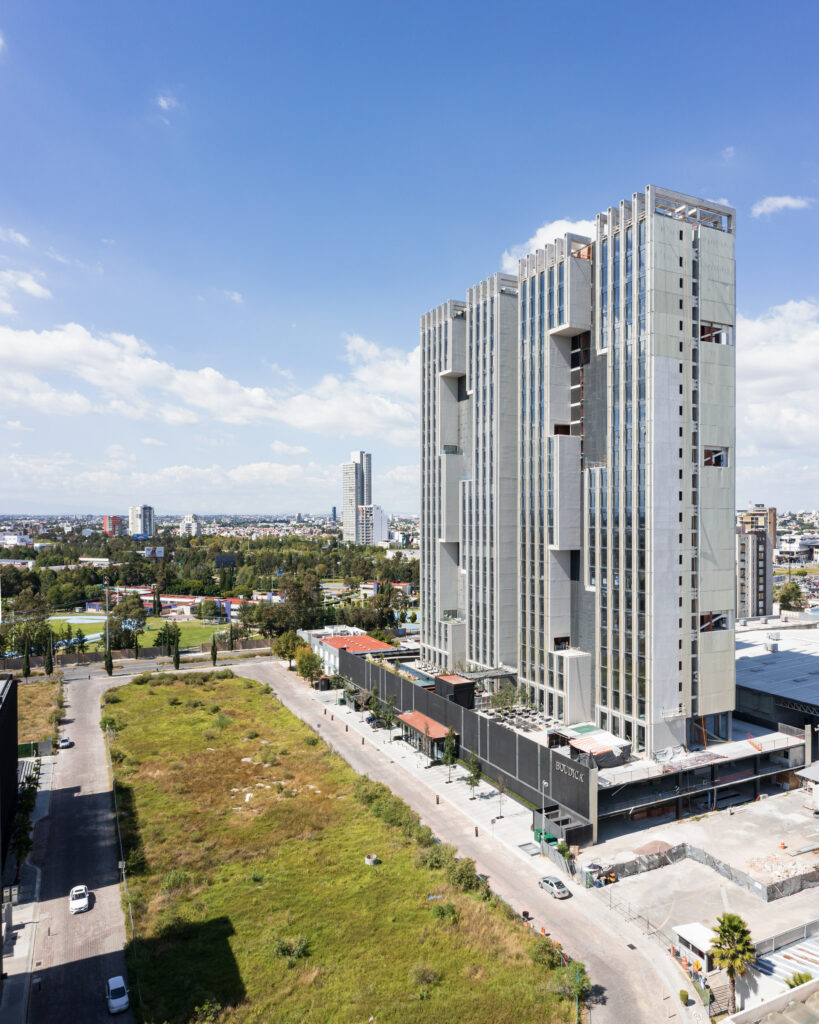
Here is the merged panorama:
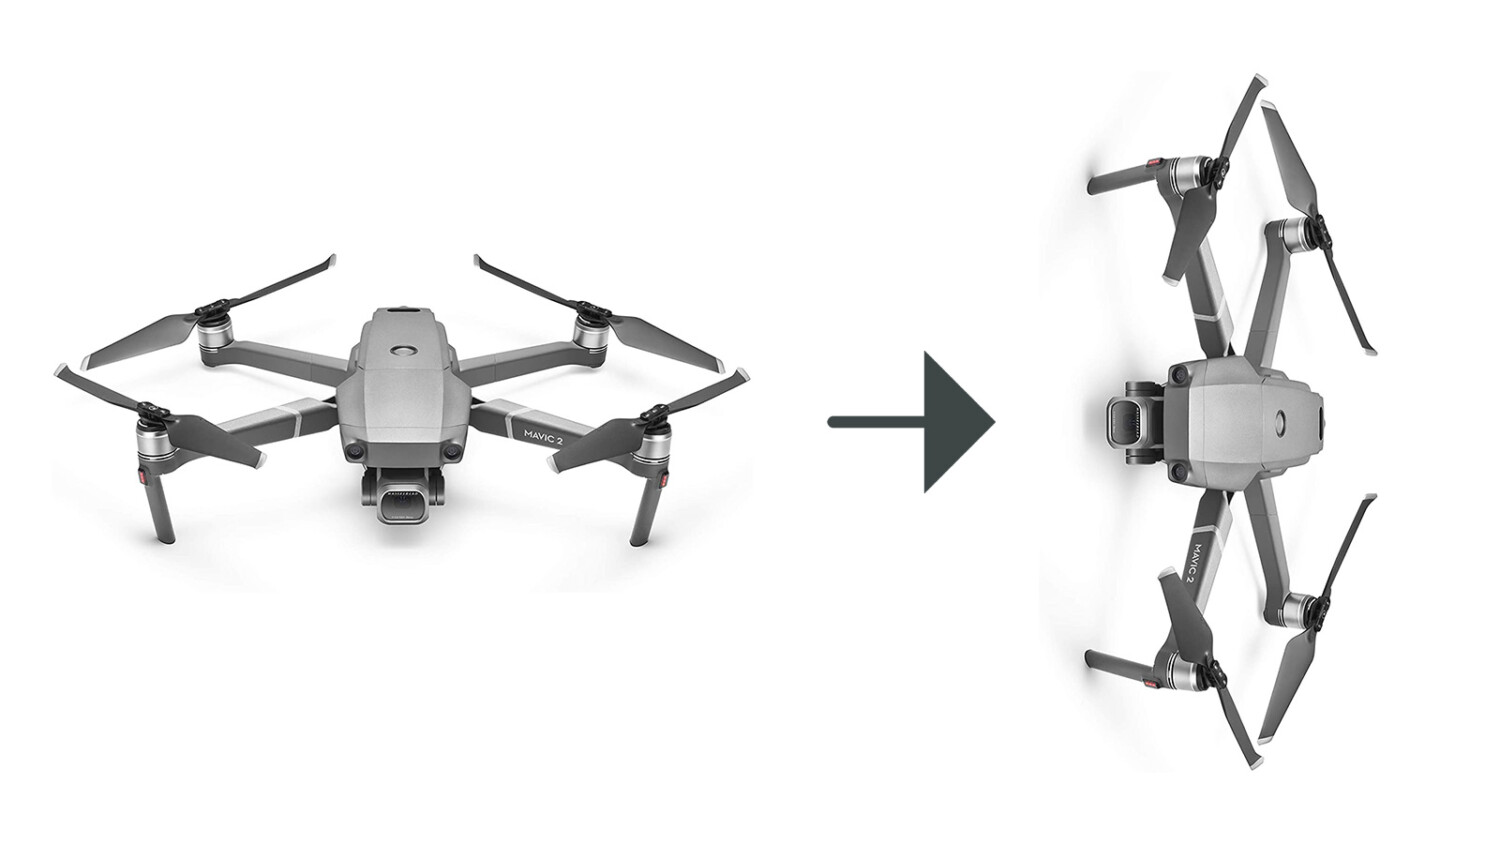
By shooting top-down shots or cropping horizontal photographs you will also get a vertical photograph. However, the first one doesn’t allow to capture facades/elevations, while the second one does reduce the quality of the final photograph.
What are your thoughts on vertical drone panoramas? Is it something that you normally do? Let us know in the comments below: